HMS Victory painting

Cmb

Joined
May 5, 2020
Messages
13
Points
58

I am very new to modeling and even newer to sailing ships. I'm undertaking a Heller 1/100 HMS Victory. I'm trying to figure out how to paint all the ornate work in the stern and side galleries. I've tried dry brushing and haven't found the right combination. Is that the right approach or is there something else. If dry brushing is correct could someone point me to a tutorial please? Thanks20210225_161800.jpg
 
Hi, thanks for the reply. I was looking for how to paint my model. The scoll work is so tiny and ornate i can't find a way to make tge model look like the great pics you sent. I was wondering if dry brushing was the way to go and if so, how to do it. So far my attempts have failed to yield an acceptable result.
 
Good lighting, hand/arm rest, top quality (sable) brushes.
GamesWorkshop/Citadel make the best paint for detail work; that's what they formulated it for.
Yellow on black is impossible otherwise.....a 'one shot' paint is essential for that.
Patience and lots of practice and then some.
 
it depends upon your objective. If you wish to cut-in each bannister, right up to the ground (an advanced painting skill), then you will have to learn how to proportionally thin your paints (model-specific acrylics are best for plastic), and you will have to learn how to properly load the brush with just enough paint that it lays down easily, without running away and pooling in the low ground. Everything Pugwash said about lighting, hand/arm rest applies, here. Learning how to breathe, while doing this (slow, measured breathing), is important. Keep in mind, though, that it takes a lot of practice to become proficient and comfortable with this technique.

On the other hand, if you merely wish to neatly pick out the surface detail, without spoiling the ground, dry brushing is the way to go. The key, after you load you brush, is to “roll” off most of the paint onto relatively lint-free paper towels (I like Bounty). The advantage of “rolling” is that it consolidates your brush tip. Then, the other critical factor is the angle of your approach; you aren’t painting with the brush tip, so much as the sides of the brush bristles.

When in doubt, there are a gazillion modeling tutorial videos on YouTube that clearly demonstrate these techniques for best results.
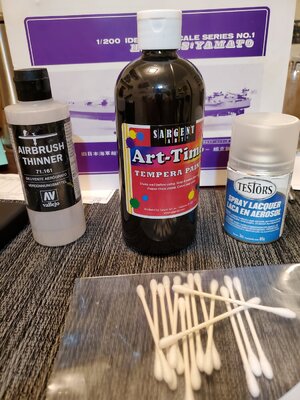
A sampling:

Heller Victory is a titanic project (ship pun intended). Breathe. Take your time, and don’t rush results. Good work results will motivate your continued progress. Sloppy, rushed work will turn the whole thing into a chore you’re just trying to “get-through.”
 
Last edited:
I have been doing this for years & it has always worked great. I use water based Tempera in black & after I have painted the rear parts all yellow & I paint everything black with the Tempera, maybe severl coats to cover where it is black. Then when it good 7 dry I use damp Q tips & wipe it off where it is yellow. I might need a little touch up & when all is dry I put on 2 coats of dullcote to seal the Tempera. Hopefully I can get some pictures of my 1/100 Victory.DSCN6668.JPGDSCN6674.JPGDSCN6675.JPGDSCN6676.JPGDSCN6677.JPG
 
I am 90 now & still love to build models. I have been doing it since before Pearl Harbor happened. I still have work to do on the Victory, but have taken a break to build a lot of Civil War boats. I just finished 3 Cottage Ind. resin kits of the Hunley, & David in 1/72 & the little 1/96 Picket Boat.
I build a lot of wood plank on frame boats years ago, but like plastic now. It is easier for me.
Gene
 
Here is my Victory to date, when I took a break to some other things to model. I got this far in about 4 months & rigged the shrouds on an Airfix rigging tool. I got real good with that & at 90 I would not try to sew rat lines any more. I did it a lot 40 years ago.05-DSCN7039-001.JPG08-DSCN7042-001 - Copy.JPG08-DSCN7042-001.JPG10-DSCN7044-001 - Copy.JPG
 
Thanks for the replies. I'm about ready to give it another go. Gene, your model looks great!
 
If you try the Tempera just take it easy wiping it off with a damp, not wet. ,Q tip. I did the front blue area too, with Tempera. I did a bunch of sub limber holes & some weathering & have very few problems afterward. As old as I am , I have a shaky .right hand & I can still do close work.
Gene
 
I am very new to modeling and even newer to sailing ships. I'm undertaking a Heller 1/100 HMS Victory. I'm trying to figure out how to paint all the ornate work in the stern and side galleries. I've tried dry brushing and haven't found the right combination. Is that the right approach or is there something else. If dry brushing is correct could someone point me to a tutorial please? ThanksView attachment 216796
Hallo @Cmb
we wish you all the BEST and a HAPPY BIRTHDAY
Birthday-Cake
How is your work on the Victory going?
 
  • Like
Reactions: Cmb
Thank you for the birthday wishes! Progress on Victory is on hold as I move into a new house. I have a great new study set up with lots of room and a lazy susan so I can spin my model without handling it. In the meantime, I have been working on a 1/200 Nichimo Yamato model at my other workspace at an apartment Ibrent near work. Certainly a contrast in style! Thanks again.
 
Thank you for the birthday wishes! Progress on Victory is on hold as I move into a new house. I have a great new study set up with lots of room and a lazy susan so I can spin my model without handling it. In the meantime, I have been working on a 1/200 Nichimo Yamato model at my other workspace at an apartment Ibrent near work. Certainly a contrast in style! Thanks again.
You are welcome
Would be interesting to see also your Yamato - in 1:200 it is a really big model :cool:
 
You are welcome
Would be interesting to see also your Yamato - in 1:200 it is a really big model :cool:
The fit and finish of the Nichimo kit is pretty bad. There are many hours of gluing, clamping, puttying, sanding, and painting to get the hull and deck to this point. Here is a pic of one of the Fujimi turrets I retrofitted to it. With some third party photoetch handrail added to that. Lol

20210414_040422.jpg
 
Last edited by a moderator:
I have been doing this for years & it has always worked great. I use water based Tempera in black & after I have painted the rear parts all yellow & I paint everything black with the Tempera, maybe severl coats to cover where it is black. Then when it good 7 dry I use damp Q tips & wipe it off where it is yellow. I might need a little touch up & when all is dry I put on 2 coats of dullcote to seal the Tempera. Hopefully I can get some pictures of my 1/100 Victory.View attachment 218354View attachment 218355View attachment 218356View attachment 218357View attachment 218358

If you try the Tempera just take it easy wiping it off with a damp, not wet. ,Q tip. I did the front blue area too, with Tempera. I did a bunch of sub limber holes & some weathering & have very few problems afterward. As old as I am , I have a shaky .right hand & I can still do close work.
Gene
 
Gene......great technique! I decided to give it a try. It worked like a charm. I was working on my Yamato and decided to use it on the name plate. It worked perfectly! I do not exactly have steady hands myself as I have parkinson's disease.. I've attached a couple pictures to show the results. It really didn't take long. About an hour start to finish. The name plate was cast in gold plastic. So I just sprayed black tempera all over it. That was a little tricky as tempera doesn't like to be airbrushed. But I got it to work by thinning it hard with acrylic thinner. Then I want to work with the Q tips. Barely damp work best. Have to use a lot of Q tips because as they load up with paint they leave a residue behind. After the Q tips a little touch up with a fine brush with tempera. Then a few light coats with the dull coat acrylic. And that's all there is to it. Gene, thank you so much again for this technique. I am sure I will use it over and over again.
 

Attachments

  • 20210427_222554.jpg
    20210427_222554.jpg
    302.6 KB · Views: 9
  • 20210427_223021.jpg
    20210427_223021.jpg
    402 KB · Views: 8
  • 20210427_223035.jpg
    20210427_223035.jpg
    312 KB · Views: 8
  • 20210427_232410.jpg
    20210427_232410.jpg
    170.8 KB · Views: 8
Hi Jimsky, It has always worked well for me. I started it on the limber holes on submarines & kept doing it on everything. I have never tried it on plated pieces. Yours looks great & I have learned about Acrylic Thinner from you.
My brother had 7 battle stars on the BB58 Indiana & was sent with I believe the South Dakota to sink the Yamato . When they got there the planes were sinking it & there were a lot of the Yamato trash & people in the water. He was very glad not to have faced 18" guns.
Gene
Hi Gene, just wanted to thank you again for the tempera technique! I tried it on the Victory and it turned out much better than my previous attempts. Here is a picture. I have more work to do but so far so good. Btw, these are Amati pieces. I messed up the kit pieces. I had to try and find replacements. They aren't exact dimensionally but I think I can make them work. Thanks again.

20210518_175340.jpg

20210518_175346.jpg
 
Last edited by a moderator:
Back
Top