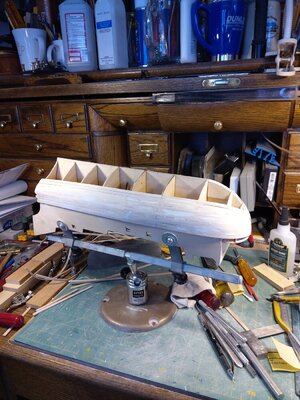
How often is wood fill used after planking?

Joined
Sep 5, 2021
Messages
131
Points
78

Location
Honolulu Hi.
I've been watching videos for the last few days and have noticed some people doing very precise work on planking that didn't appear to need any fill, and some who do good work, but the fit isn't quite as precise because they were planning on filling it anyway.

I generally prefer to work with stains rather than paint, just a personal preference, and even with a good stain-able filler, I suspect horizontal lines will still be visible. But then I was also thinking that those lines might give a nice caulking effect to the planking, and if that were the case, would it be better to stagger the planking to get the vertical lines also instead of using one long strip the length of the hull?

I also noticed people using these push pin type tools to hold the planking while the glue dried. Is something like that a better way to go rather than using clamps and rubber bands?

Thanks
 
My apologies for the pre-mature post. The videos I was watching were first planking's.

Admin please feel free to delete this post.

Thanks
 
I've been watching videos for the last few days and have noticed some people doing very precise work on planking that didn't appear to need any fill, and some who do good work, but the fit isn't quite as precise because they were planning on filling it anyway.

I generally prefer to work with stains rather than paint, just a personal preference, and even with a good stain-able filler, I suspect horizontal lines will still be visible. But then I was also thinking that those lines might give a nice caulking effect to the planking, and if that were the case, would it be better to stagger the planking to get the vertical lines also instead of using one long strip the length of the hull?

I also noticed people using these push pin type tools to hold the planking while the glue dried. Is something like that a better way to go rather than using clamps and rubber bands?

Thanks
No need to delete
But definitely I would like to send a warm welcome here on board of our forum.
Do not hesitate to ask all questions necessary.
On which project are you working or plan to build?
 
Thanks, I appreciate that.

I haven't decided on a project yet, still in the paralysis by analysis phase.

Years ago I was heavy into restoring and refinishing old electric guitars, mostly Fender Stratocasters. I had a two car garage back then and a fairly decent shop. Nothing pro level mind you, just a stay at home hobby while I was taking care of my mother in the final years of her life.

My "shop" now consists of a small spare bedroom. I don't know if that's going to limit what I can ultimately do, but eventually I'd like to do a nice model of the USS Enterprise. (The sloop not the carrier. I served aboard CVAN 65 from 72 to 75 so I've seen enough of it. :) Still it was a bit sad to see it sold for scrap a few years ago.)
 
I watched a video the other day and the kit used was basically just paper templates that you used to cut out the pieces from wood you purchase separately. I kind of like the idea of doing that for a few burner/practice type projects in the beginning, just for some basic hull and deck experience, and then move on to a complete kit down the road.

I've seen where you can buy a lot of different material, thought it might be kind of fun to play around with different materials and techniques for awhile first.
 
It just dawned on me that I can do the same thing with a few of the cheaper starter sets and use the punched out pieces from those to cut out the burner project pieces. Duhh!!!
 
I went ahead and ordered a kit from Modelers Central. I'd still like to order some extra material for practice projects.

I'm a bit unclear about the dimensions on the planking, lot's to choose from so I was hoping someone could recommend some dimensions. Also material and dimensions for the deck, bulkheads, etc.

Much appreciated.
Hallo,
sorry for a late reply, but it seems, that not only me has some problems to answer.
And I think, that we need some more information related to the model you want to build and replace already parts. Which kit, scale etc.
Also the quality of the rest of the kit (wood type etc.) icould have some influence to give a good advise.
Because there are cheap stripes and very very expansive strips (for planking) available, so it can eaisly happen, that your additionl timber is more expensive, than the original kit.
Which planks you want to change? Hull or deck? Usually you use different kind of timber for the two locations, because of color, grain and necessity of bending....

Usual way is: If it is a starter kit, than try to get experience with this model. make your mistakes her, learn more and with additional known techniques you make the second model better, and the third is once more much better. My personal experience is, that we should not expect to make with the first model a perfect model.
 
You should apply the first planking with the same precision as the second
Well, for the purposes of a first project, it may be helpful to think in terms of treating each planking layer as a finished layer. That is a worthy goal, however, the realities of skill building in this tricky aspect of construction are that first results probably won’t be “perfect,” and that’s okay.
 
Some modelers use wood filler heavily on first planking layers. Others hardly any. I also tend to use stain. The object of a first layer of planking is to create a solid foundation to apply, normally very thin, second layer planking. Some models only call for one layer. I do not normally try to fill every crack or opening in my first layers of planking. I sometimes use very small amounts of filler on finish layers…in this case making sure the product is totally stainable so it doesn’t stick out. The planking skill really comes from dry fitting each plank and learning about how to fit into the curves of the hull. Simply put, planks should lay down naturally without side twisting. Where a plan overlaps another, trim to fit. Clamping is a matter of what ever works! I rarely use clamps or pins. Instead I use CA Gel (very thick CA) as the glue. Place a drop on the touch points and hold the plank in place with my fingers for a 10 second count. There are several publications about planking that help as well as some fine postings on this forum. Patience…one plank at a time! :)
 
Last edited:
In order to get my first planking layer as smooth as possible, I use a good, sandable filler as much as needed. Its a foundation for the very thin final planking. And allows me to sculpt the hull to shape.20210202_141312.jpg
 
Thanks to all.

I mentioned in a follow up post that I was a bit quick on the trigger in posting the question because I had only watched a couple of videos.

I agree with the point about being as precise as possible with the first planking, especially after watching some real craftsman work.

I think a really tight, clean, single plank hull would be a really cool thing to build.
 
One thing I learned is a first layer of planking is a lesson learned layer for the second or finished layer. A good opportunity to discover the trouble spots, how many planks go where, what will be the curved adjustments, etc. Pay attention to how the first layer lays down and you will have a decent “planking” map for the finish layer.
 
Back
Top