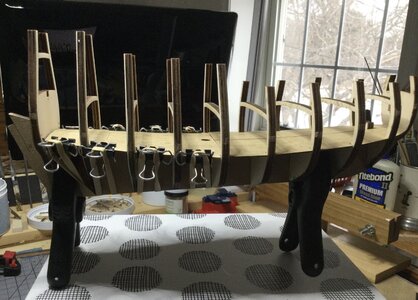
Willem Barentsz by Kolderstok AD 1596

Heinrich, thank you for that piece of information. The will be tomorrows project. BTW I noticed you added additional bracing under the deck on your WB, is that a necessity?

Jan
 
Jan I don't think it is a necessity, but I like doing it for the extra strength that it gives. When planking, I don't push the pins into the bulkheads, I nail them in with a regularly-sized hammer, so I am very rough on the hull structure. Extra strength never hurts! :)
 
Last edited:
Good morning Jan. Another WB. Awesome. Looking forward to your build. Cheers
Hi, welcome to my humble little boatyard. I’m not a fast builder nor an experienced builder, I just bumble along having a good time gluing, re-doing and following the examples of other builders. Our mutual friend Heinrich has set a high plateau with his WB build. I will be delighted to achieve fifty percent of that with my endeavor.

Jan
 
Ah, where is Anna when you need her???

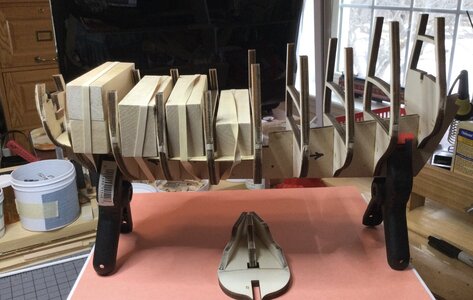
This morningI I cutout the pieces of the lower deck. Slightly sanded the edges and prepared to do a dry fit. Wow, that required some finagling, trying to fit/slide/bend/push/propel, whatever, to get them to the right spot. It's not that the tops the frames were in way of an easy fit :D. But the fiddling and diddling was worth it. No adjustments were required to have all four pieces fit just the way they should. (Thank you Mr. Kolderstok). So following the advice of Heinrich the gluing process started. Very quickly it became apparent that I didn't have the right clamps or enough fingers to hold things in place while the glue set. it was time for the "AL-FI" moment, "Rubber bands and Balsa blocks".

54A91989-7BD2-43C9-A364-9980B58321DC_1_201_a.jpeg

The first part deck in the gluing/setting process. Later today I'll wiggle in the two rear pieces and finish this part.

Jan
 
That is exactly how I did it too Jan! She is looking very good! With all that balsa you can make me a bread and butter model - Russian style!
 
Ah, where is Anna when you need her???

Ooh, the Admiral will enjoy this. :p
 
Page 7, "Glue all the frames to the keel and place deck A"

CheckThumbs-Up


The instructions and Heinrich's advice were great. BUT there wasn't a note on how to hold things in place while the glue cured. So for this Novice it was invent as you go.

The balsa blocks and rubber bands to hold deck to the frames while the glue set worked well. Gluing down the edges of the deck to follow the curve of the frames required a different technique.

My solution:

85494D85-CA8B-44CB-A152-83BF3BC52EAA_1_201_a.jpeg

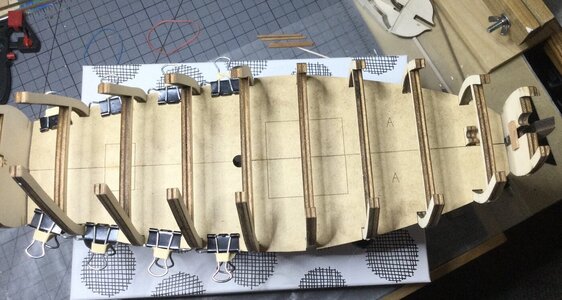
The "infamous" black clips and rubber bands to apply downward pressure on deck and have the deck pieces follow the curve of the frames.

Top view of completed deck.

669CA4DA-4A5A-44FE-A3C5-3408FE5FFD9A_1_201_a.jpeg

Now on to building the two hatches.

Jan
 
The deck looks excellent, Jan! You will see that gluing down the hatches is a little bit tricky - especially so the larger one - because of the starboard to port curvature of the deck.
 
The “AHA Moment”

I had a little time to work in the shipyard. The next build steps are the lower deck hatches. Before I glued in deck “A” I made a paper copy to use as a background to get the hatch dimensions right. Heinrich also provided a terrific guide for the hatch assembly.

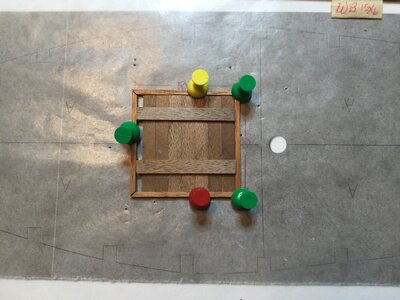
I used my paper copy to measure and cut the pieces for the outside frame (2 X 2mm Walnut), next I cut nine pieces of 1.5 X 6 mm Walnut for the hatch. I scaled the pieces to fit the 50mm square dimension shown on my paper copy. So the frame top,bottom and sides are from 2 X 2mm stock (or 2+2=4), then 50mm minus 4mm equals 48mm, which I cut as the length of the hatch pieces. Happy with my grasp of the math involved I encountered the below “AHA Moment”.

34032714-98E8-4E3E-9D1B-F954BEF3D61D.jpeg

Parts dry fitted on top of the paper copy 50mm X 50mm square. I never gave any thought to the side measurements of the pieces. At approximately 6mm plus wide, seven pieces side by side do not add up 46mm. ROTFROTFROTF

I think I’m going to make a tiny adjustment to the outside frames, have another cup of coffee and start on the smaller hatch. :rolleyes::rolleyes:

Jan
 
ROTF I wondered when or whether someone was going to query my Maths. ROTF You are absolutely right - the deck hatch measures to 50mm x 50mm on a FLAT deck. Yours is no longer flat. Go measure the difference between the highest point of your deck in the middle and then the lowest point on the extreme sides? What is the difference? 4mm by any chance ??? ROTF

Also, I made my hatch so that the frame fits just inside the scribed lines with the lines still visible.

In the final analysis though, whether the the hatch is 46mm, 48mm or 50mm makes absolutely no difference - ultimately, it is not visible at all!
 
In the final analysis though, whether the the hatch is 46mm, 48mm or 50mm makes absolutely no difference - ultimately, it is not visible at all!
Absolutely true :D

I just found it humorous this morning. After all my careful measuring, preparation and advanced math skills, the end result was a riot to look at this morning.

Jan
 
Last edited:
Back
Top