Looks fantastic, clean soldering. Saugut.
You are using an out of date browser. It may not display this or other websites correctly.
You should upgrade or use an alternative browser.
You should upgrade or use an alternative browser.
La Belle - Caf Model 1:48 by Thomas Marocke [COMPLETED BUILD]
- Thread starter Thomas Marocke
- Start date
- Watchers 61
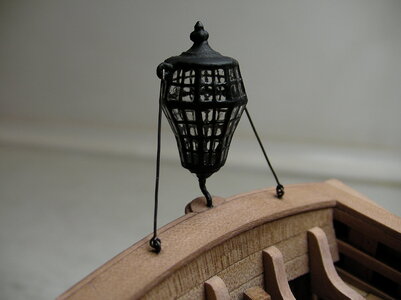
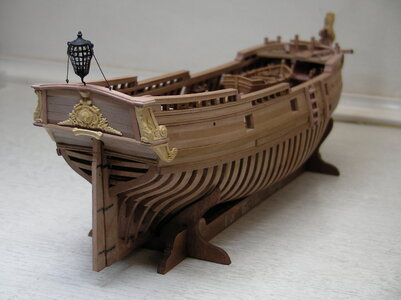
It looks fantastic, great job!Construction and assembly of the stern lantern.
View attachment 260023
Some individual parts of the lantern according to the construction drawing.
View attachment 260022
The sequence of the soldering process. Here you must have some practise in soldering, otherwise already soldered components heat up and shift or stick at once completely to the soldering iron.
View attachment 260024
This is how the lantern looks like after the Boudriot drawing.
View attachment 260050
Liquid glass for the glazing.
View attachment 260049
View attachment 260048
View attachment 260047
Now the two lateral support struts are missing.
Best regards
Thomas
Hard to believe you managed to so precisely solder all these teeny tiny brass pieces. My kit came with cast lantern. In million years I wouldn't be able to do such soldering. Great job!Construction and assembly of the stern lantern.
View attachment 260023
Some individual parts of the lantern according to the construction drawing.
View attachment 260022
The sequence of the soldering process. Here you must have some practise in soldering, otherwise already soldered components heat up and shift or stick at once completely to the soldering iron.
View attachment 260024
This is how the lantern looks like after the Boudriot drawing.
View attachment 260050
Liquid glass for the glazing.
View attachment 260049
View attachment 260048
View attachment 260047
Now the two lateral support struts are missing.
Best regards
Thomas
The lanterns look like tricky pieces that you finished very well Rich (PT-2)Construction and assembly of the stern lantern.
View attachment 260023
Some individual parts of the lantern according to the construction drawing.
View attachment 260022
The sequence of the soldering process. Here you must have some practise in soldering, otherwise already soldered components heat up and shift or stick at once completely to the soldering iron.
View attachment 260024
This is how the lantern looks like after the Boudriot drawing.
View attachment 260050
Liquid glass for the glazing.
View attachment 260049
View attachment 260048
View attachment 260047
Now the two lateral support struts are missing.
Best regards
Thomas
Hello, Thomas! You are doing an excellent job building LeBelle! I admire your skills and attention to detail. But most of it - the end results. Bravo! 


Congratulations for the puzzle. Do you have photos about the soldering process ? Its tricky to stick the part together, i bet.
Brilliant Thomas. “I want to build a ship like this when I’m big”. LOL. It amazes me the detail you have achieved.
Hi Oliver!
I don't have any photos of the soldering. The lantern consists of three levels with eight components each. In each level, two parts were soldered at an angle of 45 degrees on a wooden form. Then the four soldered parts placed in a circle and finished soldering. Only the roof and bottom are glued for safety, before the lantern floats apart again due to the heat absorption.
Not for everything there were wooden molds, tweezers and needles and so I often burned my fingers. The parts are small and are only briefly touched with the soldering iron, so it was endurable.
Best regards
Thomas
Last edited:
Hi János!
I soldered with soft solder. Hard soldering with silver solder gives the nicer seams, but flows with me only from 650 degrees. Defects can only be separated again at even higher temperatures and there is a risk that components will melt away irrevocably.
With soft solder with previous grinding of the parts and sufficient flux, you can tin well beforehand and solder quickly. The parts can also be separated well at 350 degrees without melting. So you can try several times.
Best regards
Thomas
Last edited:
You have an excellent soldering touch . . . even with occasionally burned fingers. Do you use a variable temperature soldering iron? It would seem so as to not "melt" the cast parts. Rich (PT-2)Hi Oliver!
I don't have any photos of the soldering. The lantern consists of three levels with eight components each. In each level, two parts were soldered at an angle of 45 degrees on a wooden form. Then the four soldered parts placed in a circle and finished soldering. Only the roof and bottom are glued for safety, before the lantern floats apart again due to the heat absorption.
Not for everything there were wooden molds, tweezers and needles and so I often burned my fingers. The parts are small and are only briefly touched with the soldering iron, so it was endurable.
Best regards
Thomas
Hi Rich!
The lantern was soldered with the same soldering iron (40 Watt) as for the rudder hinges. No soldering station with controllable temperature control. Soft solders with different melting temperatures would help - important holding points with higher temperature, the rest with lower temperature. I have soldered with one type of solder.
Best regards
Thomas
Very well done! RichHi Rich!
The lantern was soldered with the same soldering iron (40 Watt) as for the rudder hinges. No soldering station with controllable temperature control. Soft solders with different melting temperatures would help - important holding points with higher temperature, the rest with lower temperature. I have soldered with one type of solder.
Best regards
Thomas
Hi János!
I soldered with soft solder. Hard soldering with silver solder gives the nicer seams, but flows with me only from 650 degrees. Defects can only be separated again at even higher temperatures and there is a risk that components will melt away irrevocably.
With soft solder with previous grinding of the parts and sufficient flux, you can tin well beforehand and solder quickly. The parts can also be separated well at 350 degrees without melting. So you can try several times.
Best regards
Thomas
Thanks, Thomas! It was a wrong question anyhow because etched parts tend to burn and disappear in the heat of the flame, so hard soldering and etched parts do not go together... You've done a very good job with the lantern!
Regards
János
I can only repeat the words by our friends - GREAT RESULT
(but please next time make some photos during the process - would be highly interesting - unfortunately this ship had only one latern )
)
(but please next time make some photos during the process - would be highly interesting - unfortunately this ship had only one latern
unfortunately this ship had only one latern
I think nobody of the La Belle builders here is sad about this !
Tres Belle! I love everything about this.
Hello Thomas,
just catching up on your wonderful build log. I was curious if you have applied and clear varnish or wax to the model ?
It looks fabulous, well done.
just catching up on your wonderful build log. I was curious if you have applied and clear varnish or wax to the model ?
It looks fabulous, well done.
Before painting, some minor wood trim work needs to be done.
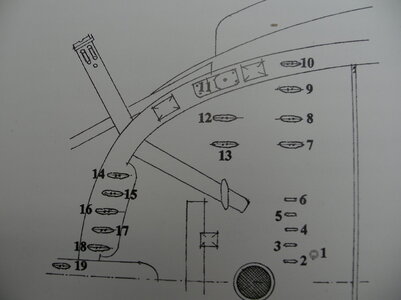
This includes attaching the small cleats.
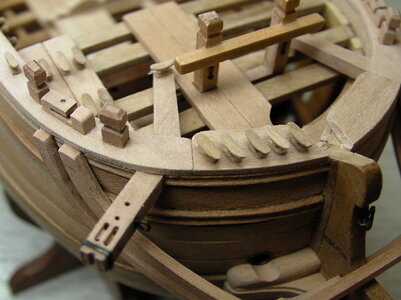
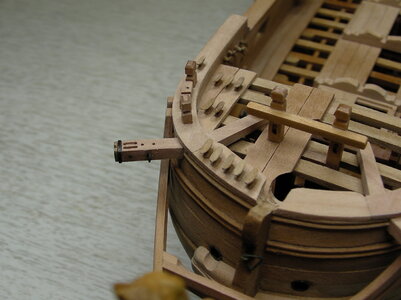
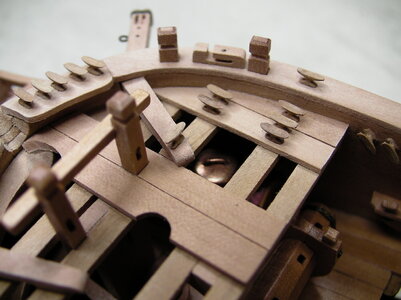
As on most French ships, they were common in large numbers. I use the cleats from "Dry-Dock Models & Parts".
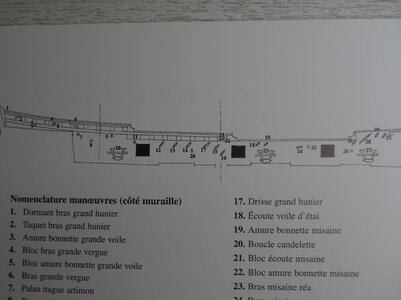
Finding the right size is not so easy with the large number and the intended use.
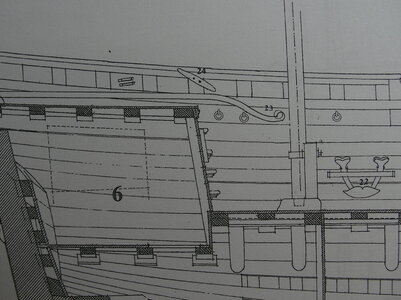
On parts of the drawings the size of some cleats can be measured.
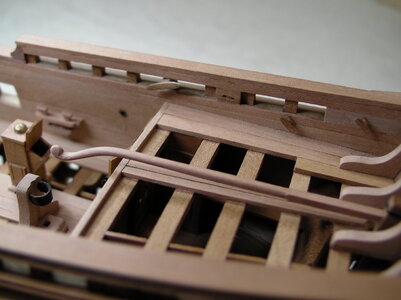
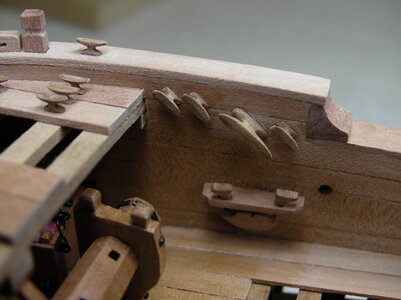
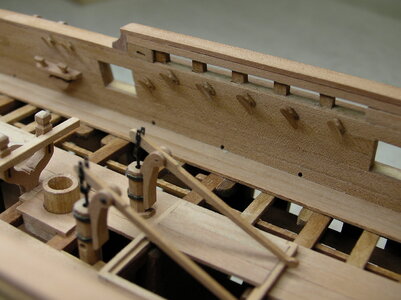
There are still many eyebolts and rings missing.
I wish everyone a nice weekend
Thomas

This includes attaching the small cleats.


As on most French ships, they were common in large numbers. I use the cleats from "Dry-Dock Models & Parts".

Finding the right size is not so easy with the large number and the intended use.

On parts of the drawings the size of some cleats can be measured.


There are still many eyebolts and rings missing.
I wish everyone a nice weekend
Thomas
Last edited:


