Led Lighting Kits

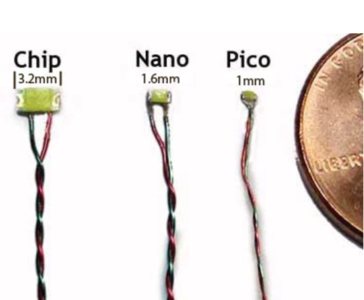
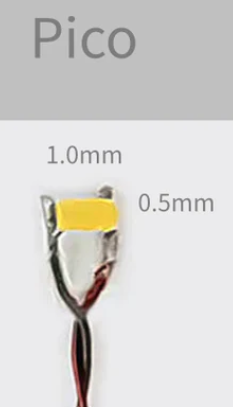
I can help you, Luiz. Ships of the 17th century are my favorite. You can purchase 3 volt LED's from Evan's Designs like those used in both of my ships. My favorite are the yellow 3 volt Pico LED's. They are super tiny but put out lots of light for their size.

1666842692564.png

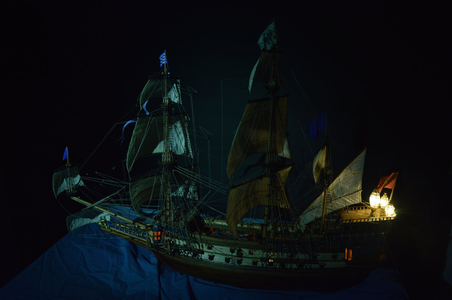
In the first ship, a programmable Arduino Uno electronic card was used to flicker six separate circuits of 3mm LED's by varying the brightness at random between low and medium brightness. It was a fair amount of work figuring this out, and hiding the electronic card into the model. A detachable cord ran from the bottom of the ship to a plug in transformer. Two Nano LED's were assembled inside each of the stern lanterns as well as the 3mm LED's placed inside the ships galleries and deck spaces.
1666843146614.png

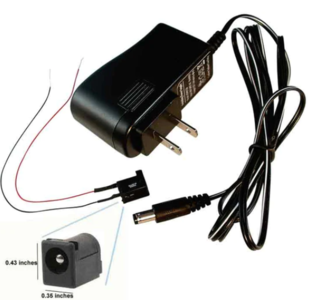
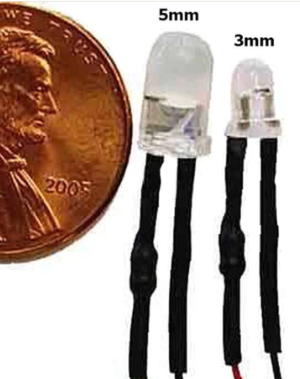
LED's and 3V DC transformer. The transformer is $16.00 USD.
1666843206290.png 1666843415629.png

1666845901352.png

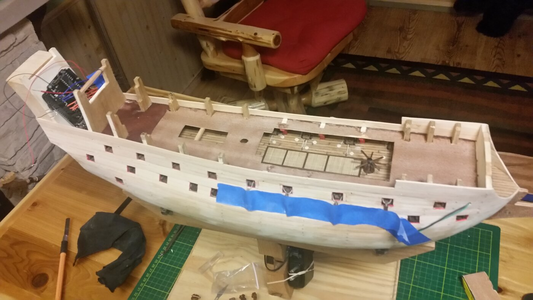
The flickering lights were nice, but because of the scale of the model, even a small amount of flickering did not seem realistic. So, on the next model, a simpler system of lighting was used, and this one is easier and better because you don't need any electronics. Pico LED's were used to simulate lanterns along the overhead of each deck inside the ship. These are very delicate, so handle them carefully. Buy extras, because you will break a few. Since this next model had a detailed interior structure, the wiring from the LED's was sandwiched between the deck support structure and the deck itself, which was glued down over all support structure and wiring. For a simpler model, the wiring would be glued along the bottom of each deck, and the LED's hang down from there about 3mm from the overhead, and shine downward.

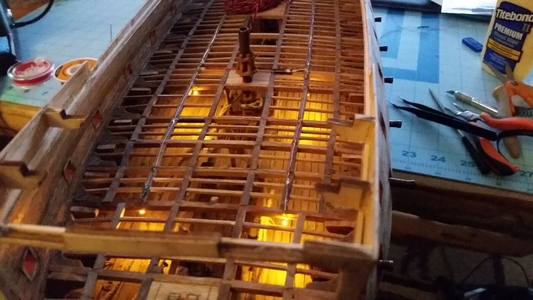
On the second model below, you can see the resistors and wiring glued to the supports. Note that each LED needs it's own resistor in series on the positive lead, or they will get too much electrical current and burn out. One of the resistors has it's original black shrink wrap on it and the other is bare. The LED leads and resistors are soldered between two long bare wires, positive and negative, that run the length of the hull. The wires are glued to the wood, with masking tape holding the wires in place temporarily until the PVA glue dries. Using flux core soft solder, connecting the wires with a soldering iron was very easy. The LED's came with resistors already as part of one of the leads. The lengths of the wire leads were changed, so the resistors were cut off and re-soldered to the lead after it was trimmed to the required length.
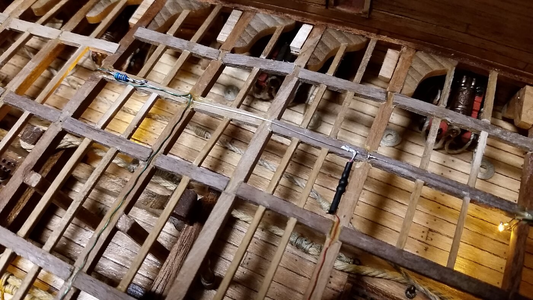
1666843901804.png

1666843921447.png

The effect looks like real ships lanterns. You're probably thinking, "That's a lot of sticks."
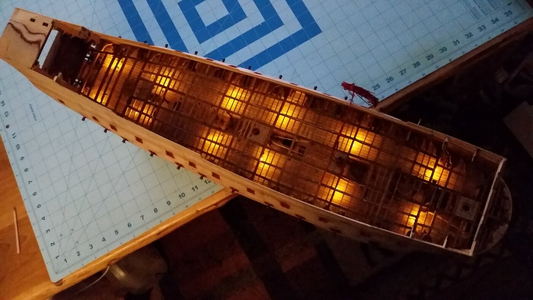
1666843959029.png

It's almost like being there. The LEDs hand down just below the beams to simulate lanterns. View using a borescope before deck above was installed. 1666844002967.png
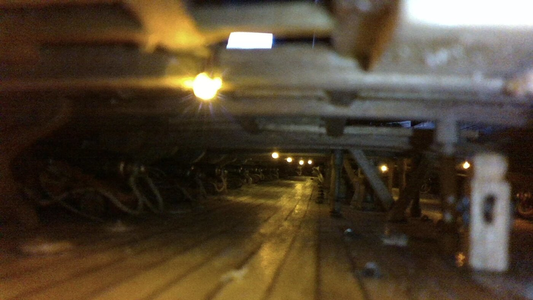
Lower gun deck viewed from stern gun port under light only provided by internal LED's.
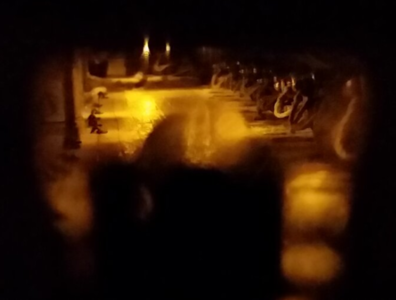
1666846836545.png

Each pico LED costs $2.35 USD.
1666844537356.png 1666844618789.png

Plug and power switch for transformer. LED's are connected to the three separate circuit wires at the top of the picture.
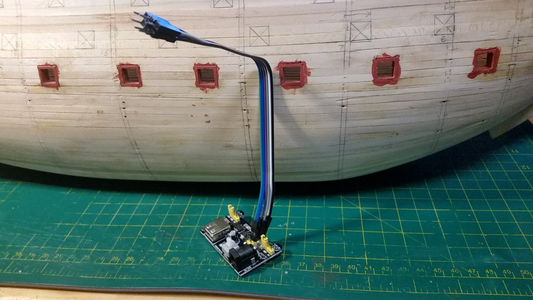
1666844931130.png

Transformer power connection and switch mounted in the hull.
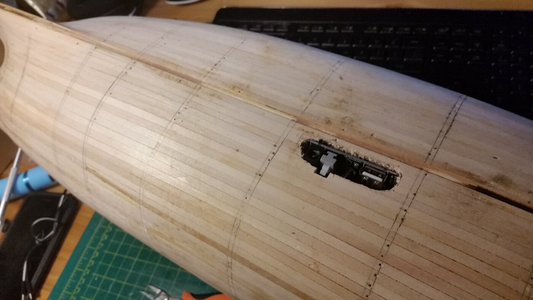
1666844984392.png

More information on wiring LED's is on the Evan's Designs website HERE. If you have any questions, please ask.
 
Last edited:
Kurt, thank you very much for your help and explanations. The lighting effects you showed in the photos are exactly what I was looking for, especially regarding the possibility of obtaining different light intensities. I'm starting a new project in the coming month and I'll certainly consult you again for more specific questions. Thank you again !
 
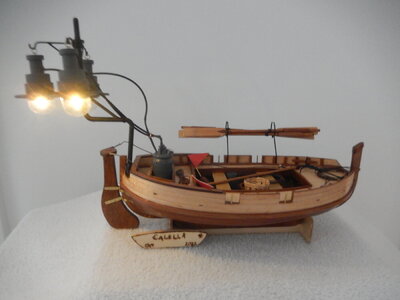
My Calella model was a bit different - hanging lanterns off the stern of a small Spanish fishing boat. I also used pico size LEDs from Evans and tried to hide the battery and switch inside a gas cylinder. To hide the wires I ran them inside the supplied small-bore tubing that was used for the 3 lantern gas lines and then into the gas cylinder where the wires were connected to the battery & switch. Somewhere along the line I broke one of the wires so only 2 of 3 laterns are currently working. (If I were to do this again I would probably incorporate the battery holder & switch into the boat cradle (stand).

DSCN8720.JPG

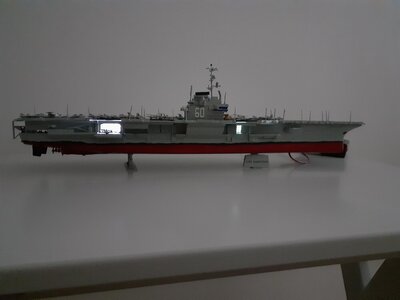
I also added LEDs to a model of the carrier USN Saratoga to add a bit of low-level lighting to the hangar deck. This was done using LEDs and resistors I picked up from a local electronics supply store (before I discovered Evans). The wiring is fixed to the upper inner hull opposite the open hangar deck doors and just below the flight deck; it goes through a small hole in the forward part of the keel and to a battery box with a switch.

20200619_163756.jpg

Lots of ways to get the effects you are looking for. Plan ahead, experiment a little, test things as you install them and, as Kurt mentions, have extra LEDs handy.
 
Thanks John, you are right. I will really have to do a lot of tests and planning, so the lighting doesn't get disproportionate in all aspects : color, intensity, quantity, etc.
 
Kurt, thank you very much for your help and explanations. The lighting effects you showed in the photos are exactly what I was looking for, especially regarding the possibility of obtaining different light intensities. I'm starting a new project in the coming month and I'll certainly consult you again for more specific questions. Thank you again !
I agree with Kurt, Evan Designs are great to deal with and there is a wealth of good supporting information on their web site. I used the pico lights on my Soleiel Royal and the results are great.
 
Hello Luiz
Yes, Evans Led Lights can be used in many different ways, all with great results. I like to use the Pino 3V lamps with there 3V transformer as it gets me away from those resistors. Just my choice as I find it is much easier to tuck away those little wires. I also like there little remote and sensor, that is quite tiny and can be hidden away quite easily on the deck area. The remote has an on and off and also 3 lighting levels that is great for use as a soft night lamp. I prefer there soft white lamps.
Theas are great people and very easily to deal with.
Regards Lawrence
 
Hello,
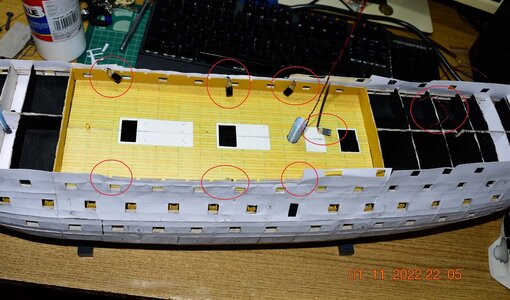
I don't have yet a completed model to show but my in my current build I am using 3mm leds (I had these from stock so I didn't bought smaller) attached at the black small pieces you see in the image.

_DSC6100 - Copy.jpg

Another two spots to add lights if you can plan it from before, are the lanterns of the ship:
mk002-hms-victory-no-41 (25).jpg
mk002-hms-victory-no-41 (19).jpg


One last thing, If you have the space, you can add a potentiometer in series with the resistor, and that way you can change the brightness of the leds.

I wish you the best,
John
 
Back
Top