-
LUCZORAMA SHIPWRECK SCAVENGER HUNT GIVEAWAY. 4 Weeks of Fun • 1 Legendary Prize ((OcCre’s Fram Ship)) • Global Crew Welcome!
**VIEW THREAD HERE**
- Home
- Forums
- Welcome to Ships of Scale Forum
- Beginners Corner - How to Get Started
- Build Logs and Documenting / Photography
You are using an out of date browser. It may not display this or other websites correctly.
You should upgrade or use an alternative browser.
You should upgrade or use an alternative browser.
That looks great.
Jan
Jan
Great job !!!
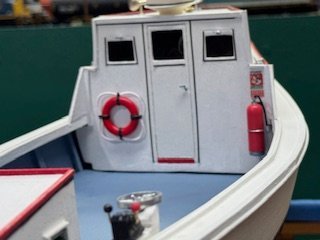
Hi Darry;,Hull planking completed, time to star smoothing out for finishing
Is the hull planking your own design? There is a great video series on building an actual lobster boat you may find interesting. Part 1 can be seen at
- Joined
- Jun 23, 2025
- Messages
- 37
- Points
- 48

The model is a Blue Jacket kit, so I followed the instructions to the best of my ability, its my first attempt at strip planking a wooden boat model , Thanks for the video. DarrylHi Darry;,
Is the hull planking your own design? There is a great video series on building an actual lobster boat you may find interesting. Part 1 can be seen atAllan
- Joined
- Jun 23, 2025
- Messages
- 37
- Points
- 48

Thanks Jan more pics to follow soon, DarrylThat looks great.
Jan
You did great and if it will be painted, realistic plank laying is not as important as if it was left bare. Your kit is not alone as many of the old time kit makers give instructions for planking that are different than planking practices on actual ships and boats.I followed the instructions to the best of my ability
Allan
- Joined
- Jun 30, 2025
- Messages
- 3
- Points
- 0
Planking looks great! This is something I intend to focus on more with my next project. On previous models, my planking has been very sloppy, knowing I can sand and use wood filler to somewhat even it out. But I am hoping I can improve this and do a proper tapered planking, allowing each plank to line up more evenly, requiring less putty and gap filler planks.
Great planking job. Thanks for the photos so we can see your work.
- Joined
- Jun 23, 2025
- Messages
- 37
- Points
- 48

Thanks to all for the complements, the bulkhead contours of the model were challenging for a beginner, instead of planking the entire boat and sanding - fairing the hull I first cut & steam each plank , glue in place , sand with a hand held mini power sander (Microlux Tools), fill in gaps with DAP plastic wood filler, sand again by hand with 200 Grit / 400 Grit paper. This approach takes a longer but for my first try at strip planking I didn't want to hurry the process. Now that the hull is planked I will apply a coat of Red Devil (wall spackle) to smooth out and finish fairing the hull. Being that Lobster boats are a smooth sided, I will paint on a coat of vinyl sealer (Micro Mark) which can be sanded, afterwards I will spray on an automotive primer & sand to completion, before painting the hull. I purchased a bottle of boiled linseed oil to use as a sealer, but decided its overkill for this project as the beauty of the wood once finished would be painted over. Any suggestions or recommendations on my work methods are welcome, I'm glad I decided to join this web site, compared to a model train forum I joined years back I find this SOS group to be much more professional, respective, and helpful to beginners. Darryl
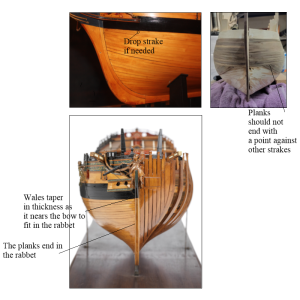
There are great tutorials on line and in print on how to edge bend or spile planks that have been given here at SoS. Key is making sure the strakes all end in the rabbet. There are the few exceptions that require a drop plank or stealer, but usually no more than one or two. Many kits still give methods that are as if no one working there has ever studied how a ship is planked and can be frustrating. If the hull is to be coppered or painted, fillers and such are not an issue though as the planking will be covered up.This is something I intend to focus on more with my next project.
Allan

- Joined
- Jun 23, 2025
- Messages
- 37
- Points
- 48

Thanks for the tip Allan the planking videos. For my 3rd project I would like to try planking a kit with better quality wood that will not be painted, which for me will require an advanced skill level, as such described & shown in your response, but I like new challenge's. DarrylThere are great tutorials on line and in print on how to edge bend or spile planks that have been given here at SoS. Key is making sure the strakes all end in the rabbet. There are the few exceptions that require a drop plank or stealer, but usually no more than one or two. Many kits still give methods that are as if no one working there has ever studied how a ship is planked and can be frustrating. If the hull is to be coppered or painted, fillers and such are not an issue though as the planking will be covered up.
Allan
View attachment 534119


