• Win a Free Custom Engraved Brass Coin!!!
    As a way to introduce our brass coins to the community, we will raffle off a free coin during the month of August. Follow link ABOVE for instructions for entering.

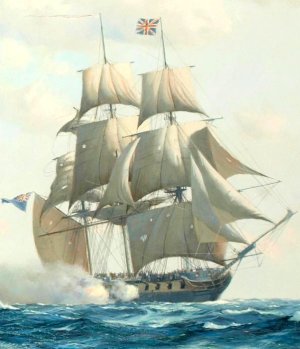
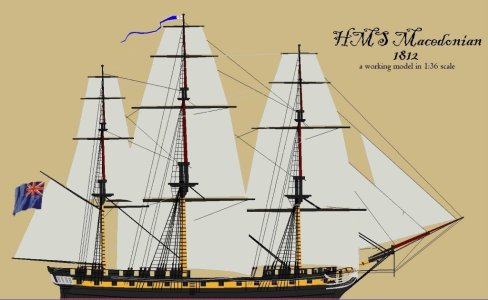
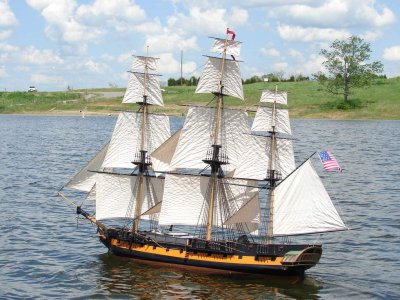
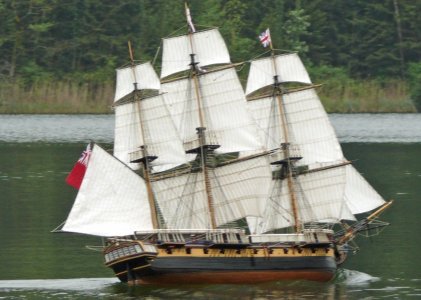
Macedonian, a British Frigate of 38 guns,c.1812, in 1:36 scale for RC sailing

Joined
May 12, 2017
Messages
379
Points
278

Location
Maryland USA
title.png
All the models I've built, or converted to sail, sailed mostly in Baltimore's "Inner Harbor." I had always wanted to build a model large enough that it wouldn't bob like a cork. When I was married, and lived in my own home, a few hundred yards from Stony Creek, even more "open water," and even more-so needing a model of some size so as not to be cork-like. I finally started building one ~ Constellation (build log link in my signature below).

Being a fan of C.S.Forrester's Hornblower series, I always dreamed of an RC model of the frigate Lydia. She being a fictional vessel, the were no plans, drawing, kits, or anything else to build from, the sort of information I did have for Constellation, so she got started instead.

Howard Chapelle's History of the American Sailing Navy has one drawing of a British frigate in it, that of the Macedonian, so along about 2010 I ordered a copy of Chapelle's drawing of her from the Smithsonian Institution. They came in 1:48 scale, and I had them scanned and printed at 1:36 scale, the same as Constellation. I gave up on finding a drawing that was suitable for Lydia, though I would find one much later, and decided to go with Macedonian.
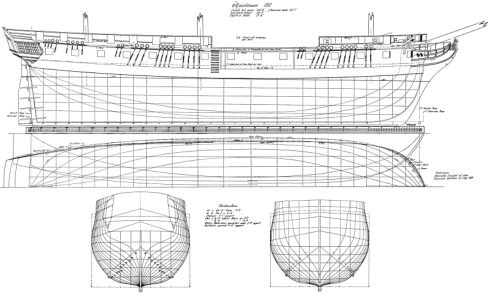
macedonian_sm.png
As a subject for a model, the ship had an interesting career: Built at Woolwich Dockyards, England, in 1809, and launched on 2 June 1810, Macedonian was one of sixteen Lively class frigates rated at 38 guns.

In January 1812, Macedonian was ordered to secretly deliver bills of exchange to Norfolk, Virginia, USA, and to bring back an equivalent quantity of gold and silver specie, as part of a scheme to keep the Bank of England solvent. During the visit, her then Captain Carden socialized with the notables of Norfolk, including then-Captain Stephen Decatur, but bungled the mission by inadvertently revealing what was planned, and had to return to Lisbon empty handed. While in Norfolk, Carden dined frequently with Captain Decatur and his wife Susan, and the men allegedly bet a beaver hat on the outcome of a battle of their ships.

The US declared war on Britain in June of 1812. In September, Macedonian was ordered to accompany an East Indiaman as far as Madeira, then to cruise in search of prizes as long as supplies permitted. The frigate left Madeira on 22 October, but only a few days later, on the morning of the 25th, encountered the American frigate United States, commanded by none other than his erstwhile dinner host Stephen Decatur.

Unfortunately for Carden, United States was one of the big 44-gun 24 pounder frigates, and her broadside was 864 pounds of metal, vs Macedonian's 528 pounds. Within a few minutes of closing, fire from the United States's brought down Macedonian's entire rig, and riddled the hull. United States then pulled away temporarily, leaving Carden and 1st Lt Hope, time to contemplate their lack of options. Finally, with the United States preparing to rake to again, Carden struck his colors, making the Macedonian the second Royal Navy vessel of the war to surrender to Americans.
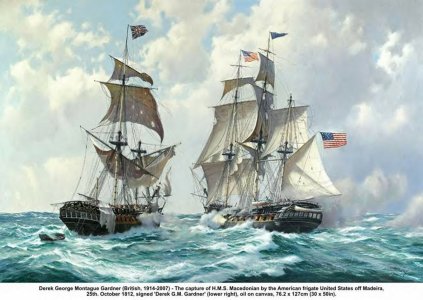
mac_vs_us.jpg
Decatur was careful to preserve Macedonian, sending over a detail to help repair her. After 2 weeks of repair at sea, Decatur then brought his prize into Newport, Rhode Island, on December 4th, causing an immediate national sensation. Constitution had previously defeated Guerriere, but she had been too badly damaged to save. Macedonian was taken into American service in April 1813 with Captain Jacob Jones in command.

After a failed attempt to run the blockade at Hell Point, she spent the remainder of the War of 1812 bottled up in the Thames River in Connecticut.

In May 1815, Macedonian joined Decatur's squadron in the Algerian War, against the Barbary powers, to stop harassment of American shipping. In June she assisted in the capture of the Algerian flagship, the frigate Mashuda, by frigates Constellation and Guerriere (a new ship), the sloops-of-war Epervier (a prize brig), and Ontario. For the next three years Macedonian patrolled the Mediterranean and off the US East Coast.

From January 1819 to March 1821 the frigate operated off the Pacific coast of South America, during the disorders following the Latin colonial revolts, before returning to Boston in June 1821. After a refit, she cruised the West Indies to suppress piracy until 1826.

On 11 June 1826 Macedonian departed Norfolk for service on the Pacific station, returning to Hampton Roads, 30 October 1828. She decommissioned in 1828 and was broken up at Gosport.


In October of 2011, having a workshop with a window AC unit, and a wood stove, plus a steady income, I started readying to build Macedonian in 1:36 scale. I had run into snags about details of Constellation, and figured Macedonian would build faster with so much more data available about Napoleonic era British frigates.
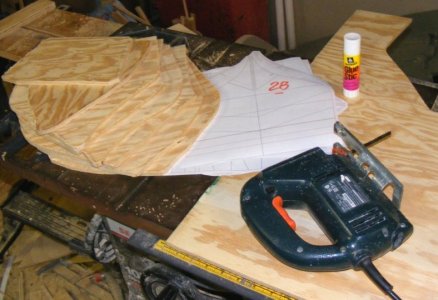
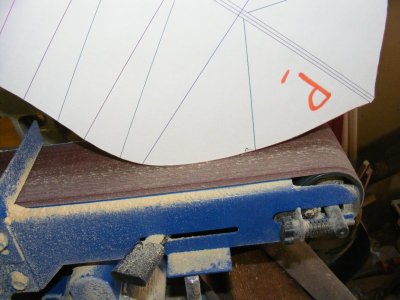
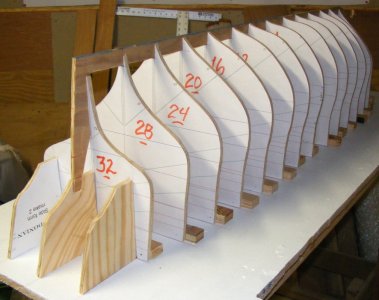
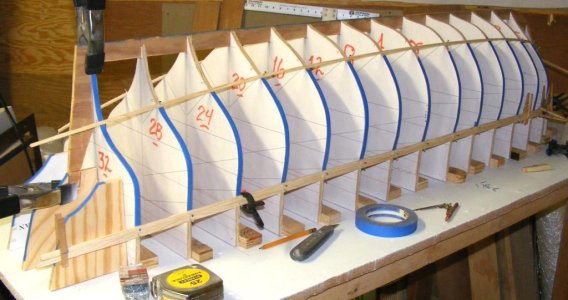
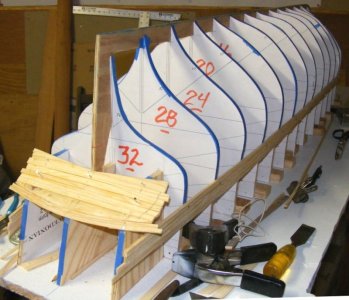
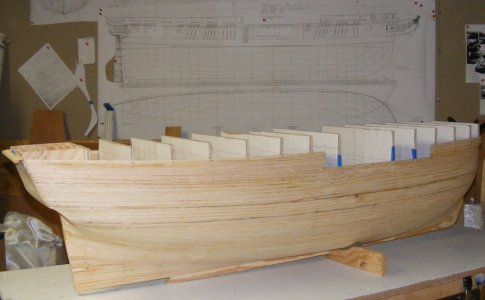
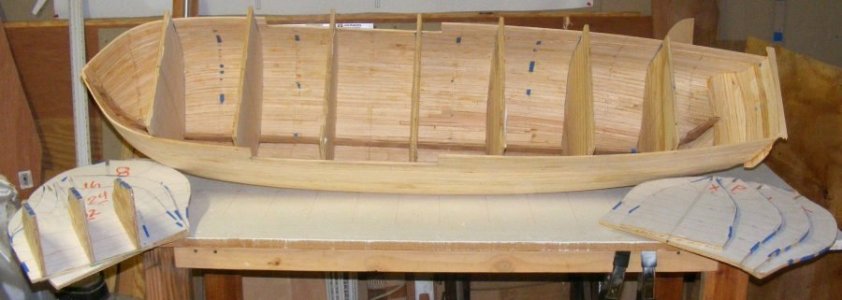
I printed her forms patterns full-sized and cut them from 3/8" (9.5mm) plywood. Rough cut them with a sabre-saw, belt sanded them to the mark, and beveled them, then stood them up on the build-board/bench Constellation and Pride of Baltimore had been built on, after sanding and painting it. The keelson and forms for the transom were added and it was off to the races!
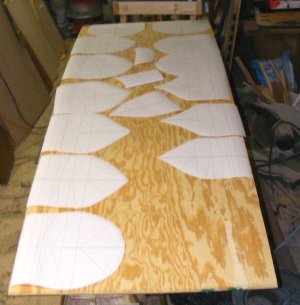
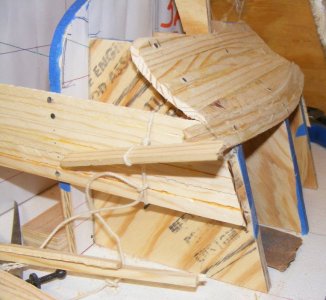
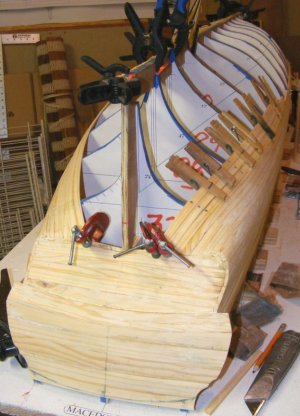
mac20111111a.jpg mac20111111f.jpg mac20111112b.jpg mac20111119e.jpg
 
Last edited:
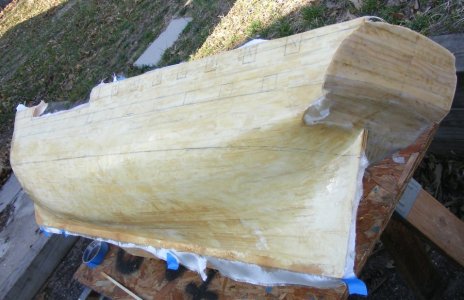
As noted; this will be a working-sailing model 1/36th the size of the original. All my labor should net a model with the following dimensions:

  1. Beam: 13.5" (34.3cm)
  2. Length of the hull: 59" (150cm)
  3. Length over the rig: 85-3/4" (218cm)
  4. Width over the rig: 36" (92cm) ~ Main yard w/o stuns'l booms.
  5. Length on deck: 55" (140cm)
  6. Draft: 6.7" (17.02cm) w/o ballast keel
This model will be smaller than Constellation which, in fact, is about the size of United States compared to her.
hms_macedonian.jpg

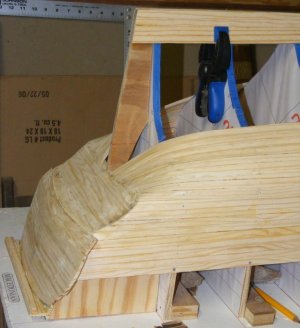
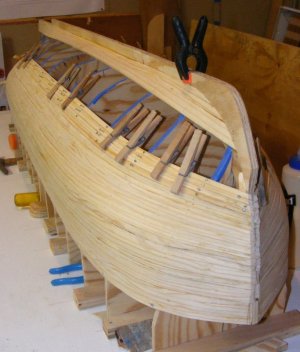
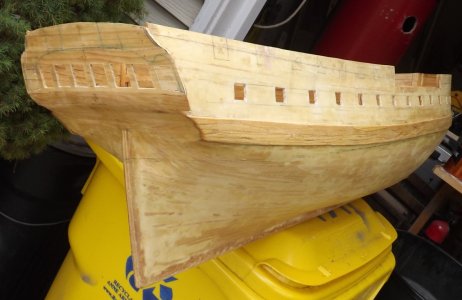
The edges of the forms were covered with blue masking tape so the planking wouldn't be glued to them. The point is for the hull to be a shell that's fiber-glassed. A 1/4" plywood keelson/stem/sternpost was inserted, and battens were tacked on at the diagonals to steady everything, and on November 20th, 2011, planking commenced with the sheer-plank and the stern tuck. Planking was 3/16" thick by 3/8" wide white pine. It wasn't properly spiled, but was tapered to no less than half it's width where needed, and stealers placed as required. The garboards were 1-1/2" wide cause I was lazy. Absolutely none of this will be visible through paint and a copper bottom, but I know it's there. My quick and nasty planking of Pride still haunts me today, because despite all the paint ~ I know it's there.
mac20111120b.jpg mac20111123c.jpg mac20111127f.jpg

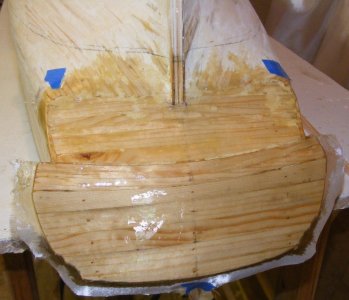
Each plank was edge-glued to the one before it. As planking continued toward the keel, the rest of the transom was planked. The parts of the stem, keel, and stern post were templated and cut from 1/2" plywood to be installed later. When the hull was closed up, it was removed from the build-board and planking above the sheer-plank was installed.
mac20111203d.jpg mac20111206f.jpg mac20111212c.jpg mac20111210f.jpg mac20111219r.jpg

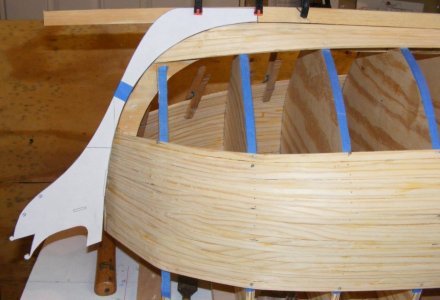
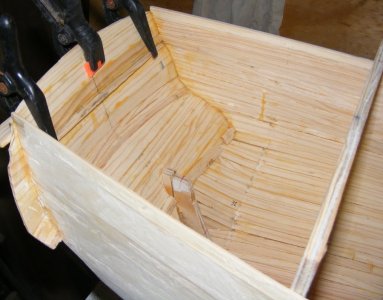
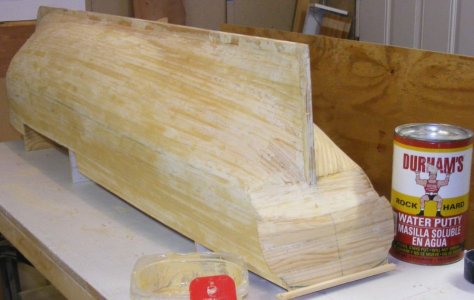
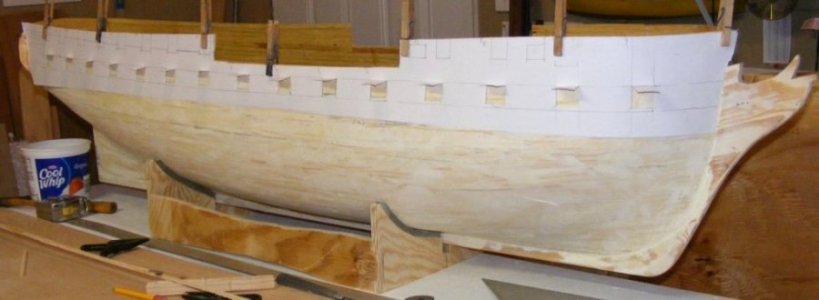
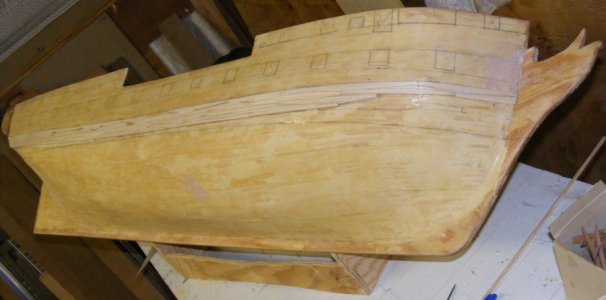
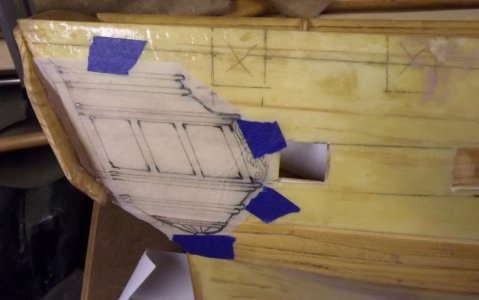
The forms were popped out, one-by,one, and the inside sanded, painted with diluted wood glue and sanded again. A couple of formed were tacked back in to hold the hulls shape as I sanded and filled any gaps with Water-Putty. A template was made to transfer details like gunports, wales, moldings, etc to the hull.
mac20111220a.jpg mac20111223g.jpg mac20111223a.jpg mac20111225c.jpg mac20111226b.jpg


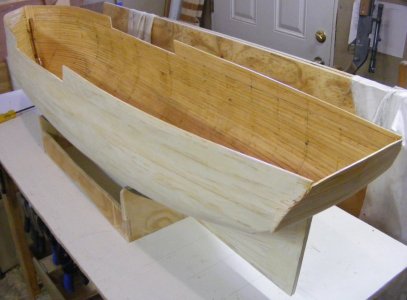
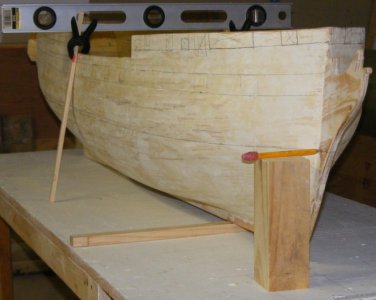
The build table was leveled, then the hull on it leveled port and starboard, and blocked up so the waterline marks fore-n-aft were at the same height from the table. A sharp pencil resting on a block of wood cut to the right length was then used to mark the waterline.
1755203022409.jpeg

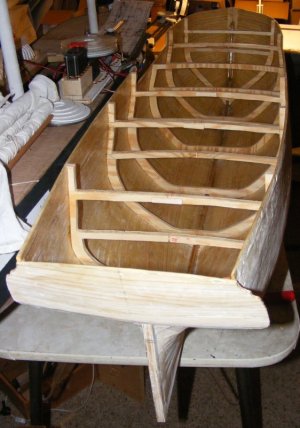
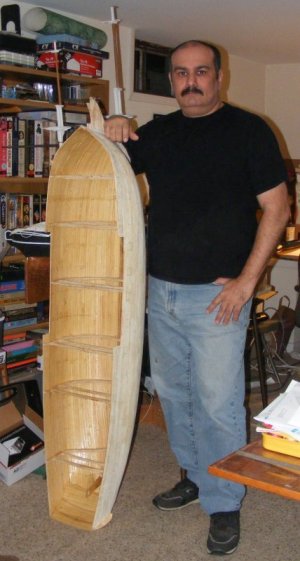
The inside of the hull was given a couple of coats of polyester resin and about half the form were cut down to the dimensions of frames and epoxied back into the hull to hold it's shape from flattening out. The hull was ready to be fiber-glassed when the weather got warm enough.
mac20120110b.jpg mac_me_20120110.jpg
 
Last edited:
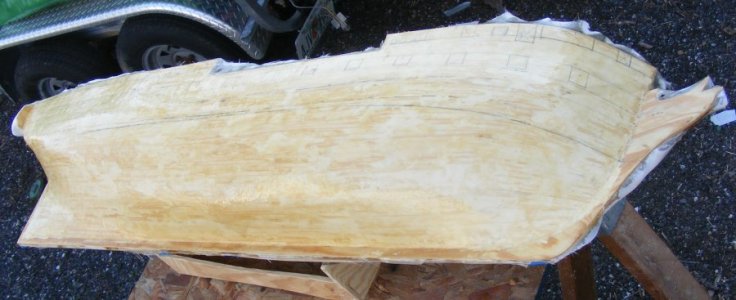
Glassing began on the first warm enough day in March 2012, starting with the transom, then afer a few days of cold, the sides. I used 4oz cloth I got from DuckWorks who sold it by the yard, but are no longer in business now.
The sides were each done in two pieces, over-lapping slightly where the wale would get installed.
mac20120312a.jpg mac20120314e.jpg mac20120314h.jpg


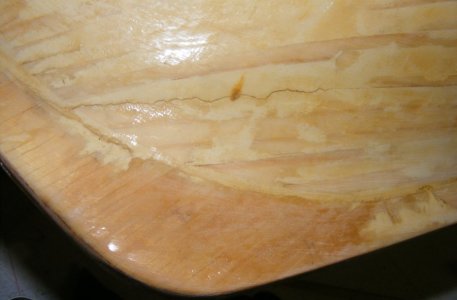
I've been asked a lot why I felt the need to glass a wooden hull? It's because it's a planked wooden hull that will be placed in water, the brackish waters of the Chesapeake Bay in my case. After I had to move, and the model had sat on a shelf in a garage (no heat or AC) for a couple of years - the wood did what wood does - it moved. If that seam in the pic below didn't have glass over it, water could have seeped in, soaked the wood under coats of resin and paint, swelled it, and eventually rotted unnoticed until a hole appeared. Think of it as a little prevention.
mac20121004e.jpg
click the pic and look closely.

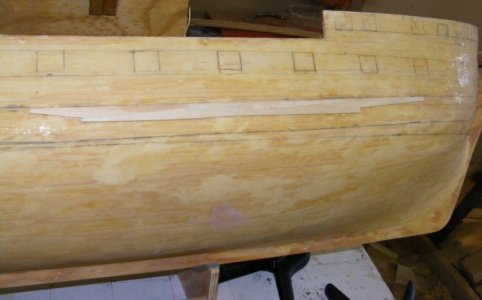
I didn't build the wales into the hull, as the real ship was built because I figure glassing over it would be troublesome. So I opted to apply it over the glass. Note: after the wale was applied and completed, I learned that the lowest wale (or the only wale on a frigate) would have been done in "anchor-stock" planking, and any wales above it would be "top-and-butt."

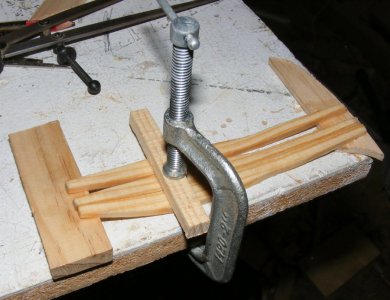
The pieces were cut from the same wood as the planking and the one rounding the bow were soaked in hot water, bent and allowed to dry in a jig. All the pieces were CAed onto the hull and any gaps filled with sawdust and CA. A friend was building a 12ft skiff in my yard/garden and I snitched some epoxy from him to give the wales, actually the entire hull, inside and out, a couple of coats.
mac20120406b.jpg mac20120411c.jpg mac20120411d.jpg

I then started to cut out the gunports when...
mac20121005g.jpg mac20121007a.jpg

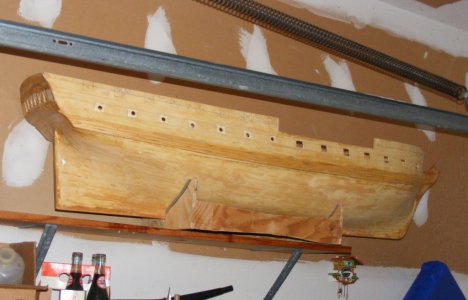
The job went away, I moved into a smaller space, the house was foreclosed, and when I finally found another full-time job, it was for less than half of what I was making. So Macedonian was literally shelved.
mac20130912.jpg
 
Last edited:
Until I could get my new space arraigned to do some work I scoured the Internet for information. A big item was what did the transom look like?
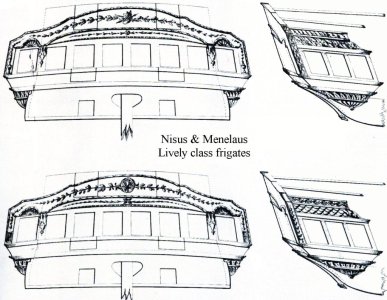
I couldn't find any painting, drawing, or model that helped at all. I got a copy of Gardiner's Frigates of the Napoleonic Wars and found the the proposed decoration of the bow, quarter galleries, and transom of the frigates Nisus and Menelaus, two Lively class frigates built and completed only weeks before Macedonian.
transoms.jpg
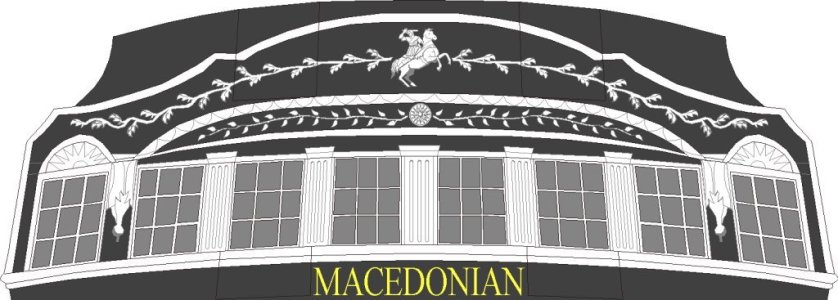
From that I conjectured this: mac_stern.jpg

The Macedonian was, in fact, Alexander the Great, who's figurehead was on the bow. I figured the stern would have followed that theme. The two frigates mentioned above had a thematic symbol at the top center of the transom. I though of several ideas; a cameo based on a bust of Alexander; a profile based on a coin; the Vergina Sun symbol of Macedonian royalty, all I thought where good choices, but not what I though some British fellow in 1809 would have come up with. The reverse of the coin with the profile had Alexander on his throne and that was my favorite, but looking at it I realized it was actually Zeus, and not Alexander, so it was back to the drawing board. I eventually went with an image of Alexander on his horse, Bucephalus. The vine work on either side is based on the vine-like bands on the breastplate of the figurehead at the US Naval Academy. Below it, I placed the Vergina Sun with laurel leaves to either side of it. There's rising suns over the quarter gallery lights as well - just like those shown for Nisus and Menelaus. I still don't know what she actually had, but this is, I think, keeping in the style, and available knowledge when the ship was built.

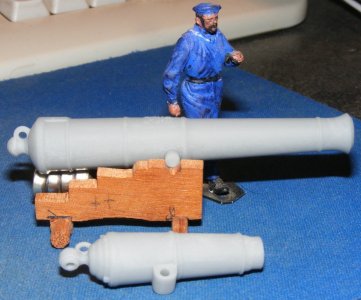
To make her guns five each 32pdr carronades, and 18pdr Blomefield with the intention to use them as masters to cast the rest in resin.
mac20131107e.jpg

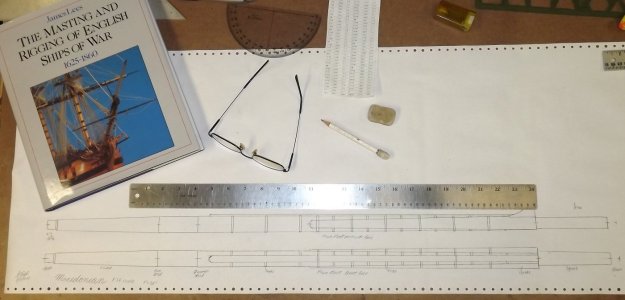
I also started digging around to figure out the dimensions of her rig. Chapelle gives her spar dimensions from 1818, which are by American standards, but I'm modeling the ship before her fight with United States, and want her British measurements. After much digging, I settled on what was in James Lee's, The Masting and Rigging of English Ships of War, 1625-1860
which should end up looking like....
wlsailplan.jpg

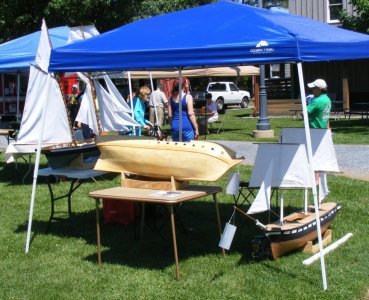
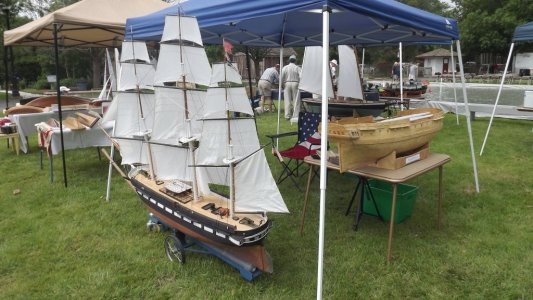
In May of 2014, the hull was displayed along with Constellation and Pride of Baltimore in the model boat festival at the Chesapeake Bay Maritime Museum. Despite being the least finished of my models, she got the most inquiries.
mac20140531a.jpg
 
I finally set-up the garage at my new place as my shop, while doing handyman work, and making camp furniture and boxes for reenactors to bring in some money.
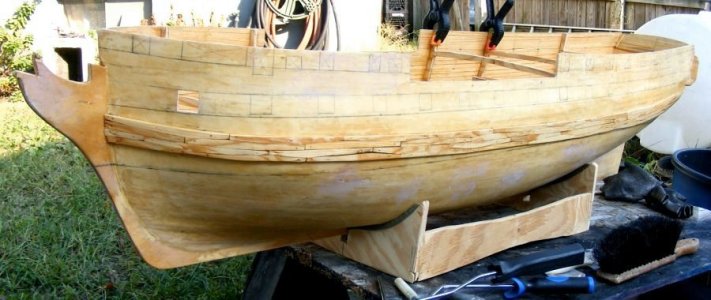
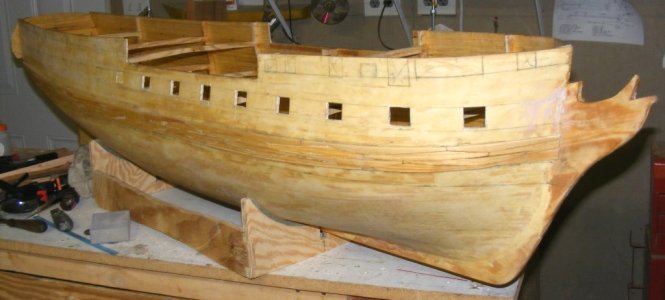
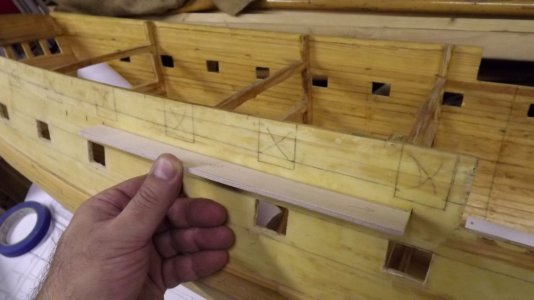
June of 2015 saw all the gunports and windows cut out. The upper ports I'll cut once there's framing behind them for support.
mac20150609a.jpg

It was October of 2016 when I got around to the model again. I though it would look like some progress was made if I could get her painted, but I felt some thing had to go on before paint could.
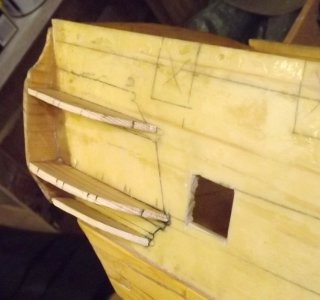
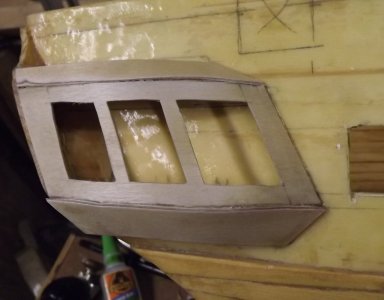
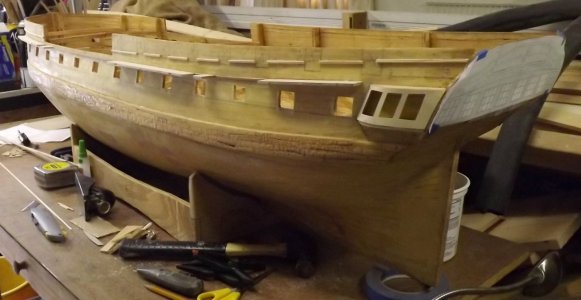
I made her channels from 1/8" thick aircraft plywood, built up the quarter galleries, and apply moldings. The moldings are the only thing I was remotely happy with. The channels were pinned with brass rod, but not glued, so those I'll remake properly. The quarter galleries, I don't want to talk about. I though it was going quite well till I stepped back and looked at them. That's going off in a totally different tangent we'll discuss later.
mac20161031a.jpg mac20161031c.jpg mac20161101a.jpg mac20161102d.jpg mac20161102f.jpg
mac20161103e.jpg but the hull did look a little more progressed.

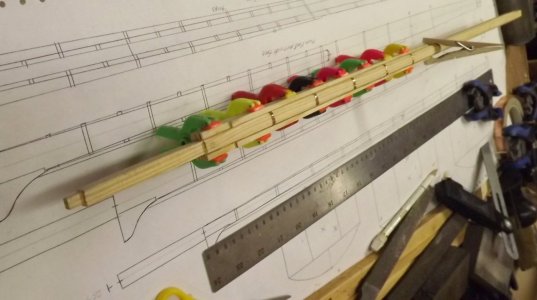
Later I took a shot at making the three lower masts.
mac20160802a.jpgmac20161110e.jpg mac20161115e.jpg
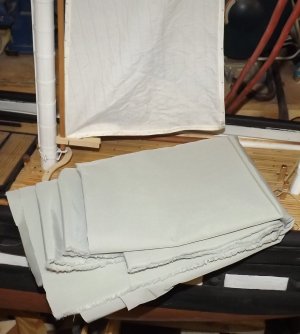
Bought a couple of yards of DuPont Supplex for making sails
mac20161220a.jpg
and bought a 3D resin printer!
elegoo_mars.jpg
 
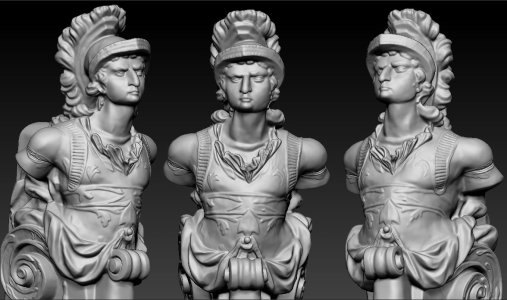
A long while ago, the Naval Academy had the figurehead of the Macedonian scanned in order to replicate it, bring the original inside, and put a replica based on the scan, back on it's pedestal. The people that did the scan found my wesite on the model and offered to sell me a 3D print for $250 USD. Mind you, I'm unemployed, legally bankrupt, and hardly in the mood to pay that sort of money for a 2 inch tall bit of plastic they literally copied. So I said "no."
3d_scan.jpg
Now, with a 3D printer of my own, I contacted these folks about maybe getting a file that I could adjust to my scale and print myself. Also, if it should get knocked off the model at some point, I could easily print another to replace it. They told me they didn't have permission from the Naval Academy to distribute the file.
Left on my own, and looking at the figurehead in Annapolis, I'm seeing Michael Pollard
michaeljpollard.png
Though I can't show any evidence, I think the "original" figurehead was badly damaged in the fight with United States and "repaired" by some sailor, as opposed to a real ship-carver, and probably "repaired" many more times after that. I can't believe a Royal Navy carver turned out that, and got away with it.
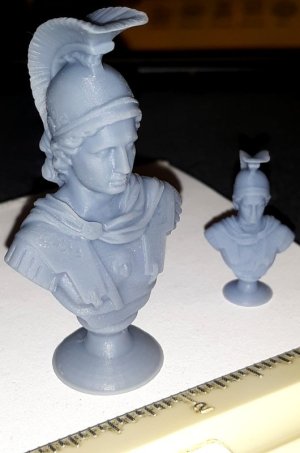
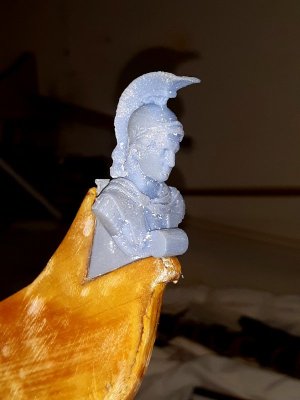
On the other hand, there is a bust of Alexander in a very similar style, that predates the ship, and was available to artists of the time. I found a scan of that bust online, and altered it to fit the model. It's not a good quality print, but I think it's better then the "original" - sorry Mr. Pollard.
mac20220320a.jpg 20220526_235802.jpg
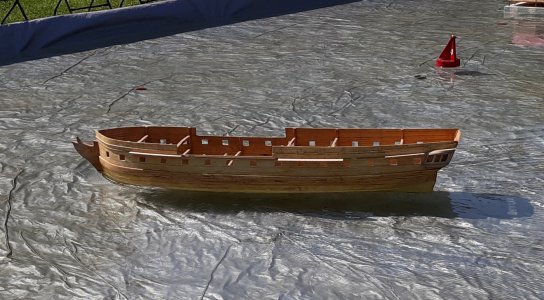
In 2019 the model went on display with her sisters at the Chesapeake Bay Maritime Museum again, and even got in the water for the first time.
cbmm2019.jpg mac20190518b.jpg
 
Last edited:
Jerry, Fascinating stuff! I like these large scale models that you build. On my bucket list is a 1:32 scale model of Constellation’s launch, to round out the three other scale ships boats in my collection. 1:32 scale allows me to include 1-3 painted figures with the display of my models.

It seems that you’ve overcome a lot of obstacles to get where you are. Hang in there!!

Roger
 
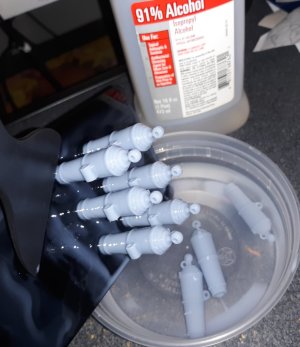
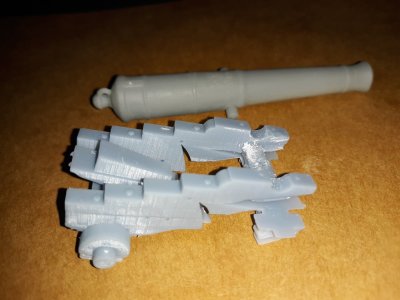
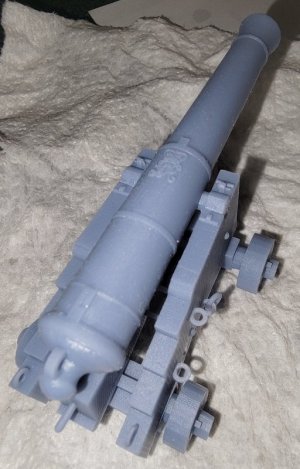
Among the first things I 3D printed were carronades for Macedonian. Printed with the resin that came with the machine. The files came from the friend that had printed the gun tubes I had gotten earlier. He also sent files for the carronade slide and 18pdr carriage. The carronades printed well, but the other items gave me problems beyond my experience at that point.
mac20200324e.jpg mac20200410b.jpg mac20200328a.jpg mac20200404a.jpg

I put the guns aside while I learned how to 3D print better. Months later, when I looked at the guns, they had warped and cracked. The tubes I had bought, years older, were still perfect. I had since switched to a better resin that was stronger and better suited for model parts. I tossed out my first 3D prints and started new.
But before printing 50+ guns and carriages, I decide to model and print something else.
I didn't model the gun-deck on Constellation as I figured that would be too many holes in a heavy model. She's sailed (jury rigged) a few times in some fairly strong gusts and never dipped her gun-stripe. I've also seen sailing models of frigates with modeled gun-decks where it didn't seem to be an issue either, so with Macedonian, I decided to model the gun-deck.
surprise_24.jpg Ray's 1:24 scale Surprize (SC&H kit) post-3777-0-75128200-1401643499.jpgLars' & Werners 1:30 scale Banterer (scratch)

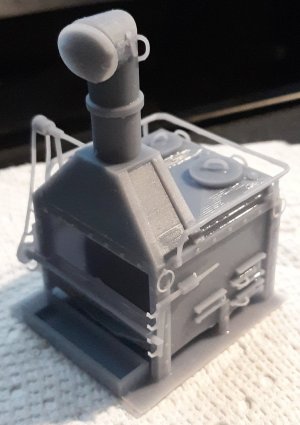
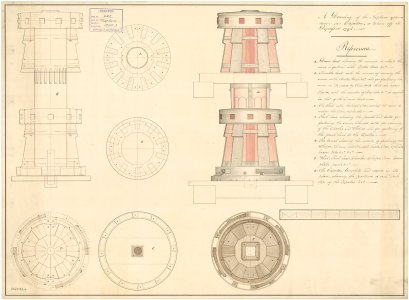
Doing that meant making all the stuff that'll be seen on the gun-deck (not all 3D modeled); the guns, bitts, capstan, ladders, pumps, the stove, cabin partitions, etc. I started with the stove.

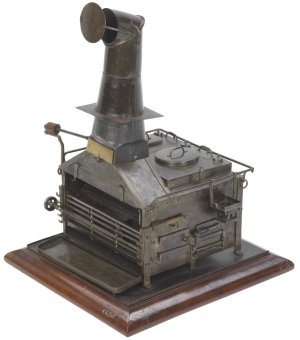
While looking for source material to base a model on, it seems the same year Macedonian was launched (June 1810), a new stove by Lamb & Nicholson was being fitted into British warships, but I haven't been able to find any drawings or images of a L&N stove to model from. Also, I assume the stove would have been requisitioned some time before the ship's launch, and would therefore more likely be a Brodie type.

The Arming and Fitting of English Ships of War 1600-1815 by Brian Lavery, has a chart of stove dimensions for various gun-rates of ships on page 198 (2006 edition).
On that chart, for a 38 gun ship; the stove's body width should be 56 inches; the length 57 inches, and the height to the top of the flat sides is 48 inches. The height to the top of the pyramid duct is 64 inches. The height of the chimney isn't given for ships of less than 80 guns.
I also looked at stoves modelers made for their ships, and mostly a beautiful model at the National Maritime Museum in the UK.
stove_nmm05.jpg

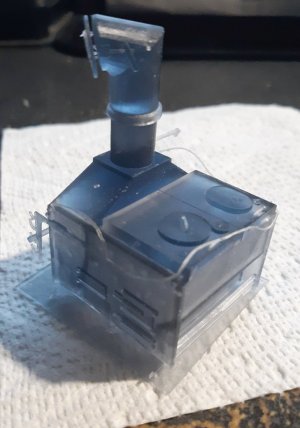
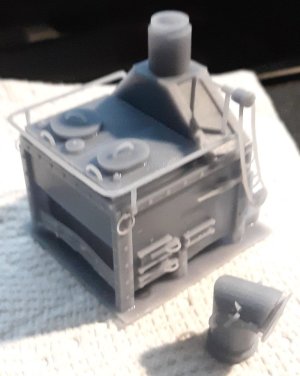
My model's first print showed I need to beef up some items or they wouldn't print right, which I did, and tried again...
mac20231114a.jpg

Which came out pretty well...
mac20231115b.jpg mac20231115d.jpg

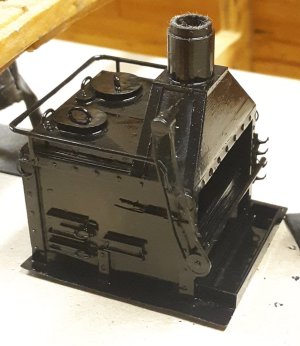
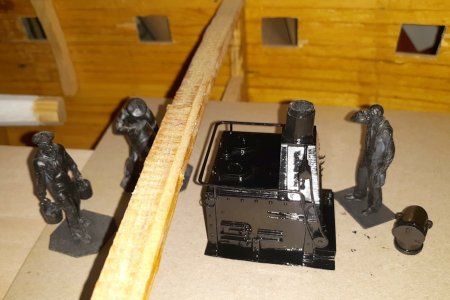
Nothing opens, moves, or functions, it'll hardly be visible except by glimpses through gun-post and hatches, but I think it fills the role quite well, especially with a coat of paint.
mac20231116a.jpg mac20231116b.jpg

Alas, the little stove is no longer with us. It was placed on a shelf, for safe keeping, and while searching for something it was bumped, fell to the concrete floor and shattered. The nice thing about 3D printing is, I have the file and can print another one! The file's also on my Thingiverse page, so you can print one too.
 
Last edited:
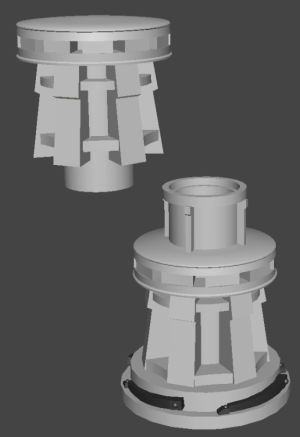
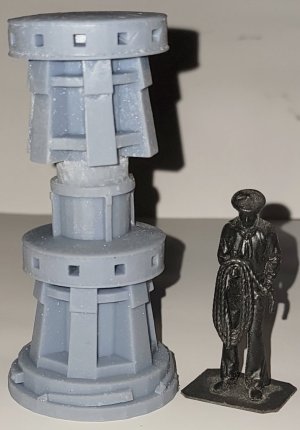
Searching the National Maritime museum's site for more models and drawings I found a drawing of a capstan for HMS Neptune. I scaled it to 1:36, adjusted it to fit the capstan in the in-board profile of another Lively class frigate, and modeled it in 3D.
neptune_capstan.jpg capstan20250113.png

The first print didn't come out usable at all, so I altered the angle a bit, and tried again.
mac20250116a.jpg

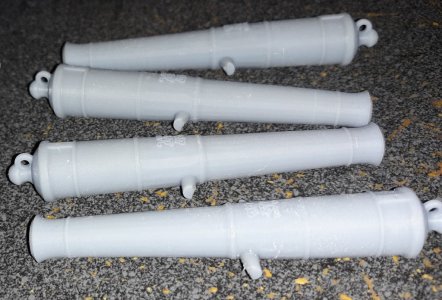
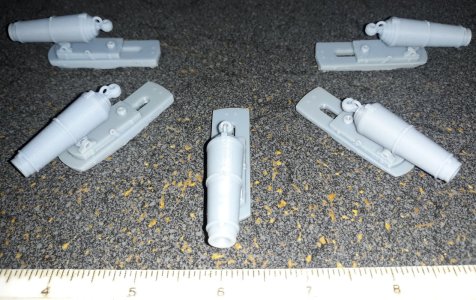
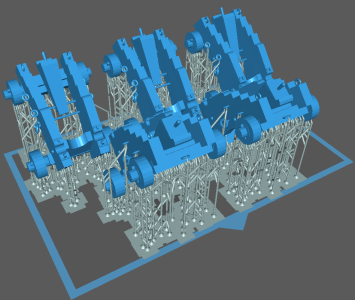
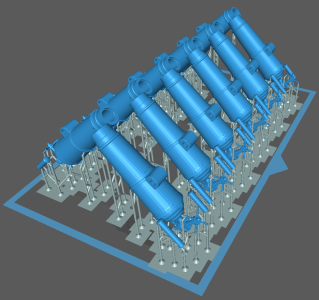
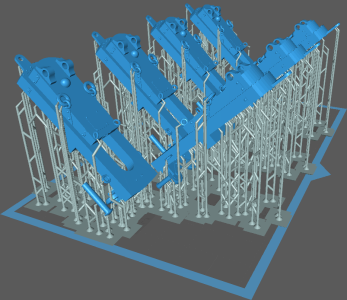
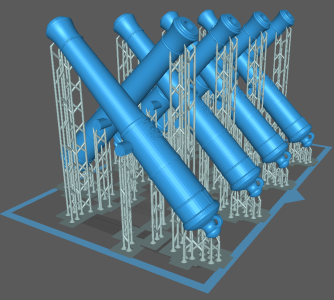
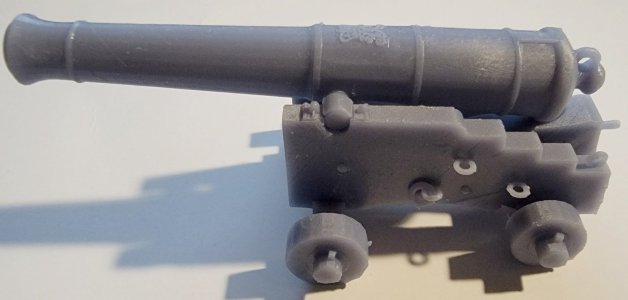
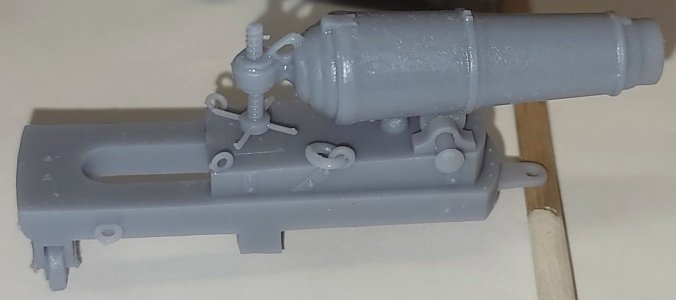
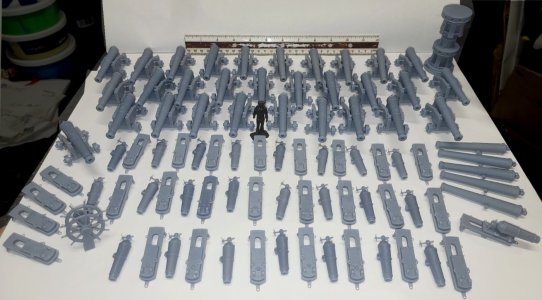
Coming back to the guns, I basically started from scratch, making new 3D models of the tubes, carriages, and slides. With more experience under my belt, specifically making naval guns, I modeled every detail I wanted with an eye to them printing well and not difficult to paint.
carriages.png carronades.png slides.png tubes.png

mac20250110a.jpg mac20250118a.jpg mac20250124b.jpg

I soon had Macedonian's entire battery and then some printed and ready for painting.
mac20250124c.jpg
 
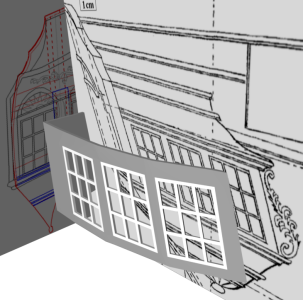
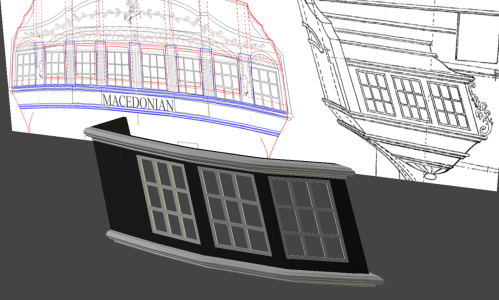
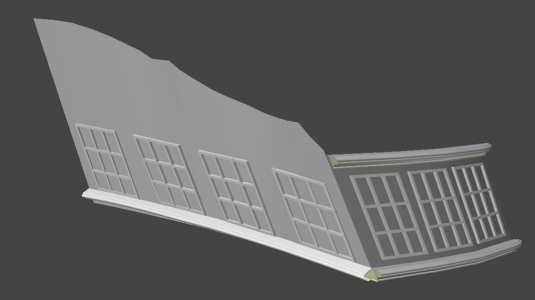
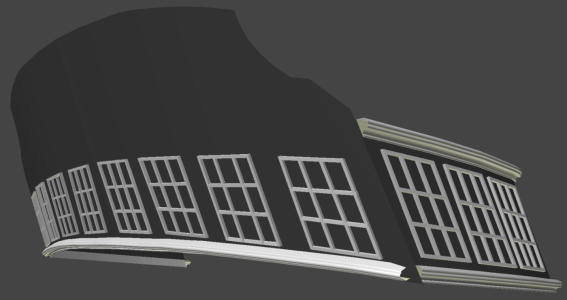
Continuing with the 3D modeling, and disappointed with my attempt at the quarter galleries, I decided to merge the two.
quarter_gallery20231207a.png quarter_gallery202401230a.png

It occurred to me to do the molding and decorations of the transom too, and then to model the whole kit-n-caboodle as a unit.
quarter_gallery20240203a.png quarter_gallery20240203b.png

Getting the profile, stern view, and actual model to reconcile has been aggravating, so this project was set aside while I worked on non-Macedonian stuff. I have learned more about my modeling software since, that will help when I come back to this.

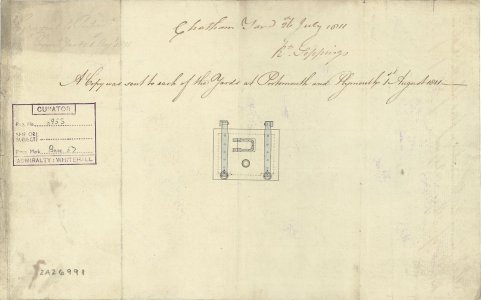
Always saving everything I find regarding details for my models, I come across this little tid-bit on NMM. It's dated 1811, a year after Mac's launching, but I don't think it could be too very different than what she probably had.
gunport1811.jpg
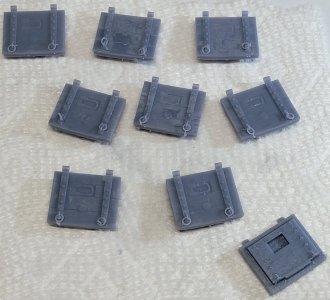
So, I modeled it to fit Macedonian.
mac20250127_112627.jpg

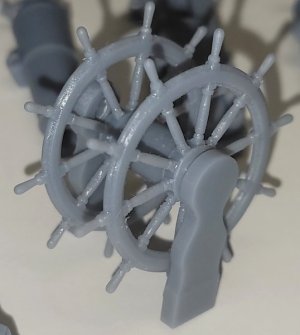
I used the existing file for Constellation's 10 spoke wheel, with supports based on what's on Unicorn.
mac20250124a.jpg
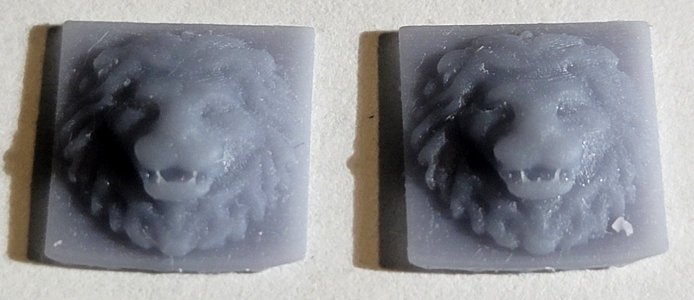
and resize a lion's face door-knocker I found on Thingiverse to make catheads
mac20250127a.jpg

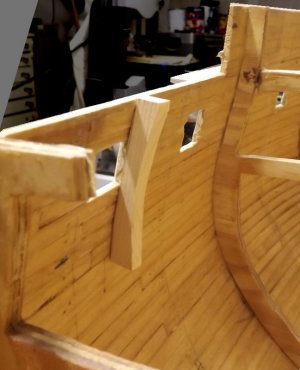
Macedonian's on the back-burner at the moment as I try to make some progress on Pride and Constellation. The big thing for her will be padding the hull inside with framing around the gun-ports and other openings to make the hull the proper thickness. There's going to be a lot of little sticks, all shaped to their part of the hull, to cut and glue in so ceiling planking, framing, and all her internals can proceed, and the upper gun-ports can be cut out.
mac20161116a.jpg
 
A little bit about Radio Control and a square-rigged sailing vessel
Coming after my experience with Constellation, the plan was simply to do the same thing I did there.
The novelty of the square-rigger in RC is controlling the yards. Fore-n-aft sails are common on RC sailboats, squares, not-so-much. The main issue is slack in the braces. Slack will allow things to snag, tangles, come off a winch drum, even over working equipment, blowing a fuse, draining the battery, all while you're a hundred yards away from fixing it.

There's basically 3 ways to approach the issue.
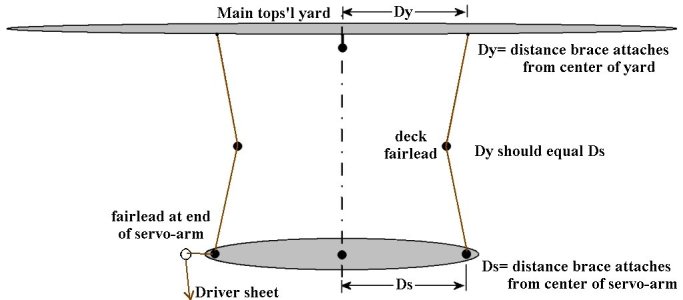
1. The most common, especially in smaller boats, I call Parallel-Bracing. This uses a servo with a double arm (a long arm with it's center/pivot at the servo) as wide as will fit in the hull and the braces attach to the yard a distance from it's center/pivot an equal distance to what's at the servo.
parallel_bracing.jpg
This set-up has it's own issues. For me, the braces on real ships tend to attach to the yards out near the ends, so this is unrealistic; and the yard move at the speed of the servo, which is too fast. Radios today can be programmed to slow that down to a more scale-speed, so that's not such a big deal.

2.The less common, for controlling squares, at least; the linear actuator/screw-trolley/winch-loop. These all basically different approaches to the same idea, move a connection point from one end of a circuit to the other and back. I refer to this as clothes-line. A lot of models use the winch-loop running a cord or ball-chain circuit to haul sheets. On a model with a lot of sail, they can pull the sheets against the winch making it work constantly and running down batteries. The shuttle on a threaded rod doesn't have that problem, but requires a strong motor (bigger battery) to move fast enough to be of real use. My problem with this is controlling a full rigged ship's yards is more complicated than just a square tops'l because every brace need to be moved a different distance, it's all more math than my visual brain can handle.

pri20220702d.png double clothes-line controls in Pride of Baltimore

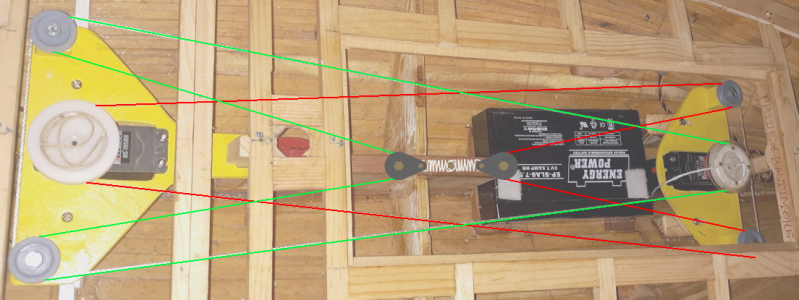
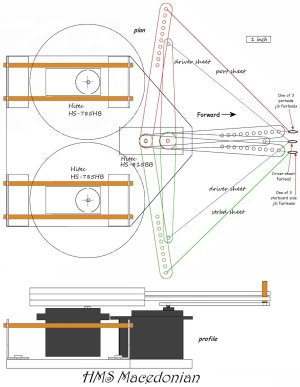
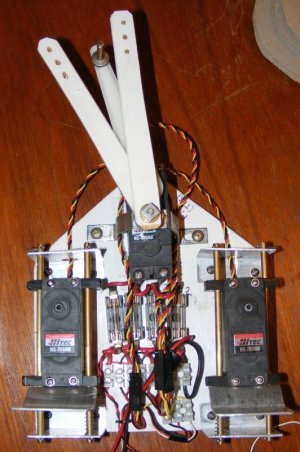
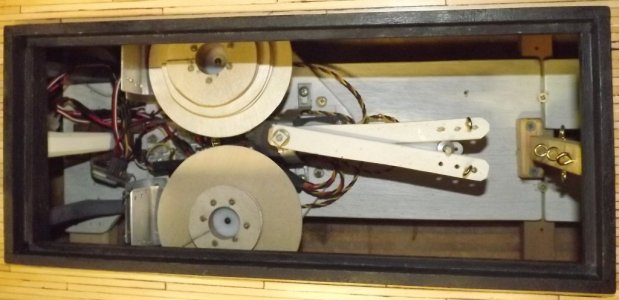
3. The least common: Brace Winches are what I opted to do in Constellation. Again the key is dealing with slack, and there's as many ways of doing that as there are modelers trying. A few of us discussed the subject for a long time in the Scale-Sail area of the RCGroups forums, and I implemented Sliding Brace Winches in Constellation, and probably in Macedonian too.
servos.jpg con20140723d.jpg con20161029f.jpg
There are two winches, one for the fore-mast yards, one for the main and mizzen mast yards combined. There's all sorts of geometry going on when you're using a line on a drum to move a point that orbits around a pivot point somewhere else; Google Jarvis Winch to see how real ships use winches to brace yards.
The braces are taught when the yards are squared. As they're braced to one side or the other, the braces paying out go slack, and the braces taking up stay tight. My winches are mounted on brass rods and can slide fore-n-aft, with light springs pushing them back against the slack. It's not perfect, and you still see some slack in the line, but it's enough to prevent tangling, snagging, etc. The servos are mounted in a way that no alteration is made to them (that would void any warranty) and they can be removed or replaced if need be without too much fuss.
On Constellation, I only actively brace the tops'l yards on each mast, relying on all the other sails being sheeted home to pull the other sails around with them. I chose the tops'l yard over the lower, or course yard so the brace is pulling from the "middle of the stack."
Because the yards are different lengths, widths? The length of line the winched have to pull for each is different. In the case of the main/mizzen, there are two winch-drums each a different diameter, so when the winch turning the drums together, pulls different lengths of line making the yards turn together.
This system allows me to run the braces as they were on the real ship, from it's anchor point on a stay or mast, through a block near the end of the yard, back to some blocks under a top, down through the hull and to the winch.
Here's something of a video on YouTube of the then jury-rigged system in action on Constellation:
.
 
Back
Top