making frame blanks

Dave Stevens (Lumberyard)

Sponsor: dlumberyard
Staff member
Sponsor
Joined
Dec 1, 2016
Messages
5,445
Points
728

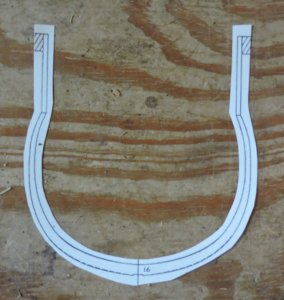
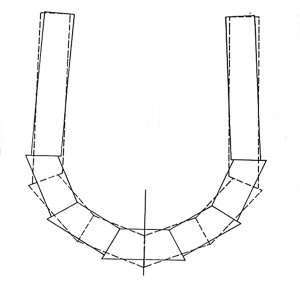
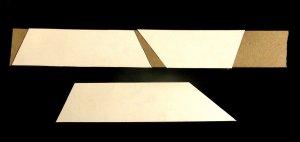
Take the cut out patterns and rubber cement them to cardboard, the type found as cereal boxes, or other food packaging boxed. The futtock patterns are glued to a backing
because these patterns may be used over and over when building a ship with 60 to 100 frames and you want to insure a clean straight line when tracing the angle to the wood. Cut strips of cardboard then glue on the patterns. Then with a razor blade cut the pieces apart to the angle on the pattern.
ol3.jpg

p2.jpg

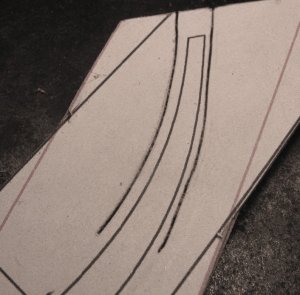
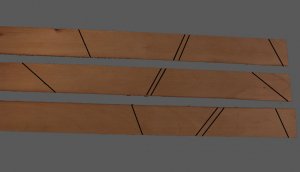
Finally trace the patterns on to the wood. The patterns are actually nested into one another to limit the amount of cutting needed and to conserve on material.

p4.jpg
 
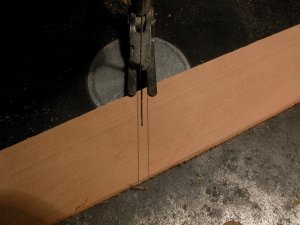
A scroll saw is being used to cut the pieces apart, it is apparent why the patterns were nested together. It take one cut to separate the pieces. You can use a small table saw to do this job. If your first starting out and buying tools. The scroll saw is more versatile than a table saw. You can cut framing blanks and cut out the frame with a scroll saw but you cant cut out frames with a table saw.

p5.jpg
once all the frame pieces are cut out the next step in sanding the ends. Here is another good reason to have the patterns glued to a cardboard
backing. The pattern is used to set the angle. You can do this free hand but that invites error. You far better off using a miter fence and keep
your piece tight against the fence.

p6.jpg

As you read through the this topic you begin to realize it is somewhat meticulous in every step and detail. Any errors along the way do add up and make building more difficult later down the road. The joinery work in the model gives it a crisp and clear look it also shows off the precision craftsmanship.
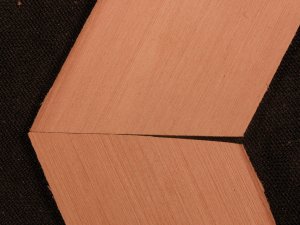
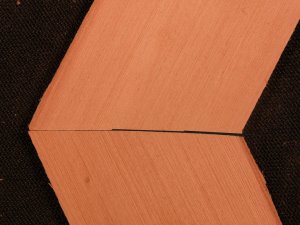
In this photo the bottom piece was sanded freehand. By not holding the piece absolutely steady and at the same angle the piece will rock causing a rounded edge.

p7.jpg

The black line is the angle line you want to sand to. A shifting in the angle at which you were holding the piece to the sanding disk is so slight you never notice it. The slightest movement of your had will caused a pivot point at the arrow. The blue line demonstrates the two different angles.

p8A.jpg

The next photos show the results. The pieces will fit both angles when pivoted forward and back. but as shown in the first photo they don't fit flat together.

p9.jpg


p8.jpg

Another way is to use a table saw by setting the correct angle and slicing off each piece. Small hobby size table saws have thin blades that tend to move or wobble and it takes the slightest movement of your had to mess up the cut. So by using a table saw is not a sure fire way of getting a perfect cut edge. The pieces were cut on a small table saw. If the piece is not held tight against the miter guide the blade will either gouge or cut in a step pattern.

p10.jpg
 
assembling a frame blank
For this part of the topic a frame from a wooden hulled steamer is being used as an example.

It is important the frame blanks are flat when assembled. To insure this the blank is glued together on a piece of plate glass. Either an epoxy glue or a wood glue can be used. Wood glue is wet and runny and it tends to warp the wood blank depending on how thick the wood is. Using wood glue i will get a small container and fill it with the glue then i leave the top off so the glue can thicken up a bit by get some of that moisture out if it. When the glue get to a point of a smooth spread a consistency like peanut butter it also becomes tacky, perfect for gluing frame blanks.

p11.jpg

p12.jpg

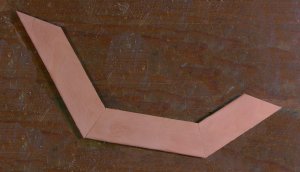
When the angles are cut and sanded correctly the joint will fit tight without any gaps. Before gluing the blank lay the pieces on to the pattern to be
sure the angles are correct.
p15.jpg
 
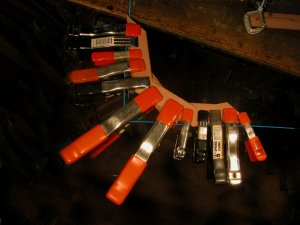
C clamps or spring clamps work the best for clamping the frame halves together. Putting the frame under weight does not work as well as clamping because it requires more weight than you would expect. Clamping a frame blank as shown here will result in a fit as shown in the next photo.

pc1.jpg

the outer edge is wide enough to slip a business card into the gap. When building frames with the blank method it is best to use as narrow a framing stock as you can. A big disadvantage to using stock wider than 1 ¼ inch is in the fact the wood tends to warp side to side in a slight arc called cupping. The advantage to wider stock is each frame blank will fit more frame shapes. Narrow stock is more stable but many more frame blank patterns are needed to complete a set of frames.

pc3.jpg

The next photo shows a frame blank clamped to the corner of a piece of plate glass. The amount of clamps prevent the wood pieces from cupping and also by clamping the blank to the glass keeps it flat and free from any twisting.

pc2.jpg

The last photo is a close up of the edge of a frame. Note it is a triple frame. The Pleasure had a triple frames spaced along the hull. The scratches are from sanding with a 80 grit sandpaper which gives you an idea how close we are looking. The photo shows the frame blanks are glued tight without gaps

pc4.jpg
 
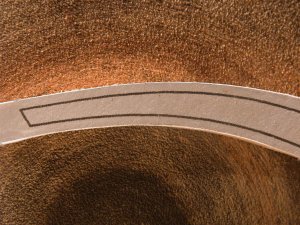
Using rubber cement the frame pattern is glued to the wood frame blank. It may not seem so but this step is important you get the patterns glued to the blank correctly
A common error is to cut the frame pattern like this. Actually it is the logical way to go because you can see the inside and outside edge of the blank to position the pattern.

df1.jpg

The paper pattern is flimsy enough that if you look close in the upper right corner you can see the pattern can move as much as quarter inch unnoticed. This will throw off the shape of the hull.

df3.jpg

df2.jpg

ideally you want to keep the inside of the drawing intact this maintains the shape with little to no distortion.

df4.jpg
 
There are two schools of thought on building a hull. One is to cut and finish each and every frame then install it into the hull. The second approach is the cut the framing a little over size inside and out. The hull is built with the over size frames and once all the frames are in place the hull is sanded and shaped. I prefer the second method for a few reasons first is your giving yourself some leeway in both shaping the frames as well as building the hull. In the first method everything from the first step has to be done exact or nothing will fit as the hull is built.

As you can see i am staying well away from the edge of the frame

apf1.jpg
This is rough cutting out the frame

apf2.jpg
 
From a rough cut out frame to final sanding, i try to keep a relative even space to the final line. Trying to stay consistent with the space keeps the hull shape within working parameters. You really do not want one frame way to big and the next few smaller then larger. This makes more work in shaping the hull when it come to sanding.

aps2.jpg

aps3.jpg
 
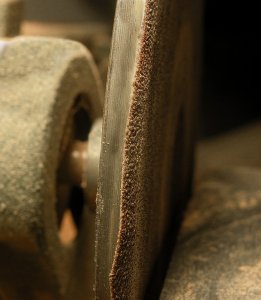
I use a 6 inch disk and belt sander combo machine and i can sand the frames inside and out. Sanding the inside of the frame is impossible on a flat disk sander so i improvised by cutting the sandpaper larger than the disk and letting it roll over the edge. This does create a sharp cutting edge and it takes a little practice to not cut into the frame, but it works. I have also used caulking and ran a bead around the back and edge of the disk to create a rounded softer cutting surface.

pf4.jpg

pf3.jpg
 
Thank you for a most informative post. It gives some great tips to a well documented process from a very practical standpoint. I am about to cut a whole ship load of frames and wondered if you had any advice for frames with a taper on the moulding rather than siding sides? Thanks in advance.
 
Thanks for sharing.

For sanding straight lines, you need to use a hand miter sander or a shooting board with plane.

mitersander2.jpg

A disk sander isn't that accurate. One move and the sanding line isn't straight anymore. I made myself a nice tool for the last mm of sanding. Perfect edges.

IMG_2874.JPG

There are more expensive solutions but for people that don't want to invest to much money and do the same job.
 
Back
Top