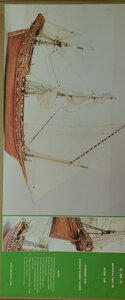
Take care of yourself. We all have problems. I have epilepsy from too many bumps on the head (lots of motocross and sports). But my hands don't shake. I need coffee just to keep me calm. We are the same age!!!That hand shaking bothers me a lot,
You are using an out of date browser. It may not display this or other websites correctly.
You should upgrade or use an alternative browser.
You should upgrade or use an alternative browser.
Marmara Trade Boat, 1:48 , SC brand [COMPLETED BUILD]
Take care of yourself. We all have problems. I have epilepsy from too many bumps on the head (lots of motocross and sports). But my hands don't shake. I need coffee just to keep me calm. We are the same age!!!
Next model will be the ZHL MISTICQUE.... to the heck with the hand shaking on this model. Is huge. The main mast is like my broom handle..... LOL.
Cheers
Daniel
Please do a Kit Presentation, when you open up the Box! - I am very interested in that kit too!Next model will be the ZHL MISTICQUE....
Please do a Kit Presentation, when you open up the Box! - I am very interested in that kit too!
No problem at all. I will do a box opening ASAP.
In the meantime you can take a look to post #26 of this thread.
ZHL Misticque
Hi John I have actually seen one ZHL build in person and remember mention of the tapered planks. Can you try and get a close up detailed shot of the planks. The more I hear about the ZHL kits and the quality, the more it makes me want to buy one in the future. From what I have seen and heard...
shipsofscale.com
Cheers
Daniel
Man... some of you guys get up early!!!I will do a box opening ASAP.
ha, I've been up for almost 2h when I wrote that comment - at 5:30 my cat demands its breakfast 
And Many Thanks, Daniel, I wonder how I could have missed that threat - probably small eyes in the morning
And Many Thanks, Daniel, I wonder how I could have missed that threat - probably small eyes in the morning
Let's start with a good morning.
For whom would like to build this model I would like to write my successes and mistakes. And I did a mistake..... now solved.
The instruction manual is kind of messy. And the pictures are not good at all. But so far I was able to deal with it. I was happy with thst fact, until I was looking carefully the pictures at this thread (Thank you Markus for this link !!!) :
If you open the thread with Chrome it will be translated to English. Nevertheless the Bla Bla isn't to helpfull but the pictures are AMAZING. Those pictures are gold in your hands.
Yesterday night, I was looking those pictures when I realized about my mistake. Went to the shop, read the instructions and nothing is said about it. But with common sense, I could have avoided it.
There are 2 beans that goes under the decks. Each one protrude the hull planking and their aim is to provide deck support in the model and real ship.
The rib where you have to glue them is marked with laser lines, so you know precisely where to glue the beams.
MY mistake.... I glued the bean in the wrong side of the rib. Without realizing about that, yesterday I glued the deck over over the beam too. So was all fixed.
When I realized about the mistake my thoughts was. I am screw now. I will have to place another wood, on the other side so it finish flash with the deck border (that detail is what I saw watching the pictures).
So now how do I un-glue all this mess. Gorila glue plus a couple of Super Glue drops. Deck and bean all glued. I fall asleep thinking on my mistake.
This morning I remembered that with all my glues, I got .... see picture below.
Put MANY DROPS (it is difficult to control the flow... it was like a bath on the produc) but WORKED !!! . In a couple of minutes all the glue was soft and I was able to unglue the beam.
@Mike : This goes with your post " how I will unglue the Gorila Wood Glue".... here you go !!!
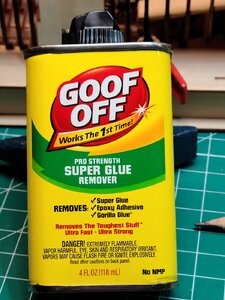
My Mistake.
I glued the bean on the side pointed by the pencil and the deck was all glued to the bean.
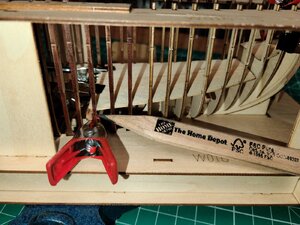
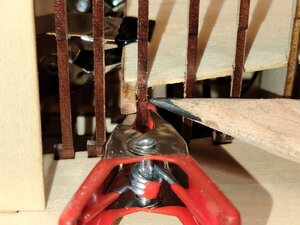
Now the bean is at the correct place.
I hope this helps others.
Cheers
Daniel
@donfarr.... you were correct and your tips. This product smell like Acetone and who know what else. But did the job in an excellent way..... 5 Starts *
For whom would like to build this model I would like to write my successes and mistakes. And I did a mistake..... now solved.
The instruction manual is kind of messy. And the pictures are not good at all. But so far I was able to deal with it. I was happy with thst fact, until I was looking carefully the pictures at this thread (Thank you Markus for this link !!!) :
If you open the thread with Chrome it will be translated to English. Nevertheless the Bla Bla isn't to helpfull but the pictures are AMAZING. Those pictures are gold in your hands.
Yesterday night, I was looking those pictures when I realized about my mistake. Went to the shop, read the instructions and nothing is said about it. But with common sense, I could have avoided it.
There are 2 beans that goes under the decks. Each one protrude the hull planking and their aim is to provide deck support in the model and real ship.
The rib where you have to glue them is marked with laser lines, so you know precisely where to glue the beams.
MY mistake.... I glued the bean in the wrong side of the rib. Without realizing about that, yesterday I glued the deck over over the beam too. So was all fixed.
When I realized about the mistake my thoughts was. I am screw now. I will have to place another wood, on the other side so it finish flash with the deck border (that detail is what I saw watching the pictures).
So now how do I un-glue all this mess. Gorila glue plus a couple of Super Glue drops. Deck and bean all glued. I fall asleep thinking on my mistake.
This morning I remembered that with all my glues, I got .... see picture below.
Put MANY DROPS (it is difficult to control the flow... it was like a bath on the produc) but WORKED !!! . In a couple of minutes all the glue was soft and I was able to unglue the beam.
@Mike : This goes with your post " how I will unglue the Gorila Wood Glue".... here you go !!!

My Mistake.
I glued the bean on the side pointed by the pencil and the deck was all glued to the bean.


Now the bean is at the correct place.
I hope this helps others.
Cheers
Daniel
@donfarr.... you were correct and your tips. This product smell like Acetone and who know what else. But did the job in an excellent way..... 5 Starts *
Well, I was able to advance a little more this afternoon.
Aftee solving my mistske with the deck bean I was very happy on how it looked... flash at the deck border (see pictures).
Glued all the decks and added some wood beans along the bottom of the ship.
Also glued the beans that keep in place the beans going from left to right. Those are not glued yet. In place for the picture.Be carefull when you glue the side beans against the hull. They are identical (left and right) but they aren't symmetrical. So you have to pay attention that one mirror the other. Also glued the mast support (black).
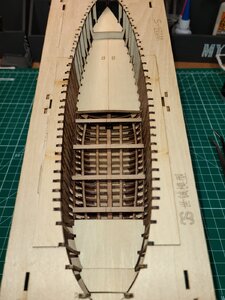
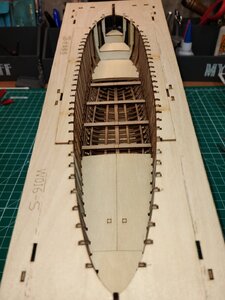
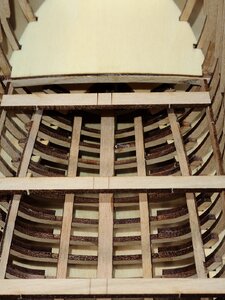
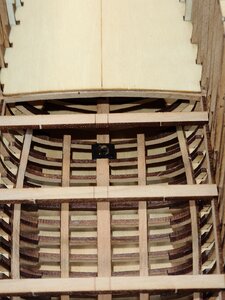
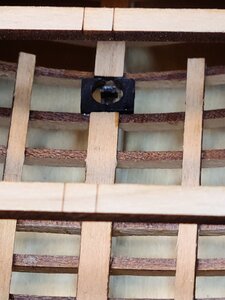
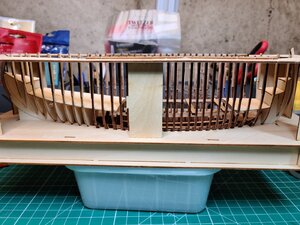
All fits to perfection. I am astonish of the quality of the cuts and wood so far.
Ask me any questions that you want.
Tomorrow I plan to start the decks planking
I plan to do as much as I can of the internal structure, as suggested by Mike, before attempting to take she out of the building jig for hull planking.
Cheers
Daniel
Aftee solving my mistske with the deck bean I was very happy on how it looked... flash at the deck border (see pictures).
Glued all the decks and added some wood beans along the bottom of the ship.
Also glued the beans that keep in place the beans going from left to right. Those are not glued yet. In place for the picture.Be carefull when you glue the side beans against the hull. They are identical (left and right) but they aren't symmetrical. So you have to pay attention that one mirror the other. Also glued the mast support (black).


All fits to perfection. I am astonish of the quality of the cuts and wood so far.
Ask me any questions that you want.
Tomorrow I plan to start the decks planking
I plan to do as much as I can of the internal structure, as suggested by Mike, before attempting to take she out of the building jig for hull planking.
Cheers
Daniel
WONDERFUL PROGRESS, JUST SUPER. GOD BLESS STAY SAFE DON
The comment above that reading suggestions to all readers, whether doing this or a related build or not, is a major benefit/reward for cruising SoS waters to avoid shoals of a similar hazard in the future. Thanks to all of the working crew. PT-2Hi Daniel
It looks really beautiful, Good luck with continuing to build the model, I'll follow
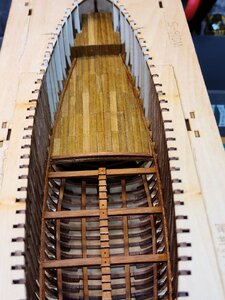
Ok guys, I have learned another lesson. I need to use my brain , experience and common sense. This means not always you need to follow the instructions in the orden they were written. I glued the decks yesterday, you all know that. Today started the planking. It was SOO DIFICULT to plank the borders with the ribs. Why I didn't plank it before???? Because I followed the instructions.
Nevertheless, job was done. Planking finished.
Then I finished some interior wood work that you can see in the pictures to make her stronger for the planking process.
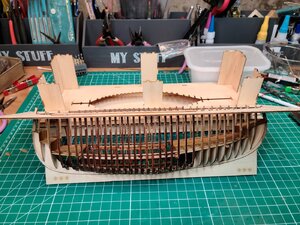
The time came to remove the building jig. I used the "goof" (product I pictured a few posts back). In 5 minutes the jig columns were lose.
I took out the ship and fall out of the jig section that was keeping her (well, her ribs )
)
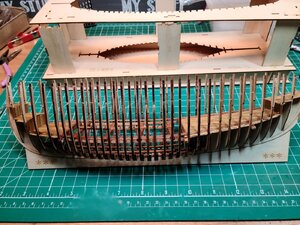
I tested how strong it was for planking. The planks are like paper, very thin, nevertheless, I felt it uncomfortable and I will be afraid of breaking a rib all the time during planking.
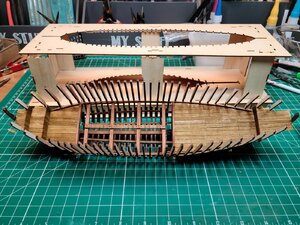
So next step was to fit her in the building jig that is in the instructions and to keep her upside down for planking.
My Gosh, after half an hour trying I had to stop, leave and return more relax. After another half an hour and a few bad words..... SUCCESS. All ribs fitted in the holes.
Stained the planks and started to play with plank #1 to understand how to fit it, when..... almost the ship went out of the building jig. Fifteen minutes later I was able to fit her again. This time I glued 4 ribs from each side to the jig. I can unglue them with the "goof" or cut them. All the ribs have to be cut, almost half of each one from each side have to gone.
Well, let me know if you have any questions.
Pictures please....
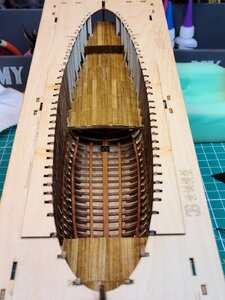
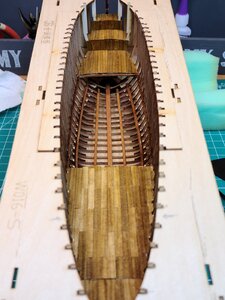
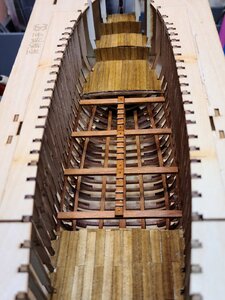
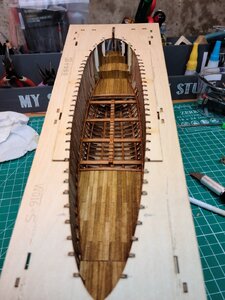
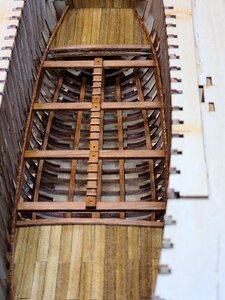
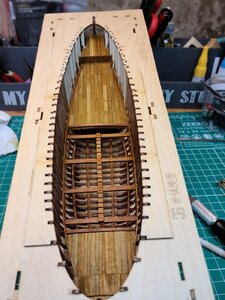
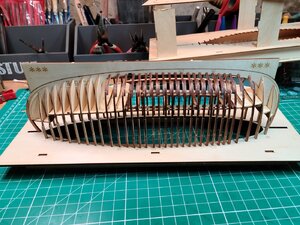
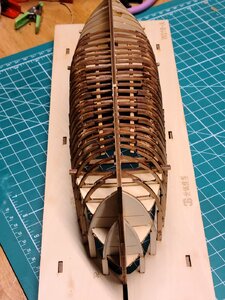
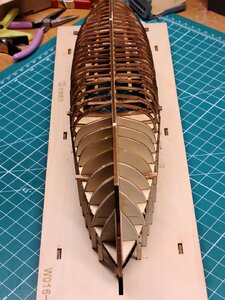
Cheers
Daniel
Nevertheless, job was done. Planking finished.
Then I finished some interior wood work that you can see in the pictures to make her stronger for the planking process.
The time came to remove the building jig. I used the "goof" (product I pictured a few posts back). In 5 minutes the jig columns were lose.
I took out the ship and fall out of the jig section that was keeping her (well, her ribs
I tested how strong it was for planking. The planks are like paper, very thin, nevertheless, I felt it uncomfortable and I will be afraid of breaking a rib all the time during planking.
So next step was to fit her in the building jig that is in the instructions and to keep her upside down for planking.
My Gosh, after half an hour trying I had to stop, leave and return more relax. After another half an hour and a few bad words..... SUCCESS. All ribs fitted in the holes.
Stained the planks and started to play with plank #1 to understand how to fit it, when..... almost the ship went out of the building jig. Fifteen minutes later I was able to fit her again. This time I glued 4 ribs from each side to the jig. I can unglue them with the "goof" or cut them. All the ribs have to be cut, almost half of each one from each side have to gone.
Well, let me know if you have any questions.
Pictures please....


Cheers
Daniel
VERY, NICE BUILD SO FAR, KEEP IT UP. GOD BLESS STAY SAFE DON
Smart man to walk away from a problem in frustration to let the simmer cool down. Sometimes I tell myself to do that but being on hormones mentally I don't always do it which leads to multiple added simmer degrees and work that later needs to be removed. There is dedication and dedication but dumb stubbornness is not one of those. Your persistence with moderation is serving you well. PT-2VERY, NICE BUILD SO FAR, KEEP IT UP. GOD BLESS STAY SAFE DON
I forgot to ask what the "goof" product is that you used????? PT-2VERY, NICE BUILD SO FAR, KEEP IT UP. GOD BLESS STAY SAFE DON
I forgot to ask what the "goof" product is that you used????? PT-2
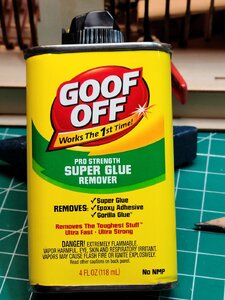
It was amazing how this product softened the glue and how fast (couple of minutes).
Smells as Acetone, but could be something diferent. It is cheap and did an amazing job.
Go back on this thread a few posts (#68). You will find this picture too and how I used to unglue a mistake I did.
Cheers
Daniel
Last edited:
Hi Daniel,
Great work with your model, like it very much.
I have the idea that kit manufactorers dont look at the wood when laser burning there parts. Wood is fragile across the grain but very strong in length of the grain. with scratch building you always look how to get the part in the best way out of the wood you have, this means frame sections should always have the grain in the length of the frame part, then you will get a very strong frame which is difficult to break. So look at the grain in your frame sections and you know where they are fragile or strong.
Excellent teaching tip.
May I ask an extra favor. Would it be possible to post here a picture of how the wood grain is seen when it is in the length of the frame.
Thank you !!!!
Daniel


