Marmara Trade Boat, 1:48 , SC brand [COMPLETED BUILD]

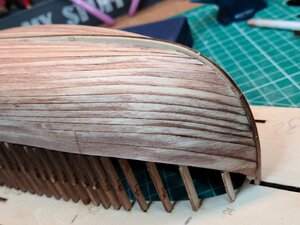
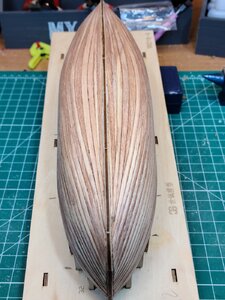
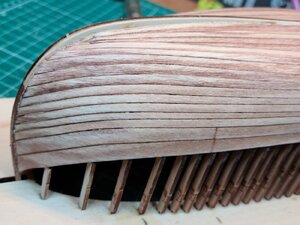
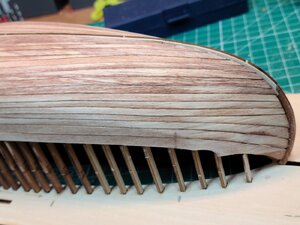
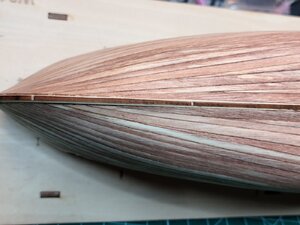
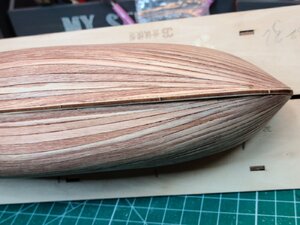
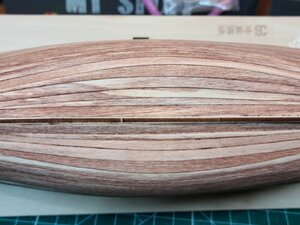
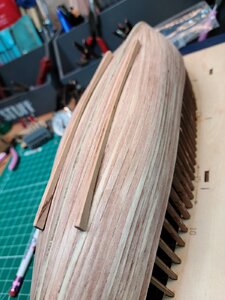
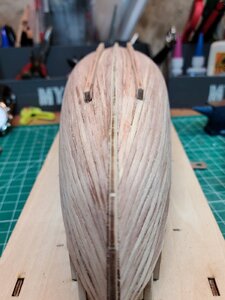
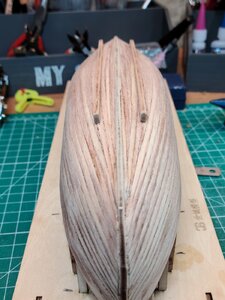
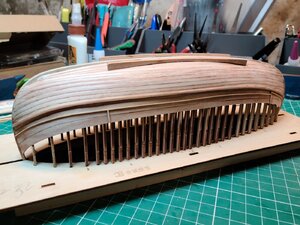
Done with Sanding. I do not think that I have to use wood filler on this hull because I see it and feel it smooth.

But let's wait Mike suggestions about the wood filler.

In the meantime, I need to define the water line.
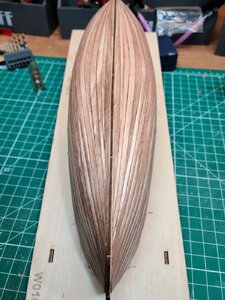
20200814_081048.jpg20200814_081109.jpg20200814_081129.jpg20200814_081147.jpg20200814_081200.jpg20200814_081207.jpg20200814_081226.jpg20200814_081232.jpg20200814_081238.jpg

Small separations between planks where filled by just adding a little of wood glue and sanding over it. Like a space between the last plank and keel....see picture below

20200814_082021.jpg

Now..... let's wait Mike

Cheers
Daniel
 
What would be the more realistic situation in a real ship/boat that has the hull painted.

Will the wood grain been seen ?

I see those model ship hulls painted white that looks like a one piece of flat wood. I do not see on those models planks painted white. At least in pictures looks like they lost the feeling that the hull was made with planks.

I STAINED a pice of the planks wood with EBONY stain. Will that look be more realistic ?

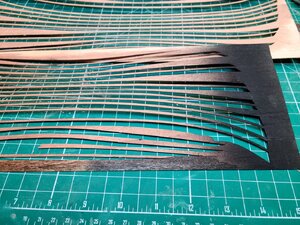
In the below picture you have:

Left driftwood stain
Center Ebony Stain
Right Black Flat from a Spray can (I used to paint brass)

20200814_083400.jpg

Will the eBony stain looks more like a black painted wood in a real boat ?

Just sharing my thoughts to hear others and learning from your comments.

Cheers
Daniel
 
Dear Daniel
The planking does look very good !
If you do feel that there is no need for a filler, then trust yourself.
To decide whether to paint the planking from the outside or stay with the textures of the wood, I personally think it is right to stick to the original look of the ship, or paint only the bottom of the hull and the top (usually from the cannon window line) to leave the wood look.
the combination achieves a balanced result, although to me the look of the wood looks more attractive and beautiful.
the progress is impressive and beautiful, well done Thumbsup Thumbsup :)
 
That is was my challenge as well. I wanted to achieve the same objective. However, in some places the planks laid so perfectly that after sanding and priming the wood, the individual plank look was lost and the effect actually too smooth ... This is not something you can plan. It will be what it will be once you start painting.
 
@shota70

This is what i would like to get with the black paint.

On the below model, painted white, you can see yet the "planks shape". Providing you the feeling of a real planked painted ship will look like. Zoom the screenshot

View attachment 173196
I think it looks very good, this is the balance I meant when I described the combination of color at the bottom and natural wood at the top
 
Done with Sanding. I do not think that I have to use wood filler on this hull because I see it and feel it smooth.

But let's wait Mike suggestions about the wood filler.

In the meantime, I need to define the water line.
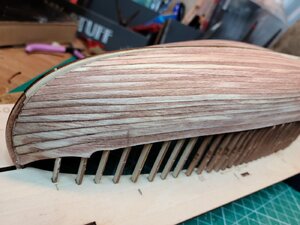
View attachment 173179View attachment 173180View attachment 173181View attachment 173182View attachment 173183View attachment 173184View attachment 173185View attachment 173186View attachment 173187

Small separations between planks where filled by just adding a little of wood glue and sanding over it. Like a space between the last plank and keel....see picture below
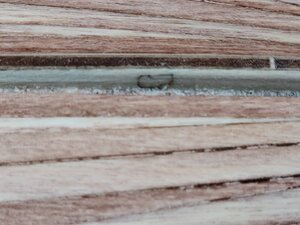
View attachment 173188

Now..... let's wait Mike

Cheers
Daniel
Wood glue???? looks like proper caulking to me. ;-) PT-2
 
What would be the more realistic situation in a real ship/boat that has the hull painted.

Will the wood grain been seen ?

I see those model ship hulls painted white that looks like a one piece of flat wood. I do not see on those models planks painted white. At least in pictures looks like they lost the feeling that the hull was made with planks.

I STAINED a pice of the planks wood with EBONY stain. Will that look be more realistic ?

In the below picture you have:

Left driftwood stain
Center Ebony Stain
Right Black Flat from a Spray can (I used to paint brass)

View attachment 173190

Will the eBony stain looks more like a black painted wood in a real boat ?

Just sharing my thoughts to hear others and learning from your comments.

Cheers
Daniel

Hi Daniel,
Its really up to you, however for my 2 bobs worth, I would mask off the lower hull and use the matte black spray. To my mind the effect you got with the grain showing through looks great, and as shota70 said maybe finish the rest in a natural wood.
If you are unsure of a new technique take the time to experiment you can learn a lot experimenting.
I am not sure what the "assisted keel" is and although it isn't mounted on the turn of the bilge it may be a "bilge keel", you may already know its purpose, it is to keep the boat upright when beached or operating in tidal estuaries.
Hope this helps.
Cheers,
Stephen.

Thank you for your explanations. I didn't know the purpose of that "bilge keel" neither the correct nsme. I like to build wooden ships but I am far away of being knowledgeable on ships topic.

Thank you !!!!!!

Concerning the paint. I will follow the color pattern of the kit developer. Lower hull flat black and background decorations in red. All the rest will be wood color.

Cheers
Daniel
 
I mean that the boom keel should not go in line with the keel, but more parallel to the planks in an arc, these planks are so that the boat does not rock too much from side to side, I have seen this on many Norwegian boats, but they can certainly be to stabilize the boat on land, greetings-
 
Hi Daniel. You are very quiet. Is everything OK?

Hi Heinrich

Thank you for checking. I was all the week concentrated in the Marmara hull paint plus correcting another mistake. I used the wrong strip of wood for the wale. Took me 2 days to unglue the wale (fully glued to the hull all along).

Picture of Marmara with the wrong wale wood
20200814_214922.jpg

When the wale mistake was corrected I started to follow a painting process that a fellow modeler gave me.

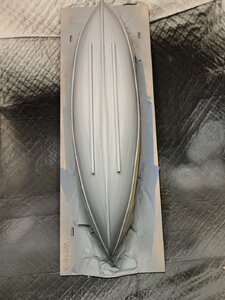
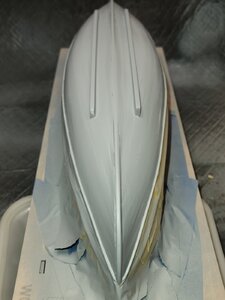
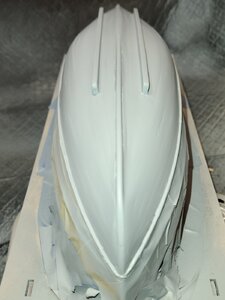
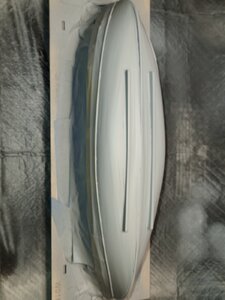
In a nutshell the steps were: hull defects corrected with wood filer and sanding. Then priming followed by a wet sanding and another priming . Each step takes 24 hours (drying time). Now I am almost at the last step that will be the black paint. Hull will have a distressed look, like a boat in use and not brand new.

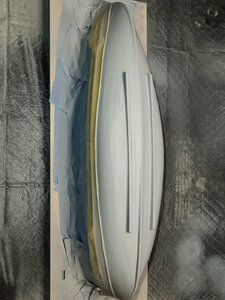
Actual stage after my last priming round:

20200820_132841.jpg20200820_133138.jpg
20200820_133112.jpg

20200820_133156_copy_5202x6936.jpg20200820_133206_copy_5202x6936.jpg

Now keep your fingers crossed for the last step.

Cheers
Daniel
 
That looks as good as anyone can hope for. You can be very happy with that! With black, my two cents is just to use a matte black and stay away from shiny finishes.

Thanks !! Yes, it will be the Tamiya flat black that I pictured a few post back.

BTW I was following your extra cannons issue. Very interesting. I am sure you will succeed.
 
Hi Heinrich

Thank you for checking. I was all the week concentrated in the Marmara hull paint plus correcting another mistake. I used the wrong strip of wood for the wale. Took me 2 days to unglue the wale (fully glued to the hull all along).

Picture of Marmara with the wrong wale wood
View attachment 174276

When the wale mistake was corrected I started to follow a painting process that a fellow modeler gave me.

In a nutshell the steps were: hull defects corrected with wood filer and sanding. Then priming followed by a wet sanding and another priming . Each step takes 24 hours (drying time). Now I am almost at the last step that will be the black paint. Hull will have a distressed look, like a boat in use and not brand new.

Actual stage after my last priming round:

View attachment 174285View attachment 174286
View attachment 174287

View attachment 174288View attachment 174289

Now keep your fingers crossed for the last step.

Cheers
Daniel
That is a very nice and uniform planking job that you have covered over. I'll have to work to get up to that standard of uniformity. PT-2
 
Back
Top