Mary Ann by Billing Boats 472 - Build log

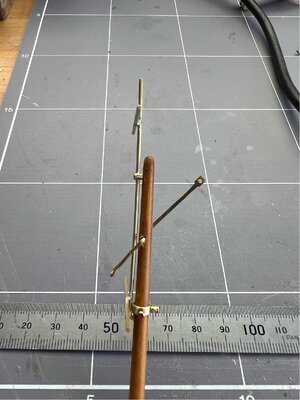
The mast antenna
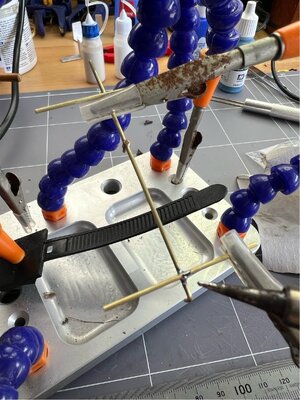
This is a simple brass wire arrangement. The plans suggested gluing the cross members, but I soft soldered them as I think it will be stronger in the long run. Here it is underway, before any clean up…

1721542855806.jpeg

Here is the final product, from the side, before painting the antenna grey. The other fittings are for attaching ropes and a long antenna wire.…

1721542893907.jpeg
 
Windows
The kit is not supplied with any material to create the windows (the prototype photos do show windows), so I purchased some 0.4mm clear polystyrene sheet manufactured by Evergreen. It cuts very cleanly using a knife and I will glue them in using canopy glue applied via a fine syringe. Originally, I was going to add the windows before assembling the walls of the wheelhouse but decided that I’d probably end up marking them or accidentally push one out during the assembly, so the windows go in now, prior to the roof going on.

Each window was measured up using a small metal rule and then cut using a sharp knife. In some cases I used score and snap, which also gave a good finish. They were cut so that there would be a light friction fit as I don’t have ‘frames’…I’m trying to keep the windows as large as possible. Once each one was fitted, I add a small bead of canopy glue to the inside edge. I’m happy with the way they finished up.

1722663974844.jpeg
 
Colours & Painting
I’ll interrupt things here and list the paint colours I’m using in case anyone is interested. I plan on painting the boat in a similar colour scheme to that suggested by Billing. I’ve seen the hull finished in white above the waterline in some builds, but I prefer the light duck egg blue of the Billing example. However, I’m not a big fan of the bright Emerald Green they use in many places on the deck, so that will be changed to a mid-blue (Grey Blue from Vallejo...see the photo in the last post). Otherwise, it’s pretty consistent.

Except where mentioned, all of these are brush-on paints.

Vallejo Grey Blue: Deck fittings etc where Billing uses Emerald green.
Vallejo Medium Sea Grey: Deck and mast fittings as directed.
Vallejo Gunmetal: Winch and other places that need a ‘metallic’ grey finish.
Vallejo Light Green Grey: This was a test for the hull colour, but it was only used on the internal table.
Vallejo Carmine Red: Anywhere that a deeper dull red is needed, sailor cap, gallows block cheeks, etc.
Vallejo Bright Orange: Life rings.
Vallejo Basic Skin Tone: Crew, but only with a darker wash over it.
Vallejo Cork Brown: Used to make a brown wash for crew.
Vallejo Red Leather: Some brown deck fittings.
Vallejo Wood Grain: In places where I want to make ply look like wood, it’s a dark translucent brown. Window frames etc.
Vallejo Black: Anything black, plus as a wash on crew clothes and engine exhaust .
Sikkens Light Oak (it’s a water based exterior decking finish): Masts, booms, Otter boards, top rails.
Dulux Lexicon: Wheel house interior.
Dulux Vivid White (Gloss): Wheel house roof.
Dulux Duramax Clear Matt spray: Top coat on most things.
Rust-Oleum Ultra Cover White spray: Railing on top of the wheelhouse.
No name Silver spray: Engine exhaust.
Montana Gold brand spray in Polar Blue: Hull (above the waterline - the duck egg blue equivalent)
Still to be decided: Hull (below the waterline)

The timber panelling was originally finished with a brushed on clear matt polyurethane (Cabots), but I wasn’t happy with it because when you gave it a second coat, the lovely matt finish changes to something closer to satin…and it’s quite obvious if you do a touch up. So, I have done a bit of experimenting and found a rattle can spray (Dulux Duramax Matt) that does a great job, even over existing satin and matt finishes - it’s also rated for outside use. The entire boat will eventually get a coat of it as I prefer a matt finish on a working boat. It probably should be a weathered finish, but I’m not confident in my skills to do a realistic weathering, so that is something I may have to come back to later on.

I’m not yet decided on the hull colour below the waterline. The Billing example, and other builds I’ve looked at, are a brown colour. I prefer something with a bit of red in it, perhaps I could try a reddish brown, ferric red is probably going too far. I will have to experiment.

That's enough talk about the build above deck (for the moment)...next post will be the start of the hull planking.
 
Planking - Getting started
Well, if I’m being honest, this part of the build is probably the one thing I’ve been a bit concerned about. I’ve never done any hull fairing or planking in the past, so I’m starting from a zero-skill base on this one.

In preparation, I read the guides listed on this link (along with many other posts on the subject) https://modelshipworld.com/topic/23950-planking-tutorials-pdfs/ , and tried to follow the general rules outlined.

The laser-cut ply bulkheads are obviously square cut on the outer edges, so they need to be sanded to get a fair edge for the planks to be glued against. For this I made up a few sanding boards using some scrap mdf about 250 x 40mm and glued some 180 grit paper to those. That gave me a longer, but manageable sanding surface to run across the bulkhead edges to get the correct angles.

In some cases, this required a significant amount of removal, particularly around stations 9 & 10 - they extended well beyond the ply deck surface at the top and also they need a quite tight angle down lower due to the shape of the hull in the rear. (As I explain in a later post, I will regret sanding these couple of frames to the levels shown…they need to be wider than you think to get a nice rounding of the stern).

1724480000254.jpeg

I used a spare plank to run across the bulkheads to get an idea of when they looked like the right shape. Once that was out of the way, it was on with the planking.

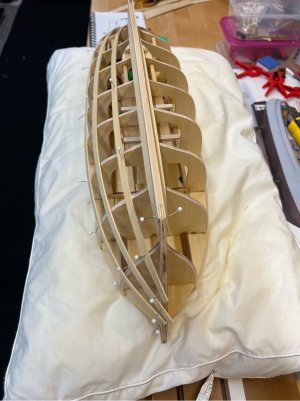
I tried to do the ‘lining off’ using a few of the planks as battens, and filling out a table of lengths at the frame stations. Here is one side with the battens, they looked pretty smooth and even.

1724480206196.jpeg

Although I understand what the lining-out process is supposed to achieve, I struggled with it as I didn’t have a ‘feel’ for how the planks were going to behave when I started working with them. So, in the end I decided to start at the keel and do a few planks either side to get a feel for what is possible.
 
Planking - Keel
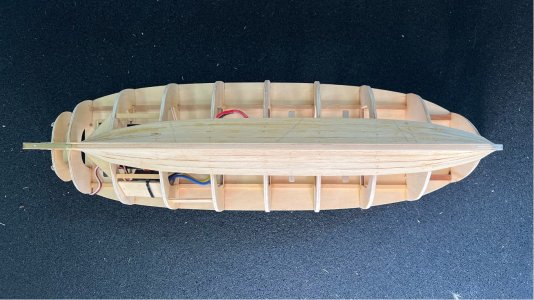
This worked out reasonably well…

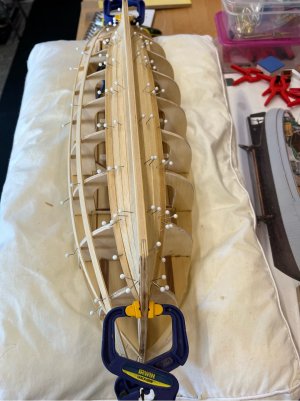
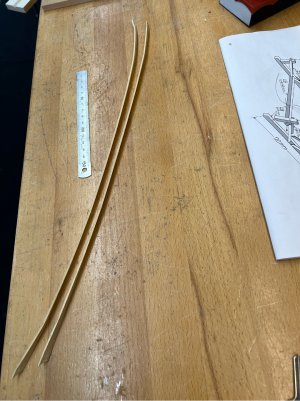
I chose to soak my planks in cold water for 24 hr before using them. The Obechi softens very nicely. I used an offcut of 25mm pvc conduit, capped at a length that allowed the planks to be fully submerged. I pinned the wet planks to the frames, with minor shaping at the ends / joins and allowed them to dry for at least a day without gluing because, at this stage, I’m not sure of the likely outcome…when I’m happy with the result I’ll glue them down.

1724480372163.jpeg

The planks are just pinned there at the moment, and the outer one on each side is still wet. I let them dry for at least a day, and then they can be removed and hold their shape while allowing some finer fitting. I’m not too concerned about the pin holes, as the hull is going to be filled, sanded and painted when finished, so they won’t be seen.

1724480422419.jpeg
 
Planking - Stealers
In the overhead shot in the previous post, the planks all look to be laying nicely, but when you come around to the side you find that there are some gaps at the bow and stern of the hull, and this is because I am not bending the planks laterally (well, not too much). This means I’ll need to add a short stealer to each side and at each end. I am also trying to keep everything as symmetrical (side to side) as practical. Although this will be a painted hull, and hence allow me to fill and hide any less-than-ideal build, I’d still like to build it to the ideal…as practice for future models that might have a timber finish.

Here is an example of the gap at the bow, between the last plank and the one below it...
1724741081002.jpeg

After drying, a stealer was pre-cut to the dimensions that I thought looked right, making sure that nothing was less than half the width of a plank. That was used as a pattern to mark both planks (labelled 3 & 4 in the next pic) and called 3b. The planks were removed and cut to the markings, and here it is back on the frame. That actually works much better than I was expecting.

1724741273595.jpeg

And here is the finished product at the stern. The stealer went in between planks 2 & 3, called 2b in the photo. In this case the photo was taken after the planks had been glued in position, but before any clean-up or sanding.
1724741338065.jpeg

Once those four planks had been laid, I decided to use some two part epoxy resin to seal the inside of these planks and the area around the keel and garboard while I still had access through the side of hull. I figure that any small amounts of water than find their way in through the upper access ports is going to rest in the lower reaches of the hull interior. This also had the benefit of sealing any small gaps and also the tiny holes left by the mapping pins - I wiped down the outside of the hull a few times with methylated spirits (denatured alcohol) while it was going off, to minimise the sanding later.

1724741417349.jpeg

When I started the planking, I was determined to take my time and practice a little patience. I’ve taken ten days to get to this point (stop laughing!)…I do a little bit, think about it and often come back and change things (the beauty of not gluing straight up)…and so far, I’m enjoying it.

Next time I'll get started on the upper strakes.
 
Planking - Stealers
In the overhead shot in the previous post, the planks all look to be laying nicely, but when you come around to the side you find that there are some gaps at the bow and stern of the hull, and this is because I am not bending the planks laterally (well, not too much). This means I’ll need to add a short stealer to each side and at each end. I am also trying to keep everything as symmetrical (side to side) as practical. Although this will be a painted hull, and hence allow me to fill and hide any less-than-ideal build, I’d still like to build it to the ideal…as practice for future models that might have a timber finish.

Here is an example of the gap at the bow, between the last plank and the one below it...
View attachment 467633

After drying, a stealer was pre-cut to the dimensions that I thought looked right, making sure that nothing was less than half the width of a plank. That was used as a pattern to mark both planks (labelled 3 & 4 in the next pic) and called 3b. The planks were removed and cut to the markings, and here it is back on the frame. That actually works much better than I was expecting.

View attachment 467634

And here is the finished product at the stern. The stealer went in between planks 2 & 3, called 2b in the photo. In this case the photo was taken after the planks had been glued in position, but before any clean-up or sanding.
View attachment 467635

Once those four planks had been laid, I decided to use some two part epoxy resin to seal the inside of these planks and the area around the keel and garboard while I still had access through the side of hull. I figure that any small amounts of water than find their way in through the upper access ports is going to rest in the lower reaches of the hull interior. This also had the benefit of sealing any small gaps and also the tiny holes left by the mapping pins - I wiped down the outside of the hull a few times with methylated spirits (denatured alcohol) while it was going off, to minimise the sanding later.

View attachment 467636

When I started the planking, I was determined to take my time and practice a little patience. I’ve taken ten days to get to this point (stop laughing!)…I do a little bit, think about it and often come back and change things (the beauty of not gluing straight up)…and so far, I’m enjoying it.

Next time I'll get started on the upper strakes.
YOU SHOULD DOWNLOAD THE ARTILKLEF -IT IS FREE -THAT WAS MY BIBBLE WHEN I WAS BUILDING- EL CAPI

01-DRAWEING 001.jpg

01-DRAWEING 001.jpg

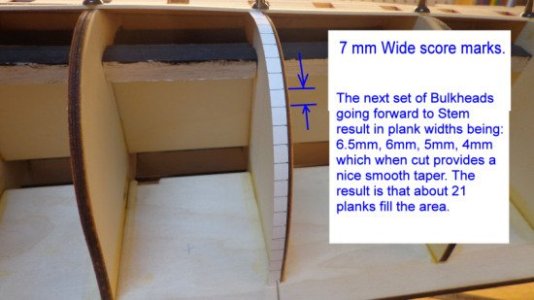
091-MEDIR CUARDERNAS- MEUSURE THE BULKHEADS FOR PLANKING (2).jpg

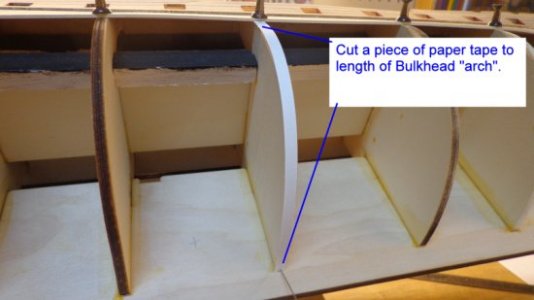
092-MEDIR CUARDERNAS- MEUSURE THE BULKHEADS FOR PLANKING (3).jpg

090-MEDIR CUARDERNAS- MEUSURE THE BULKHEADS FOR PLANKING (10).jpg

093-MEDIR CUARDERNAS- MEUSURE THE BULKHEADS FOR PLANKING (9).jpg
 
Nice work Pete. Your photos and build log are excellent. :)
Thanks Brian and Grant. Sometimes I think I'm probably put too much detail in here...but I'm writing for someone like me who is just getting into the hobby and is interested in seeing how someone else built the same thing. Sounds like the balance is about right.
 
Planking - Upper strakes
Now I feel as though I need to add a few rows of planks from the deck level and down, to get an idea of how they will lay along the sheer of the deck line. The Billing plan diagrams are not overly detailed, but I’m pretty sure that the top of the first plank should align to the top of the deck, and then later the bulwark will sit on the top of the upper face of the deck. The Mary Ann has a reasonable degree of sheer, given her length, and this is the area where it seems natural to be bending the plank laterally (ie applying force to the narrow side) to fit with the natural flow of the deck…even though that goes against one of the rules of planking.

The upper strakes are relatively simple at the bow end, but things get a little complex at the stern, particularly as you work your way down the sides…the planks seemingly need to be bent in 3 directions at times. The plans show this area being done as separate planks on each side, coming together at the stern post in an open sided square rabbet.
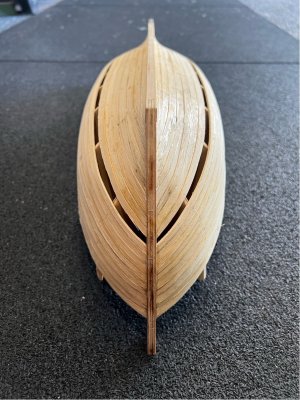
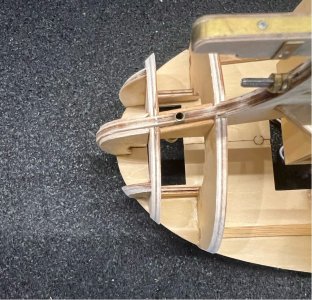
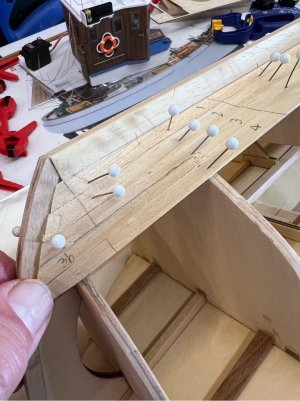
I did start the planking using the plan’s direction, but I wasn’t happy with the shape of the stern, it was developing a small degree of ‘pointedness’ at the stern post (see photos below). In my opinion, the shape of the stern is key to the beauty of these boats. I wanted to achieve a smooth rounded shape in plan view and also a gentle curve top to bottom in the side view. One of the big advantages to pinning the planks to the frame and allowing time for things to dry, is that it also allows me time to think about alternative ways to do things.
Here it is pinned, with separate strakes on each side of the stern (hull upside down)...

1725774879051.jpeg

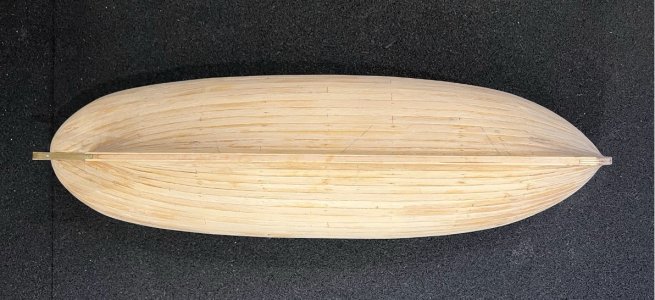
And in plan view…I should have taken one from above the deck, but the stern is coming to a blunt point rather than a smooth curve around the whole of the stern.

1725775453748.jpeg

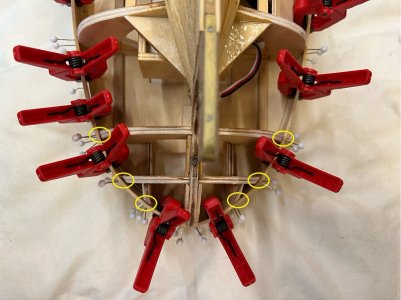
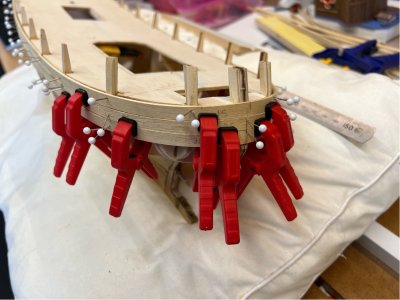
I’m pretty sure that the shape is not forming properly for a few reasons, the key one being that I have sanded too much off the last two frames and the small members that run parallel to the keel in that last small section (shown with yellow circles in the photo). Even allowing for that, I think the process of bringing two planks together at the stern post, naturally forms a point to some degree. The solution I used was to remove those planks, make up a timber former of the shape of the stern (I copied it from the 1:1 plan sheet) and form up planks that would run as a continuous strake around the stern and to a bulkhead frame further along each side. This adds an extra join in the planking, but results in a much nicer shape. I also added some timber back onto those frames where I had been a little too eager with my initial fairing.

Next post will show how I did that.
 
Planking - The stern shape
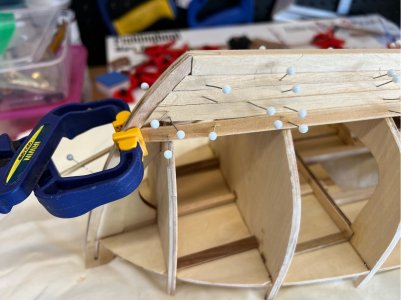
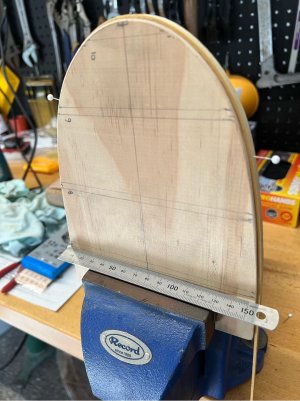
Here is the form I made up from a piece of offcut radiata pine. You can see a plank pinned to the outer edge. Before making this up this former, I tried a couple rows of nails hammered into a wide plat panel, but that technique doesn’t allow the easy use of a planking iron like this method allows. The planks were then allowed to dry for a day and they came off the former with a nice permanent curve.

1725775678916.jpeg

Now for the real test, applying them to the frame. I sanded the open rebate to a flat on the rear of the stern post to allow the planks to sit in the right position, and here are the first few pinned to test the fit. I’m much happier with this, although I’ll do a little further edge sanding to adjust the plank heights.

1725775727848.jpeg

You can see that the last few frames on each side have also had timber added to their outside edge to get them back to the right shape. They will be trimmed up later on.

In contrast, the bow is relatively straightforward. The planks needed some custom bending using the planking iron, but it all came together pretty easily. Once I progress below this level, each plank will need some trimming in height.

1725776305571.jpeg
 
Planking - Back on the stern
Now that I have the upper stern area looking the way I want, and glued in place, I need to plan the next few planks. It gets a bit complicated at this point because the planks needs to twist a little and also bend in two directions. That seems impossible to do with a continuous plank around the whole stern, so I will transition back to planks coming from each side that join at the post.

1726295025261.jpeg

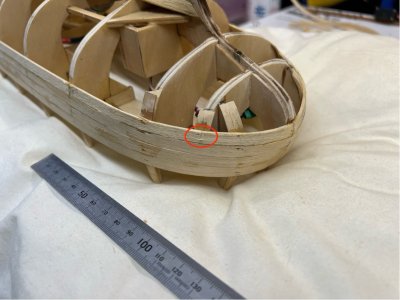
Due to the shape I need to fit to, I admit to breaking a few planking rules on this one (and the next strake). It’s difficult to see in the photo, but the planks needs significant lateral bending to match the compound curve of the hull…this means that the top and bottom of the plank effectively need to be different lengths, or have significant stresses held within that causes a clinkering effect. I minimised this as much as practical with shaping, but I did resort to taking a small cut in half of the width of the plank (you can see it with the red circle, on the last bulkhead). This removes a lot of pent-up force from the plank, but you then need to manage the shape of the lower edge of the plank to maintain a gentle curve.

However, when I came to the next plank I found that I’m progressing down the stern post way to quickly (yes, the lining-off process would have picked that up if I knew what I was doing!). So, this plank will be tapered to about half of its width (I’ve only completed one side in the photo below…this photo also clearly shows the additional timber glued back onto the edges of the over-faired last two ply bulkheads).

1726295127179.jpeg

This process was continued until I had finished the 7th strake from the top. At this point I was concerned about how the planks coming along the hull from the lower edges were going to meet the stern post area. They quickly progress from ending in a vertical orientation to close to horizontal over a plank or two. I have to say, that this is an area where I found the Billing instructions of little use. Their drawings of the planking do not offer any guide to manage this issue, and I doubt that you could use plain planks to do what they show in the diagram.
 
Planking - the bit in between
This didn’t turn out to be as bad as I had feared. I moved onto planking from the bottom up again, as this will get the planking further along the lower hull toward the stern post and I can then see how things are going to come together. I laid out the next planks, without doing any lateral bending to see what sort of gap I ended up with. As it turns out, it's not too bad and I think I could ‘carve’ a suitable stealer to fit in the gap. The only trick here is that we are transitioning from vertical to horizontal, right where that stealer has to go, so ideally it needs to have a curved outer face Here is a photo with the plank pinned in position on both sides, before thinking about the stealer.

1726295537750.jpeg

That last plank needed to have a section trimmed out of it to allow the stealer to fit and join over a bulkhead. It’s a little less than half plank width, but close enough. The end result is shown below after being glued up...I was quite happy with that.

1726295617228.jpeg

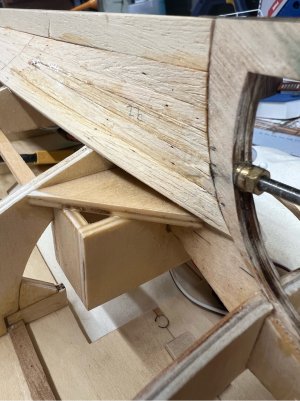
Note that the wedge of ply that you can see below the servo box (in photo above) had to be trimmed on the outer edge to allow the next few planks to cover it without fouling. This was custom addition strengthening that I added due to the model being converted to RC.

1726295807534.jpeg

I should note here...that I have been painting the inside of the glued down planks with clear epoxy resin, in batches as I go. I think it makes it easier to get to all internal faces when you still have relatively large gaps in the sides, and it means that I only have small areas to do via the limited access from the upper openings when I'm finished.

My next concern is to make sure I manage the process of closing the gap between the upper and lower sets of planks with just one plank width to finish. The photo above shows that the area around the last two frames is a bit wider than most of the rest of the hull. The lining-off process was repeated as that last plank was being put in place to ensure that I’m catching things as early as practical. I think it will come together okay.
 
Planking - Closing up
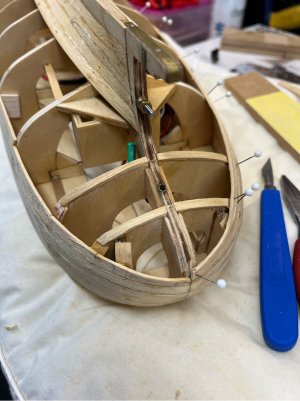
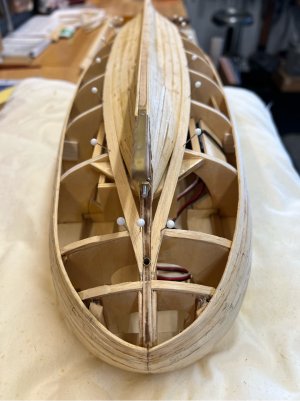
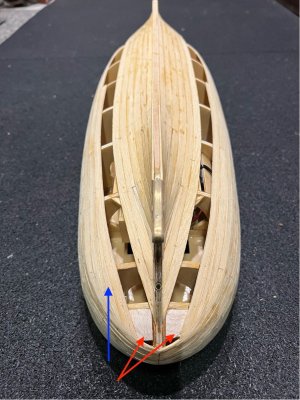
On to the last few planks. As mentioned in an earlier post, I had to add some timber to the last two bulkheads to adjust for my over-zealous fairing prior to starting the planking (you can see that in the photo of the previous post). But that’s not all I had to add…because of the way I’ve chosen to do the upper planks at the stern, I now find that it’s not practical to try and force the next few planks to into the space at the stern, so I have decided to add some internal cheeks to allow the planks to be finished against the edge of the last plank in the photo above. This might not be conventional ship building practice, but it allows me to manage the remaining gap much more easily and I think it should at least as strong as other options.

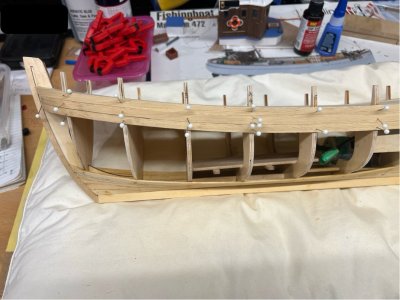
Here is a photo with the added cheeks (red arrows show the ‘paulownia’ timber cheeks) and the next two upper side planks have already been added. You may be able to see that I have also added a long slender stealer (see the blue arrow) between those planks to better manage the remaining gap. They do break the half plank width rule at the far end, but they finish over a bulkhead, so I’m happy with it. Same treatment to each side.

1726881845136.jpeg

Below, second last plank now in. Each of the last few have been carefully edge sanded to make sure that the remaining gap is one plank wide and the planks fit neatly.

1726881871390.jpeg

I’ve been concentrating on the stern because it’s the complicated end. At the bow, each of the planks requires a little work, but it’s pretty straight forward. Generally at the stem, I have used one full plank and then alternating with planks that have been reduced to around half width at the stem and transitioning to full width along the lower edge to the second bulkhead. These all need to have some degree of shaping using the planking iron and a rounded former.

As the photo below shows, I should have been shaping the planks more on the lower section of the hull near the stem, rather than bending them against the bulkheads…that has caused the first bulkhead to show a slight bulge that I could have avoided. I will correct that when fairing the hull, but it’s a useful lesson for future builds.

Note that the first two ply bulkheads are solid, no cut outs at all. This means that the last three planks have gone on in that area without being able to internally coated with epoxy resin. I’ll probably drill holes in the deck, before planking that surface, so that I can add that protective coating.

1726881901982.jpeg

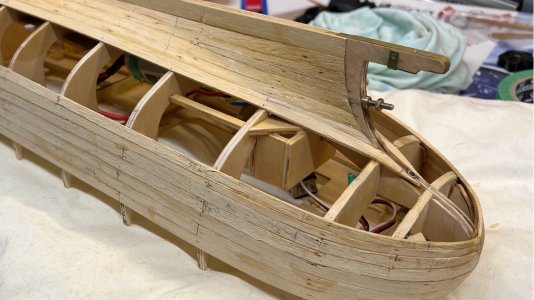
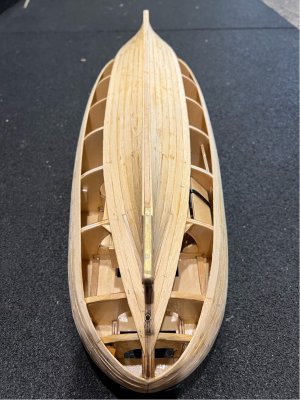
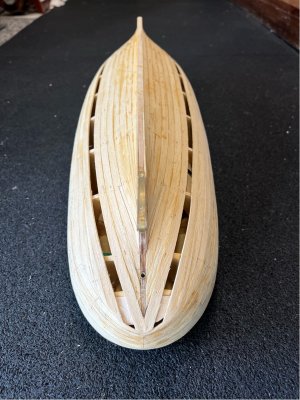
My take-away from this is…provided the lining-off process is followed on the way to closing up, then finishing of that last plank becomes a trivial and enjoyable experience. Here is the finished article…it has had some minor sanding at this point, but no filling…that’s the next task.

1726881923586.jpeg

Now that I’ve made it through the planking process, here are a few things that worked for me…and lessons learnt (note that this is not the novice trying to tell anyone how it should be done). It’s also worth pointing out that the kit provided Obechi timber for the planks and they seemed to be very forgiving for this process.
  • I’m learning to be patient…let the process develop at its own pace, it doesn’t need to be finished tomorrow. It’s been a surprise how often this gave me time to come up with a better way to do things.
  • I chose to soak my planks in cold water for 24 hr before using them. The Obechi softens very nicely. I used an offcut of 25mm pvc conduit, capped at a length that allowed the planks to be fully submerged. As explained in a future post, I’m not sure that I would do this again. I think I could get a similar result by simply wetting the plank and using either a planking iron or hot air gun…resulting in less retained moisture in the plank when it is glued to the frame.
  • I pinned the wet planks to the frames, with minor shaping at the ends / joins and allowed them to dry for at least a day without gluing…in hindsight, they looked and felt dry, but I suspect they still had a high internal moisture level and that led to further problems later on.
  • Where there is a bend and there is not an underlying frame (eg close to the bow), in future I would use the heated planking iron to set a curve before pinning…to stop the plank deforming locally at the next bulkhead, giving a lump at the bulkhead when it should be a soft curve.
  • I removed the dried & pinned planks (nicely formed and set), and did any final shaping that was required to improve the plank-to-plank fit (eg some bevelling)
  • Add stealers where required, and try to stick to the rule of no plank or stealer less than ½ the original width, and all end-joins on a bulkhead.
  • I tried not to force planks in the lateral direction (edge bending), but in some cases I didn’t see any other option (explained above when used). I think the residual stresses remaining from this may cause problems down the track with plank movement, so avoid it where practical with stealers and plank shaping.
  • I glued using slow CA on the bulkheads and along the edge join, and a spray of accelerator in areas where I needed it to set quickly (eg the plank ends)…I should have been more careful with the edge gluing to reduce the likelihood of splitting between the planks down the track.
  • I’ve painted the inside of the fixed planks with clear epoxy to seal the inner surface and also provide some added gluing force…this is best done as you proceed because you can lose access to some areas.
  • Now that I understand the lining-off process (and how the timber will and won’t bend), I would use it from the start, and to better effect, next time.
Hi Pete, I'm loving this Build Log.
And you are no Beginner ...............
And yes I love these working boats.
I'm currently building the OcCre Ulises Tug Boat, and there is some similarities with our builds.
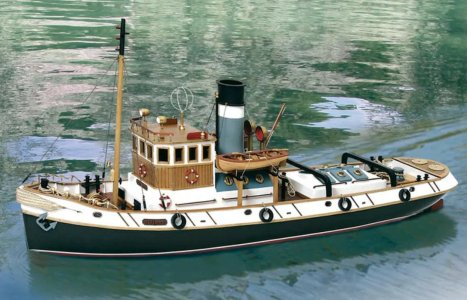
A library photo of my Tug.
And yes a lot of these boat kits come with basic rudder and prop shaft set ups.
But I guess they are just primarily display models
I have also built the Billings African Queen, and it is RC and Live Steam.
And we are both Aussies

On Water Ulises 1.jpg
 
Hi Pete, I'm loving this Build Log.
And you are no Beginner ...............
And yes I love these working boats.
I'm currently building the OcCre Ulises Tug Boat, and there is some similarities with our builds.
A library photo of my Tug.
And yes a lot of these boat kits come with basic rudder and prop shaft set ups.
But I guess they are just primarily display models
I have also built the Billings African Queen, and it is RC and Live Steam.
And we are both Aussies

View attachment 472188
Hi a49kid, I hope you're going to do a log of the build of Ulises, I'm looking forward to seeing some pics...that's a good looking tug. I can see something like that as a build in my future.
 
Back
Top