• LUCZORAMA SHIPWRECK SCAVENGER HUNT GIVEAWAY. 4 Weeks of Fun • 1 Legendary Prize ((OcCre’s Fram Ship)) • Global Crew Welcome!
    **VIEW THREAD HERE**

Midwest Muscongus bay lobster smack 1:24 MID951

Joined
Jul 13, 2024
Messages
16
Points
48

Hello Everyone,
Welcome to this build log of Midwest kit Muscongus Bay Lobster smack.
This is my first build log, and I am starting it mid build - so thank you for bearing with me while I find my voice. I was motivated to start it thanks to kind encouragement from a few forum members, whom I thank warmly.

I will start by pointing out that there are
2 Muscongus Bay lobster smack kits: one by David Antscherl that has a functional rudder and centerboard, actually planks the hull and seems to have nicer finishing touches, and then there is the kit for this log, designed by Chuck Passaro and is simpler. The rudder is fixed, the centerboard is fake and the hull is actually comprised of 2 broad boards for each side.
I was a bit disappointed initially, as my objective was to learn how to plank. But I like the instructions by Chuck and it is still a fun little project so on we go.
Another member (Mauri Zio I believe) had a smart idea where they simply cut the boards into planks and then planked the hull like that - I wish I had thought of that before starting the hull. Ho well, live and learn.
 
I started by assembling the keel and frames. That was pretty straightforward - however it’s worth noting that some of the elements of the keel were off by as much as a couple millimeters. For example, the positions of frames 3 and 4 were too far apart compared to the planset and to the dimensions of the cockpit floor. So I had to insert some wedges to make up for this. It was a fun exercise of making sure that what I was doing looked as it should be.

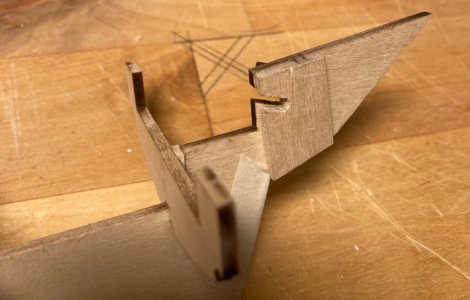
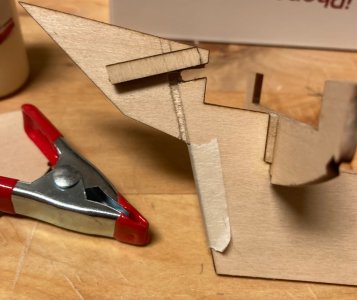
I was annoyed about the fixed rudder so decided to make it functional. Allowing for a shaft (if that’s the right word) between the tiller and the rudder meant drilling a hole thoroughly through the keel at one of its narrowest points, with obvious risks of breaking it. So I shaped reinforcing blocks to go on each side of the keel. I glued one on one side, then carefully made a hole for the rudder shaft, then glued another reinforcing block on the 2nd side. It worked quite well.
It is important to not make these blocks too bulky nor make them stick too much underneath the cockpit as to not interfere with the battens that will be placed shortly after. (My port side block for example is too long on the picture below)

IMG_8260.jpeg

IMG_8259.jpeg
 
After placing the deck, I added the battens meant to support the hull. I was surprised that despite pre-bending them and what I thought was good prep, they were hard to fit perfectly within their intended notches, particularly towards the stern (frame 4 and transom). I had to re apply glue and much clamping to force them in place.

I spent a good amount of time fairing the frames - this is my 3rd model. The first one I tried was the Scotland by Corel - a great kit, but with minimal instructions. I didn’t fair the frames properly and it made planking afterwards quite challenging. I actually stopped midway through the 2nd planking to improve my skills with easier kits (like this one).

I then proceeded to place the 2 side planks. While there is for sure a time gained from using broad boards instead of planking the hull, I am not a fan of this approach. The boards are oversized on purpose, and the extra material creates a lot of conflict with the rest of the boat, particularly the deck and at the front (bow?). Their bulkiness makes them very hard to shape properly. I soaked them extensively and let them dry in place with much much clamps and rubber bands before gluing them.

After gluing in place, there were gaps in some areas (with the transom, with parts of the deck, and at the bow). I had to reapply glue and clamps in multiple spots to make them properly fit.
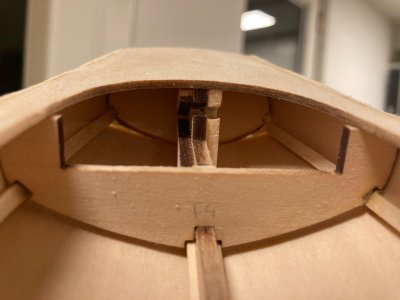
I then became quite annoyed that pushing the side boards in place actually resulted in the battens separating from the frames at the same problematic areas as before (picture below).
What’s the point of fairing if the hull boards don’t follow the frame!

IMG_9008.jpeg
 
I’ve built this kit twice, but the first time was about 35 years ago so let’s forget that one, shall we? I love your idea of the working tiller/rudder. I regret now not having at least simulated some rudder hinges on my most recent.

I found that fairing(chamfering) the batten along it’s length made a big difference when it came time to do the planks.

The trick with the batten is to go one bulkhead at a time, getting it fully seated then let the glue dry before forming the batten to the next bulkhead.

After adding the deck, I did the upper plank, faired that to the batten, then added the lower plank. As you mentioned, the planks are oversized, so the excess needed to be cut down close, then sanded to a nice curve. The planks do get thin near the batten, but with care they’ll work out fine.

Looking forward to following your progress.
 
Back
Top