I have a a couple of Japanese saws. They are very thin. They are pull saws instead of push saws.
Their teeth are very fragile and can break when they encounter metal.
As a beginner on using this saws:
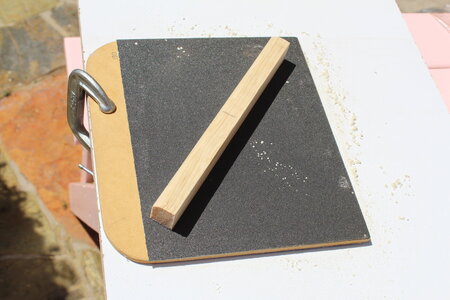
1) Prepare the sandpaper.
With the issue of bringing outside the tools and material, a piece of MDF (could be of other material but it is what I have at home) was covered with sandpaper: 120 on one side and 180 on the other side.
Use the sandpaper at your discretion during the build.
2) Prepare the materials for the mini miter box.
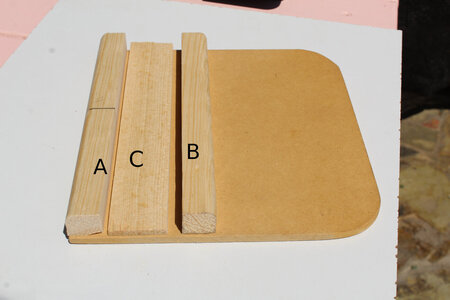
3) Glue the pieces
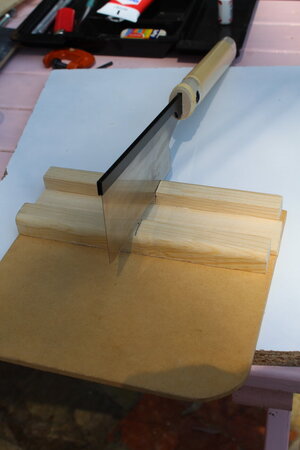
4) Use the Japanese saw to mark (B) and saw until there is a small indentation on (C)
Making wedges
5) Cut D to have a length of 10 cm
- place D in the box
- use the indentations on A & B as a guide
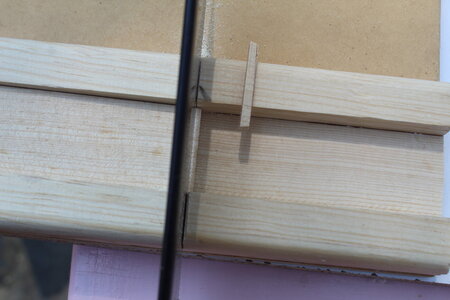
6) Mark with a pencil a line to make 2 wedges on D
I tried to use the saw to cut the wedge using the guides, but ended up doing it on the edge of the jig
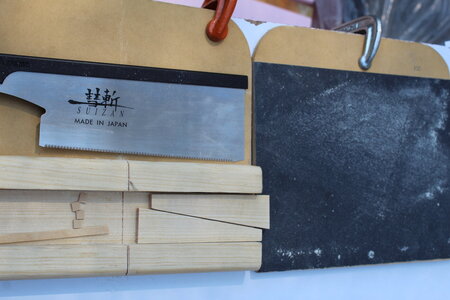
See how nice the mirror image of the wood shows on the saw.
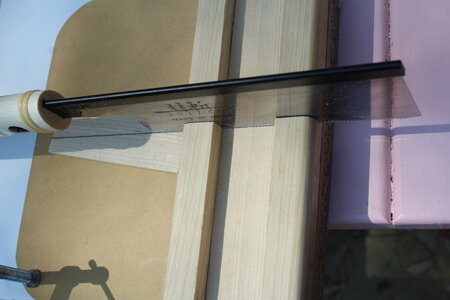
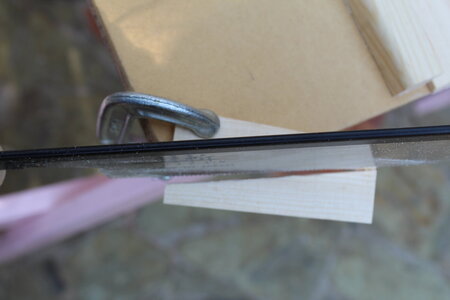
Using the jig
- The wedges can be used as a stopper
- In the image I used it to cut up to 5mm
- the wood is easy to keep in place with the left hand
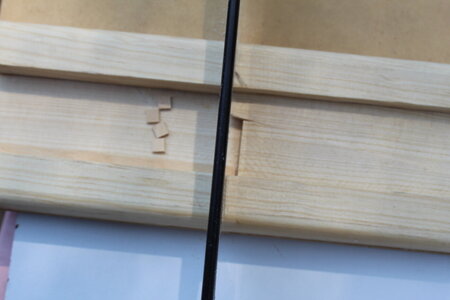
The wedges can be used as a clamp
- When the wood is so wide that is difficult to keep in place with the hand, place the wedges on top to tighten up.
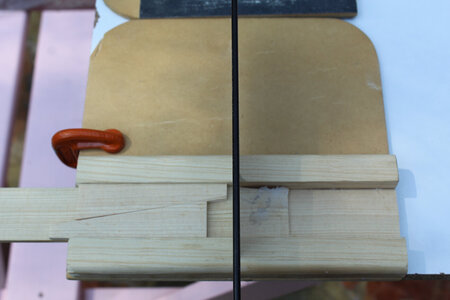
The complete set:
Their teeth are very fragile and can break when they encounter metal.
As a beginner on using this saws:
- I am not nailing the pieces.
- Currently has only the 90 degree.
1) Prepare the sandpaper.
With the issue of bringing outside the tools and material, a piece of MDF (could be of other material but it is what I have at home) was covered with sandpaper: 120 on one side and 180 on the other side.
Use the sandpaper at your discretion during the build.

2) Prepare the materials for the mini miter box.
- A base
- 2 pieces of wood. (use what you have) (A & B)
- I got this dimensions: height 17.5 mm x width 20 mm x length 20 cm
- In A make a mark at the middle, use the saw, but don't go all the way thru
- 1 large wooden paint mixer (C)
- cut to 20 cm (C)
- keep the left over (D)

3) Glue the pieces
4) Use the Japanese saw to mark (B) and saw until there is a small indentation on (C)

Making wedges
5) Cut D to have a length of 10 cm
- place D in the box
- use the indentations on A & B as a guide

6) Mark with a pencil a line to make 2 wedges on D
I tried to use the saw to cut the wedge using the guides, but ended up doing it on the edge of the jig
See how nice the mirror image of the wood shows on the saw.


Using the jig
- The wedges can be used as a stopper
- In the image I used it to cut up to 5mm
- the wood is easy to keep in place with the left hand

The wedges can be used as a clamp
- When the wood is so wide that is difficult to keep in place with the hand, place the wedges on top to tighten up.

The complete set:


