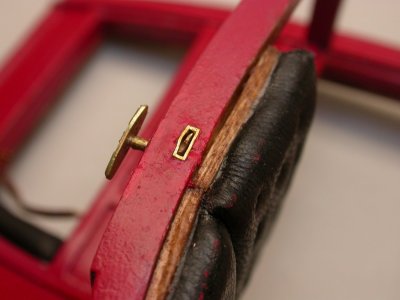
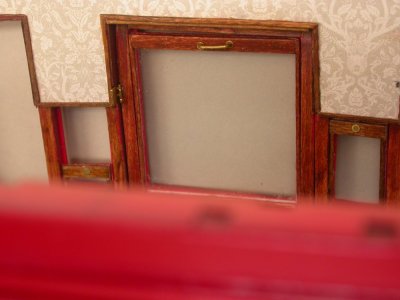
This model marks a transition for the builder, whose hand tremors now preclude me from the 1/48th scale biplanes that occupied me for almost 50 years. It was completed over a period of months in 2024 and 2025. It is the first wooden model I’ve attempted, and I found the transition both entertaining and relaxing, as hand tremors are actually useful for sanding! As a first kit of this sort, I benefited greatly from the outstanding materials, plans and instructions included in the package, and would recommend this to any novice, even ahead of simpler subjects that are not as well presented. I’ll limit my remarks to the modifications I incorporated or particular matters I deem of importance to success.
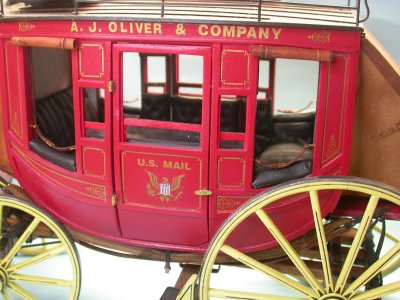
Being a Montanan, I opted to pay homage to the initial carrier in the state, Andrew Jackson Oliver, who launched a stage and transport enterprise in 1863 to serve the gold mining towns of Bannack and Virginia City. In truth, I very much doubt that Abbott-Downing nine-passenger coaches were in use during the brief period of operation before Oliver sold out to Ben Holladay’s Overland; more likely conveyances being “mud wagons” of a simpler nature. So call it “artistic license”.
I determined early on that a more modestly decorated vehicle seemed appropriate for territorial Montana, and enabled me to skip elaborate pin striping on painted running gear, and limit fancy work on the coach and wheels. I stained the reaches and axles brown and used chemical treatments to blacken the white metal and brass components. I wanted to portray sufficient wear to make the coach look “used” without being dilapidated. If and when I build a buckboard, I’ll make it dilapidated.
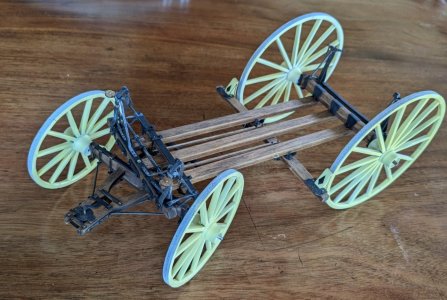
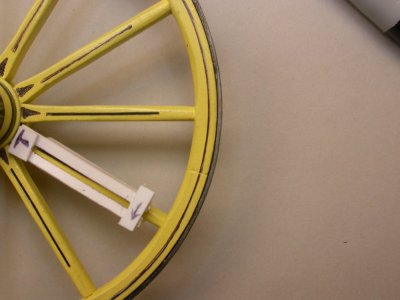
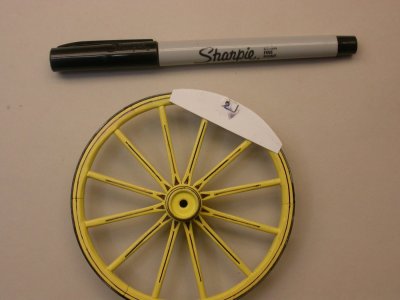
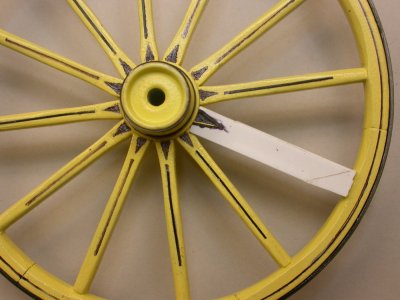
A certain amount of pin striping did help lift the vehicle from drabness, and while the kit includes templates to help achieve this with Sharpie pens, it will take a very steady hand to render these neatly. A more certain procedure was the construction of marking jigs that would guide the pens. Mine are made from styrene to fit over the perimeters of the different sized wheels with a hole to allow the tip of the ultra-fine marker to be rotated around the circumference. A second jig limited the stripe on the spokes to a uniform dimension, and a third provided the triangles around the wheel hubs.
Were I to tackle more complicated pin striping, I’d consider making waterslide decals on my home printer, a straightforward process in itself, but a long and tedious application chore. This would be particularly advantageous if the modeler was fully decorating the vehicle’s suspension, as those parts can be tricky to access.
I did use more traditional masking techniques to add modest décor to the brakes, brake handle, and whiffletrees, and resorted to sliced black decal transfers to correct mistakes.
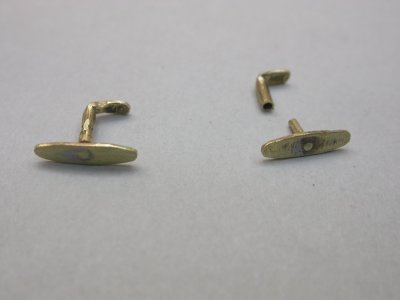
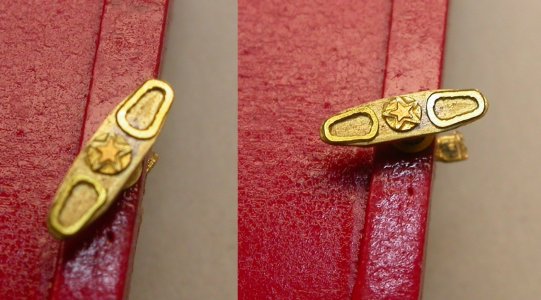
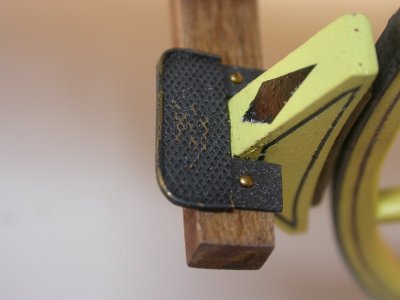
Having an abundance of miscellaneous photo-etched parts, I could judiciously add detail without complicated scratch-building. Simple brass grills for model railroaders were glued onto the step to give the impression of a cast-brass anti-skid feature, then scuffed slightly to reflect wear. Note, also, a brake shoe of “leather” which is a pad of styrene bent to conform to the wheel.
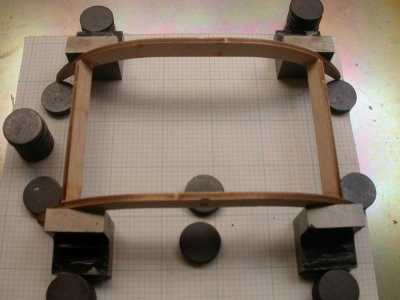
When building the coach body itself, square, plumb, and level are important concepts to bear in mind, as any deviations will make subsequent assemblies more difficult and mistakes will perpetuate themselves through the project’s conclusion, to the detriment of the overall appearance. Accordingly I made sure the assemblies were true by utilizing a building board, in my case a steel sheet with magnets and squares to align pieces as I went along, and secure them as adhesives cure. A sheet of graph paper makes it easy to spot misalignments.
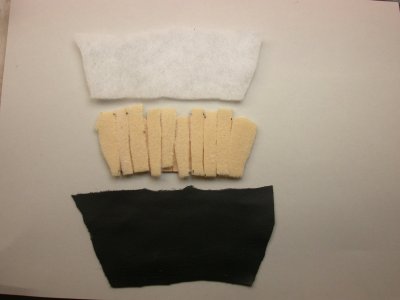
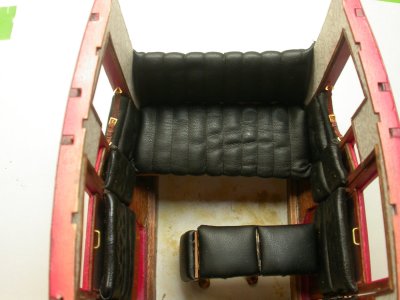
The kit calls for upholstered items to be carved and sanded from appropriately-sized wooden blocks, then finished to represent leather or fabric. I appropriated the method suggested by Artesania Latina’s fine 1:10 scale kit and used foam rubber, fiberfill, and artificial leather purchased at a fabric shop. This was modified for other upholstery styles used on the model as described below. It can be argued that any leather representation, even skived versions of the real thing, are out of scale, but I am satisfied with the texture and believe it superior to anything I might have achieved with wood. In retrospect, a color lighter than black would make the dark interior easier to see, but I never found any reference photos of western coaches with upholstery other than black.
Three methods were employed for the various cushions involved:
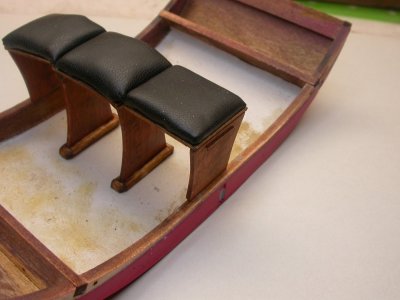
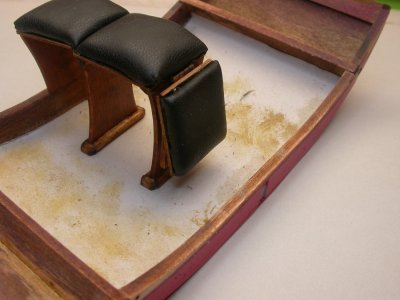
For simple cushions like those for the driver, messenger, and the jump seats, an appropriately-sized wooden sheet was padded, then covered with leather, and the corners pinned and glued to the back side.
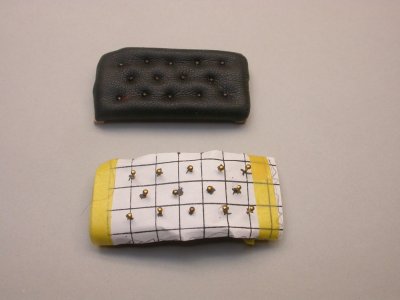
To represent the tufted and buttoned wall cushions, I used pins to stand in for upholstery buttons, the heads painted semi-gloss black. These were pushed through the layers of leather and padding and then through a thin wooden batten, and secured from behind with a dot of CA adhesive.
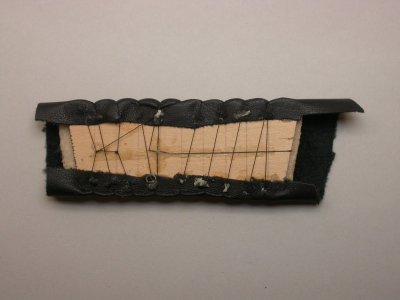
For the rolled upholstery typical of the seats, I used black surgical silk stretched tight to create the longitudinal seams through the padding and again secured behind a wooden panel. I considered pulling this tight to the seat with small loops from the back side, but the amount of tedious effort dissuaded me. In the end, I’m counting on the globs of CA and epoxy glues on the back of the seat panels to hold the thread taut and preserve the upholstery rolls, at least through my lifetime.
The photos illustrate the procedure.

Being a Montanan, I opted to pay homage to the initial carrier in the state, Andrew Jackson Oliver, who launched a stage and transport enterprise in 1863 to serve the gold mining towns of Bannack and Virginia City. In truth, I very much doubt that Abbott-Downing nine-passenger coaches were in use during the brief period of operation before Oliver sold out to Ben Holladay’s Overland; more likely conveyances being “mud wagons” of a simpler nature. So call it “artistic license”.
I determined early on that a more modestly decorated vehicle seemed appropriate for territorial Montana, and enabled me to skip elaborate pin striping on painted running gear, and limit fancy work on the coach and wheels. I stained the reaches and axles brown and used chemical treatments to blacken the white metal and brass components. I wanted to portray sufficient wear to make the coach look “used” without being dilapidated. If and when I build a buckboard, I’ll make it dilapidated.

A certain amount of pin striping did help lift the vehicle from drabness, and while the kit includes templates to help achieve this with Sharpie pens, it will take a very steady hand to render these neatly. A more certain procedure was the construction of marking jigs that would guide the pens. Mine are made from styrene to fit over the perimeters of the different sized wheels with a hole to allow the tip of the ultra-fine marker to be rotated around the circumference. A second jig limited the stripe on the spokes to a uniform dimension, and a third provided the triangles around the wheel hubs.
Were I to tackle more complicated pin striping, I’d consider making waterslide decals on my home printer, a straightforward process in itself, but a long and tedious application chore. This would be particularly advantageous if the modeler was fully decorating the vehicle’s suspension, as those parts can be tricky to access.
I did use more traditional masking techniques to add modest décor to the brakes, brake handle, and whiffletrees, and resorted to sliced black decal transfers to correct mistakes.


Having an abundance of miscellaneous photo-etched parts, I could judiciously add detail without complicated scratch-building. Simple brass grills for model railroaders were glued onto the step to give the impression of a cast-brass anti-skid feature, then scuffed slightly to reflect wear. Note, also, a brake shoe of “leather” which is a pad of styrene bent to conform to the wheel.

When building the coach body itself, square, plumb, and level are important concepts to bear in mind, as any deviations will make subsequent assemblies more difficult and mistakes will perpetuate themselves through the project’s conclusion, to the detriment of the overall appearance. Accordingly I made sure the assemblies were true by utilizing a building board, in my case a steel sheet with magnets and squares to align pieces as I went along, and secure them as adhesives cure. A sheet of graph paper makes it easy to spot misalignments.

The kit calls for upholstered items to be carved and sanded from appropriately-sized wooden blocks, then finished to represent leather or fabric. I appropriated the method suggested by Artesania Latina’s fine 1:10 scale kit and used foam rubber, fiberfill, and artificial leather purchased at a fabric shop. This was modified for other upholstery styles used on the model as described below. It can be argued that any leather representation, even skived versions of the real thing, are out of scale, but I am satisfied with the texture and believe it superior to anything I might have achieved with wood. In retrospect, a color lighter than black would make the dark interior easier to see, but I never found any reference photos of western coaches with upholstery other than black.
Three methods were employed for the various cushions involved:
For simple cushions like those for the driver, messenger, and the jump seats, an appropriately-sized wooden sheet was padded, then covered with leather, and the corners pinned and glued to the back side.
To represent the tufted and buttoned wall cushions, I used pins to stand in for upholstery buttons, the heads painted semi-gloss black. These were pushed through the layers of leather and padding and then through a thin wooden batten, and secured from behind with a dot of CA adhesive.
For the rolled upholstery typical of the seats, I used black surgical silk stretched tight to create the longitudinal seams through the padding and again secured behind a wooden panel. I considered pulling this tight to the seat with small loops from the back side, but the amount of tedious effort dissuaded me. In the end, I’m counting on the globs of CA and epoxy glues on the back of the seat panels to hold the thread taut and preserve the upholstery rolls, at least through my lifetime.
The photos illustrate the procedure.


Last edited:


