G’day.
Something that I have desired for a very long time is an Incra LS Positioner, after seeing one in person at a Working with Wood Exhibition and thinking I would like one of those, then on seeing the price thinking maybe some day, that is not to say they are extremely expensive but out of my budget range at that time.
I could see that this product has a really great amount of versatility for my needs, a lot of this due to the positioning using a thread and fine adjustment of the fence, brilliant idea in my opinion.
Well that day came late last year!!!
My Incra LS Positioner arrived late 2020. If I had gone and bought a Router Table with Router lift and stand it would have cost a lot more than I am prepared to spend this could have been around $1000 to $2000 without trying given that a nice Router lift costs from $450 to $800 AU dollars that is far too expensive for me. My tight arse itus would have kicked in!!
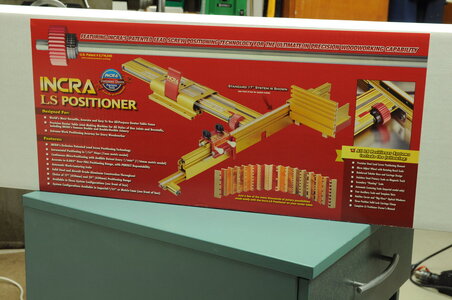
And here is what you get in the box.
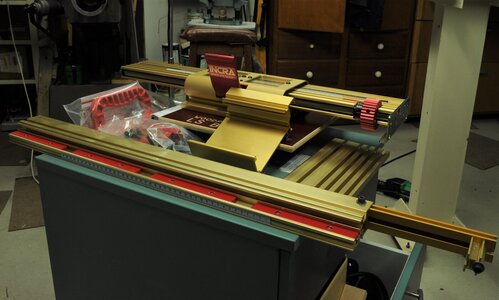
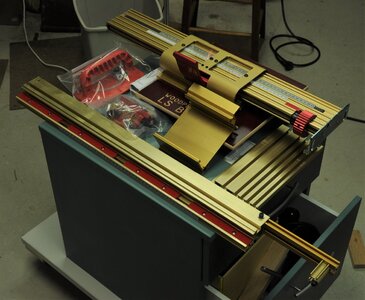
The good thing about one of these lifts is the ability to adjust the Router bit height from the table top.
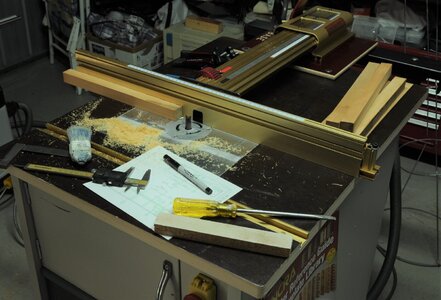
Fortunately I had a ready made Router Table top that was generously given to me from a deceased estate this was a big bonus even though it had a bit of a warp in it it was in pretty good shape.
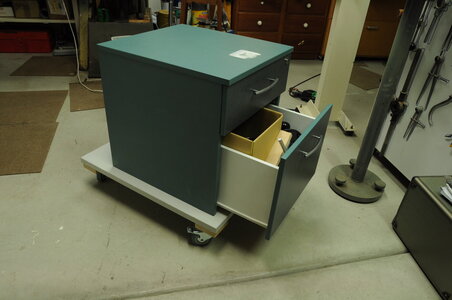
At some point in 2020 my Admiral had a clean out of furniture in the house and among the items that were shoved into the garage (with some consternation from me, pointing out that the garage is not the Tardus and has a limit on space) was a 2 draw office trolley, this took up quite a bit of real estate in the workshop and sat there until after looking a a couple of You Tube videos on how other people have made there own Router Tables an idea came along to use it as a base for the forthcoming Router Table project.
After looking around online for a Router lift kit some of these are very nicely made with an equally nice price.
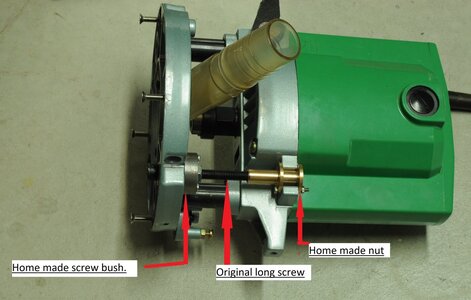
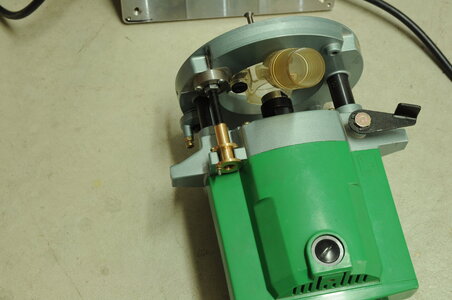
I ended up buying a $70 Router lift kit off Ebay and modified it to suit my old Hitachi ½” Router, I was really struggling to work out how the “kit” would work with my Router so some new parts were made up and minor modifications made to the mounting plate.
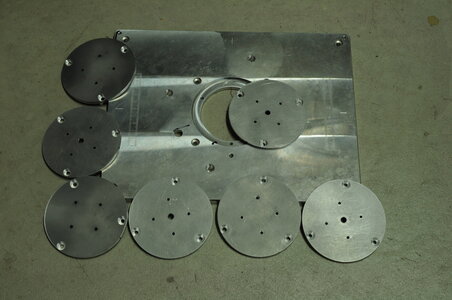
I looked at what other people have done and came up with my own interpretation of a removable insert, I ended up making 7 inserts the reason being that I want to be able to use even very small router bits and this means a good range of hole sizes through the centre another reason is that once set up it is not that hard to produce more blank inserts than to go back and have to make a couple more later, which would irritate me greatly.
I added a base with wheels.
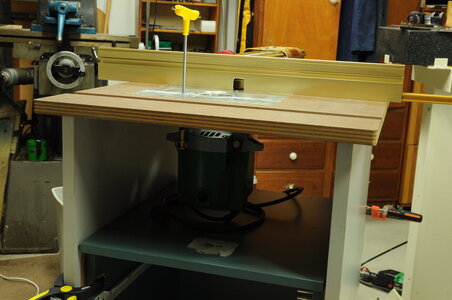
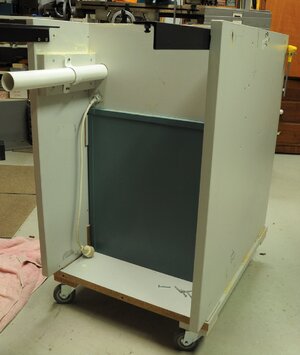
A simple box made out of melamine covered chip board and screwed onto the 2 draw unit.
A piece of plastic water pipe is used for helping remove dust.
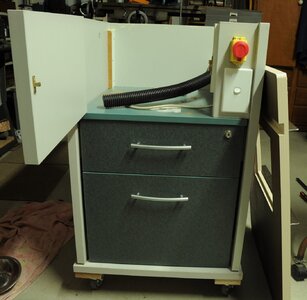
I purchased an Emergency stop switch off Ebay and fitted it along with a light switch to cut power to the Estop switch because it “hums” when power is applied to it.
The underside and sides of the Router Table top were painted to seal the material, then some heavy steel angle screwed to the underside, hopefully this will stabilise the top and prevent any further movement.
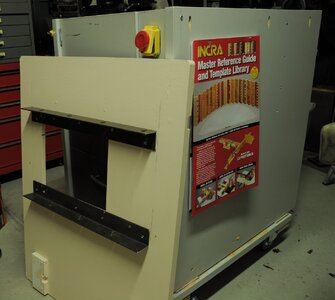
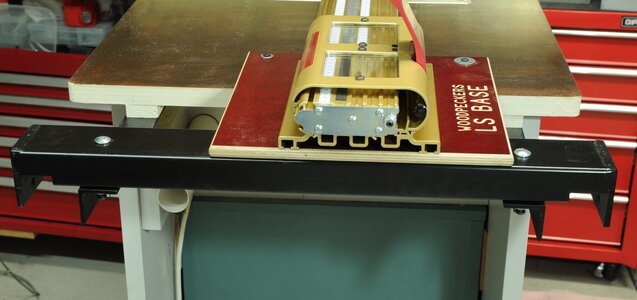
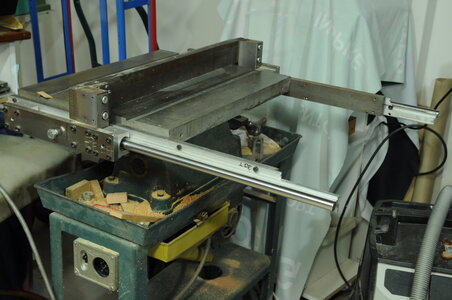
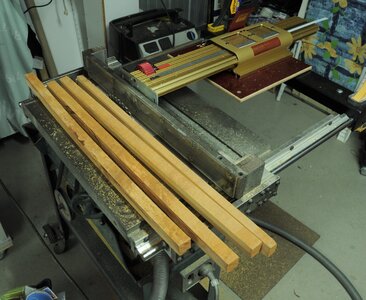
I wanted to get the most out of my Incra jig so I came up with a way of fitting it to my 8” table saw. I used some rectangular hollow section steel to make an attachment that would be screwed onto the Incra jig then onto the Router Table using 2 coach head bolts and can be clamped onto the saw fence guide rails on my dads old 8” saw that I heavily modified a few years ago.
After the top had been screwed down securely, I used a jack plane to flatten the top this took a while though fortunately the warp wasn’t too bad when I was happy with the flatness I applied a liquid wax to seal the top.
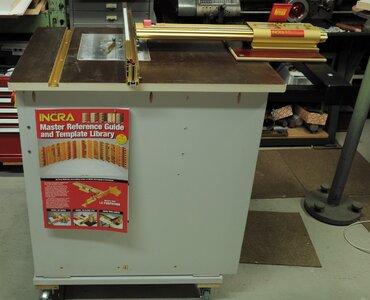
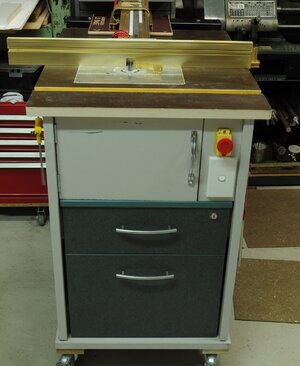
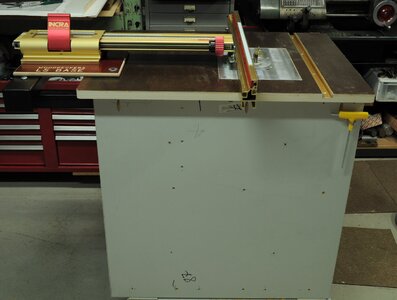
I am very happy with my new bit of gear it works as hoped on trimming down stock and I am able to reliably adjust then remove .1 mm or .004” without any worry's.
Thanks for having a look.
Cheers,
Stephen.
Something that I have desired for a very long time is an Incra LS Positioner, after seeing one in person at a Working with Wood Exhibition and thinking I would like one of those, then on seeing the price thinking maybe some day, that is not to say they are extremely expensive but out of my budget range at that time.
I could see that this product has a really great amount of versatility for my needs, a lot of this due to the positioning using a thread and fine adjustment of the fence, brilliant idea in my opinion.
Well that day came late last year!!!
My Incra LS Positioner arrived late 2020. If I had gone and bought a Router Table with Router lift and stand it would have cost a lot more than I am prepared to spend this could have been around $1000 to $2000 without trying given that a nice Router lift costs from $450 to $800 AU dollars that is far too expensive for me. My tight arse itus would have kicked in!!

And here is what you get in the box.


The good thing about one of these lifts is the ability to adjust the Router bit height from the table top.
Fortunately I had a ready made Router Table top that was generously given to me from a deceased estate this was a big bonus even though it had a bit of a warp in it it was in pretty good shape.
At some point in 2020 my Admiral had a clean out of furniture in the house and among the items that were shoved into the garage (with some consternation from me, pointing out that the garage is not the Tardus and has a limit on space) was a 2 draw office trolley, this took up quite a bit of real estate in the workshop and sat there until after looking a a couple of You Tube videos on how other people have made there own Router Tables an idea came along to use it as a base for the forthcoming Router Table project.
After looking around online for a Router lift kit some of these are very nicely made with an equally nice price.
I ended up buying a $70 Router lift kit off Ebay and modified it to suit my old Hitachi ½” Router, I was really struggling to work out how the “kit” would work with my Router so some new parts were made up and minor modifications made to the mounting plate.


I looked at what other people have done and came up with my own interpretation of a removable insert, I ended up making 7 inserts the reason being that I want to be able to use even very small router bits and this means a good range of hole sizes through the centre another reason is that once set up it is not that hard to produce more blank inserts than to go back and have to make a couple more later, which would irritate me greatly.

I added a base with wheels.

A simple box made out of melamine covered chip board and screwed onto the 2 draw unit.

A piece of plastic water pipe is used for helping remove dust.

I purchased an Emergency stop switch off Ebay and fitted it along with a light switch to cut power to the Estop switch because it “hums” when power is applied to it.

The underside and sides of the Router Table top were painted to seal the material, then some heavy steel angle screwed to the underside, hopefully this will stabilise the top and prevent any further movement.

I wanted to get the most out of my Incra jig so I came up with a way of fitting it to my 8” table saw. I used some rectangular hollow section steel to make an attachment that would be screwed onto the Incra jig then onto the Router Table using 2 coach head bolts and can be clamped onto the saw fence guide rails on my dads old 8” saw that I heavily modified a few years ago.


After the top had been screwed down securely, I used a jack plane to flatten the top this took a while though fortunately the warp wasn’t too bad when I was happy with the flatness I applied a liquid wax to seal the top.


I am very happy with my new bit of gear it works as hoped on trimming down stock and I am able to reliably adjust then remove .1 mm or .004” without any worry's.


Thanks for having a look.
Cheers,
Stephen.
Last edited:


