MY BLUENOSE- YUANQING SCALE 1:72 SCALE [COMPLETED BUILD]

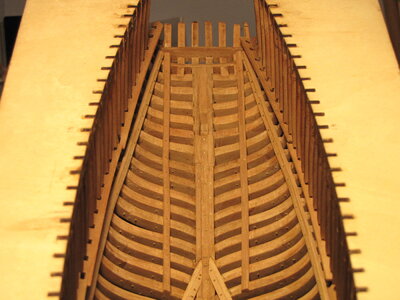
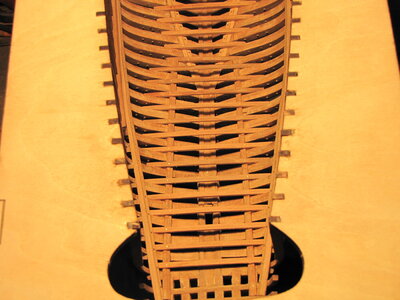
Hello Ship Mates, Just a little update this AM as the little fellows and I have built and installed the pair of Stringers in the after hull. In looking at my YQ-Bluenose build this area seamed uncompleted much like Peter also felt. By adding these Stringers we reinforced the stern hull frames, And yes we also added the simulated bolts to these Stringers.

Regards LawrenceIMG_6138.JPG
 
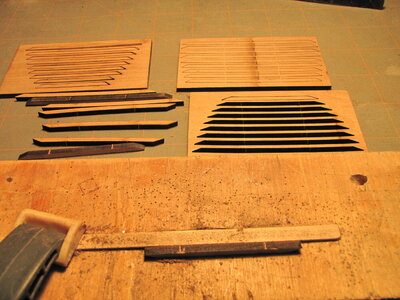
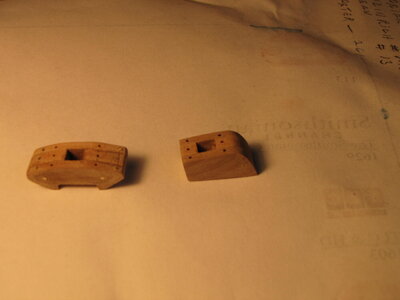
Hello Ship Mates, The little fellows and I have been quite busy this week end in our little Old Ship Yard. We have constructed the two Mast Feet that are now ready to install. Now we are bogged down with cleaning more of our beloved char from the deck beams # 75 to 83 and #84 to 92 along with #93 to 101. Not a very pleasant way to spend our day but it hast to be done.

Regards LawrenceIMG_6139.JPGIMG_6140.JPG
 
Hello Ship Mates, Just a little update this AM as the little fellows and I have built and installed the pair of Stringers in the after hull. In looking at my YQ-Bluenose build this area seamed uncompleted much like Peter also felt. By adding these Stringers we reinforced the stern hull frames, And yes we also added the simulated bolts to these Stringers.

Regards LawrenceView attachment 298792
Stringers here, Stringers there, Stringers are everywhere. :)
Nice job, Lawrence!
Regards, Peter
 
Last edited:
Hello Ship Mates, The little fellows and I have completed cleaning up the char on the lower deck beams, installed the simulated brass bolts and installed them in our YQ-Bluenose. Following Peter's lead we will build the lower deck Stringer beams from the scrap wood left over from the cutting of the deck beams.

Regards Lawrence IMG_6141.JPG
 
It is starting to get problematic, when Lawrence starts to dream of stringers .......
and? Do you?
Good work my friend
Hello Uwe, I thank you for your very kind words. Yes the Stringers!!! I do realize that these are extra and not rely requires on such a small scale as my YQ-Bluenose, But I love the look that Peter has displayed in his YQ-Bluenose and we wanted to make our build just a we bit special but not at all to the extent that Peter has.
Regards Lawrence
 
Beautiful joinery on that hull Lawrence. I knew that you would take Bluenose in your stride and so it proved to be.
Hello Heinrich, I thank you very much for the Flowers. Yes the Bluenose is special to me as I was born and lived in Nova Scotia for a lot of years. I have ordered a bunch of Led Lights from Evans Designs, They are great people and are also one of SOS sponsors that will turn my YQ Bluenose into a great night lamp.
Regards Lawrence
 
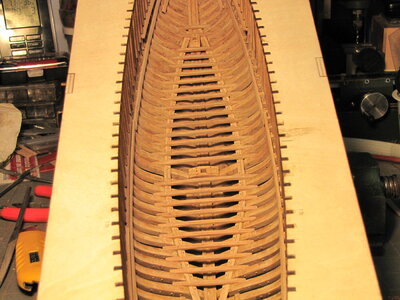
Hello Ship Mates, The little fellows and I have built and installed all of the lower deck beams on the stern Stringers. We may have to adjust a couple around the Rudder Head Trunk, but for this we will wait and see just how it all works out.

Regards LawrenceIMG_6142.JPG
 
Hello Ship Mates, The little fellows and I have built and installed all of the lower deck beams on the stern Stringers. We may have to adjust a couple around the Rudder Head Trunk, but for this we will wait and see just how it all works out.

Regards LawrenceView attachment 300171
The beams are nicely flat and nailed on the chamfered Stringers. A nice piece of scratch building and adding to your BN.
Regards, Peter
 
Hello Ship Mates, The little fellows and I have built and installed all of the lower deck beams on the stern Stringers. We may have to adjust a couple around the Rudder Head Trunk, but for this we will wait and see just how it all works out.

Regards LawrenceView attachment 300171
Currently working on the lower clamps and more specific on the design of the aft stringers and captain's cabin floor supports ánd awaiting an order for planks via @Henk Liebre. I may possibly deviate from your and @Peter Voogt 's build...
Your build in the meantime is showing a very high build quality. Thumbs-Up
 
The beams are nicely flat and nailed on the chamfered Stringers. A nice piece of scratch building and adding to your BN.
Regards, Peter
Hello Peter, Thanks for your very kind words. Yes it is fun to build from scratch again if ever so little. That char removal has my thump sour and raw again but I will live that is for sure. Peter I have a question for you if you do not mind, and that is how thick of planks did you plank the inside of your YQ-Bluenose? I have some Castelo Boxwood that is .075" or 2mm thick that I have just sanded down to .050" or 1.32mm. In your opinion is this thin enough or should I sand it down to around 1mm.
? Thanks.
Regards Lawrence
 
Currently working on the lower clamps and more specific on the design of the aft stringers and captain's cabin floor supports ánd awaiting an order for planks via @Henk Liebre. I may possibly deviate from your and @Peter Voogt 's build...
Your build in the meantime is showing a very high build quality. Thumbs-Up
Hello Johan, Yes it is always nice to build our YQ-Bluenoses just a little different and that makes them all the more special to us. Your ship is coming along nicely, always knew it would.
Regards Lawrence
 
Peter I have a question for you if you do not mind, and that is how thick of planks did you plank the inside of your YQ-Bluenose? I have some Castelo Boxwood that is .075" or 2mm thick that I have just sanded down to .050" or 1.32mm. In your opinion is this thin enough or should I sand it down to around 1mm.?
Hi Lawrence. You may ask me as much as possible and I will answer as much as possible ...... :)
All the inside planks I have used where around 1 mm / .039 thick. The palm wood on the bottom floor is 0,8 mm / 0.034. The website told it was also 1 mm, but they delivered slightly thinner. For the deck I use the spare hull planks of YQ and they are 1,05 mm / 0,041" thick.
I chose that 1 mm because:
a: the half planked decks are fully visible in my openwork model;
b: The Saga shows in a drawing a 'DeckPlanking' thickness of 3" thick / 4 3/4" wide. In the overall list of items: Planking: Topside 3 1/2", bottom planks 3".

With a closed hull like yours, you have to see how your .039 shows. Especially where you have a view of the sides, with the light on those sides.
But when you also are gone make a open model ........... ;)
Regards, Peter
 
About the width of 4 3/4": In scale 1:72 it would be 1,67 mm / .065". Even for me, that was to small :D
My first thought was to work with 2mm wide planks, but that's now 2.6. Not much narrower than YQ's 3mm planks, but then I would end up with half a plank width at the waterways at the width point.
My advice is to make a plan of your planking and measure the necessary. Unless you don't mind using 'filling slats'.
Regards, Peter
 
Hi Lawrence. You may ask me as much as possible and I will answer as much as possible ...... :)
All the inside planks I have used where around 1 mm / .039 thick. The palm wood on the bottom floor is 0,8 mm / 0.034. The website told it was also 1 mm, but they delivered slightly thinner. For the deck I use the spare hull planks of YQ and they are 1,05 mm / 0,041" thick.
I chose that 1 mm because:
a: the half planked decks are fully visible in my openwork model;
b: The Saga shows in a drawing a 'DeckPlanking' thickness of 3" thick / 4 3/4" wide. In the overall list of items: Planking: Topside 3 1/2", bottom planks 3".

With a closed hull like yours, you have to see how your .039 shows. Especially where you have a view of the sides, with the light on those sides.
But when you also are gone make a open model ........... ;)
Regards, Peter
Hello Peter , Thanks very much for the wealth of information that you have provided me with making my build much easier. No I do not process the great skills that you have in model ship building and an open hull YQ-Bluenose would be out of the question for me all though it would be nice. I am going to add some Led Lighting so the inter hull will be visible but not to the same extent as yours.
One more question and that is, how big did you make your galley stove? The reason I ask is that I am going to try and build replica of the Atlantic Fisherman Stove # 33, should be fun I think, with a red Led Lamp inside to show up a bit around the cracks in the door and covers, Thanks.
Regards Lawrence
 
One more question and that is, how big did you make your galley stove? The reason I ask is that I am going to try and build replica of the Atlantic Fisherman Stove # 33, should be fun I think, with a red Led Lamp inside to show up a bit around the cracks in the door and covers, Thanks.
The dimensions of my stove partly depended on the space I had in the forecastle. The 'house' is 11x7x9mm / .433 x .275 x .354
With LED-lights inside the hull, you will see a lot of the interior and a Fisherman’s replica would be great. And a LED in the stove …….:D Wow!
 
Back
Top