MY BLUENOSE- YUANQING SCALE 1:72 SCALE [COMPLETED BUILD]

Hello Ship Mates, Well I finally got the little fellows to move about just a bit fasted these last few days. We have completed building and flaring frames #09 to #16

These we have dry fitted to the ships keel. We have glued up frame # 17 and cut out frame # 18, golly but we sure do have a long way to go.

Regards LawrenceView attachment 287897View attachment 287899View attachment 287901View attachment 287902
Hello Boshaken, Thanks for your visit to my build log. I am not sure on the grit of these files. I do believe they are around 150 grit as they are a fairly rough file and do cut rather fast. I also have a much finer set that looks like around 500 that I use to finish up with. I find a verity of grits seams to work good for me
Regards Lawrence
Thanks Lawrence!
 
Hello Ship Mates, The little fellows and I have completed the next set of 8 frames that we now have dry fitted into the ships keel. These will have to be tweaked before they are installed into the building jig. We are almost to the half waypoint.

Looks like we will have to take a few days off as all of this char removal and the flaring of the frames have left me with cracked thumps, nothing to worry about that a few days off wont fix.

Regards LawrenceView attachment 288720View attachment 288721
Hey Lawrence - looks great! Mine is on the way ala Heinrich and I'm excitedly reading about all the current BN POF builds. Question - what is best tool to remove the char and the best one to bevel the frames?
 
Hello Ship Mates, We got another little up date, The little fellows and I have installed the Keelson and along with it's simulated bolts. We have also cleaned up the inter hull bring out just a bit of the YQ-Bluenose pear wood color. Can hardly wait until I am able to put on a coat of Tung Oil or Varnish as I have not made up my mind as yet on which one.

Regards LawrenceView attachment 296272View attachment 296273View attachment 296274
Looks amazing Lawrence! Question - I'm assuming you predrill and then nail the nails in the keelson before it's installed?
 
Hey Lawrence - looks great! Mine is on the way ala Heinrich and I'm excitedly reading about all the current BN POF builds. Question - what is best tool to remove the char and the best one to bevel the frames?
Hello Boshaken, I do believe that there is no one way to remove the char. I have used my Dremel and a drum sander attached to remove the heaviest of the chat and then used my files to clean up the rest. It is what ever works best for you.
Regards Lawrence
Hey Lawrence - looks great! Mine is on the way ala Heinrich and I'm excitedly reading about all the current BN POF builds. Question - what is best tool to remove the char and the best one to bevel the frames?
Hello Boshaken, Welcome to the YQ-Bluenose Build Form. You will find Heinrich along with all of the other Bluenose Builders very helpful, all you have to do is ask.
Regards Lawrence
 
Looks amazing Lawrence! Question - I'm assuming you predrill and then nail the nails in the keelson before it's installed?
Hello Boshaken, Here on the YQ-Bluenose form you will see a lot of ways to do things. On the Keelson in my build, Well I cheated just a bit and drilled and install all of the simulated nail bolts on the work bench and then glued it into the ship. I figured that I did not need the extra strength as mine are just for show. Regards Lawrence
 
Thanks Lawrence. I actually have several Dremels including a battery operated on that one can adjust the speed on. That would make careful short order of the char! I hope :)
Hello Boshaken, That is great, But go lightly, removing only the heaviest char and clean up with your files, as you do not want to change the ships shape.
Regards Lawrence
 
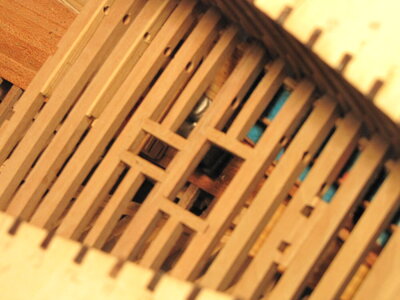
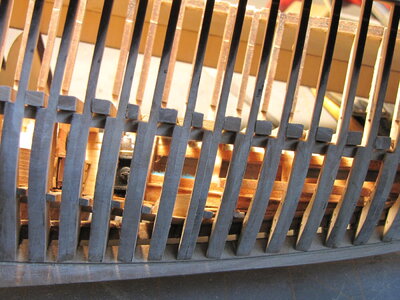
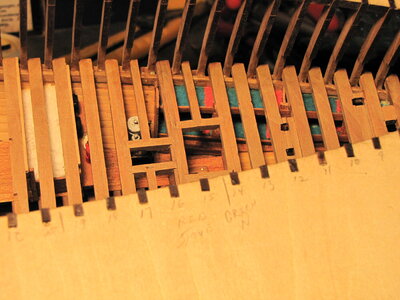
Hello Ship Mates, Work has continued on out YQ-Bluenose, the little fellows and I have installed the sink, pump and stove in the Galley. We have also added a couple of fry pans that hang on the bulkhead over the sink. We have built and divided the salt room and added some imitation salt filling the salt ben. We have also added and filled in all of the remaining deck beams over the salt room, Galley and Foc'sel area. Time now for a bit of a rest.
Regards LawrenceIMG_6171.JPGIMG_6172.JPGIMG_6170.JPG
 
You did a lot of work in the front of your BN, Lawrence. A well equipped galley and forecastle. The deck beams looks great. Nicely fitted joints.
Regards, Peter
Hello Peter, I thank you for your very kind words, Yes the Foc'sel is complete except to give her a final coat of Tung Oil and to add the led lighting. I have been thinking of adding a few cut outs below the deck beams for a better view, but will leave that idea for now.
Regards Lawrence
 
Hello Peter, I thank you for your very kind words, Yes the Foc'sel is complete except to give her a final coat of Tung Oil and to add the led lighting. I have been thinking of adding a few cut outs below the deck beams for a better view, but will leave that idea for now.
Regards Lawrence
Given the effort you put into the galley and bunks, I thought you'd do a PVSC on us. Leaving some frames partially out looks promising though...
 
Given the effort you put into the galley and bunks, I thought you'd do a PVSC on us. Leaving some frames partially out looks promising though...
Hello Johan, Thanks for your reply and nice words. Not sure I understand what PVSC means, Please enlighten me on this one? Yes I am half thinking of a few cut outs below the deck beams, that would give a clear view but not an over kill.
Regards Lawrence
 
Hello Boshaken, Here on the YQ-Bluenose form you will see a lot of ways to do things. On the Keelson in my build, Well I cheated just a bit and drilled and install all of the simulated nail bolts on the work bench and then glued it into the ship. I figured that I did not need the extra strength as mine are just for show. Regards Lawrence
 
Thanks Lawrence. Can you relay what size drill bit you used for the holes and wht size nails you used? This is my first attempt at building a ship but am excited about detailing the vessel as you experts have showcased and done!
 
Hello Ship Mates, Work has continued on out YQ-Bluenose, the little fellows and I have installed the sink, pump and stove in the Galley. We have also added a couple of fry pans that hang on the bulkhead over the sink. We have built and divided the salt room and added some imitation salt filling the salt ben. We have also added and filled in all of the remaining deck beams over the salt room, Galley and Foc'sel area. Time now for a bit of a rest.
Regards LawrenceView attachment 307948View attachment 307949View attachment 307950
Hi Lawrence - if I may ask, what are those holes drilled through the crossmembers in the first pic?
 
Hi Lawrence - if I may ask, what are those holes drilled through the crossmembers in the first pic?
Hello Joe Hunt, I thank you for your very kind words and nice comments. Those holes in the deck beams on the port side are for the placement of the Led Lighting that will be installed a bit later.
Regards Lawrence
 

Beautiful progress my friend - you and the little fellows deserve a bit of a rest after a job well done!
Hello Henrich, Thanks for your very kind words. Yes we will be cutting back working in the Old Ship Yard for a couple of weeks as we do have so very much out side work to do and catch up on. Still hoping for a few hours here and there. Do want the aft cabin deck beams installed.
Regards Lawrence
 
Back
Top