My Swing at Caldercraft HMS Victory

Joined
Jan 14, 2019
Messages
204
Points
143

Location
Pine Valley, CA
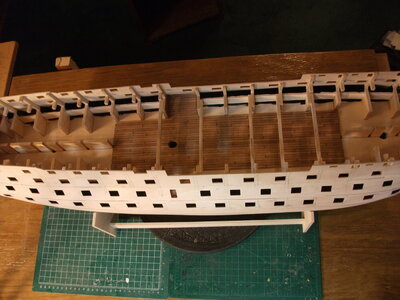
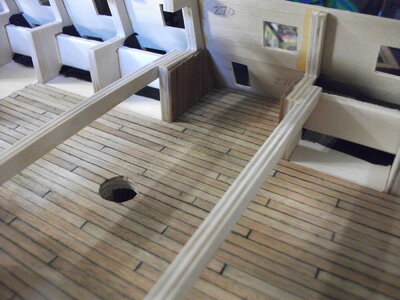
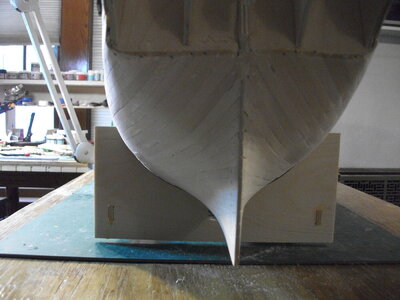
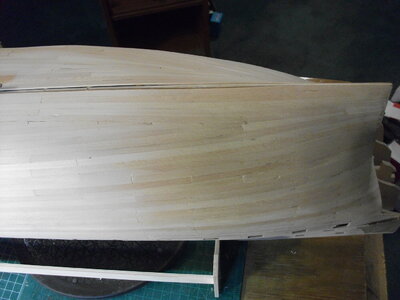
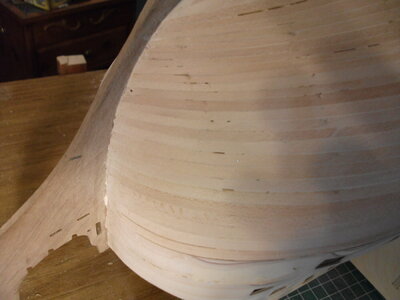
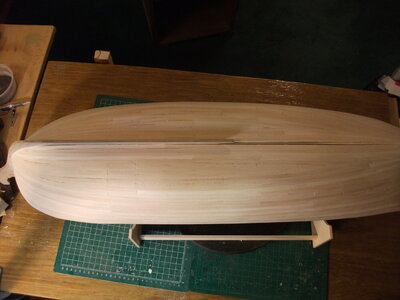
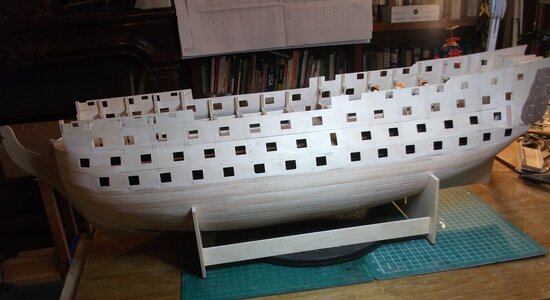
Have been watching TraumaDoc's progress with great interest as he is just a few weeks ahead of me. Also see that Maddog Harry is also embarking on the same voyage. I have been learning a lot from Paul Vicker's videos/log as well. I started my build on 23 November and have gotten the first planking done and just starting on the stern quarter gallerys. Have been sanding, and sanding, ...... and sanding on the hull to smooth everything out, think I am just about there. I don't have the equipment or talent to take great photos so I will not do a full build log but will try to chime in with lessons learned when I figure out something useful. I have been very impressed with the quality`of the materials provided by Caldercraft as well as the quantity. The first planking material is 1.5 by 6mm lime and every piece was spot on 6 mm. This has been an issue for me with other kits (planking width variations). Also, they provided 70 pieces and I have 20 remaining after finishing up the planking. The fit and finish on all the keel and bulkhead pieces is first rate as you would expect. It is a beast though, and is getting heavy. Here are some shots of progress to date:
DSCF1185.JPGDSCF1186.JPG
+DSCF1187.JPGDSCF1188.JPG
DSCF1190.JPGDSCF1191.JPG
DSCF1192.JPGDSCF1193.JPG

Just started with the stern quarter gallerys, using the walnut ply pieces provided. Quite a bit of fitting and concern with this but Paul's videos help a lot.
DSCF1194.JPG
Also, on a previous kit I discovered these Marklin railroad screws to use where you just can't get a clamp to hold well enough. They were invaluable as I did the first planking and I still recommend them.
DSCF1195.JPG
Anyway, having a lot of fun with this one so far and I really appreciate the work of those ahead of me who have helped illuminate the way. Happy New Year to all.
 
Hi let me be the first to join you on this project it is a magnificent model. A while back I purchased this kit from eBay the hull was about 60% finished. I have just started to work on mine but there's a lot to do before I can go forward. Watching the build logs will be a big help to me as I put right some of the things that have been done.
Your build looks to be progressing very well but be careful, although this is an excellent kit things can go wrong as I am finding out.
Tony
Appreciate the comments and the heads up. Am trying hard to triple check before getting the glue out. It is an adventure!! Cheere
 
Have been watching TraumaDoc's progress with great interest as he is just a few weeks ahead of me. Also see that Maddog Harry is also embarking on the same voyage. I have been learning a lot from Paul Vicker's videos/log as well. I started my build on 23 November and have gotten the first planking done and just starting on the stern quarter gallerys. Have been sanding, and sanding, ...... and sanding on the hull to smooth everything out, think I am just about there. I don't have the equipment or talent to take great photos so I will not do a full build log but will try to chime in with lessons learned when I figure out something useful. I have been very impressed with the quality`of the materials provided by Caldercraft as well as the quantity. The first planking material is 1.5 by 6mm lime and every piece was spot on 6 mm. This has been an issue for me with other kits (planking width variations). Also, they provided 70 pieces and I have 20 remaining after finishing up the planking. The fit and finish on all the keel and bulkhead pieces is first rate as you would expect. It is a beast though, and is getting heavy. Here are some shots of progress to date:
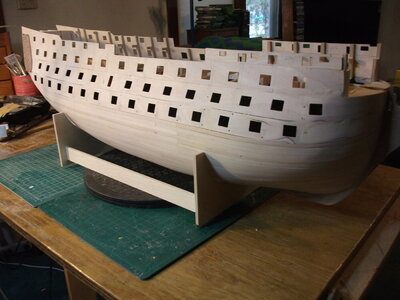
View attachment 348559View attachment 348560
+View attachment 348561View attachment 348562
View attachment 348563View attachment 348565
View attachment 348566View attachment 348568

Just started with the stern quarter gallerys, using the walnut ply pieces provided. Quite a bit of fitting and concern with this but Paul's videos help a lot.
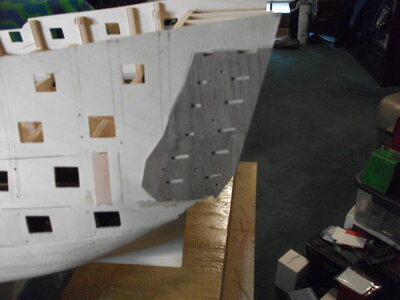
View attachment 348570
Also, on a previous kit I discovered these Marklin railroad screws to use where you just can't get a clamp to hold well enough. They were invaluable as I did the first planking and I still recommend them.
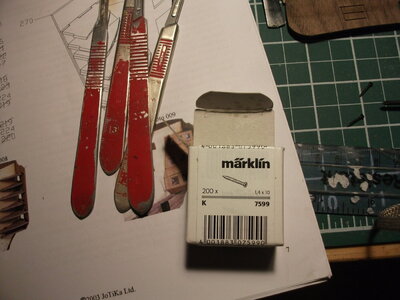
View attachment 348572
Anyway, having a lot of fun with this one so far and I really appreciate the work of those ahead of me who have helped illuminate the way. Happy New Year to all.
Good afternoon. That is great work. Cheers Grant
 
Well Done!. The galleries are just a it fiddly, but all fit properly if you follow the instructions exactly and don't rush. Great job on the hull. it will make the 2nd layer a breeze.
 
Well Done!. The galleries are just a it fiddly, but all fit properly if you follow the instructions exactly and don't rush. Great job on the hull. it will make the 2nd layer a breeze.
Paul, high praise indeed, thanks for the feedback. Am warily approaching the installation of the vertical sections of the galleries, the instructions and plans are virtually silent on this step. Thanks again for all your work and effort to make and post those very helpful videos. Most appreciated.
 
Paul, high praise indeed, thanks for the feedback. Am warily approaching the installation of the vertical sections of the galleries, the instructions and plans are virtually silent on this step. Thanks again for all your work and effort to make and post those very helpful videos. Most appreciated.
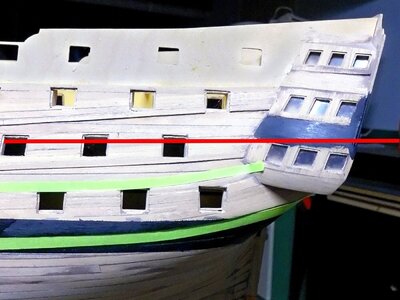
On my Victory the gallery windows are out of line with the gunports which just doesn't look right, still checking to see what went wrong. Maybe other parts are incorrectly placed which put these out.

IMG_20221219_081130.jpg
Tony
 
Have been watching TraumaDoc's progress with great interest as he is just a few weeks ahead of me. Also see that Maddog Harry is also embarking on the same voyage. I have been learning a lot from Paul Vicker's videos/log as well. I started my build on 23 November and have gotten the first planking done and just starting on the stern quarter gallerys. Have been sanding, and sanding, ...... and sanding on the hull to smooth everything out, think I am just about there. I don't have the equipment or talent to take great photos so I will not do a full build log but will try to chime in with lessons learned when I figure out something useful. I have been very impressed with the quality`of the materials provided by Caldercraft as well as the quantity. The first planking material is 1.5 by 6mm lime and every piece was spot on 6 mm. This has been an issue for me with other kits (planking width variations). Also, they provided 70 pieces and I have 20 remaining after finishing up the planking. The fit and finish on all the keel and bulkhead pieces is first rate as you would expect. It is a beast though, and is getting heavy. Here are some shots of progress to date:
View attachment 348559View attachment 348560
+View attachment 348561View attachment 348562
View attachment 348563View attachment 348565
View attachment 348566View attachment 348568

Just started with the stern quarter gallerys, using the walnut ply pieces provided. Quite a bit of fitting and concern with this but Paul's videos help a lot.
View attachment 348570
Also, on a previous kit I discovered these Marklin railroad screws to use where you just can't get a clamp to hold well enough. They were invaluable as I did the first planking and I still recommend them.
View attachment 348572
Anyway, having a lot of fun with this one so far and I really appreciate the work of those ahead of me who have helped illuminate the way. Happy New Year to all.
Very clean and nit job.
 
This looks amazing , I have a victory in the box and will get started after I complete the USS Constitution from Modelshipways. Good luck
 
Have been watching TraumaDoc's progress with great interest as he is just a few weeks ahead of me. Also see that Maddog Harry is also embarking on the same voyage. I have been learning a lot from Paul Vicker's videos/log as well. I started my build on 23 November and have gotten the first planking done and just starting on the stern quarter gallerys. Have been sanding, and sanding, ...... and sanding on the hull to smooth everything out, think I am just about there. I don't have the equipment or talent to take great photos so I will not do a full build log but will try to chime in with lessons learned when I figure out something useful. I have been very impressed with the quality`of the materials provided by Caldercraft as well as the quantity. The first planking material is 1.5 by 6mm lime and every piece was spot on 6 mm. This has been an issue for me with other kits (planking width variations). Also, they provided 70 pieces and I have 20 remaining after finishing up the planking. The fit and finish on all the keel and bulkhead pieces is first rate as you would expect. It is a beast though, and is getting heavy. Here are some shots of progress to date:
View attachment 348559View attachment 348560
+View attachment 348561View attachment 348562
View attachment 348563View attachment 348565
View attachment 348566View attachment 348568

Just started with the stern quarter gallerys, using the walnut ply pieces provided. Quite a bit of fitting and concern with this but Paul's videos help a lot.
View attachment 348570
Also, on a previous kit I discovered these Marklin railroad screws to use where you just can't get a clamp to hold well enough. They were invaluable as I did the first planking and I still recommend them.
View attachment 348572
Anyway, having a lot of fun with this one so far and I really appreciate the work of those ahead of me who have helped illuminate the way. Happy New Year to all.
Looks spectacular!!!!! Slow and steady,, I am almost done with second planking,, I screwed put the stern galleries a little, I didn’t sand the edges down enough on the frame, as I wasn’t sure if it was suppose to be a “ledge” or not,, but some sanding and other things,,, making it better. As you build the stern galleries,, get out the metal bottom pieces and test fit them as you go in anticipation of how they will fit later on,, I realized I needed to add some balsa in to get the fit , which I would rather do now then after it is painted etc. ( I am not actually mounting the pieces yet, but making sure I am ready for them)_
 
On my Victory the gallery windows are out of line with the gunports which just doesn't look right, still checking to see what went wrong. Maybe other parts are incorrectly placed which put these out.

View attachment 348960
Tony
Have seen a lot of discussion on that alignment. Hard to get an accurate visual. Followed the instructions as best I could and they look pretty close to yours. You have an interesting project there. Cheers
 
Looks spectacular!!!!! Slow and steady,, I am almost done with second planking,, I screwed put the stern galleries a little, I didn’t sand the edges down enough on the frame, as I wasn’t sure if it was suppose to be a “ledge” or not,, but some sanding and other things,,, making it better. As you build the stern galleries,, get out the metal bottom pieces and test fit them as you go in anticipation of how they will fit later on,, I realized I needed to add some balsa in to get the fit , which I would rather do now then after it is painted etc. ( I am not actually mounting the pieces yet, but making sure I am ready for them)_
Thanks very much, you are doing a fantastic job and I am benefiting greatly from your photos. Thanks for posting them. Started second planking last night.
 
Back
Top