Occre Revenge - Assistance please for upgrading kit supplied doors & windows

Joined
Aug 30, 2020
Messages
639
Points
308

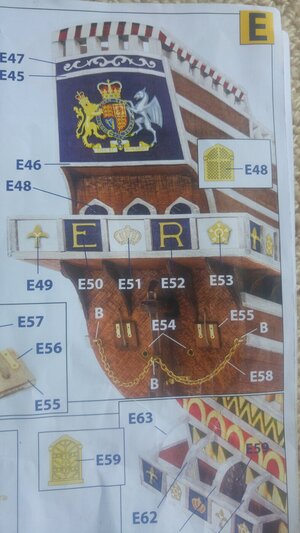
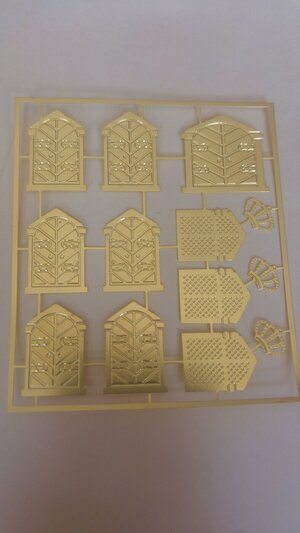
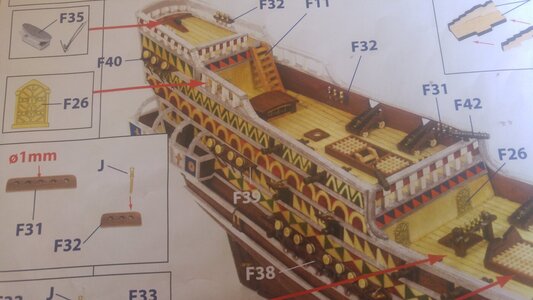
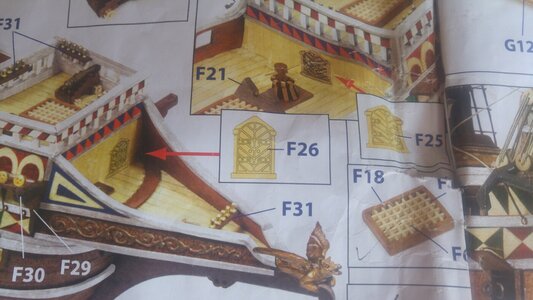
Hi fellow modelers, currently building my second ship and would like to improve the kit supplied doors and windows which are just stick on brass etchings, the plans look like they have been painted or highlighted in some way(any advice on best way to do this) see parts E48, F25 & F26 and a picture of the actual parts.
I thought about adding some nails as door knobs and maybe a frame around the parts or sticking some wood on the back so it stands out a bit more, any tips or thoughts greatly appreciated.
Perhaps after this build I will be confident enough to make some actual doors for more realism.
 

Attachments

  • E48.jpg
    E48.jpg
    180.4 KB · Views: 49
  • Etchings.jpg
    Etchings.jpg
    114 KB · Views: 51
  • F 26.jpg
    F 26.jpg
    147.2 KB · Views: 49
  • F25-26.jpg
    F25-26.jpg
    167.8 KB · Views: 50
I am currently building the Victory Models kit of the Revenge so I understand your dilemma. First and obvious the brass etched doors and windows are meant to represent gold colored gilding. These galleons had a lot of color and gilded decorations. There are a couple of things you can do With the doors. First decide whether to display doors open or closed. If open you need to create a wood backing piece to attach the “gilded” etched brass. My kit actually supplied these wood door pieces for this purpose. Then glue the assembly on edge to the side frames of the openings to resemble an open door. As for the etched brass itself: 1. You can leave as is. Just attach the etched parts in place without any additional coloring. This is actually what I ended up doing and it represents a fully gilded door decoration. 2. You can color the etched brass. Coat the piece with a brown (such as burnt seinna) then wipe off the paint from the raised decorations. Leave the brown color in the “valleys”. When dry rub the etched piece gently with a very fine sandpaper to clean up the raised deco and slightly burnish the bright brass color.

The windows I would leave the brass color. You can use the very fine sandpaper technique to give them a burnished look. Hope this helps...
Thank you, the tip to paint and rub off leaving the valleys is a good one. I will leave as doors closed, I thought about making open doors but I think I will save that for another time and prepare it earlier in the build. Interesting to note on tbe plans the rear windows seem to be coloured.
 
You can color the etched brass inserts for the rear windows. Often a light grey or very light blue is used...same technique as the door panels...fill in the valleys...rub off the raised deco...lightly burnish with a very fine sandpaper.
 
You can color the etched brass inserts for the rear windows. Often a light grey or very light blue is used...same technique as the door panels...fill in the valleys...rub off the raised deco...lightly burnish with a very fine sandpaper.
Good tip thank you
 
Back
Top