You are using an out of date browser. It may not display this or other websites correctly.
You should upgrade or use an alternative browser.
You should upgrade or use an alternative browser.
Re: OcCre Santisima Trinidad Build Log
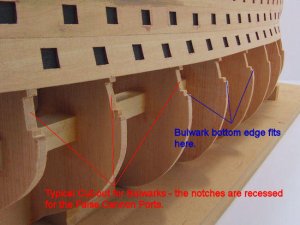
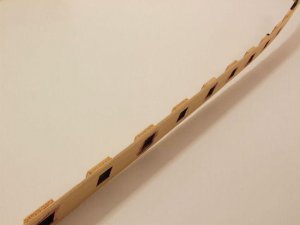
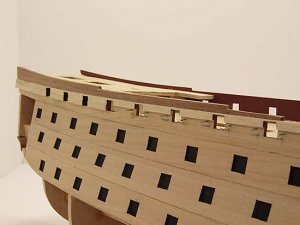
I have finally completed the Bulwarks installation. Now is the time to take a break and study on Planking the lower hull to see how that is going to turn out. I will have to buy a few battens and start measuring for the strakes. So far, I have managed to stay away from any wood putty or wood filler. Besides the planks would have covered that up anyway.
I have finally completed the Bulwarks installation. Now is the time to take a break and study on Planking the lower hull to see how that is going to turn out. I will have to buy a few battens and start measuring for the strakes. So far, I have managed to stay away from any wood putty or wood filler. Besides the planks would have covered that up anyway.
Re: OcCre Santisima Trinidad Build Log
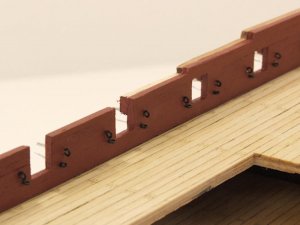
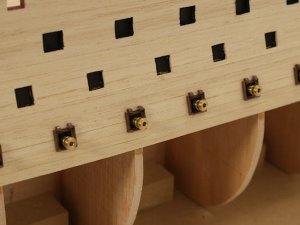
The Ring Bolts so far are all hand made. I bought some 24(?) gauge - can't remember right now because I don't have that sitting in front of me at the moment. But, I used a simple technique of a small drill locked in a vise and hand wrapped the wire around it. Put a coat of gray primer and then flat black enamel. The holes were pre drilled. The other end will be snipped of of course.
The Ring Bolts so far are all hand made. I bought some 24(?) gauge - can't remember right now because I don't have that sitting in front of me at the moment. But, I used a simple technique of a small drill locked in a vise and hand wrapped the wire around it. Put a coat of gray primer and then flat black enamel. The holes were pre drilled. The other end will be snipped of of course.
Re: OcCre Santisima Trinidad Build Log
The supplied Ring Bolts are Brass and really quite large. I would almost venture to say that the given Ring Bolts guage was about .7mm in thickness as I am now using a gauge of about .44 mm. I wanted to find some black wire suitable, but could not. Gotta go I am at office now.
The supplied Ring Bolts are Brass and really quite large. I would almost venture to say that the given Ring Bolts guage was about .7mm in thickness as I am now using a gauge of about .44 mm. I wanted to find some black wire suitable, but could not. Gotta go I am at office now.
Re: OcCre Santisima Trinidad Build Log
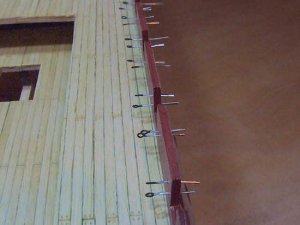
I have got the Ring Bolts done for Port and Starboard Bulwarks. I found a quicker way of doing the Ring Bolts per the Admiral. I need to post the step process for every body. I have no excuse. I need to do this so that anybody needs Ring Bolts, they can follow what I did if they want to. If you stay tuned, I will try to post the process. The image below just shows how I leave enough length of the Ring Bolt to push threw the Bulwark. Only for manageability purposes. This way I can grab the Ring Bolt shafts using a pair of needle nose pliers without getting my fingers on the Bolts.
I got frustrated because I could not find any black wire (well I could, but it was glossy). So, as lazy as I am, I chose the opposite and made my own - painted with gray primer, then "enamel" flat black (both of which are Model Master Paint).
On the other side, I will use a pair of pliers to "pull" the shafts threw and bend the wire up against the other side of the Bulwark. I put of drop of CA glue on the shaft side of the Bulwark. Clip the remaining wire and used a Diamond needle file to file down the rough spur. Well, actually I lied just a tad - I will say that I used a dremel tool with emery attachment (shame on me - I know) first, then I used the Diamond needle file to finish off the spur. If you do not have any Diamond Coated Needle files then you are missing out. These are not like any other files I have used. They have a "cutting" effect to wood / metal / brass that will take the material off quickly. I suggest highly to get them. They are not expensive as mine were bought from Model Expo
"DIAMOND COATED NEEDLE FILE SET, 5PCS., 5-1/5" ITEM NUMBER: MT1003
As always, I hope this post is helpful to some.
Re: OcCre Santisima Trinidad Build Log
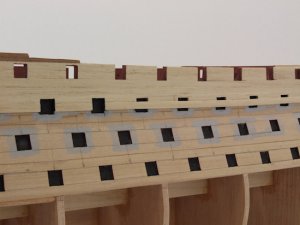
The instructions call for you to plank from top to bottom, however, some do it the other way and start at the lower end of the Bulwarks and go to the top. I just decided to start at top and work down. I have done a lot of measurements. The Port Holes are slightly off and some needed to be readjusted in height. After taking some dividers, I found the overall Port Holes to be ok now. The pencil lines indicate this. The last planking strip that you see is being cut out as I go. I have found two methods and neither are good or bad. One method I choose earlier is to cut each plank to the width between Port Holes. I found this very time consuming, so I opted this time to lay the whole plank down and then cut out the Port Holes. This is a little harder to do, but faster. In some ways it gives even better appearance. The gray primer is just there as a point of reference to add contrast between the black port holes and Bulwark to see if any work needs to be done to clean up the squareness.
BTW- I have working on my main website "copying" the Blog content to the main website. The Blog is still there. I probably will not do anything with it. I just found that the software for the Blog can be time consuming so I am putting all of my build logs on the main site. I invite you to take a look and see. I am caught up with the Trinidad copy and I have one more page to go on the Sultana copy. But I think that you all will find it looks better. I am asking for feedback on the website if any of you so kind to offer.
Re: OcCre Santisima Trinidad Build Log
I guess you could say that the upper bulwark area is a solid sheet of very thin ply which I guess you can say that is a initial "plank" as it forms the foundation for the main planking. The hull underneath will have one layer as the upper and lower planks are really thick - if I remember around 2mm thick. It is not like a veneer final planking as on some ships. Even the upper planking is a 2mm thickness.
Thanks for the compliments. I remember, I was going to demo a step process of making the eyebolts. Need to do that. It is really not a glamorous task.
Re: OcCre Santisima Trinidad Build Log
The wood is much stiffer to begin with. It would have done better soaking it more. In this case, I ran hot water for about 30 seconds on the end of the plank that needed bending the most and just held the bend in my hand for a while. However, this is a very shallow bend. The next plank will be curving around the bow at a very sharp turn, so I will need to let that soak for about 30 min.
The wood is much stiffer to begin with. It would have done better soaking it more. In this case, I ran hot water for about 30 seconds on the end of the plank that needed bending the most and just held the bend in my hand for a while. However, this is a very shallow bend. The next plank will be curving around the bow at a very sharp turn, so I will need to let that soak for about 30 min.
Re: OcCre Santisima Trinidad Build Log
Hi everyone,
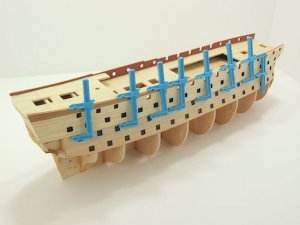
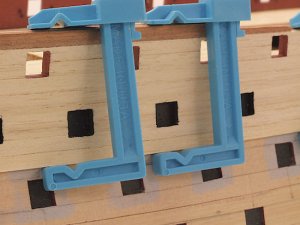
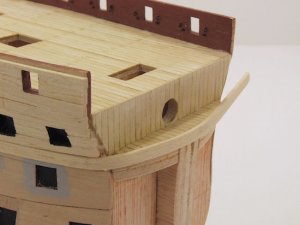
This evening, I glued one planking strip as shown with the clamps. The Clamps were bought at www.modelexpo-online.com. They have if I remember two sizes. The image (Planking 10) shows the extreme amount of Plank Bending to achieve the best results for the bow. The excess will be cut off at midpoint of the stem. The Planking Strip was soaked in hot water for about 15 minutes and then bend with hand very carefully. Then made same method again carefully until bent shape was desired. It is very easy to break this wood so be careful.
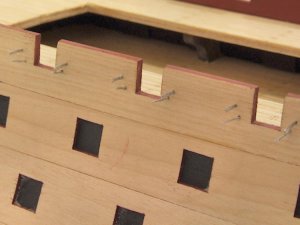
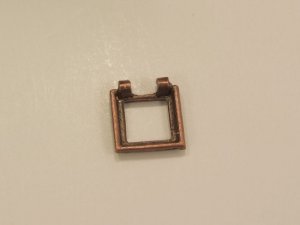
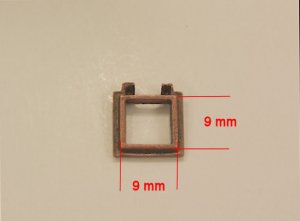
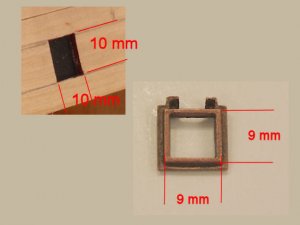
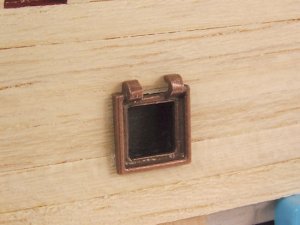
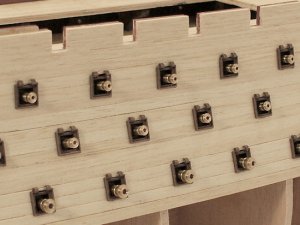
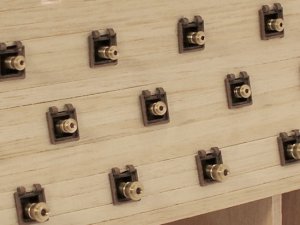
Next I demonstrate the Gun Port openings. I found out by omission of not studying parts that the Gun Ports a slightly smaller than the laser cut Gun Ports. I have an image that demonstrates that the laser cut Gun Port openings are exactly 10mm x 10mm. The rear of Gun Ports frames (metal) have a flange that is exactly 9mm x 9mm. You must take care when Planking to remove only the amount of wood for the Gun Ports so not to remove too much. It is an easy oversight to cut out the Gun Port openings in the Plank to match the same size as the lazer cut Gun Port Openings. This you need to be aware.
Re: OcCre Santisima Trinidad Build Log
Well, I whole hearted made the mistake. I am having to go back to each gun port to add a tiny shim to either top or bottom. This shim will most likely never be seen as the gun port will hide it, but the shim is necessary. Thank goodness this is only on one row that I figured this out. I still have the rest of the hull on one side to make the pre-correction to and I have not touched the other side of the hull. It goes back to it is so easy for (at least me) to assume that the designer of the model has taken all of this into account.
Well, I whole hearted made the mistake. I am having to go back to each gun port to add a tiny shim to either top or bottom. This shim will most likely never be seen as the gun port will hide it, but the shim is necessary. Thank goodness this is only on one row that I figured this out. I still have the rest of the hull on one side to make the pre-correction to and I have not touched the other side of the hull. It goes back to it is so easy for (at least me) to assume that the designer of the model has taken all of this into account.
Re: OcCre Santisima Trinidad Build Log
There are a few admissions I must make at the risk of revealing my ignorance of Gun Ports and lids.
1) I do not have any resources available (at the moment) to know what type, style, shape of gun port to make.
2) the preceding comment therefore lends to not knowing what material to use and how to make them to look reasonable accurate.
I am open to suggestions and experience here !
Re: OcCre Santisima Trinidad Build Log
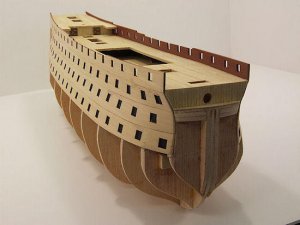
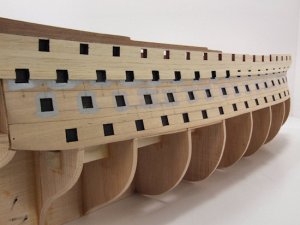
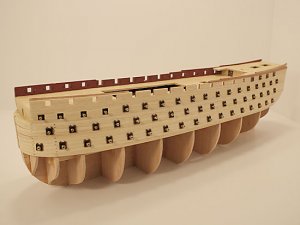
It has been about a month or more since I have posted. The progress has been slow, but at last I have the starboard side of the upper planking completed as well as dry fitting all the cannon lids and drilling out the holes so that the brass cannons will fit correctly. This picture only shows the 1st deck added. Now, I am on to the port side and started the planking there.
I have learned a few new tricks to planking that does not take as long. Like yesterday, I already planked 4 strips and have the ports already cut out in one day. The first attempt took me a whole week - So, I am learning some techniques that are allowing me to become quicker and more efficient at what I am doing. When both sides are done, then I will progress to the lower planking on both sides.
Re: OcCre Santisima Trinidad Build Log
Well, sometime things in life change around and so does the hobbies. Nothing major going on at household, just summer and things need to be done outside. I have to add walking to my daily routine (yulk) per docs wishes. this takes time, plus other things around the house. Then work lately has been demanding and when I sit down and look at the ship, I say to myself - I don't know if I feel like doing this tonight or not.
But, I am making good progress.
I must tell you like I mention to others that I am basically lazy and I must confess that I look for the easy way out (of my building ships).
Lets say that I am getting tired of cutting out over 120 gun ports with the thickest planking I have ever worked with in my life !!!! The stuff is hard as a brick and there is NO easy way to do this step, but to do it. I have two more rows of 17 to 18 gun ports to cut out and I will finally be finished with that task.
Re: OcCre Santisima Trinidad Build Log
I am back to cutting out Gun port openings. I think that in about a week, or less, I should have all the ports open, then I can progress to planking the lower hull !!<
I am back to cutting out Gun port openings. I think that in about a week, or less, I should have all the ports open, then I can progress to planking the lower hull !!<
Re: OcCre Santisima Trinidad Build Log
I have almost completed the gun ports on star and port sides, and then onto the so called dreaded Lower main planking. This is a single planking job, but those 5mm thick planks are tough to deal with.
I have almost completed the gun ports on star and port sides, and then onto the so called dreaded Lower main planking. This is a single planking job, but those 5mm thick planks are tough to deal with.
Re: OcCre Santisima Trinidad Build Log
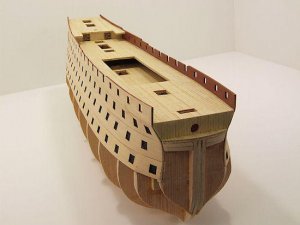
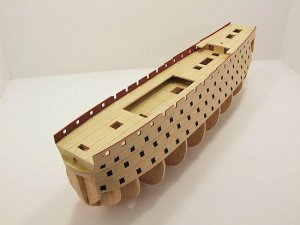
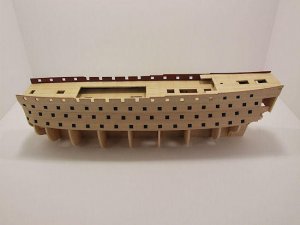
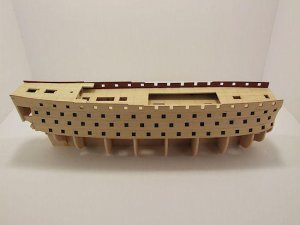
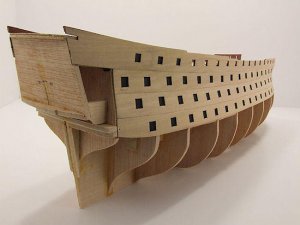
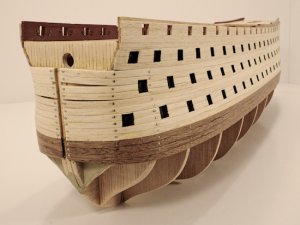
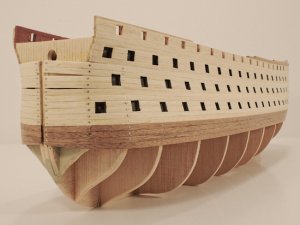
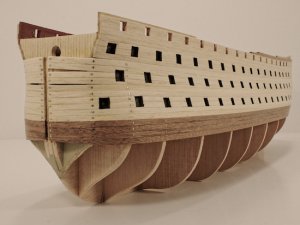
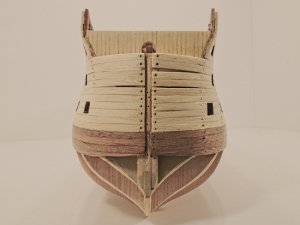
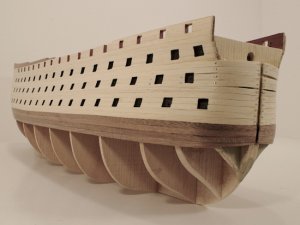
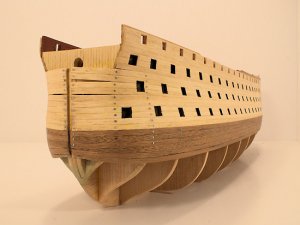
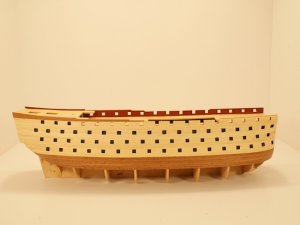
It has been a while at least 2 to 3 months since I have posted an results. I have been working on this ships upper planking. Up until now, there has not been too much to report. But, I have gotten to the point that I have BOTH sides of the upper planking done and all the Gun Ports cut out.
The pictures just show that the Guns and Frames are temporarily set in place and are not glued in yet. This comes later in the build. However, the Guns and lids needed to be fitted before I could move on.
The next step is to start planking the lower hull.
Re: OcCre Santisima Trinidad Build Log
OK !!! So, it has been a while since I have posted here. I thought I would never get back to ship. There has been a lot going on here. First I had to find my build log. It was way down in page number 9. But that is ok, at least I found it. My wife and I went back to the Philippines. Fortunately we missed the Typhoons - we made it back before that happened to us.<br/>
If you look hard enough, I am sure that some of you will find some problems, but I am satisfied with my work - that counts - for me at least.
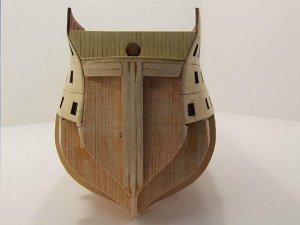
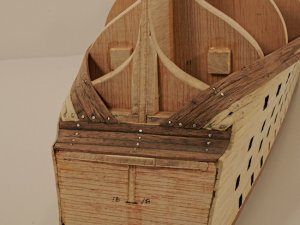
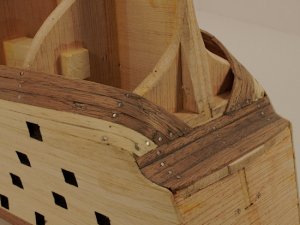
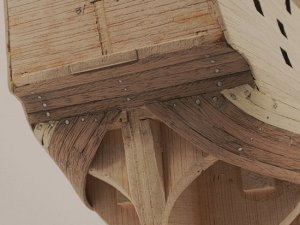
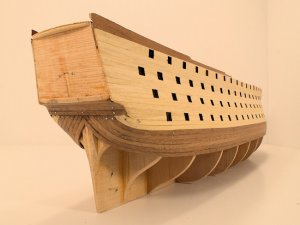
Anyway, I am well underway with the lower planking. The thick wood (single planking) is really a challenge to deal with. It takes a lot of time and patience to get the wood to bend in the manner of which you want it. I have patience, but not THAT much. Sometimes the wood starts to crack just a little and I back off - you really can't tell. But, the good news is that the area in the pictures that you see will be "covered up" with wales so I am not worried too much. At least I have a nice smooth transitions. I only focus on the stern and not the bow. I have not even glued nor bent the wood for the bow as that will come later. Now that I have 3 pieces on each side, now I will glue the rest of the (3) on each side to the hull and focus on the bow. After that I will need to determine the way I am going to plank the rest of the hull. On this ship, you really have to plank the first section the way I have it (according to the directions) and the images that came with the book - but we all know that we can deviate from this. I decided to stick with the known factors. I am well pleased with what I have here so far. I am sure that someone that has more experience and has a nice wood bender (hot iron) would be able to accomplish it better, but I only bend it using hot water and my hands.
It is good to be back working on the Trinidad again.


