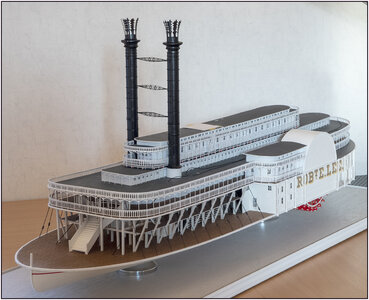
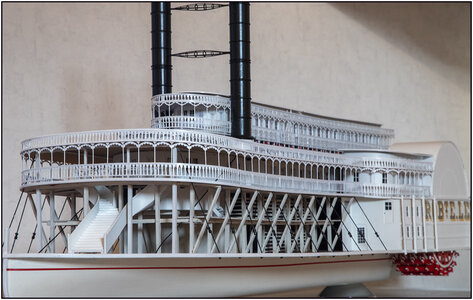
Paddle Steamer Robert E. Lee, scale 1:96, scratch build by the Alan L. Bates drawings [COMPLETED BUILD]

And the long right and left railings and draperies designed.
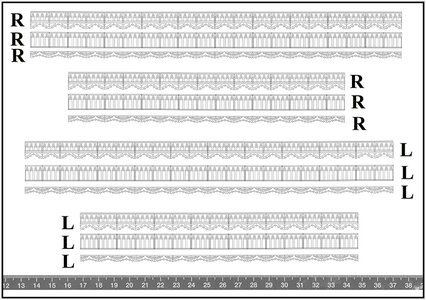
168 RailingOrnament4.jpg
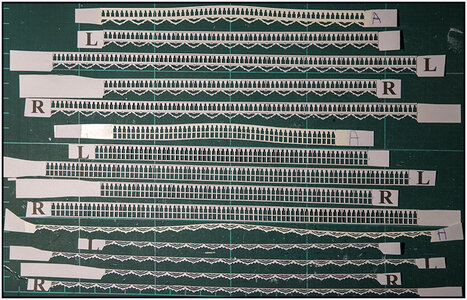
I made them in 2 parts. Then I can shift them a little bit when applying, if the arches just do not quite match with the position of the uprights. Although all the wholes for the uprights where drilled with a gap of 12,5mm, sometimes 0,5mm + or -, gives a shifting over the overall length.
Therefor I marked all the uprights on the molds, but over a length of almost 42 cm (16,5 inch) they can shift a little bit.
Each piece of example, with the length that fits between 3 uprights (=2 arcs), I could therefore stretch or shrink them when placing in Photoshop in respect of those marked uprights. And then 0.5mm + or - again makes a lot of difference.
In my last post #80 by the picture of the model, you can see by the top mold, the uprights from the letter A to the left are shifted. Its only a fraction of a mm, but it disturbs the visibility. That mold is adjusted.

Now all the cutting can start.
Regards, Peter.
 
Last edited:
Always interesting when you're bumping into your limit. That's what I got with the drapery now.
The Texas has the more luxurious cabins. That's why I wanted to make the drapery a little more luxurious. With an extra bale.
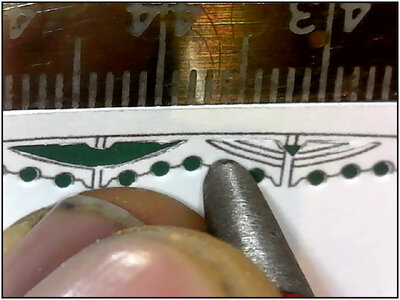
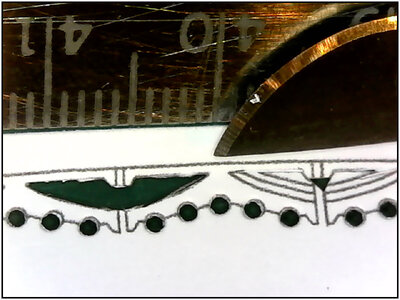
But that's just a little too much for cutting out with the scalpel knife.
I can buy a set of smaller blades, but I only have to shoot a little bit and there's another loose bale. As in this first little piece already happens.

169 RailingOrnament5.jpg
Cutting the wholes with the hollow-point. At the right the ornament with the extra bale. And the start op the cutting.
(The black lines disappear when sprayed.)

170 RailingOrnament6.jpg
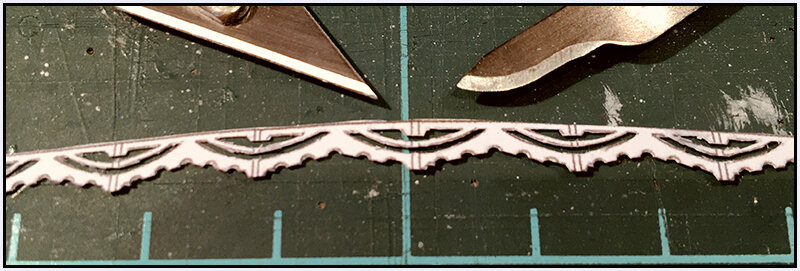
But the scalpel knife brings me to my limit.
Then we go forward as designed for the Main Cabin Skylight.
Regards, Peter
 
Last edited:
Does Size Really Matter? . . . . YES!
I didn't like it and it was my honor that I couldn't cut out the drapery with the extra bale.
Still bought some new blades: smaller and pointed.
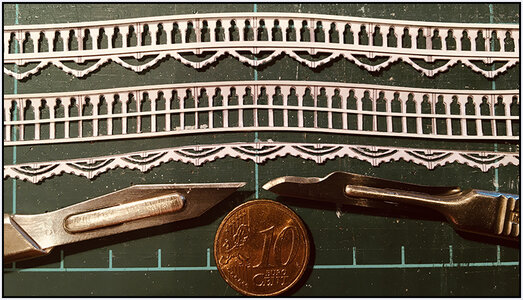
New attempt, it takes a lot of concentration with lots of small intermediates, but the result pleases me. A single bale got loose, but I could glue that with CA.
(Also here: if you find him later, I'll give you a Bossche Bol.)
171 RailingOrnament7.jpg
172 RailingOrnament8.jpg
3 strips done, 15 to go.
Regards, Peter
 
Last edited:
congrats for this extreme work - I could never do it in such a way - unbelievable o_O
- did you ever think about photo etching such repeating forms?
Thanks Uwe.
In an earlier post I talked about considering photo etching. But with the chemicals, I didn't like it. But in this way, that's how we get there. And: plenty of time!
Regards, Peter
 
Last edited:
At first, thanks for all the likes and reaction. I needed them the last days!.

Build up by cutting away:
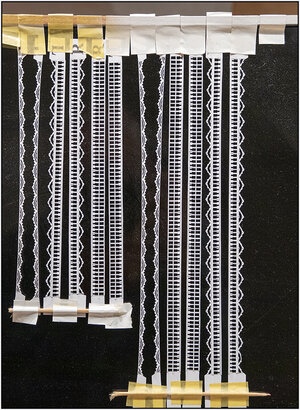
After a small week of staring through my glasses and working on the square mm, the cutting is finally finished. Because there was asked what steps I had to take to get to the end result, I took some pictures of the intermediate steps.
Due to the experience with the railing and draperies around the Hurricane Deck, I have merged these 2 for the roof of the Texas. And on the cutout, I glued the roof frame. That'll save a lot of trouble by the applying around the roof.


First I started with glueing the handrail on top of the strips. I makes them also a bit stiff, more easy to handle.
Hitting out of the rounds:
174 RailingOrnament10.jpg

Cutting out "the neck":
175 RailingOrnament11.jpg

Cutting out "the hull":
176 RailingOrnament12.jpg

Cutting out "the half moon":
177 RailingOrnament13.jpg

Cutting off the top and bottom"
178 RailingOrnament14.jpg

Fitting the roof frame between railing and drapery:
179 RailingOrnament15.jpg

Sprayed: (The already sprayed part from the front.)
180 RailingOrnament16.jpg

That makes this collection witch has to be fit on the model:
181 RailingOrnament17.jpg

But still to spray this parts tomorrow morning:
182 RailingOrnament18.jpg
Everything a bit fixed among themselves, otherwise it flies in all directions when spraying.

Phoe, I'm glad this cutting job's over.
Regards, Peter
 
Intermediate (stair)step:
It is my habit to have 1 or 2 follow-up steps in my mind of the part of the construction I am working on. Saves the necessary demolition work afterwards.

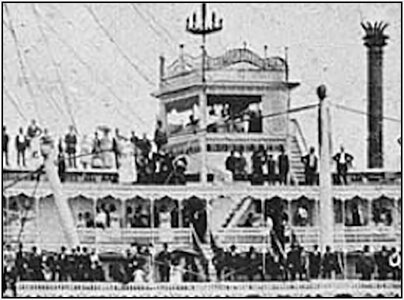
If the railings and draperies are fitted, only the roof of the upper Skylight had to be given a drapery. That drapery is also around the roof of the PilotHouse. You can see that in the drawings. Only those are the Robt's. E. Lee I.
On the picture of the II that I use for further construction, the skylight roof only has a white frame. So that saves another one last piece of carving.
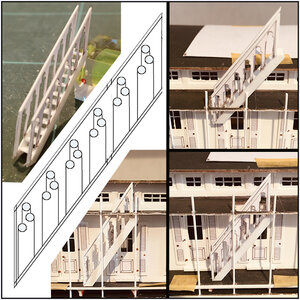
However, a staircase can be seen that runs from the Texas towards the PilotHouse. It's behind the railing and drapery. So I won't be able to get to that later.
The stairs in the picture have no handrail.
183 Trap1.jpg
From the roof of the Hurricane goes 2 stairs to the Texas. They do have handrails.
I decided to provide all the stairs with a handrail.
In Photoshop my design of the railing skewed.
From Evergreen strip the stair frames and steps made and the railings cut out.
Then the installing plan must also work: making a stairwell in the roof of the Texas, cross the stairs through the stairwell to apply. Between the uprights of the railing, this was no longer possible. Luckily the plan worked.

Below in the design, with clockwise around it, from top left:
-the stairs with steps of 4mm wide,
-stung through the stairwell,
-in place,
-sprayed
184 Trap2.jpg
The 2 pieces of tape are on the spot where 2 steps come and where I have to interrupt the railing.

Can I get back to the railings and draperies.
Regards, Peter
 
Last edited:
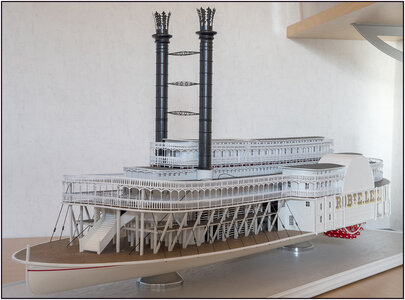
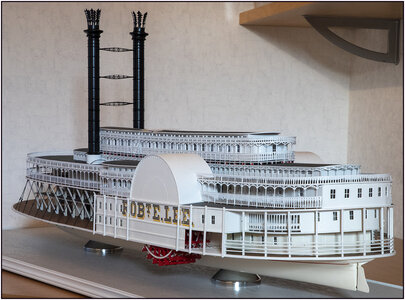
I thought I'd finish putting on the 15 strips before. But what I was afraid of: when applying the ornaments around the Main Cabin Skylight I bumped with my hand into the railing at the rear ............ almost 20 cm railing out of his decency. That took me over an hour of renovation. It can go on again, but it may well be that at the end of the build I renew a part of that.

But now he's standing there like this:
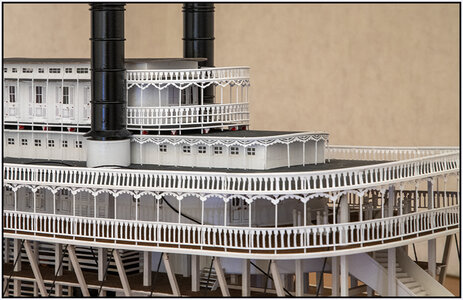
185 05-11-1.jpg
186 05-11-2.jpg

And en-profile:
187 05-11-3.jpg

From a slightly higher perspective, where the roofing gives a nice contrast with the white parts:
188 05-11-4.jpg

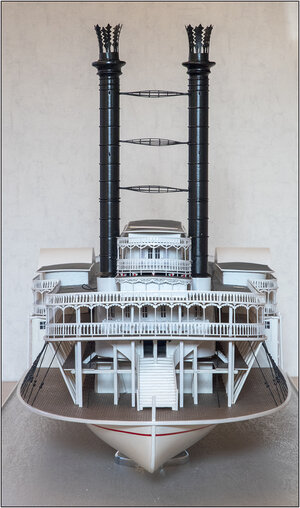
And once from a lower point of view:
189 05-11-5.jpg
With also a nice view on the Main Stairs.

On to the last step in height: the Pilot House. Then I can start working out the details from top to bottom.
Regards, Peter
 
I thought I'd finish putting on the 15 strips before. But what I was afraid of: when applying the ornaments around the Main Cabin Skylight I bumped with my hand into the railing at the rear ............ almost 20 cm railing out of his decency. That took me over an hour of renovation. It can go on again, but it may well be that at the end of the build I renew a part of that.

But now he's standing there like this:
View attachment 189814
View attachment 189815

And en-profile:
View attachment 189816

From a slightly higher perspective, where the roofing gives a nice contrast with the white parts:
View attachment 189817

And once from a lower point of view:
View attachment 189818
With also a nice view on the Main Stairs.

On to the last step in height: the Pilot House. Then I can start working out the details from top to bottom.
Regards, Peter
Beautiful and precise build with precise detailing. PT-2 (Rich)
 
Out of ignorance and desire to know how you obtained the very fine and precise cutting and if you used an 3-D printer for any of the parts at any point?????? PT-2 (Rich)
Actually, I am a old fashion builder with wood and some Evergreen. Just with my saws, knifes, sandpaper, files, etc.
The only new technology is the use of Photoshop for disigning some parts. And printed on 120gr paper for the parts wich are not able to cut out of tin wood (triplex) or the Evergreen.
Beautiful and precise build with precise detailing. PT-2 (Rich)
And thanks very mutch for the complement!
Regards, Peter
 
Actually, I am a old fashion builder with wood and some Evergreen. Just with my saws, knifes, sandpaper, files, etc.
The only new technology is the use of Photoshop for disigning some parts. And printed on 120gr paper for the parts wich are not able to cut out of tin wood (triplex) or the Evergreen.

And thanks very mutch for the complement!
Regards, Peter
I greatly respect those who depend upon their own hand skills and not mechanical/electrical tools. PT-2 (Rich)
 
I really appreciate your work, it is very interesting and skilled, don't forget it is cardboard. :)
Thanks Jim,
You meant: don’t forget, the railing and drapery is cardboard ;)?
All the other parts (minus the windowframes) are plywood/triplex, from the thickest in the hull till the thinnest for the walls.
Regards, Peter
 
Last edited:
Back
Top