-

Win a Free Custom Engraved Brass Coin!!!
As a way to introduce our brass coins to the community, we will raffle off a free coin during the month of August. Follow link ABOVE for instructions for entering.
-

PRE-ORDER SHIPS IN SCALE TODAY!
The beloved Ships in Scale Magazine is back and charting a new course for 2026!
Discover new skills, new techniques, and new inspirations in every issue.
NOTE THAT OUR FIRST ISSUE WILL BE JAN/FEB 2026
- Home
- Forums
- Ships of Scale Build Logs
- Super Detailing Static Models / Other Genres
- Super Detailing Static Models
You are using an out of date browser. It may not display this or other websites correctly.
You should upgrade or use an alternative browser.
You should upgrade or use an alternative browser.
Pocher 1:4 Ducati Panigale S ‘Anniversario’ + ‘Final Edition
Chapter 16, step 2:
Chain:
To finish this chapter immediately, also the chain mounted.
It is useful to put an iron wire through the opening in the swingarm and then pull the chain through. In 2016, I was messing around before the chain got through:
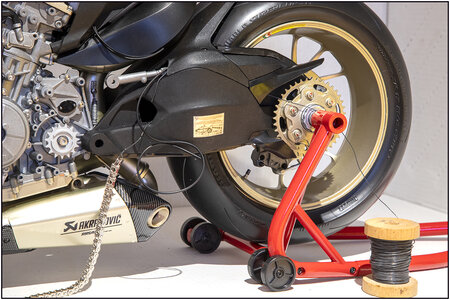
It's a broken chain. The two ends are connected with a separate link:
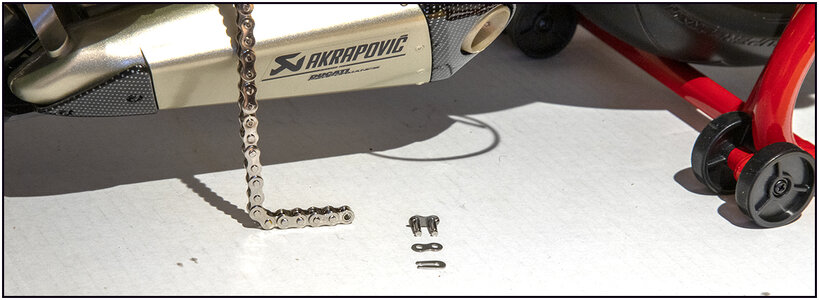
And fixated with the split spring. The close side ALWAYS towards the direction of rotation of the chain.
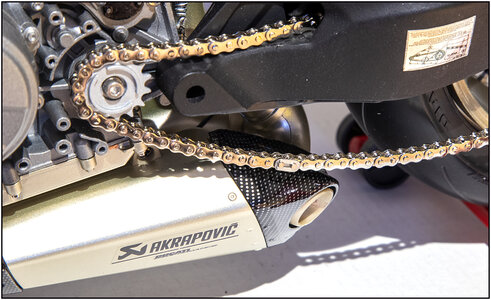
The chain-tension sticker indicates how tight the chain should be. We don't do that until the rear suspension is fitted and set. This can be done in 2 positions:
-road, with a low position of the rear frame with seating;
-race, with a higher position.
Now with the included key the chain already put something on tension:
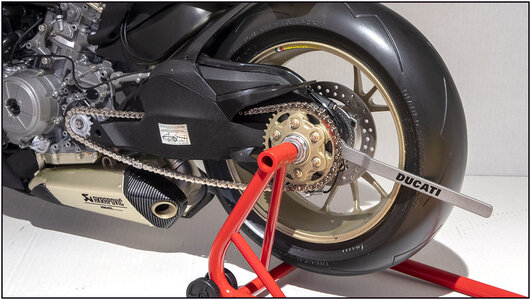
In post #56 you can see the ring with the large rectangular teeth. To rotate the eccentric axis to strain the chain.
Regards, Peter
Chain:
To finish this chapter immediately, also the chain mounted.
It is useful to put an iron wire through the opening in the swingarm and then pull the chain through. In 2016, I was messing around before the chain got through:

It's a broken chain. The two ends are connected with a separate link:

And fixated with the split spring. The close side ALWAYS towards the direction of rotation of the chain.

The chain-tension sticker indicates how tight the chain should be. We don't do that until the rear suspension is fitted and set. This can be done in 2 positions:
-road, with a low position of the rear frame with seating;
-race, with a higher position.
Now with the included key the chain already put something on tension:

In post #56 you can see the ring with the large rectangular teeth. To rotate the eccentric axis to strain the chain.
Regards, Peter
I worked towards this phase because lately I noticed that working on 3 models brought me the wrong tension. I wasn't "comfortable in my own skin" anymore. That's why I decided to give the Duc a break for the time being and focus all attention on building The Lee to it's finish.
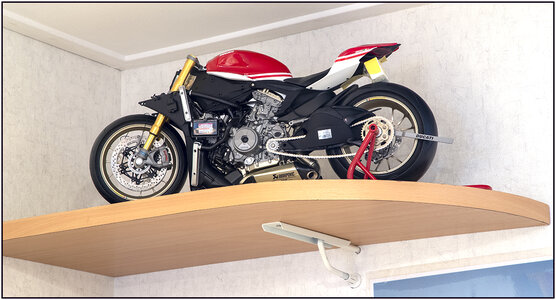
The Duc now stands tall, dry and safe and can always look at it with an oblique eye.
Regards, Perter

The Duc now stands tall, dry and safe and can always look at it with an oblique eye.
Regards, Perter
Incredible details and work Peter!
Thanxs Don,Incredible details and work Peter!
Yes, it is a great kit.
Regards, Peter
I can understand that Peter,I worked towards this phase because lately I noticed that working on 3 models brought me the wrong tension. I wasn't "comfortable in my own skin" anymore. That's why I decided to give the Duc a break for the time being and focus all attention on building The Lee to it's finish.
View attachment 202050
The Duc now stands tall, dry and safe and can always look at it with an oblique eye.
Regards, Perter
Personally I prefer to work on one model at a time otherwise I tend to get stressed.
Looking forward to your return to this magnificent project when you are ready.
Cheers,
Stephen.
Stephen,I can understand that Peter,
Personally I prefer to work on one model at a time otherwise I tend to get stressed.
Looking forward to your return to this magnificent project when you are ready.
Cheers,
Stephen.
Thanxs for the understanding. You will see the pop-up of the build-log in a few weeks
Hi Kent,Looks great. I hope that I can do as well.
Kent
You also thanks. When you build step-by-step with dry-fit and always looking a few chapter ahead, you will make it.
The lines from the RF and RG tubes, are sometimes difficult to follow in the drawings. On the last page of the manual, there is a list of all the tubes and wires. For myself a wrote by every tube the page and chapter of the beginning and the end. And between which parts it is connected.
With the advantage you are going through the whole manual and get a better impression of the whole build. And you got the impression on with side the tube must go the later connection.
For example: (P=page, C=chapter)
RF-01: P5-C3-U07 / P6-C5-T08.
On page 6, the ending of this tube, Pocher wrote also the beginning, but by the beginning on page 5 not where it's ending
 .
.When you need help, let me know.
Regards, Peter
Thanxs Ted!Excellent work Peter!
Will look forward to seeing the final assembly when you come back to it.
Ted
You will see, as also wrote above, popping up.
Regards, Peter
Last edited:
hi Peter, I love your report. I'm also making the same model but much slower. I'm trying to follow the manual of the transcript kit from autograph, but without this kit (1500 euro is to much for me) . So this model will take me months to complete because i have to make a whole lot of parts myself, but that is the fun of it. I also bought the hardwarekit of Paul Koo. here are some foto's of my project (as far as the engine now :-( ) but the details are stunning.

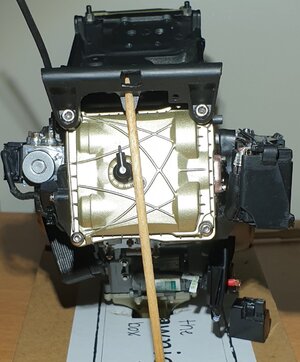
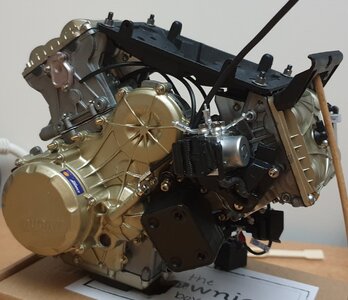
wish you luck with finishing your ducati, it is a beautiful motorcycle. vriendelijke groeten, Lex Blok


wish you luck with finishing your ducati, it is a beautiful motorcycle. vriendelijke groeten, Lex Blok
Hi Lex,hi Peter, I love your report. I'm also making the same model but much slower. I'm trying to follow the manual of the transcript kit from autograph, but without this kit (1500 euro is to much for me) . So this model will take me months to complete because i have to make a whole lot of parts myself, but that is the fun of it. I also bought the hardwarekit of Paul Koo. here are some foto's of my project (as far as the engine now :-( ) but the details are stunning.
View attachment 203113
View attachment 203115
View attachment 203117
wish you luck with finishing your ducati, it is a beautiful motorcycle. vriendelijke groeten, Lex Blok
Thanxs for the reply. Your build looks great. Al lot more details, chainged bolts, labels etc.
Beside the kit from Paul Koo, I have also looked to the Autograph details. It is a beautifull challenge to make them scratch yourself. And the satisfaction is even greater.
Go on!
Regards, Peter
Thanxs for the reply and all the likes . Regards, Peterit's amazing
Hi all,
Soon the build will go on.
Thanks to a tip of @Dean62 , perhaps interesting for some of you:

 uk.pocher.com
History comes alive again.
Regards, Peter
Soon the build will go on.
Thanks to a tip of @Dean62 , perhaps interesting for some of you:

HK114 Lotus 72D - 1972 British GP, Emerson Fittipaldi - 1:8 Scale Kit
HK114, Lotus 72D - 1972 British GP - Emerson Fittipaldi - 1:8 Scale Kit, Pocher, 1:8 Model Car Kits, 1:8 Scale
Regards, Peter
Last edited:
I love your Ducati Peter...but I am also a big fan of the Lotus 72 F1 cars! I can’t wait until they release it!!!Hi all,
Soon the build will go on.
Thanks to a tip of @Dean62 , perhaps interesting for some of you:
History comes live again.
HK114 Lotus 72D - 1972 British GP, Emerson Fittipaldi - 1:8 Scale Kit
HK114, Lotus 72D - 1972 British GP - Emerson Fittipaldi - 1:8 Scale Kit, Pocher, 1:8 Model Car Kits, 1:8 Scaleuk.pocher.com
Regards, Peter
Hi Kent,There is also a Final Edition of the Panigale coming Summer of 2021. I have reserved it, the F2 and also a LeGrand Mercedes 300 SLR from ScaleAutoWorks.com
I saw also all these models passing by. Gives me choise-stress
For you a lot of work to do in your ‘garage’ in the 2nd half of ‘21 and the 1th in ‘22 (or longer).
Also stuff to see them growing in build-logs
Here some links for the MB 300 SLR:

LEGRAND Mercedes-Benz 300 SLR ''Uhlenhaut Coupé'' scale 1/8 kit blue - LEMKE LEGRAND 1:8 Collection
Meta Description for LEGRAND Mercedes-Benz 300 SLR ''Uhlenhaut Coupé'' scale 1/8 kit blue
Regards, Peter
The Mercedes SLR Uhlenhaut is from company LeGrand, part of Lemke from GermanyThere is also a Final Edition of the Panigale coming Summer of 2021. I have reserved it, the F2 and also a LeGrand Mercedes 300 SLR from ScaleAutoWorks.com
Hi Uwe,The Mercedes SLR Uhlenhaut is from company LeGrand, part of Lemke from Germany
Looks like a very interesting kit.....
They have been working on the development for over a year and I have been looking the site from the beginning. The possible price has already gone up in that time.
Regards, Peter


