POF Hayling Hoy 1760 Modelship Dockyard

Joined
Apr 16, 2021
Messages
44
Points
103

Hello my name is Arne and I’m from the Netherlands. Have been watching in silence at al the great builds over here.

This will be my first build log. Build some ships before like the Endeavour j class. But never a POF build. I still have a lot to learn. Hope this build log will help with that and also slows me down by knowing people are watching so it has to be good.

I ordered the Hayling 15-08 and today it was at the door. I also received a mail that there was a issue with under cutting on some sheets. Unfortunately my kid was one of them. New sheets will be send, great service.
257625A0-F681-4C6A-A56C-6975BC923A17.jpeg


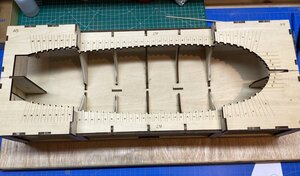
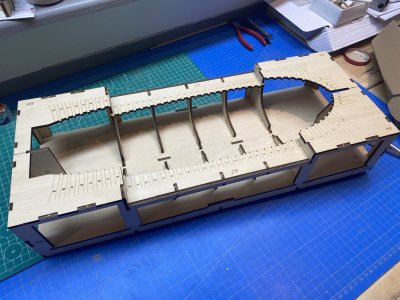
Could not resist to start with the platform. Everything went smoothly, only dry fitted at the moment.
FD766644-02F6-4DDA-8AE2-4EDDBD7A6BE8.jpeg

Arne
 
Today glued the platform today. After glueing there was a little twist in the platform. After I installed a board everything was nice and square

E36F0B25-A7FE-42E6-9C41-4F3BCC9E3E51.jpeg

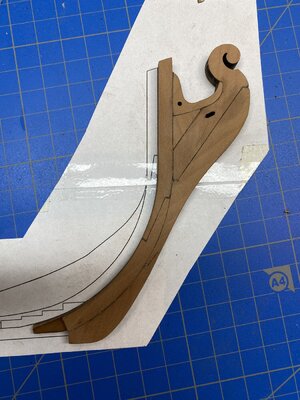
The board with the first pieces of the keel had some under cutting. But with a little more effort the came loose. The cutting line of these pieces is not square but a little incline. I suppose this has something to do with the laser?
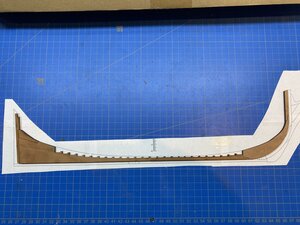
The drawing of the keel was not printed yet. On my home printer it took 6 sheets to get it to the right size. This is not ideal but luckily at the office we have a big printer.
To get a nice fit the cutting lines had to be made square. I suppose I have to do this for every piece?

BC9A7A01-E07B-4604-B520-FF1D39400F16.jpeg
Thanks for the likes and the comments
 
Today glued the platform today. After glueing there was a little twist in the platform. After I installed a board everything was nice and square

View attachment 325852

The board with the first pieces of the keel had some under cutting. But with a little more effort the came loose. The cutting line of these pieces is not square but a little incline. I suppose this has something to do with the laser?
The drawing of the keel was not printed yet. On my home printer it took 6 sheets to get it to the right size. This is not ideal but luckily at the office we have a big printer.
To get a nice fit the cutting lines had to be made square. I suppose I have to do this for every piece?

View attachment 325853
Thanks for the likes and the comments
Hi., started mine a few days ago. Looks good doesn't it. Started on the keel today but could not find a full scale template, never occured to me to scale up the one I found. So thanks for that. I have auto cad and can import pdfs and mess about with it. Looking forward to seeing how you manage the frames. I started on frame zero yesterday. Stuffed it up.
 
Hi., started mine a few days ago. Looks good doesn't it. Started on the keel today but could not find a full scale template, never occured to me to scale up the one I found. So thanks for that. I have auto cad and can import pdfs and mess about with it. Looking forward to seeing how you manage the frames. I started on frame zero yesterday. Stuffed it up.
Hi Colin, looks good indeed. You can find a full scale template of the keel on the flash drive and through the google drive link Victor send you.
 
Hi, thanks for that. I did find the template, just never occurred to me to print at A3, comes out fine then.
If you print directly from the pdf and choose the 100% scale option it will print correctly on any size paper, including 8 1/2 x 11
 
What are you doing about the "burned" edges of many pieces? Are you going to leave them dark or sand them down to bare pear wood? The flats are very easy to sand but the edges, especially the curved edges, would not be easy to sand without changing the shape of the pieces or rounding over the edges.
 
What are you doing about the "burned" edges of many pieces? Are you going to leave them dark or sand them down to bare pear wood? The flats are very easy to sand but the edges, especially the curved edges, would not be easy to sand without changing the shape of the pieces or rounding over the edges.
I sand them down, because of the laser cut the pieces are not square so everything already have to be sanded. Scrapping with a knive also works with out changing the shape.
 
Last week not much was done on the ship. Been away on a 7 day mtb race for charity. Came home yesterday and this morning I had a look at the frame assembling. I’m not sure if I understand everything right.
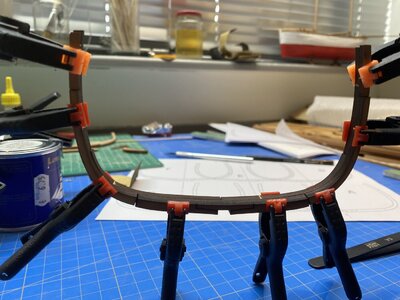
I took al the pieces of frame A. I think the outcome has to look something like this.
88D94777-586E-4E2B-8516-4C5A6F37818F.jpeg
EA47F4A2-F2F5-4F18-8630-7D044FE7AB26.jpeg
The manual is talking about a A side and a B side. How do I know which side is which?
 
Last week not much was done on the ship. Been away on a 7 day mtb race for charity. Came home yesterday and this morning I had a look at the frame assembling. I’m not sure if I understand everything right.
I took al the pieces of frame A. I think the outcome has to look something like this.
View attachment 329198
View attachment 329199
The manual is talking about a A side and a B side. How do I know which side is which?
we had a similar discussion only a short time ago in this topic by @colin100 mainly on the second page

I hope thi sis helping already - otherwise we will clarify
 
Maybe you could also take a look at my building log of my La Salamandre, the first POF-kit I made, where I showed the making of frames much in detail.
Please take a look also at the following posts in this log - it is hiopefully explaining several things, you have to check how it is looking like on your kit of the Hayling Hoy (which I do not know in detail)

 
Back
Top