Alex, I'd like to know a blow by blow instruction on how you did your water.
I've watched a number of vids at YouTube but the more I see the better I will be able to emulate the process. Thanks.
There are, of course, a variety of options people use for creating the sea in a bottle. Plasticine seems to be the most popular, my old friend Gil Charbonneau of Maine preferred that. FIMO may be a form of plasticine, I’m not sure. I only used it once, for a kit review, because that’s what came with the kit. On Gil’s advice, I put the plasticine in the bottle and set it in a cool oven. In a few minutes the plasticine melted and adhered evenly to the glass. I lifted the bottle out carefully, to keep the liquified clay from slopping around inside the bottle and as it cooled, gently chopped up the surface with a coat hanger wire to simulate an active sea surface. Otherwise, the surface would have been perfectly smooth. I only did this once.
As I wrote before, my preferred material is glazing putty, colored with artists oils. First, I determine how much putty will be needed adding water to the bottle until the level looks right and measuring the amount in a measuring cup. It’s important to be sure the bottle is completely dry before putting any putty or clay in. The I mx the appropriate amount, usually with a bit extra, with the blue and orange paint. A cheap pie plate works well as a mixing container and a small putty knife and/or flat blade screwdriver work well for the mixing. It’s hard to know how much paint to add, so start with small amounts and add more as needed. It is possible to add too much and the putty begins to take on a texture like cake frosting. This will be hard to work with and will have plenty of excess oil that could eventually damage your model. It’s best to go for consistent color.
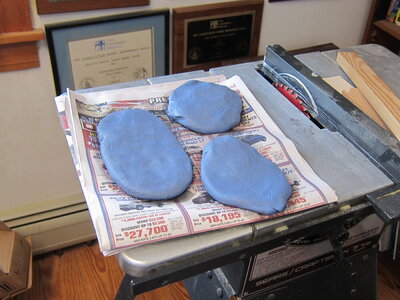
Even if you are careful with the amount of paint, the colored putty will still have some excess oil. This eventually will darken the natural wood surfaces, such as the deck, and the sails will also darken and become translucent. Once this is consistently through the model it gives it an appealing “aged” look and the oil will probably help preserve it. But unfortunately, this takes place over a few years and the sails change color in random order, so for quite a while it looks really awful. To keep this from happening I form the putty into a “patty” and leave it on newspapers to let the excess oil seep out. I usually set it out after mixing it, leave it overnight and turn it over on fresh paper I the morning. The following evening it gets turned once more and by the next morning it can be used. You want to keep some oil in the mix so it will be malleable, but not enough to mess up the model.
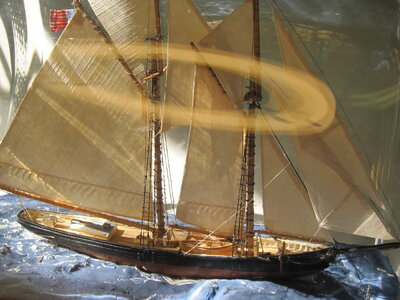
You can insert the putty into the bottle in a number of small pieces laid out along the “bottom” of the bottle, but I prefer rolling it into” snakes” that can be dropped through the neck and mashed down where you want the putty. You will have to make some kind of “putty tamper”. Most of my tampers are simply wooden disks sawn from dowels, drilled in the center and epoxied to coat hanger wire. Some tools made this way have lasted me over 40 years. The tamping process is time consuming but rewarding in the long run. The quality of the work done here will plays an important part of the atmosphere and mood inside where your ship will be seen and enjoyed. There are two goals at once; make the adherence of the putty to the glass even and free from “cracks” in putty or gaps. And make the water surface even and smooth as possible. Sure, you want some motion along the surface, but a ship skimming along an even sea is more compelling that a vision of the vessel out on wild night just before the masts are about go by the board.
Attached is a picture of three putty “patties” soaking the oil out. Please note the color is not that dark. It does darken a bit on its own over time. This was for a trio of 2 liter schooners from a few years ago.


")


")

 s." It is available from Amazon for $14.95. His numerous photos showing how to put the ship in the bottle are worth far more than the price of the book.