
You are using an out of date browser. It may not display this or other websites correctly.
You should upgrade or use an alternative browser.
You should upgrade or use an alternative browser.


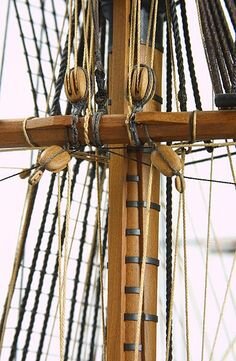
Should not ratlines sag a bit between shroud ropes? At least all old sail ship contemporary depictions show them that way.

Hi ,can you post an image please how those ropes look like beetwen the ratlines?Any tips or tricks on keeping rat lines from sagging too much between shrouds?
Thanks for any help.
Yes, You are right. A little downwards but not Upwards, of which Y has seen-even from Experiences Builders. el CAPIShould not ratlines sag a bit between shroud ropes? At least all old sail ship contemporary depictions show them that way.
Attachments
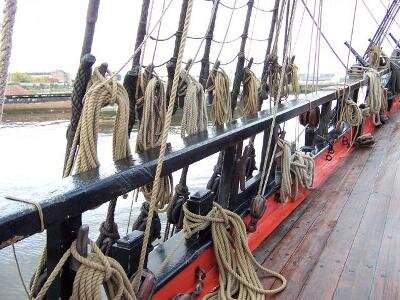
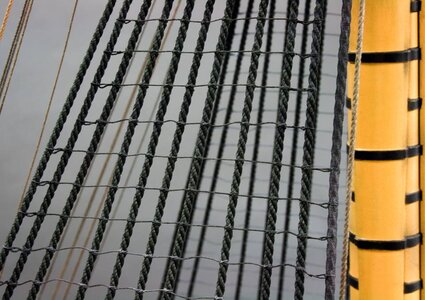

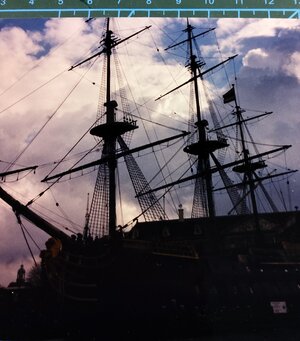
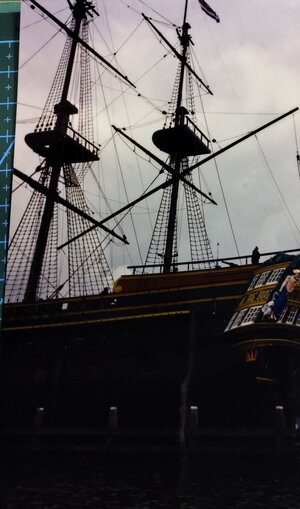
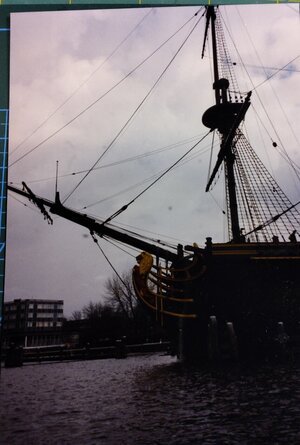
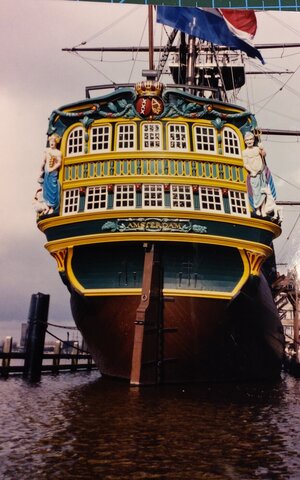
Here's some pictures I took of Amsterdam in Amsterdam harbor (the Netherlands). You can see howthe ratlines look for comparison.
Attachments
Last edited:

hello Mike,
I am adding ratlines to my Hannah right now. As for the sag. For me anyway...
I pull my clove hitch to just before it tightens. With my finger n thumb I hold on to both shrouds on each side of the ratline and then finish pulling the slack out. Because if I don't do this when i tighten the clover it tends to pull both shrouds close together. Then once I release you show that sag you are talking about. So holding the shrouds the way I do prevents too much sag from happening.
Mario

I had a tough time getting consistency in my ratlines on my Bluenose. I think until I do a few hundred more I won’t be happy with the results. Between the various tricks, tips, jigs and knots I still scratch my head trying to figure out how long the thread should be, do I start on the left or right, should the thread go above or below, do I do a cow hitch on the outside shrouds....I’m as they say all fingers and thumbs wondering when I should use tweezers, what kind to use, when do I try and tighten which knot ...
The problem for me in doing ratlines is tension in the thread which makes it difficult to get a uniform appearance. But in a completed model the ratlines are not really noticed.
I think the ratlines are one of the most visible features. There is a handy jig that basically uses two flat pieces of wood and small clamps to hold all your shrouds in place while you tie the lines. You just reposition the jig as you move up the shrouds.The problem for me in doing ratlines is tension in the thread which makes it difficult to get a uniform appearance. But in a completed model the ratlines are not really noticed.

more and less my way of doing it- I only used cloth pin insteed.
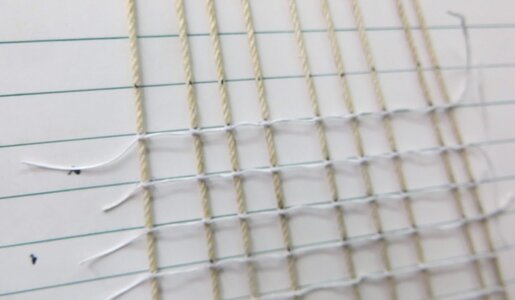
I don't have any problem keeping the shrouds in place or getting the right ratline spacing. It is with the appearence ratlines themselves. With thin thread, gravity is not a strong enough force to give the ratlines the right drape. Rather it is tension in the thread the determines how it looks. You can see the curvy ratlines in the attached photo. Any suggestions on how to solve this problem would be appreciated.I think the ratlines are one of the most visible features. There is a handy jig that basically uses two flat pieces of wood and small clamps to hold all your shrouds in place while you tie the lines. You just reposition the jig as you move up the shrouds.

'I did make a mixture of water white glue -if wanting a color . add it. Mix well and add your finger to the mix and starting from the top going down. not only the futtock but the shroud too. give it over all- Do not press too much, now your futtock will all the right swing downwards. It will also glue the fuz on the shrouds too, and conserve the riggenI don't have any problem keeping the shrouds in place or getting the right ratline spacing. It is with the appearence ratlines themselves. With thin thread, gravity is not a strong enough force to give the ratlines the right drape. Rather it is tension in the thread the determines how it looks. You can see the curvy ratlines in the attached photo. Any suggestions on how to solve this problem would be appreciated.View attachment 205176
I might try this on my next build.'I did make a mixture of water white glue -if wanting a color . add it. Mix well and add your finger to the mix and starting from the top going down. not only the futtock but the shroud too. give it over all- Do not press too much, now your futtock will all the right swing downwards. It will also glue the fuz on the shrouds too, and conserve the riggen
Having replaced ratlines for real on an old 70 foot ketch, the idea is to get them as taut and as straight as possible i.e. no sag. It's people going up and down them that cause the sag - the knots get a bit tighter. So, if modelling as just built - no sag. Otherwise, a bit of sag

So this is an example of using thin glue. El Capi mentioned using white glue thinned with water which I have had great results with. In this 1:96 model, I used very thin ca glue and treated each rat line as it was installed. If any part of a ratline was arching upward, I used a toothpick to put a tiny drop of ca on each of the 2 knots associated with that section, and then blotted it by pinching with a piece of cloth. Then as the glue was firming up, which happens pretty fast, I simply pressed down on that section with a small thin rod or toothpick which I kept in motion by rolling it left and right on that section. Once the glue is sufficiently set, the line will stay in a nice downward sag. Or straight was also fine if that's the best I could get. Once I have a dozen or more ratlines installed this way, I find I can easily go back and improve any bits that might have shifted as the work progressed. The model is now 10 years old, and everything is still holding up as you can see. I don't know that it matters in this current discussion, but these particular ratlines are actually not thread, but black monofilament. It was the only thing I could find at the time that came close to scale size for this model. So this technique obviously works even if the material isn't absorbent thread. Just the presence of the glue in the knots does the job. I think this process is probably a tiny bit easier with thread.

I USED CLOTH PINSI think the ratlines are one of the most visible features. There is a handy jig that basically uses two flat pieces of wood and small clamps to hold all your shrouds in place while you tie the lines. You just reposition the jig as you move up the shrouds.