
You are using an out of date browser. It may not display this or other websites correctly.
You should upgrade or use an alternative browser.
You should upgrade or use an alternative browser.

Rope coils for gun rigging or belaying pins?I feel a little embarrased having to ask this question,but here it goes. Can anyone give me a tip as to how to make neat rope coils. My attempts so far are terrible.

Theres a tutorial on You Tube about this.
.
.
Thanks for your reply. My problem is with gun rigging.Rope coils for gun rigging or belaying pins?

The direction of the coil, clockwise or counter to lay down will depend upon the hand of the hawser or line that you are using. Try both ways to match the hand and it will be easier for it to lay down naturally. If you moisten the hawser with watered down white glue, make the coil on waxed paper to dry either open or under a weight is should lay flat. Flemished coils were a spit and polish form unlike the Flemished long figure 8 which would be a working condition. Either will depend upon the presentation that you are giving. . . a ship at anchor or in harbor or one at sea in working conditions. Just my thoughts, PT-2I feel a little embarrased having to ask this question,but here it goes. Can anyone give me a tip as to how to make neat rope coils. My attempts so far are terrible.
OOPS. .. I should have said "round coils" in contrast to the long 8. PT-2The direction of the coil, clockwise or counter to lay down will depend upon the hand of the hawser or line that you are using. Try both ways to match the hand and it will be easier for it to lay down naturally. If you moisten the hawser with watered down white glue, make the coil on waxed paper to dry either open or under a weight is should lay flat. Flemished coils were a spit and polish form unlike the Flemished long figure 8 which would be a working condition. Either will depend upon the presentation that you are giving. . . a ship at anchor or in harbor or one at sea in working conditions. Just my thoughts, PT-2
Thanks I will try to find it. I never think to look on you tube. I think this is due to my age.Theres a tutorial on You Tube about this.
.
Many thanks for your info. As a novice I'm learning a great deal here.OOPS. .. I should have said "round coils" in contrast to the long 8. PT-2

A revelation to me was the discovery that the coil of rope is not the same piece of string as the one going through the blocks etc. (unlike in real life). make the coil off the model, put it on the deck and the tail of the working rope is lost in the coils somewhere.
Here's one video. I've seen much the same done around a set of pins on a board instead of the finger.
Here's one video. I've seen much the same done around a set of pins on a board instead of the finger.
Here is a flat rope coil method for cannons.
There was another video of someone using the flat plastic of CD/DVD cases (instead of the metal saucers) to sandwich the coil around the central hub. I thought that was better because you're able to see what you are doing.
There was another video of someone using the flat plastic of CD/DVD cases (instead of the metal saucers) to sandwich the coil around the central hub. I thought that was better because you're able to see what you are doing.
Many thanks for thatA revelation to me was the discovery that the coil of rope is not the same piece of string as the one going through the blocks etc. (unlike in real life). make the coil off the model, put it on the deck and the tail of the working rope is lost in the coils somewhere.
Here's one video. I've seen much the same done around a set of pins on a board instead of the finger.

Try also this - it is working well
 www.modelerscentral.com
This is a principle way - so you can adjust with the material what you have in your workshop.
maybe also with a pin or nail and two round plastic sheets / disks (best would be transparent) , in the center a hole for the nail.
You have to clamp the beginning of the rope between one disk and the nail and now you can coil the rope between the two disks (distance of the disks is exactly the thickness of the rope)
When you reached the necessary diameter of your rope-coil you can lift or remove one plastic sheet and fix the coiled rope with some wooden glue.
How To Make Deck Rope Coils | Complete Guide | Modelers Central
Modelers Central offer you insight from Australian Master Modeler Leon Griffiths, who shows us his tips on how to make the deck stand out with deck rope coils.
This is a principle way - so you can adjust with the material what you have in your workshop.
maybe also with a pin or nail and two round plastic sheets / disks (best would be transparent) , in the center a hole for the nail.
You have to clamp the beginning of the rope between one disk and the nail and now you can coil the rope between the two disks (distance of the disks is exactly the thickness of the rope)
When you reached the necessary diameter of your rope-coil you can lift or remove one plastic sheet and fix the coiled rope with some wooden glue.
Last edited:
- Joined
- Apr 10, 2020
- Messages
- 94
- Points
- 143

There is another very simple method. Fix a sticker, with the sticky side up, on your desk. Press the end of your rope on the sticker and turn it around the center pressing it onto the sticker, until you reach the desired diameter. Fix the coil with diluted woodglue. After some time you can remove the coil from the sticker and place it where you want.
Job done.
Job done.
Thanks Jan, thats brilliant.There is another very simple method. Fix a sticker, with the sticky side up, on your desk. Press the end of your rope on the sticker and turn it around the center pressing it onto the sticker, until you reach the desired diameter. Fix the coil with diluted woodglue. After some time you can remove the coil from the sticker and place it where you want.
Job done.
So, I guess I have to be contrary and ask really the dumbest question. All the neat and tidy coils must have been done this way obviously when the cannons are not being used, but in heavy warfare, that would not be the case, but rather messy???
. . . and as a matter of fact, while I was searching for the exact same thing so that I can rig my cannons, I saw a picture of a deck of a ship that even though the Cannons were NOT being used, the lines were just 'heaped' or coils piled up - so, which also begs the question, is the practice of coiling the ropes a 'real thing' or is this just something that a modeler started a long time ago. I am only curious and not trying to start a huge discussion about it.")
. . . and as a matter of fact, while I was searching for the exact same thing so that I can rig my cannons, I saw a picture of a deck of a ship that even though the Cannons were NOT being used, the lines were just 'heaped' or coils piled up - so, which also begs the question, is the practice of coiling the ropes a 'real thing' or is this just something that a modeler started a long time ago. I am only curious and not trying to start a huge discussion about it.
I'm beginning to like this idea.I think I could reach a compromise hereSo, I guess I have to be contrary and ask really the dumbest question. All the neat and tidy coils must have been done this way obviously when the cannons are not being used, but in heavy warfare, that would not be the case, but rather messy???
. . . and as a matter of fact, while I was searching for the exact same thing so that I can rig my cannons, I saw a picture of a deck of a ship that even though the Cannons were NOT being used, the lines were just 'heaped' or coils piled up - so, which also begs the question, is the practice of coiling the ropes a 'real thing' or is this just something that a modeler started a long time ago. I am only curious and not trying to start a huge discussion about it.
- Joined
- Oct 22, 2020
- Messages
- 14
- Points
- 48

I think a lot is perspective Donnie. Flemish coils are for looks yeah, but it's also tidy (irl). The line won't run right out if you need it NOW but that's not when it's done. It looks good and is easy to get around, hard to hang things up on to a point. You're not going to trip on it. Boatshow yes, offshore no.
"Heaped" lines you simply don't see on a professional level, not even in the back of the container. And many times what may appear to be coils are usually efficiently flaked out and ready to run lines. Other times lines may be stored in bolsters. Like Flemish coils, it all depends on the circumstance.
I was working on a boat once tidying up, doing things like this and such, (boredom may have to do with Flemish coils as well) and overheard someone on the dock say I was getting things "shipshape". Had 5k nm sailing offshore and had never heard that other than as a cliché. They had the opposite perspective that I did but they nailed exactly what I was doing nonetheless.
It's not just modelers imo...
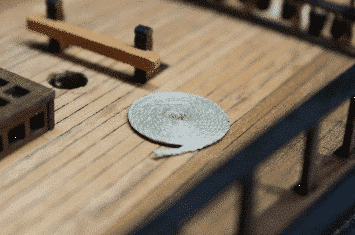
My method was very simple. I made a platform on a stick with a 2cmx2cm square piece of double faced tape. You lay a length of line onto the tape with he line in one hand and guide the press the line onto the tape by tapping it with the tip of your razor knife into the coil shape. Then coat the coil with two applications of PVA glue. Allow to dry. Pry the coil off the tape with the edge of the razor knife. Glue them to your deck. Done! I made both left and right hand coils. The coils shown are 1:100 scale, a bit smaller than most people need.


NIce precise coils. Two questions: are the carriages from kit parts? If not their scale and thickness of side material is larger than in scale with the cannons. The other is that when the cast rings were placed on later barrels they are on top of the cascabel and not below as you show in this trial setup. You will be working very small and fine to cut and place the cap squares over the trunnions and their securing components. An excellent reference for the carriages is Building 18th Century Artillery by Damian Siekonic. While for almost full sized guns, these are for salute guns, the principles and proportions are the same. I like to think about the space required for a gun crew of 14 around a 32 pounder, including the gun captain at the breach and two boys running powder charges and shot from below. That leaves six or seven present in lines on each side of the gun with their assigned loading/firing/reloading procedures. WHOOMMMMM!!!! PT-2My method was very simple. I made a platform on a stick with a 2cmx2cm square piece of double faced tape. You lay a length of line onto the tape with he line in one hand and guide the press the line onto the tape by tapping it with the tip of your razor knife into the coil shape. Then coat the coil with two applications of PVA glue. Allow to dry. Pry the coil off the tape with the edge of the razor knife. Glue them to your deck. Done! I made both left and right hand coils. The coils shown are 1:100 scale, a bit smaller than most people need.
View attachment 189254
View attachment 189255
View attachment 189256