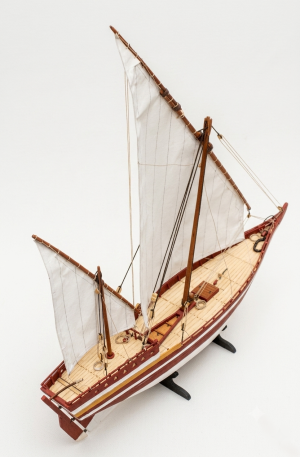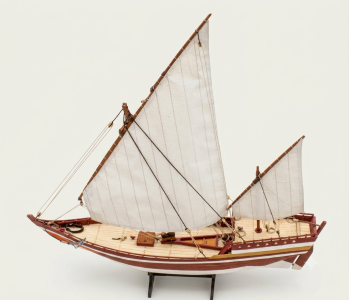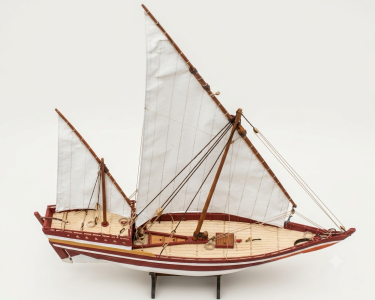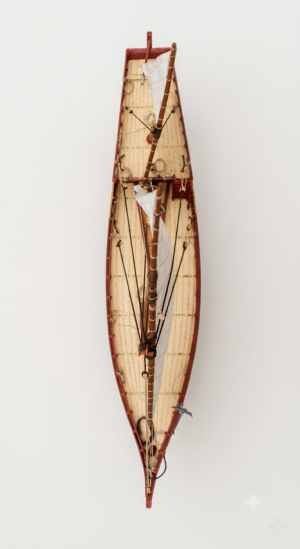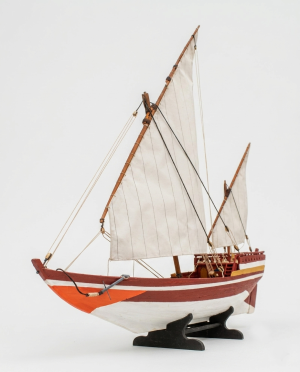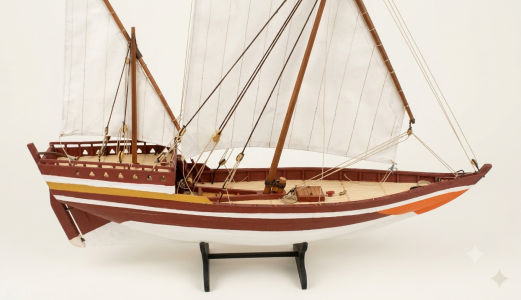



I disappeared, busy with one thing and another, including my book, which the publisher is dragging out. There are also medical issues with tests and all that... I'm still stuck on my partial model of L'Hermione, as I'm getting the right tools (electric jigsaw, router, and accessories), because without them it was difficult to make the model. Meanwhile, I started and finished a little boat, which I'll describe below.
THE SAMBUK
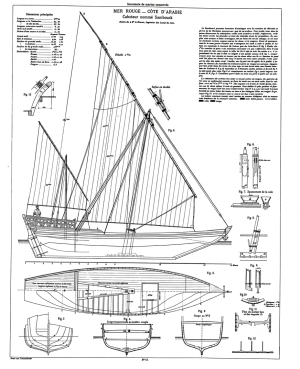
Information about many old ships, whether fishing vessels, merchant ships, or defense vessels, has been preserved thanks to naval architects and navigators who recorded information about the ships they designed or who took measurements and made drawings of the vessels they encountered on their voyages. Among the latter, the V.A. Paris of the French Navy stands out. During his travels, he drew, measured, and specified the notable characteristics of many ships; one of them is the Sambuk, which he recorded as Sambouk on the plate on page 63 of his book.
The Sambuk is one of the most emblematic and largest types of dhow (traditional wooden sailing ships with triangular lateen sails). Its origins date back centuries to the Arabian Peninsula. Historically, it was the ship most commonly used for pearl fishing in the Persian Gulf, coastal trade in the Red Sea, and navigation in the Indian Ocean. The following is a translation of the notes on V.A.'s plan. Paris, which has been used as the basis for the presented model
1. History
"The Sambuk bears a strong resemblance to the boats of Muscat and the Malabar Coast, especially regarding its rigging. It has a deck, but in the smaller sizes only the handrails (side walkways) are covered, and in the space between them are movable benches upon which planks are placed for passage. The larger ones have a full deck, and their frames, placed end to end with the struts, have no other fixed joints than the walers and the inner lining. Among the early models, there is a stern bulkhead that does not reach all the way to the deck, where the height of the beams increases; it is made of planks raised about 0.70 m, joined to vertical crossbeams, which are embedded in the keel block and whose ends are attached to the opposite sides by ropes. The Arabs often paint their ships in bright colors, the shades of which are indicated as follows: black, yellow, white, green, red."
The Red Sea Sambuk is distinguished from other Eastern vessels by very defined structural features that should be reflected in the frames and rigging: the stern. Unlike dhows with pointed ends, the Sambuk has a flat or transom stern, a clear influence of the Portuguese and English ships that arrived in the Indian Ocean from the 16th century onwards. The stem has a very pronounced and elegant curve forward, ending in a stylized and sharp extension at the bow (a characteristic ram known as a "bisha").
2. References:
"Souvenirs de marine – Plans ou Dessinns de Navires” V.A. François-Edmond Pâris – Gauthier Villars, Imprimeur 1882
"The Dhow: An Illustrated History of the Dhow and Its World" – Clifford W. Hawkins (1977)
"Sons of Sinbad" – *Alan Villiers (1940)
"The Sailing Craft of Western Saudi Arabia" – D.A. Agius (2007)
"Les dhows de la mer Rouge" – Henri de Monfreid
“Traditional Arab Sailing Ships” Taylor, James

 en.wikipedia.org
3. Datos generales
País: Arabia Saudí
Tipo: Dhow
Función: Pesca / Comerciante
Longitud: 22,95 m (306 mm)
Manga: 5,40 m (72 mm)
Profundidad: 2,70 m (36 mm)
Longitud total: 22,95 m (306 mm)
Altura total: 24,23 m (323 mm)
Escala: 1:75
4. Preparación del modelo
La idea y la información se tomaron del libro "Souvenirs de marine – Plans ou Dessinns de Navires" de V.A. François-Edmond Pâris, así como del artículo "Ghanjah Arabiga" en el número de noviembre de 1986 de la revista Modelarz, escrito por Marian Sobel. A partir de los planos y líneas del casco, se obtuvieron las secciones de los bastidores, la forma de la cubierta y las dimensiones de las velas y el aparejo.
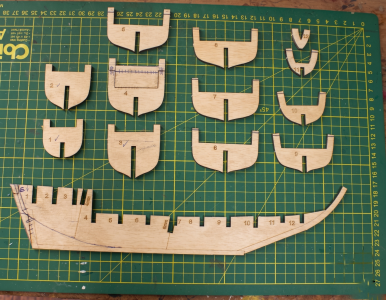
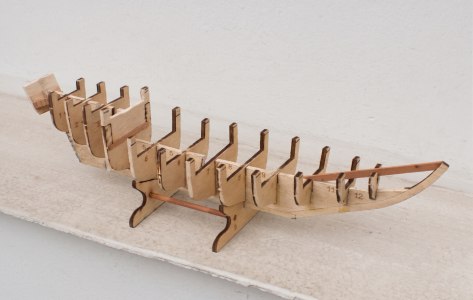
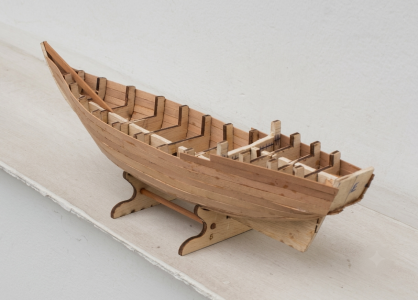
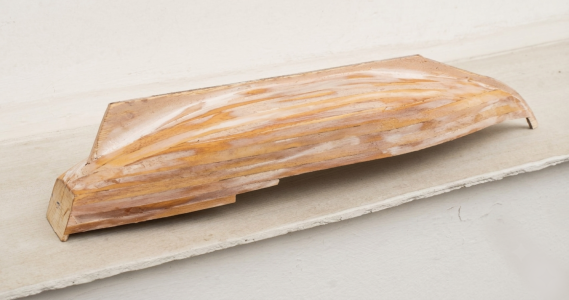
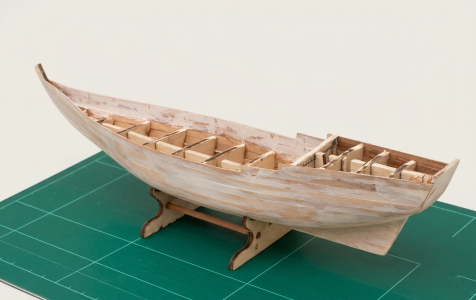
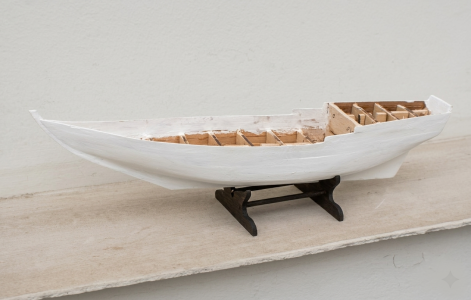
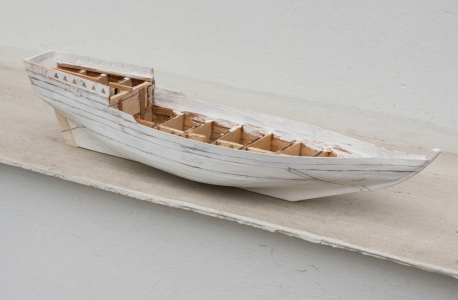
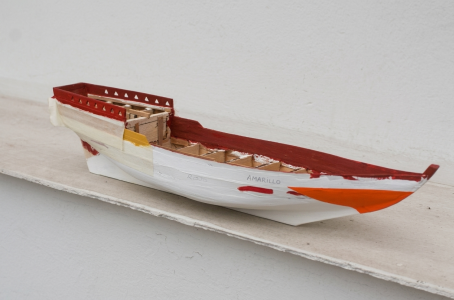
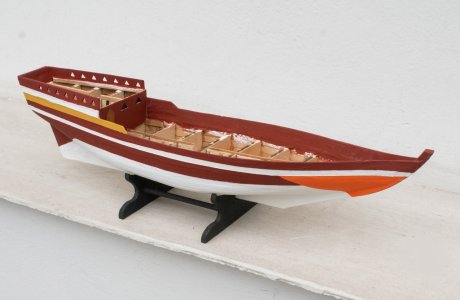
El diseño del bastidor fue dibujado en AutoCAD y, utilizando el archivo PDF resultante, la quilla falsa, los marcos y las partes principales se cortaron con láser en contrachapado de 3 mm. Otras piezas, como la plataforma y los paneles, fueron cortadas de contrachapado de 1,2 mm. Una vez disponibles las láminas cortadas, las piezas se desmontaron, lijaron y colocaron. Luego se pegaban con cola blanca, se realineaban y se montaban sobre un marco. Los marcos se lijaban para darles forma y prepararlos para recibir las tablas de 1x6 mm. Las dimensiones de otros elementos más pequeños se tomaban y redibujaban a mano alzada en un cuaderno de bocetos. Las tablas de 1x6 y 1x5 mm se cortaron y lijaron con papel de lija de grano #120, con gran cuidado, ya que un grosor de 1 mm deja poco margen para errores o tablas desalineadas. Se aplicó una capa de masilla hecha de pegamento blanco, serrín y un poco de masilla para madera. Tras secarse, se lijó de nuevo y se aplicó una capa de pintura blanca, seguida de otra vez más de lijado. Las imperfecciones se reparaban con masilla acrílica blanca, que, tras endurecerse, se lijaba con papel de lija de grano #320.
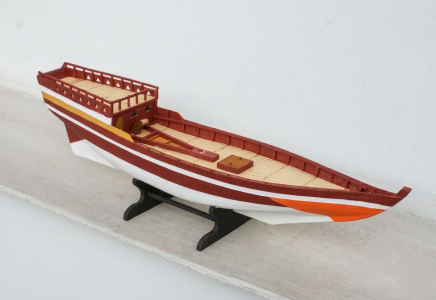
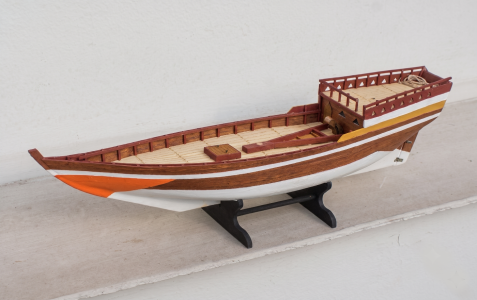
La línea de flotación estaba marcada y, con un lápiz de punta fina, se dibujaban las franjas a pintar en varios colores en el casco. La cubierta, hecha de una lámina de 1,2 mm, fue cortada con láser. Antes de colocarlos en los marcos, había que lijar los bordes para que encajaran perfectamente contra el interior del casco. Se preparó la entrada a la bodega, la entrada a la cabina, la barandilla de la cabina de popa y otras características.
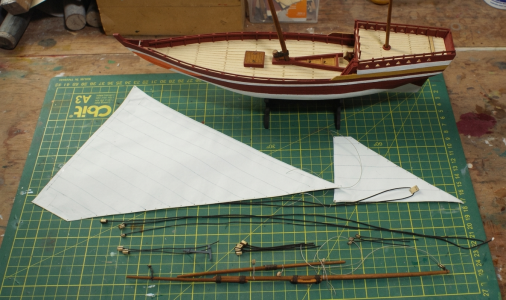
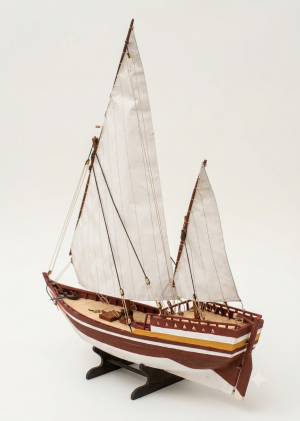
Se fabricaron el mástil mayor y el mástil de mesana, así como las vergas. Se perforaron los agujeros del aparejo y todo se teñió con un color caramelo diluido en un 50% con alcohol. Se hicieron las amarraciones correspondientes, y los bloques y bloques se montaron. Luego, el casco submarino se pintó de blanco y las superficies superiores se pintaron de naranja, amarillo, blanco y granate, siendo este último predominante en toda la superestructura del modelo. Se decidió que el modelo tendría todas sus velas completamente extendidas, y estas se prepararon con papel blanco blando de aproximadamente 40 g/m², pintado en ambos lados con pintura acrílica blanca. Tras secarse, las velas se cortaron a medida, dejando un borde de 4 mm para permitir un hilo de refuerzo y el pliegue. Luego, con un fino lápiz negro, se simularon las costuras. Tras pintar, se colocaron la cubierta, la cubierta de popa, la proa terminada, la escalera, el timón, los accesorios de cubierta y otros elementos.
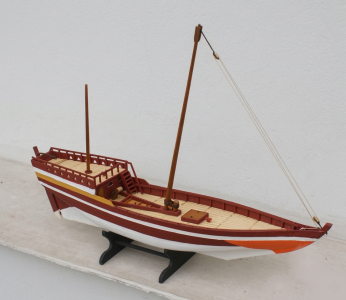
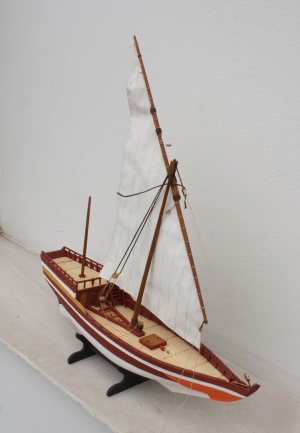
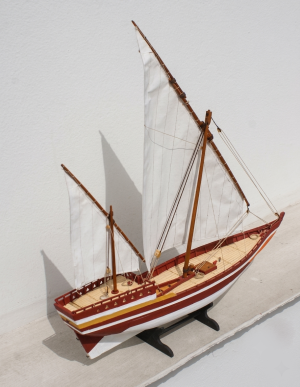
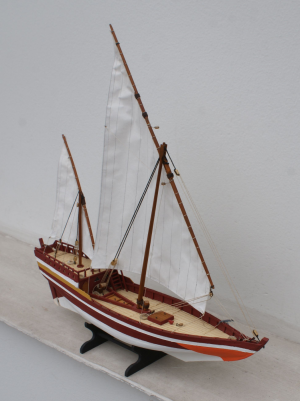
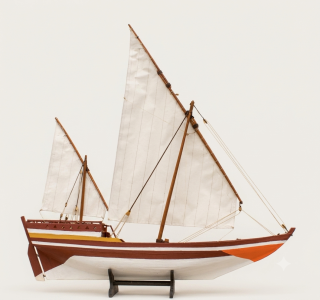
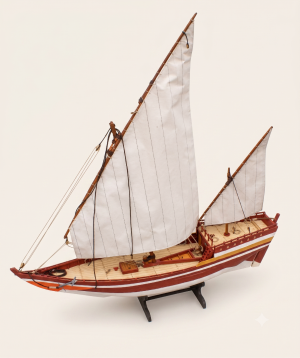
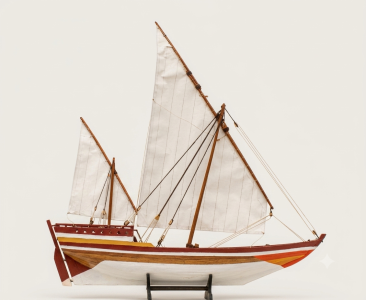
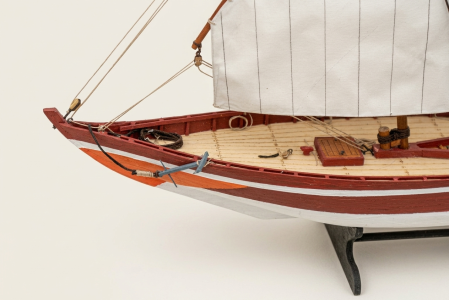
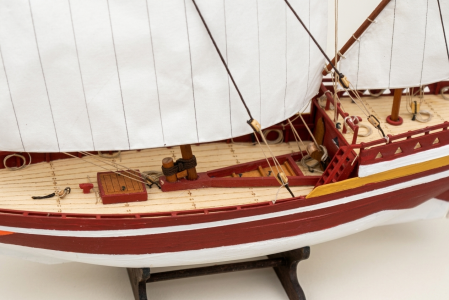
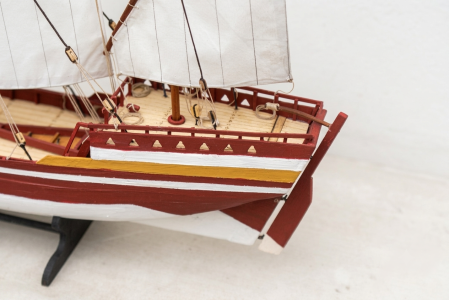
Se erigió el mástil mayor, alineándolo con la línea central y su inclinación delantera; También se erigió el mástil de mesa. Las primeras líneas utilizadas fueron los forestays, hechos con hilo de 0,5 mm de color oscuro debido a que estaban encerados con betún de Judea. Para otras líneas, se utilizó hilo grueso y de color blanco roto. A continuación, se aparejaba y aseguraba la del mástil mayor, ya con la vela montada, con drizas. El mismo procedimiento se seguía con la vela de mesana y la. Una vez asegurados, se colocaron los obenques, cuidando que los mástiles se alinearan con la línea central. Finalmente, se montaron otros elementos como el ancla y se retocó la pintura. A continuación se muestran fotos del modelo terminado.
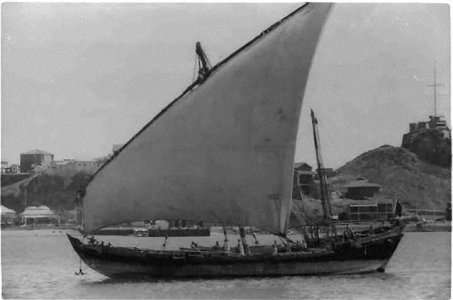
THE SAMBUK
Information about many old ships, whether fishing vessels, merchant ships, or defense vessels, has been preserved thanks to naval architects and navigators who recorded information about the ships they designed or who took measurements and made drawings of the vessels they encountered on their voyages. Among the latter, the V.A. Paris of the French Navy stands out. During his travels, he drew, measured, and specified the notable characteristics of many ships; one of them is the Sambuk, which he recorded as Sambouk on the plate on page 63 of his book.
The Sambuk is one of the most emblematic and largest types of dhow (traditional wooden sailing ships with triangular lateen sails). Its origins date back centuries to the Arabian Peninsula. Historically, it was the ship most commonly used for pearl fishing in the Persian Gulf, coastal trade in the Red Sea, and navigation in the Indian Ocean. The following is a translation of the notes on V.A.'s plan. Paris, which has been used as the basis for the presented model
1. History
"The Sambuk bears a strong resemblance to the boats of Muscat and the Malabar Coast, especially regarding its rigging. It has a deck, but in the smaller sizes only the handrails (side walkways) are covered, and in the space between them are movable benches upon which planks are placed for passage. The larger ones have a full deck, and their frames, placed end to end with the struts, have no other fixed joints than the walers and the inner lining. Among the early models, there is a stern bulkhead that does not reach all the way to the deck, where the height of the beams increases; it is made of planks raised about 0.70 m, joined to vertical crossbeams, which are embedded in the keel block and whose ends are attached to the opposite sides by ropes. The Arabs often paint their ships in bright colors, the shades of which are indicated as follows: black, yellow, white, green, red."
The Red Sea Sambuk is distinguished from other Eastern vessels by very defined structural features that should be reflected in the frames and rigging: the stern. Unlike dhows with pointed ends, the Sambuk has a flat or transom stern, a clear influence of the Portuguese and English ships that arrived in the Indian Ocean from the 16th century onwards. The stem has a very pronounced and elegant curve forward, ending in a stylized and sharp extension at the bow (a characteristic ram known as a "bisha").
2. References:
"Souvenirs de marine – Plans ou Dessinns de Navires” V.A. François-Edmond Pâris – Gauthier Villars, Imprimeur 1882
"The Dhow: An Illustrated History of the Dhow and Its World" – Clifford W. Hawkins (1977)
"Sons of Sinbad" – *Alan Villiers (1940)
"The Sailing Craft of Western Saudi Arabia" – D.A. Agius (2007)
"Les dhows de la mer Rouge" – Henri de Monfreid
“Traditional Arab Sailing Ships” Taylor, James
Ghanjah - Wikipedia
3. Datos generales
País: Arabia Saudí
Tipo: Dhow
Función: Pesca / Comerciante
Longitud: 22,95 m (306 mm)
Manga: 5,40 m (72 mm)
Profundidad: 2,70 m (36 mm)
Longitud total: 22,95 m (306 mm)
Altura total: 24,23 m (323 mm)
Escala: 1:75
4. Preparación del modelo
La idea y la información se tomaron del libro "Souvenirs de marine – Plans ou Dessinns de Navires" de V.A. François-Edmond Pâris, así como del artículo "Ghanjah Arabiga" en el número de noviembre de 1986 de la revista Modelarz, escrito por Marian Sobel. A partir de los planos y líneas del casco, se obtuvieron las secciones de los bastidores, la forma de la cubierta y las dimensiones de las velas y el aparejo.
El diseño del bastidor fue dibujado en AutoCAD y, utilizando el archivo PDF resultante, la quilla falsa, los marcos y las partes principales se cortaron con láser en contrachapado de 3 mm. Otras piezas, como la plataforma y los paneles, fueron cortadas de contrachapado de 1,2 mm. Una vez disponibles las láminas cortadas, las piezas se desmontaron, lijaron y colocaron. Luego se pegaban con cola blanca, se realineaban y se montaban sobre un marco. Los marcos se lijaban para darles forma y prepararlos para recibir las tablas de 1x6 mm. Las dimensiones de otros elementos más pequeños se tomaban y redibujaban a mano alzada en un cuaderno de bocetos. Las tablas de 1x6 y 1x5 mm se cortaron y lijaron con papel de lija de grano #120, con gran cuidado, ya que un grosor de 1 mm deja poco margen para errores o tablas desalineadas. Se aplicó una capa de masilla hecha de pegamento blanco, serrín y un poco de masilla para madera. Tras secarse, se lijó de nuevo y se aplicó una capa de pintura blanca, seguida de otra vez más de lijado. Las imperfecciones se reparaban con masilla acrílica blanca, que, tras endurecerse, se lijaba con papel de lija de grano #320.
La línea de flotación estaba marcada y, con un lápiz de punta fina, se dibujaban las franjas a pintar en varios colores en el casco. La cubierta, hecha de una lámina de 1,2 mm, fue cortada con láser. Antes de colocarlos en los marcos, había que lijar los bordes para que encajaran perfectamente contra el interior del casco. Se preparó la entrada a la bodega, la entrada a la cabina, la barandilla de la cabina de popa y otras características.
Se fabricaron el mástil mayor y el mástil de mesana, así como las vergas. Se perforaron los agujeros del aparejo y todo se teñió con un color caramelo diluido en un 50% con alcohol. Se hicieron las amarraciones correspondientes, y los bloques y bloques se montaron. Luego, el casco submarino se pintó de blanco y las superficies superiores se pintaron de naranja, amarillo, blanco y granate, siendo este último predominante en toda la superestructura del modelo. Se decidió que el modelo tendría todas sus velas completamente extendidas, y estas se prepararon con papel blanco blando de aproximadamente 40 g/m², pintado en ambos lados con pintura acrílica blanca. Tras secarse, las velas se cortaron a medida, dejando un borde de 4 mm para permitir un hilo de refuerzo y el pliegue. Luego, con un fino lápiz negro, se simularon las costuras. Tras pintar, se colocaron la cubierta, la cubierta de popa, la proa terminada, la escalera, el timón, los accesorios de cubierta y otros elementos.
Se erigió el mástil mayor, alineándolo con la línea central y su inclinación delantera; También se erigió el mástil de mesa. Las primeras líneas utilizadas fueron los forestays, hechos con hilo de 0,5 mm de color oscuro debido a que estaban encerados con betún de Judea. Para otras líneas, se utilizó hilo grueso y de color blanco roto. A continuación, se aparejaba y aseguraba la del mástil mayor, ya con la vela montada, con drizas. El mismo procedimiento se seguía con la vela de mesana y la. Una vez asegurados, se colocaron los obenques, cuidando que los mástiles se alinearan con la línea central. Finalmente, se montaron otros elementos como el ancla y se retocó la pintura. A continuación se muestran fotos del modelo terminado.