San Bartolome - Pavel Nikitin ship model

Joined
Sep 1, 2019
Messages
76
Points
113

Well! She certainly is a chubby little piglet and weighs about as much to. There is a lot of lumber in this build. As this kit comes with all pieces pre cut ( decking and planking ) I would consider this to be an excellent intermediate skill level ship to build. The finish done by pavel however looks to be in the realm of artist. As my paint kit was returned by post in ukraine and I am not a doctor ( no patience - to wait for replacement) Some issues are instruction manual related so I will start a separate thread ( below ) and update it as I progress with the build. I believe the manual issues are from a cross over from version 1 to version 2 of this kit but not sure
The kit itself is of true eastern European construction technique - Big, Heavy Duty, Built to last forever. The decking and planking are 2mm thick PLANKS!! rather than the traditional .5mm in most kits. The style of the ship reminds me of more like a caricature the a replica and that's probably why I like it so much - it's different.
 
Last edited:
INSTRUCTION MANUAL CORRECTIONS - Will update this thread as I progress. ** Please let me know if I make mistakes here **
PAGE 2 - the second part #46 ( first page instruction keel assembly) is located on plywood sheet #9.
PAGE 59 & 61 - part # 70R & 70L are actually parts 73L & 76R
PAGE 95 - part sheet #35 is actually sheet #40
 
Last edited:
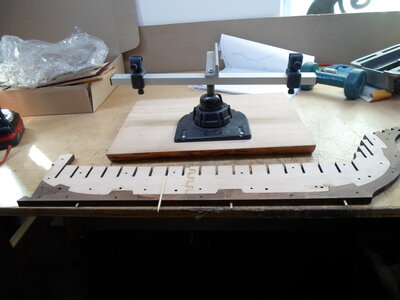
I installed keel pins made of bamboo sticks to strengthen the joint as I use my own ship building slipway that only clamps on the bottom of the keel
keel pins.jpg
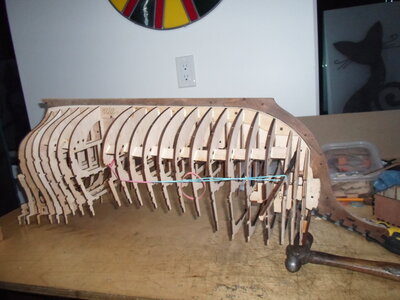
Dry fit the bulkheads in 2 steps ( fore then aft ) tightened up with elastics and then glue/welded the seams rather than installing bulkheads one at a time
bulkheads.jpg
 
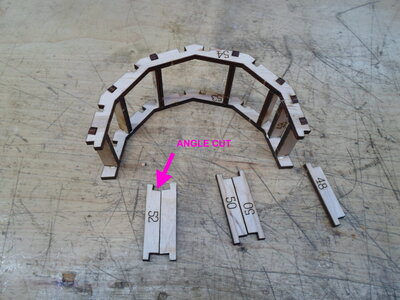
Be sure to put the angled cut on the horse shoe wall ( I think that's a technical term LOL ) framing to the top plate to get the angle correct
angle cut.jpg
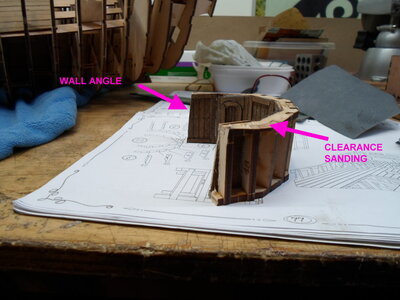
Had a bit of trouble getting the wall angle lined up so I did the right thing and got out the chainsaw Redface
Also had to grind the back/top of the framing to fit under the bulkheads
wall angle.jpg
Going to hold off planking the rest of the deck for now until I can fit the main mast in place ( easier to work on without deck in the way )
 
Last edited:
Wow, great start on the kit. I agree it’s a big and heavy set of boxes to lug around. You are few steps ahead and your posting will no doubt aid the rest of us. Interesting the use of the bamboo to hold the keel so you can use your ship building vice. Did you press your keel pieces between boards after you finished assembling them?
 
I didn't use boards to press. I just used weights ( put plastic wrap down on flat bench then drill press vice, 5 lb. bar bell, couple machinist blocks on top) whatever works ** TIP ** - stay away from the admirals iron :rolleyes:. The parts were very flat and not warped so didn't really need the press. good quality plywood.
 
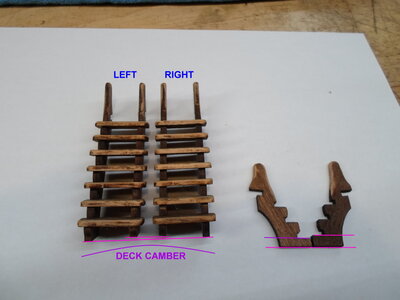
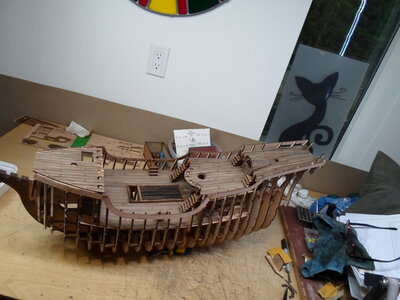
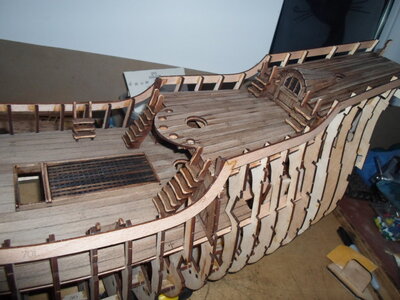
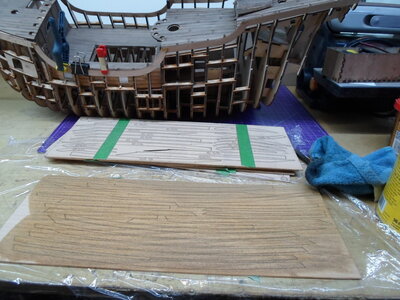
Decking is all down ( ladders and cargo not glued in ) Really liking the sanded relief look but the stain I used( minwax #211 provincial) is a little dark for my liking so I may do some more deck sanding to bring back the natural wood tone. Just got an email today saying my paint kit is on the way so will be testing the fading/airbrush and see how it looks. I am also considering dark walnut railing and trim and lighter tone hull planking but will have to see.
deck detail 1.jpg
deck detail 2.jpg
 
Decking is all down ( ladders and cargo not glued in ) Really liking the sanded relief look but the stain I used( minwax #211 provincial) is a little dark for my liking so I may do some more deck sanding to bring back the natural wood tone. Just got an email today saying my paint kit is on the way so will be testing the fading/airbrush and see how it looks. I am also considering dark walnut railing and trim and lighter tone hull planking but will have to see.
View attachment 338321
View attachment 338322
Good morning. Looking really good. I must say looking at @Pathfinder65 ,Jan's, and your logs this looks like an amazing kit. Cheers Grant
 
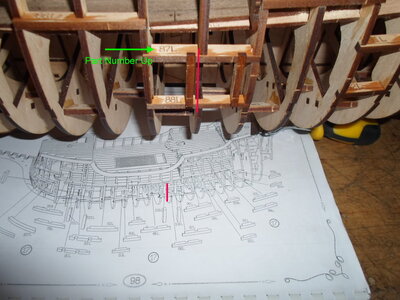
A bit of an issue on PAGE #98 - parts 87L 88L. I installed the parts with part # etching facing UP but I am not sure if this creates a problem with gun port placing. In instructions it shows gun port located forward but with part numbers facing up the port is located aft. If parts where rotated 180 ( part number etching facing down ) this would reverse the location. I am going to hold off on other side until I get second set of instructions to use planking information to locate proper position. Not a big deal to cut out upright posts and relocate on the installed one anyways.
cannon port align.jpg
 
** ALERT ** - rogue/mislabeled part 7Y
Page 102
- cannon port assembly. There appears to be 2 - #7Y parts that are mislabeled and should be 3Y ( extras ). Ask me how I found this one LOL. Thankfully there is CA unbond solution and I spotted the problem shortly after gluing. There are extra 7Y parts on the sheet ( Y1 ) that are not marked but are the right size.
7y part.jpg
 
Last edited:
JUST A THOUGHT, I HAVE A VAST AMOUNT OF EXPERIENCE OF TAKING PARTS APART, BOTH PVA AND CA, I USE NAIL POLISH REMOVER IT MUST BE 100% ACOTON I BRUSH IT ON THE JOINT AND SLOWLY PRY THEM APART IT MAY TAKE 2 OR 3 TIMES DOING THIS IT WILL COME APART NO DAMAGE AND AFTER DRYING AND CLEAN UP CAN BE REGLUED JUST ME. GOD BLESS STAY SAFE YOU AND YOURS DON
 
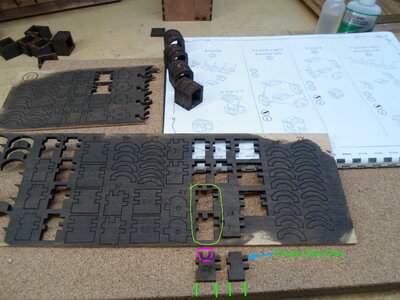
I like to pre-stain the parts if possible to avoid any glue spots where the glue, during assembly, may soak into the wood and stop stain from penetrating, leaving a clear spot in the finish. I have decided to do a 3 tone finish on this ship as I had already stained the deck planks. My paint kit is on the way right now from pavil and will try the air brush, final aging/shading, technique on the finished ship. Also use a strip of masking tape to hold parts on sheet until assembly.
plank staining.jpg
 
That hull has an amazing amount of thick wooden parts in it. How long is the model and do you intend to go Rc and in the water? Seems like very heavy building for a display piece. Nice work sleepyfish.
 
It is 38 inch long and about 10 inches wide at the hull so with yardarms will be about 21 inches wide. Definitely going to need a big shelf or it's own table for display. As for weight IT'S HEAVY!! Built like an old grandfather clock. No plans to RC just a display model
 
I like to pre-stain the parts if possible to avoid any glue spots where the glue, during assembly, may soak into the wood and stop stain from penetrating, leaving a clear spot in the finish. I have decided to do a 3 tone finish on this ship as I had already stained the deck planks. My paint kit is on the way right now from pavil and will try the air brush, final aging/shading, technique on the finished ship. Also use a strip of masking tape to hold parts on sheet until assembly.
Have you found any problems with glue adhesion when applied to pre-stained pieces? I've done that before on wooden airplanes and had the joint fall apart under stress. (The glue was Titebond.)
 
Have you found any problems with glue adhesion when applied to pre-stained pieces? I've done that before on wooden airplanes and had the joint fall apart under stress. (The glue was Titebond.)
I've done two tests of glues on differing surfaces, mostly lightly varnished and those with Danish oil, and found good adhesion to treated surfaces in general:

Test of-Different Glues On Differing Surfaces

I also quite often stain surfaces first, for the same reason as sleepyfish, for use on ship models and have not had a problem. I will admit that if I were constructing an airplane model, where I know there is more stress involved, I would still NOT stain first. Likewise, I would tend to roughen the wood surface for that use, rather than smooth it as usually done on ships.
 
Back
Top