Shackleton's Endurance - Occre - By Bill-R

Joined
May 4, 2022
Messages
450
Points
238

Location
Land O Lakes, FL
Hello everyone,

While I am getting ready for my first scratch build of the L'Amarante, I would like to start a build thread of the Endurance that I am building.

I have admired Ernest Shackleton's Antarctic Expedition for a long time. What he and his men were able to endure was truly amazing. With the recent discovery of the Endurance wreck, the story has become more interesting.

I have purchased the kit from a local hobby shop. I am lucky to have a hobby shop close to me. I found that the contents of the box, in my opinion, are very good. All of the supplied wood is of good quality. The laser cutting is very crisp, photo etching very nice and fittings are of good quality. The supplied instructions are very good. The instructions include written instructions, pictorial steps and there are QR codes to scan that will take you to the corresponding YouTube video for that pictorial step.

I plan to do a lot enhancements to the kit along the way. I have been able to gather over fifty photographs of the ships and I feel the are a lot of corrections that can be made to the kit.

Some of the changes are as follows:
  • The planking for the kit appears to be too wide. The supplied material with the kit is 5mm. This would equate to an approximately 14" (355.6mm)wide plank. From looking at my pictures, the planks appear to be around 7-8 inches wide. I have read that some kit manufactures generally supply 5mm material for deck planking without regard for scale of the model.
  • In the pictures, the planks may be painted. I can't see any end to end butts and I don't see any nailing.
  • The smokestack (I'm not sure if there is an official name) is round in the kit. It should be a rounded rectangle.
  • On the model, below the foredeck there is no opening. The pictures I have shows an opening, but I can't tell if there are any doors. More investigation needed.
  • The model vent stacks are way too small and will need to be replaced and repositioned
  • The hull planking is very different from the model.
  • Changes to the stanchions, cables and railings.
There are a lot more enhancements I plan on doing along the way.

If anyone has any suggestions or comments please let me know.

Thanks,
Bill
 
Hello everyone,

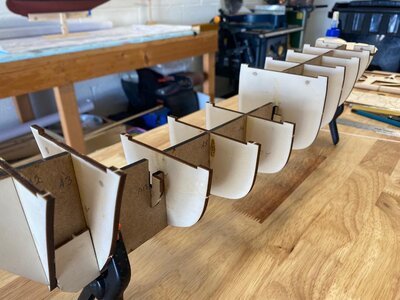
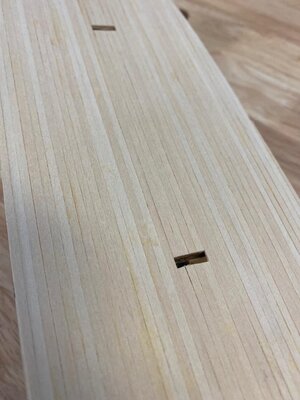
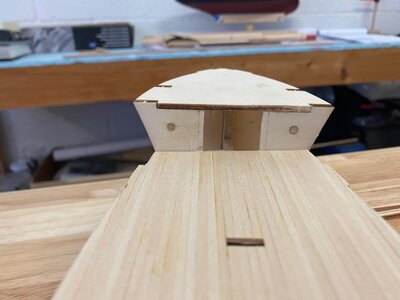
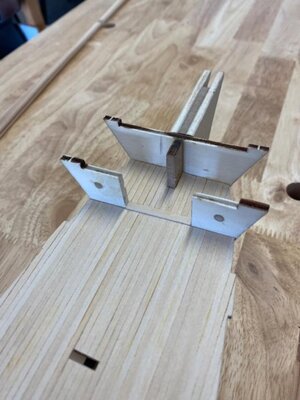
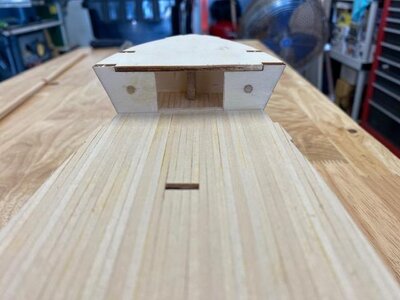
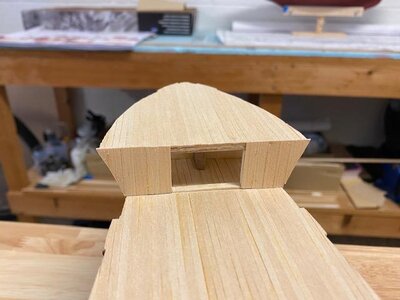
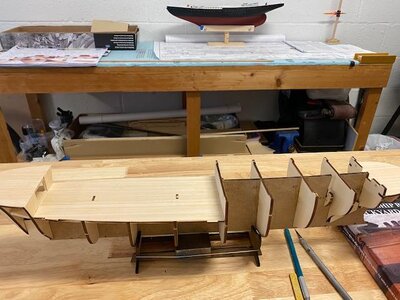
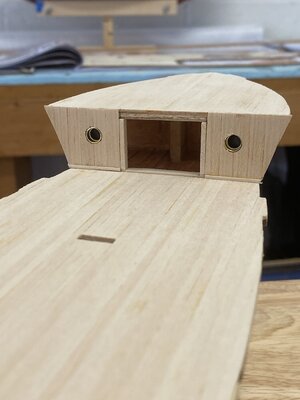
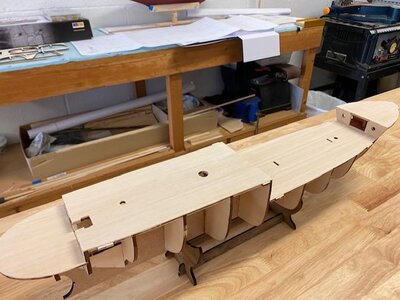
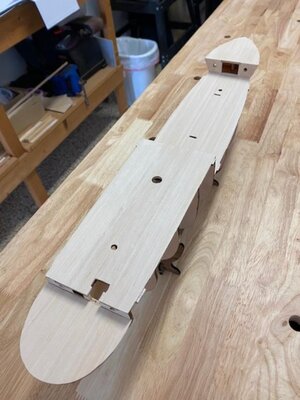
I've gotten the bulkheads in place with no problem and have started on the planking. The planking supplied with the model is too wide for the scale. I have cut 2.5mm planks to use for my model. At 1:70 scale, that would make a plank around 7" wide. While I am planking, I have started to work on the opening under the forward deck. The pictures that I have seen do not show any doors for the opening. I have not been able to find any pictures that show the entire opening, but for now I will use what information I have found. There have been several other pictures of ships that I have seen that do not have doors for this opening. Not use if there is a standard for this.

By the way. If you notice me using the wrong terminology for ship parts or structures, please let me know. I am new to ship building, so any help would be greatly appreciated. When I was young I raced sail boats, but that was a long time ago and a lot of water has gone under that bridge.

Thanks,
Bill

end3.jpg
end1.jpg
end2.jpg
 
Hello everyone,

While I am getting ready for my first scratch build of the L'Amarante, I would like to start a build thread of the Endurance that I am building.

I have admired Ernest Shackleton's Antarctic Expedition for a long time. What he and his men were able to endure was truly amazing. With the recent discovery of the Endurance wreck, the story has become more interesting.

I have purchased the kit from a local hobby shop. I am lucky to have a hobby shop close to me. I found that the contents of the box, in my opinion, are very good. All of the supplied wood is of good quality. The laser cutting is very crisp, photo etching very nice and fittings are of good quality. The supplied instructions are very good. The instructions include written instructions, pictorial steps and there are QR codes to scan that will take you to the corresponding YouTube video for that pictorial step.

I plan to do a lot enhancements to the kit along the way. I have been able to gather over fifty photographs of the ships and I feel the are a lot of corrections that can be made to the kit.

Some of the changes are as follows:
  • The planking for the kit appears to be too wide. The supplied material with the kit is 5mm. This would equate to an approximately 14" (355.6mm)wide plank. From looking at my pictures, the planks appear to be around 7-8 inches wide. I have read that some kit manufactures generally supply 5mm material for deck planking without regard for scale of the model.
  • In the pictures, the planks may be painted. I can't see any end to end butts and I don't see any nailing.
  • The smokestack (I'm not sure if there is an official name) is round in the kit. It should be a rounded rectangle.
  • On the model, below the foredeck there is no opening. The pictures I have shows an opening, but I can't tell if there are any doors. More investigation needed.
  • The model vent stacks are way too small and will need to be replaced and repositioned
  • The hull planking is very different from the model.
  • Changes to the stanchions, cables and railings.
There are a lot more enhancements I plan on doing along the way.

If anyone has any suggestions or comments please let me know.

Thanks,
Bill
It’s hard to believe in this day and age that manufacturers go to all the trouble to put these kits together and they don’t get the details right. Don’t they know that the majority of us who build these kits don’t want an inaccurate model? I know I don’t have the time or desire to do heavy research and then end up going to the trouble to make the variety of corrections. So I don’t buy the kit. Seems ridiculous they don’t go the extra inch when they’ve gone the mile.
 
I am further along the line on my Endurance. At the beginning I considered opening up the foredeck bulkhead but struggled to find pictures. But by the time a helpful member here gave me pointers I was to far advanced to easily get the decking in the opening.
There were no doors on the opening. Just inside on the port side was a wc and on the starboard a lamp store. Screenshot_20221022_153214.jpg

I wish now that I had paid more attention to the scale of the planking but again I was too far down the line before it occurred to me. Its only my second build so next time I'll plan it a bit better.
I have made a few other alterations to the kit and am not too unhappy with my results, could always do better of course...
Have a look at my build log (Endurance Second Build), I'd appreciate any help or suggestions.
I'll be following yours with interest. Already off to a great start I see.
 
Hello everyone,

Thanks for looking in and the likes.

Hello Barcomad. I checked your thread and your Endurance is coming along very well. Have you seen a picture of the entire foredeck bulkhead opening? The pictures I have only shows the upper area of the opening. Also, I have a picture of the drawing you included with post, but when I try to enlarge the picture on my computer the writing gets blurry and I can't read it. Do you have the same problem? I am not the greatest with computers, so it could very well be lack of knowledge on my part.:)

Thanks,
Bill
 
Have fun with the build. Sir Ernest Shackleton has been my hero for years. When I finished building the “Smit Rotterdam” last year, a ship on which I myself sailed for many years, I started building the Endurance. I'm already on my way, started with the masts this week. I'm not really into building according to all the historical measurements and I just used the materials from the kit, only made a small adjustment here and there to the things that I didn't like. I am, of course, the captain of my ship. But I have great admiration for the builders who build everything exactly according to the available historical books and drawings. I just don't always find the videos on You Tube of Ocre and the planning and building regulations out of the box completely in agreement. Again, have fun with the build.

IMG_5650.jpg
 
Have fun with the build. Sir Ernest Shackleton has been my hero for years. When I finished building the “Smit Rotterdam” last year, a ship on which I myself sailed for many years, I started building the Endurance. I'm already on my way, started with the masts this week. I'm not really into building according to all the historical measurements and I just used the materials from the kit, only made a small adjustment here and there to the things that I didn't like. I am, of course, the captain of my ship. But I have great admiration for the builders who build everything exactly according to the available historical books and drawings. I just don't always find the videos on You Tube of Ocre and the planning and building regulations out of the box completely in agreement. Again, have fun with the build.

View attachment 336061
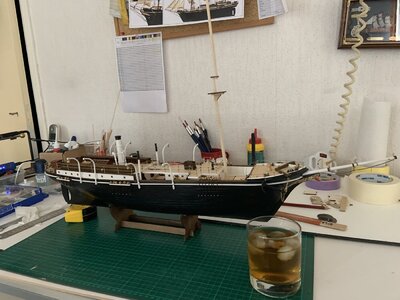
How often do you attempt to dip your paintbrush into the wrong glass? ROTF Exclamation-Mark
 
Hello everyone,

Thanks for looking in and the likes.

Hello Barcomad. I checked your thread and your Endurance is coming along very well. Have you seen a picture of the entire foredeck bulkhead opening? The pictures I have only shows the upper area of the opening. Also, I have a picture of the drawing you included with post, but when I try to enlarge the picture on my computer the writing gets blurry and I can't read it. Do you have the same problem? I am not the greatest with computers, so it could very well be lack of knowledge on my part.:)

Thanks,
Bill
I have only seen the picture that you have.
I don't even own a computer, just a smart phone and a tablet. 20 years ago I could even do a bit of programming but it's gone way past me now.
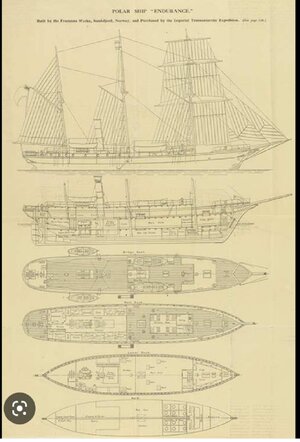
I searched the image on Google lens and came up with a sharper copy:
Screenshot_20221023_135808.jpg
For some reason I was unable to copy the link. I'll try again later.
 
I have only seen the picture that you have.
I don't even own a computer, just a smart phone and a tablet. 20 years ago I could even do a bit of programming but it's gone way past me now.
I searched the image on Google lens and came up with a sharper copy:
View attachment 336075
For some reason I was unable to copy the link. I'll try again later.

I get there in the end
 
Hello Barcomad. Thanks for the latest picture. It is much clearer.

Hello Alskabear. Your Endurance is looking great. I have always enjoyed adding detail to the models that I build. I think it started when I was young. At an early age, I started building model cars for contests and it has continued to today. The most important thing though is to have fun. Building models has always provided much enjoyment for me.

Thanks for looking in.

Bill
 
Looks good, Bill. Now I am wishing that I had done the same with that area. Also made the deck planking like you with the narrow planks.
Has anyone ever built a model with which they are fully satisfied? I can't imagine that I ever will, but still enjoying the endeavour with the Endurance.
 
Thanks Barcomad. I know what you mean. Anytime I build something, I always think I could have done a little bit better.

Thanks,
Bill
 
Hello everyone,

I have filled all of the predrilled holes for the portholes with dowel material. The grommets that are supplied with the kit are not very scale looking and are too small for a scale look. I have noticed that there appears to be two types of portholes on the Endurance. One type appears to have a bezel and some do not.

Bill

1666710978489.png
 
Hello everyone,
I have gotten two of the replacement portholes mocked in place. Only thirty more to do. I still have to finish the wood around the porthole frames. I stained the aft deck, but I did not like the way it turned out. I stripped the planking off and am now installing new planking. More to come for the staining.

Thanks,
Bill

8AF23DCB-BAEA-499E-AAE2-5CAB11A9FC3B.jpeg
 
Back
Top