Soldering and custom photo-etching

Joined
Jul 27, 2017
Messages
29
Points
48

Location
Winnipeg, Canada
Hey all, I just published video 5 on making custom photo-etched parts and soldering. Hope it helps someone, or at least is mildly entertaining!

https://historicshipmodel.com/how-they-are-made

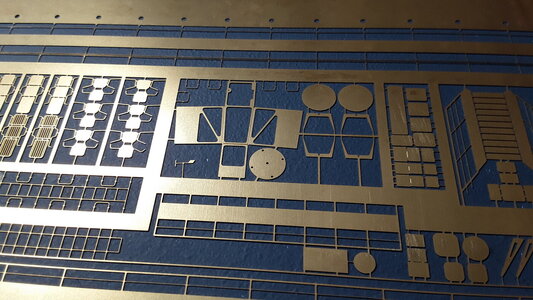
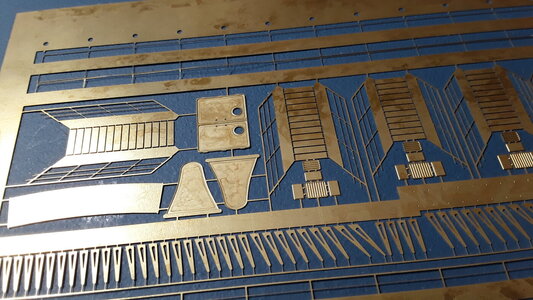
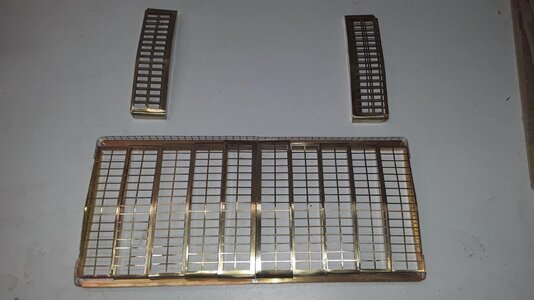
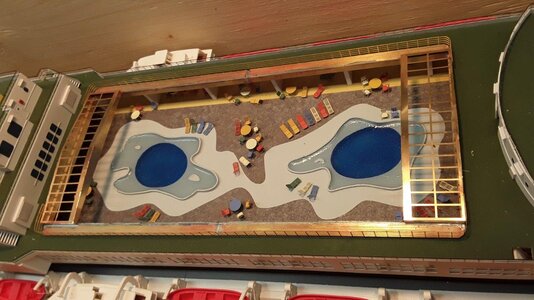
Next-up I will be making some custom photo-etched brass sheets! Any small, thin details you see on the model such as ladders, railings, window frames, antennas, radars, etc... etc... are photo-etched brass. I will show you how I did it from planning and drawing the parts in CAD to sending the files for fabrication to folding the parts to soldering them together and painting. Lots to cover here, but it makes such a difference in the model!!!
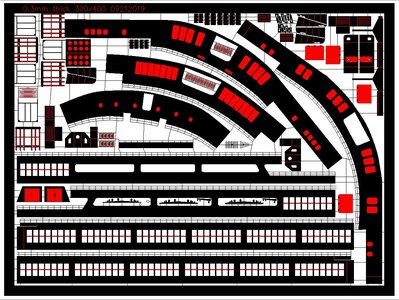
peexample.JPGPE artwork example2.JPG003 crane, tables.jpg003 stairs doors.jpg042 skylights finished.jpg041 surround in place.jpg
 
I have dealt with PE items in my train building workload.

I need to find a good bending tool!
I guess Kurt your internet is not functioning at full speed :D Here... Jim comes to the rescue. Those are not cheap, and if you browse the internet for a bit more than a minute, you will find most-likely less expensive. They can be found in different sizes and variations of bending shapes. I own one SMS004 and super-happy. When choosing the PE bending tool, you look for precision and the ability to bend various sizes and shapes. Good luck!

 
Hello Jarod, I just watch Oceanic episode 5 (metalsmith work) and amazed by your PE production/soldering skills. The CAD work is not for everyone, IMHO, But soldering tips... I remember, we recently have a discussion about soldering PE parts. But your video tutorial is suppressed all our discussions. People, anyone dealing with PE parts please check Jarod's videos!
Obviously, I have some questions: What soldering iron do you recommend, what temperature you will commonly use, and what kind of flux it is? I am sure members would be happy to know the answers.
 
I have dealt with PE items in my train building workload.

I need to find a good bending tool!
The one I used in the video was called "Etch Buddy" from Micro Mark. But, to be honest I find a pair of long-nosed, smooth-jawed needle nose pliers just as useful. For shorter etched parts, with bend lines of maybe 1" or less the pliers are good, but for longer parts like the railings around the pool on the Oceanic the specific etch bending tool is better.
 
Hello Jarod, I just watch Oceanic episode 5 (metalsmith work) and amazed by your PE production/soldering skills. The CAD work is not for everyone, IMHO, But soldering tips... I remember, we recently have a discussion about soldering PE parts. But your video tutorial is suppressed all our discussions. People, anyone dealing with PE parts please check Jarod's videos!
Obviously, I have some questions: What soldering iron do you recommend, what temperature you will commonly use, and what kind of flux it is? I am sure members would be happy to know the answers.
Thanks, I'm sure the CAD is not for everyone and may be boring to watch, but that is how it was done, and is likely similar to how the off-the-shelf PE brass from Tom's Modelworks or WEM are made.

Yeah, since I made that video I have already thought of a few more things to add to it so I may do a specific soldering video when I get some time. In the meantime I don't know what solder or flux I use, the label fell off the bottle long ago. I have had them both for years and don't recall where they came from. I expect they may be something like this: https://www.amazon.ca/Oatey-53013-Hobby-Solder-Kit/dp/B00100I25O

I use a Weller iron that was broken and discarded at my work, and I rescued and repaired it. I don't think the exact type is important, but a 35 or 40 Watt iron is about right and changeable tips are helpful. A big, bulky tip is best for soldering parts with lots of metal close to the joint because the bulk of the material sucks heat out of a small tip before the parts get up to temperature. A smaller tip is easier when working on parts like railings or radars that don't have much heat-sinking ability.

I use the hottest temperature available for brass. That way the small parts are heated up very fast and the joint location gets hot enough to melt the solder almost instantly, the solder flows, and then you can take the iron away and move your hand away before the heat flows to your fingers. Using cooler temperatures I find the parts warm more evenly and by the time the solder melts it is already too hot to hold that close to the joint.

Hope that helps!
 
Hey all, I just published video 5 on making custom photo-etched parts and soldering. Hope it helps someone, or at least is mildly entertaining!

https://historicshipmodel.com/how-they-are-made

Next-up I will be making some custom photo-etched brass sheets! Any small, thin details you see on the model such as ladders, railings, window frames, antennas, radars, etc... etc... are photo-etched brass. I will show you how I did it from planning and drawing the parts in CAD to sending the files for fabrication to folding the parts to soldering them together and painting. Lots to cover here, but it makes such a difference in the model!!!
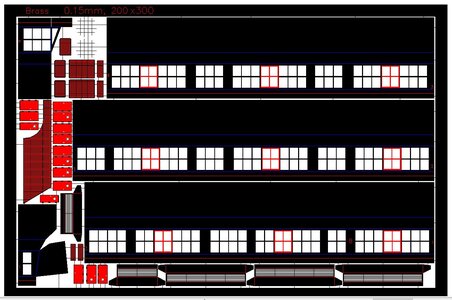
View attachment 197206View attachment 197208View attachment 197209View attachment 197210View attachment 197212View attachment 197213
Thanks for starting this post, home made Photo Etch is something I would like to try at some point, I am looking forward to following your log.

Cheers,
Stephen.
 
Back
Top