• Beginning at 5:00AM PST (13:00 UTC) on Friday February 14th, all services in the Los Angeles, California, USA Data Center will be offline to perform a Data Center Migration. Due to the nature of this migration, we anticipate up to 24 hours of downtime to safely complete this work. Please be patient during this time and thank you for being a valuable member of our community.

Sopwith Camel – modified Atesania 1:16 – fully functional –

Joined
Oct 30, 2021
Messages
8
Points
43

Location
France
Hello everyone,

I know the Sopwith Camel build has been featured in several threads, whether from Artesania or Model Airways. However, in this thread, I want to focus specifically on the modifications I plan to make to the Artesania version.

My challenging goal is to enhance its functionality as much as possible—particularly by making the ailerons, rudder, and elevator movable, as these components are static in the original kit.

Rather than documenting the entire build, I’ll be showcasing only the modifications I make along the way.

For a full build guide on the Artesania Sopwith Camel, I recommend checking out Ken’s detailed thread.
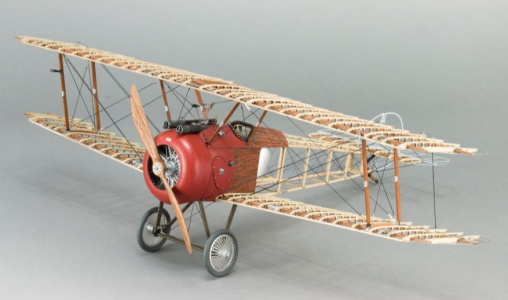
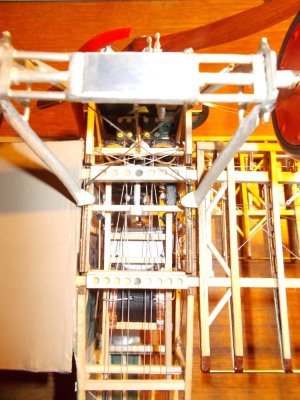
1738750399513.png
(picture from Artesania)
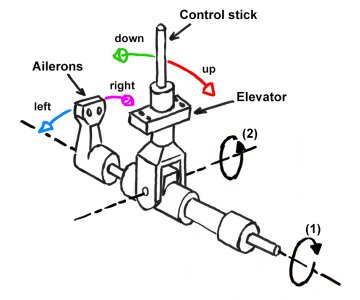
 
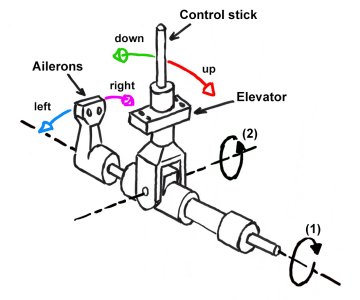
My plan is to redesign and scratch-build a fully functional two-axis control stick for the plane, capable of controlling both the (1) ailerons and (2) elevator (see sketch below). I am still considering the best construction method—whether to use 3D printing, brass, styrene, wood, or a combination of these materials.

control_stick.jpg

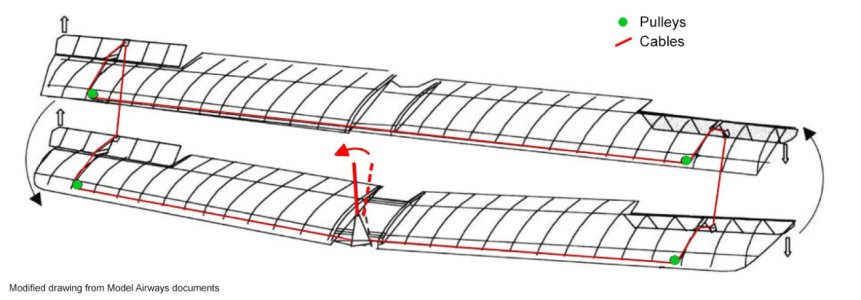
Additionally, I will need to incorporate working pulleys wherever necessary to ensure smooth cable movement, minimizing friction and preventing potential cable (sewing thread or nylon thread) damage from sharp edges. Below is a sketch, modified from Model Airways, showing how the mechanism works for the ailerons.

cabling_02.jpg

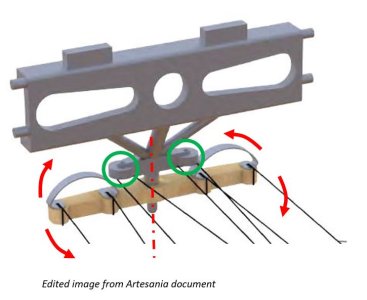
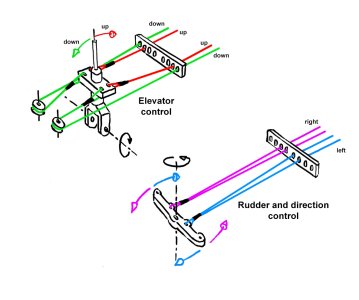
I will also need to redesign the rudder control part with a moving (red arrows in the image below) wooden part where the pilot places his/her feet. I will also need to incorporate, in the same part, working pulleys (green circles in the image below). These pulleys are linked to the plane control stick to control the elevator.

cabling_08.jpg
 
Last edited:
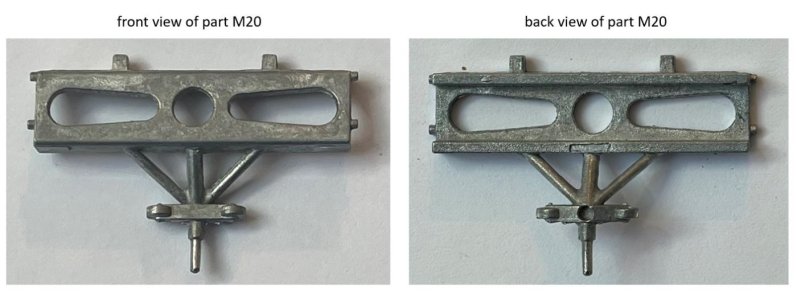
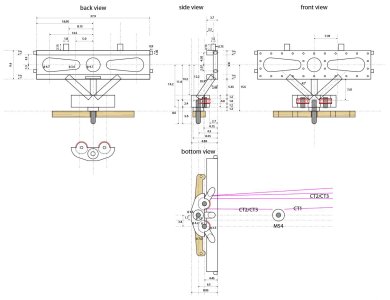
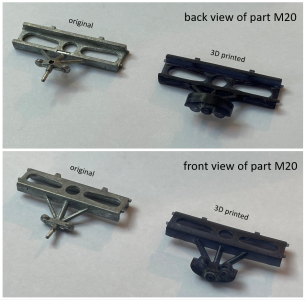
I’ve begun creating detailed technical sketches to reproduce the original parts while incorporating my desired modifications. Below is part M20 from the Artesania kit, shown in both front and back views. After modeling the modified part in Fusion 360, I plan to 3D print it.
M20_original.JPG

My primary objective is to ensure that the wooden part can rotate about its vertical axis for rudder control. Additionally, I need to integrate two moving pulleys that will transmit elevator motion from the control stick via threads. The brass pulleys (already ordered), in red in the technical drawing, I intend to use have a 4 mm diameter, a 1.5 mm hole for the axis, and a thickness of approximately 1.4 mm.

plan_M20_modification.JPG
 
Last edited:
Want to watch this endeavor
I've looked at this as a future project but have too many other 'things' going on to really do much more then watch others build it now.
A question - with making the controls work, have you considered covering all or at least 50% with silkspan or other similar material?
 
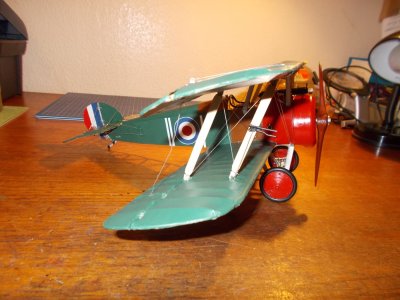
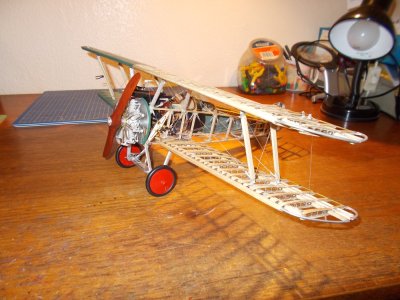
A while ago I made the model airways version. That should and indeed did work for a short time. Unfortunately the thread used for the wires was too stretchy and that was the end of that. I covered and painted half the model with good old tissue and dope!! I made a half engine cowl from the bottom of a cider tin and used the sides of same to make half a side for the model. Thought you might like a look.

DSCN1212.JPG

DSCN1215.JPG

DSCN1220.JPG
 
"A while ago I made the model airways version. That should and indeed did work for a short time. Unfortunately the thread used for the wires was too stretchy and that was the end of that. I covered and painted half the model with good old tissue and dope!! I made a half engine cowl from the bottom of a cider tin and used the sides of same to make half a side for the model. Thought you might like a look."

Perfect! Too bad that the control wires did't work out though.
 
Want to watch this endeavor
I've looked at this as a future project but have too many other 'things' going on to really do much more then watch others build it now.
A question - with making the controls work, have you considered covering all or at least 50% with silkspan or other similar material?
So far I am not planning to cover the plane, even half of it. I will see along the construction. The model kit is so detailed, including the modifications I am doing, that I'd like to keep all parts visible once it's finished.
 
Very nice job and thanks for the advice!
I’ve realized that the black plastic/nylon threads provided by Artesania for simulating the control cables are too elastic and fragile. I plan to use something much less stretchy and far more resistant to tension. I'm still exploring my options. I also hope that the pulleys I add will help prevent the threads from failing.


A while ago I made the model airways version. That should and indeed did work for a short time. Unfortunately the thread used for the wires was too stretchy and that was the end of that. I covered and painted half the model with good old tissue and dope!! I made a half engine cowl from the bottom of a cider tin and used the sides of same to make half a side for the model. Thought you might like a look.

View attachment 500001

View attachment 500002

View attachment 500003
 
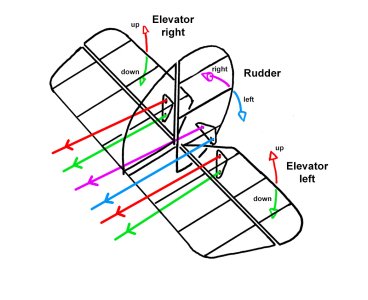
For those unfamiliar with how both old and modern planes are controlled, here are some sketches I’ve made to help explain or clarify.

control_stick.jpg
cabling_03.jpg
tail_cables.jpg
 
Last edited:
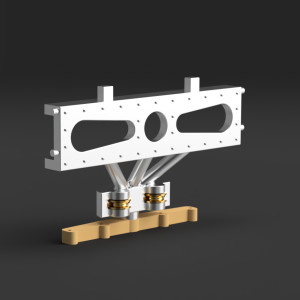
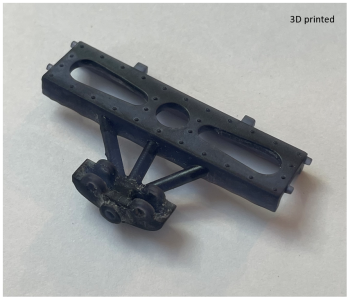
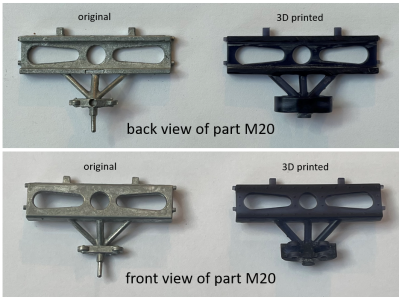
This weekend, I 3D-printed the M20 part I designed in Fusion 360.
For reference, I’m using a Uniformation GK2 resin printer with Siraya Tech Blu (Nylon Black) resin, which should be well-suited for mechanical parts. The part measures about 40 mm in length.
I’m still waiting for the pulleys I ordered, which should fit into the two slots.

1739084891998.png
1739084827093.png
1739084853874.png
 
Back
Top