• LUCZORAMA SHIPWRECK SCAVENGER HUNT GIVEAWAY. 4 Weeks of Fun • 1 Legendary Prize ((OcCre’s Fram Ship)) • Global Crew Welcome!
    **VIEW THREAD HERE**

Sovereign of the Seas - Sergal - Vintage kit (1974)

Joined
Jul 3, 2020
Messages
34
Points
78

Well, it’s time to start my next high seas adventure in model shipbuilding.

After finishing my last ship (HMS Victory, kit by Artesania Latina, completed in June 2024, Ships of Scale build log can be found here), I had pretty much convinced myself that I would likely not build another ship model. At least one the size of Victory (51” long, 40” tall). With my kids grown and moved out, my wife and I are thinking of downsizing. I didn’t know where I’d eventually keep the finished models or if I’d have the workarea space. I knew I’d still do some modeling, but maybe scratch builds on something much smaller.

So, I actually put Victory up for sale on Facebook Marketplace. Asking price: $5000. Over 4 months, a few people reached out saying they loved the final result, but no one was ready to purchase. I knew it would require the right person to come along, and I didn’t really think it would happen. I was thinking that if I didn’t sell it somewhat soon, I would like to find someplace to donate it to – maybe a local library. Somewhere that a lot of people could see and enjoy it.

All that changed when Father Mark contacted me in May 2025.

Mark's first post to Ships of Scale was in September 2023 (see here). He had purchased a vintage Sovereign of the Seas kit by Sergal. He had planned to build the kit himself, but he had not built a model ship like this before. He got the book by John McKay to help, but I think he realized he didn’t have the experience or the time to devote to this project.

There’s a much bigger back story to all of this, but let me give a brief summary. “Father Mark” is his login name on this forum. Mark is an ordained minister but isn’t a pastor. But he’s building a ministry and there's a lot of nautical inspiration to this ministry. He was actually looking at buying a finished version of Sovereign of the Seas. And that’s when he came across my Facebook Marketplace posting.

He contacted me about if he could come see Victory. I knew nothing of his background, and I wasn’t interested in just showing someone Victory unless they were serious about purchasing. But something resonated with me about Mark. He came by with his wife Sandy. After viewing the ship for a bit, Mark started telling me about his ministry.

He didn’t know that I too am a born again follower of Jesus and devout Christian. Our meeting was a divine encounter!!! There’s no such thing as coincidence. By the time we finished talking, I was overjoyed to donate Victory to Mark as a centerpiece for his ministry. He in turn was thrilled to have found someone that he could commission to build Sovereign of the Seas for him.

So, here I am. Starting to build another ship. What’s crazy is that before I decided to build Victory, I had narrowed down my choices to either Victory, Sovereign of the Seas, or Amerigo Vespucci.

The vintage Sovereign kit that Mark bought is the “black box” version. The 9 sheets of plans are dated 1974. There’s a couple of very minimal instruction manuals. But I have McKay’s book, and of course, all of my fellow SOS (Ships of Scale + Sovereign of the Seas) builders to help provide guidance.

My goal is to just use the kit that I have. However, I’m going to keep my eyes out for a newer version of SOS from Sergal that I might be able to get at a pretty good price. That would give me better instructions and have a 2nd set of material and ornamentation in case the vintage kit is missing anything. I haven’t tried going through the entire kit to verify everything is there. It looked pretty intact. I’m just moving forward and trusting that everything I need is there or that I can figure out a way to get what I need. I know the user Woodpecker on this forum already posted to contact him for any extra parts as he has a 2nd kit of Sovereign as well.

Some of the customizations I plan to integrate at Mark’s request:
> using blue instead of black as the 2ndary color
> lights through the decks and especially the stern
> perhaps leaving one side of the hull unpainted to showcase the natural wood (as I did with Victory)
> rigging with full sails
> making my own rope
> present the final model on the open sea - where the ocean is made with resin

76861903317__85868F2D-142B-44FA-BA93-C268B22B73DF.jpeg

IMG_4337.JPEG

IMG_4338.JPEG

IMG_4339.JPEG

IMG_4341.JPEG

IMG_4343.JPEG

IMG_4344.JPEG

IMG_4345.JPEG

IMG_4346.JPEG

IMG_4348.JPEG

IMG_4349.JPEG

IMG_4350.JPEG

IMG_4351.JPEG
 
Ron,
Congrats !! on having a vintage version of this product. The very BIG advantage are the 600+ Bronze metal bits, NOT the white metal electroplated bits
that are supplied in the current kit. Good luck - I will follow along.

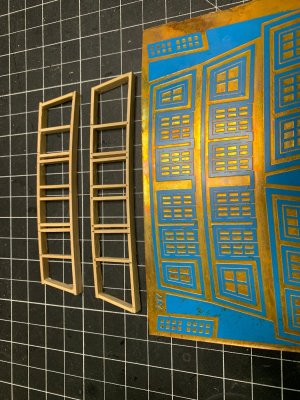
PS: those instructions are useless. The stern window frames should be tossed - You can buy separately those window framings that are in the current kit very excellent upgrade --
I've spent way too long working on this kit - If I can be of any help please let me know. My log also has excellent informative posts from other builders of this kit. Especially from Kurt ---Don't know how to add link to his log.
He is the master of knowledge about this ship.

PS2: I did have one big advantage - I had both the vintage and current kit available - did a bit of blending between the two.....

Cheers,
 
Last edited:
I'll be following this thread also, I have the very same kit (2 of them) if you are missing anything let me know, I have double.
 
If you are going to build the Sovereign of the Seas as the post 1658-1660 refit as Royal Sovereign, which the Sergal kit really is, I would use the brass etched plates as templates and use thin sticks of cherry and walnut to scratch build the window frames. Use clear plastic attached behind the framework, and put lights inside the model. To make the frame segments easy to construct, buy or make a chopping tool which can cut equal length quickly and accurately. If you don't have hardwood sticks of the right size, buy them or use a small desktop band saw and rip your own to whatever width you need. Both of these tools are incredibly useful!

I use this one:

Northwest Short Line - The Chopper $46 USD​

1750695894416.png

Band Saw at Harbor Freight $179 USD
1750696071308.png
 
If you are going to build the Sovereign of the Seas as the post 1658-1660 refit as Royal Sovereign, which the Sergal kit really is, I would use the brass etched plates as templates and use thin sticks of cherry and walnut to scratch build the window frames. Use clear plastic attached behind the framework, and put lights inside the model. To make the frame segments easy to construct, buy or make a chopping tool which can cut equal length quickly and accurately. If you don't have hardwood sticks of the right size, buy them or use a small desktop band saw and rip your own to whatever width you need. Both of these tools are incredibly useful!

I use this one:

Northwest Short Line - The Chopper $46 USD​

View attachment 527717

Band Saw at Harbor Freight $179 USD
View attachment 527721
DARIVS,
Thanks for the feedback. I'll be following your build log closely as well as Oldflyer's. I'll take your advice of not using the brass templates for the stern and build my own. I was thinking the same. And I already have lights threaded up through the keel (see below).

Also, I actually have The Chopper. I found it helpful building Victory when the pieces were thin. However, working with it on SOS so far has been problematic. The basswood I was cutting was a bit thicker and I needed the sizes to be very accurate. They were not accurate. Every cut was pushing out the plastic 90 degree edge by a bit, even though the screen holding the plastic in place was tighened down as much as it could. I actually purchased a precision sander from Ultamation Modeling Tools. See Youtube video here. I think this kind of tool will really push up the level of detail I can accomplish. I also purchased a mini table saw which seems to be very accurate.

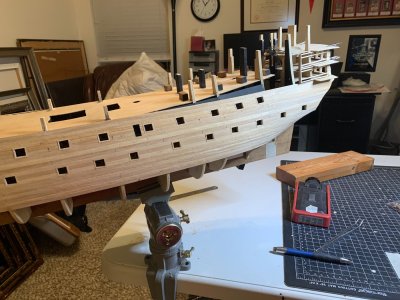
Mark had already put the keel and bulkhead frames together by the time he turned her over to me. Everything looked right. Not much cleanup needed.

I plan to take pictures of all the plan sheets so that there’s a record of them for others to use. The kit was missing the first page of the plans and duplicated page 3. Others have provided links to what looks to be the first page from a newer version of the Sergal kit that I think mimics what the 1974 plan sheet would have been.

Pre-fitting Masts
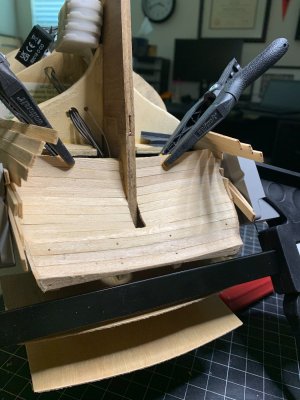
I doublechecked that all of the dowels provided in the kit addressed the needs of the masts and yards. All looked good here too. I test fitted the masts. I had to resize the notch in the internal keel area where the masts would sit. I created a supporting “cradle” for the bottom of the masts to fit in snuggly as the notch by itself wasn’t going to be possible to utilize when the hull was covered and I couldn’t see where the mast was going to sit. The cradle provides a nice way for me to ensure that when I push the mast all the way in and they sit in the cradle, the masts will be at the correct angle front-to-back and vertically perpendicular with the decks.

For the bowsprit, I plan to just use the pre-drilled hole that goes right above the keel rather than using the off-centerer bowsprit approach.


Lighting Design
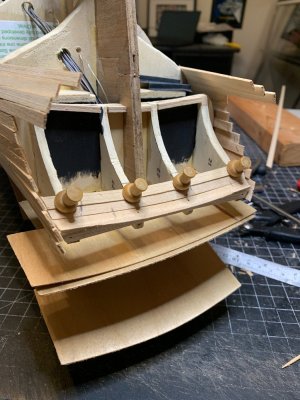
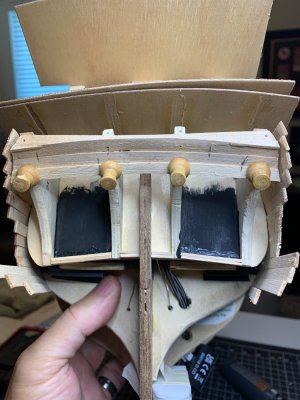
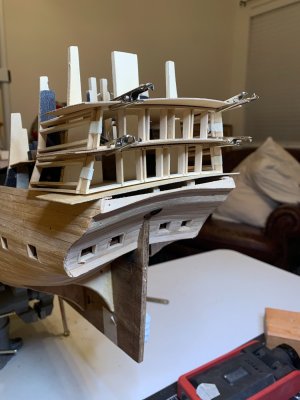
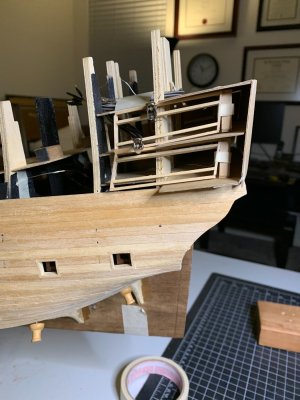
Next, I had to think through how I was going to do the lighting. I still have a lot of thinking about how that will work in the stern area, but I knew I needed to string the lights along the lower and middle gun decks. Because both of those decks aren’t actually built out and just have false backs that the guns are inserted into, I knew there would be open spaces between the decks that the lights could shine through. To minimize that, I just used black construction paper as a barrier between the decks. I also used the black paper to act as a barrier of any light possibly shining out through any joints/seems in the planking.

The wiring for the lights is threaded up through the bottom of the keel. The string of lights used on the decks and throughout the stern just turn on/off. Some of the lights on this string actually are below the lower gun deck. Since they are are halogen lights and thus don’t get hot, just covering them with black paint is sufficient to turn them “off”.

I’m using the Just Plug system from Woodland Scenics and have 6 dimmable bulb lights that I hope to use with the lanterns that adorn the outside of the stern. I don’t know how I’m going to actually thread the wiring up into the lanterns. That's a design challenge to be tackled down the road.

IMG_4273.JPEG

IMG_4273.text.JPG

IMG_4286.JPEG

IMG_4318.text.JPG

IMG_4320.text.JPG

IMG_4323.text.JPG

IMG_4325.JPEG

IMG_4336.text.JPG
 
Last edited:
Excellent start. Good amount of foresight is also very helpful. Hope to be of help with the mistakes that I have made with mine - thanks for following along..
light leaks are insidious - I lived through several of those and I only lit the stern. You are adding light throughout - great idea!

PS: you will certainly finish yours before me - even with my six year lead :D haha....

Cheers,
 
Keepsakes
As I was getting started with Sovereign, I remember that 35 years ago when I built the USS Constitution (kit from Mamoli), I had traveled to the Bahamas and found an old Danish coin from1678 that had a sailing ship on the transverse side of the coin. The coin was made to be a pendant on a necklace, but it was just sitting in my drawer for many years. After finding the coin, I got to thinking about whether there were other coins with sailing ships on them.

Lo and behold, I found 1 ounce silver proofs for the last 3 ships I’ve built or am building: Constitution, Victory, and Sovereign. I couldn’t resist starting a collection. Finding a walnut display case with a podium for each coin makes a great way to present everything.

IMG_0086.JPG

IMG_0093.JPEG

IMG_4278.PNG

IMG_4355.JPEG
 
Keepsakes
As I was getting started with Sovereign, I remember that 35 years ago when I built the USS Constitution (kit from Mamoli), I had traveled to the Bahamas and found an old Danish coin from1678 that had a sailing ship on the transverse side of the coin. The coin was made to be a pendant on a necklace, but it was just sitting in my drawer for many years. After finding the coin, I got to thinking about whether there were other coins with sailing ships on them.

Lo and behold, I found 1 ounce silver proofs for the last 3 ships I’ve built or am building: Constitution, Victory, and Sovereign. I couldn’t resist starting a collection. Finding a walnut display case with a podium for each coin makes a great way to present everything.

View attachment 528735

View attachment 528736

View attachment 528737

View attachment 528838
I bought one of those silver medallions for HMS Sovereign of the Seas too! :D Thumbsup
 
Hi--I just finished this ship in May and wish you lots of fun and interesting challenges. Just be aware that the plan book is totally useless and if you follow it you will have huge issues. I ignored it. Also, the plans are pretty bad and inconsistent from sheet to sheet so you really have to do some out of the box thinking and planning (which clearly you are doing with the cool lighting work).

A couple of other thoughts:

1. Yes, definitely do your own stern windows and the lighting will make things amazing.
2. When you do the mast work, be aware that the lubber hole openings in the little discs they provide are way too small and unless you enlarge them you can't get lines through them.
3. The kinds of things you have to check that you never thought you did--the flags are bigger than the dimensions of the top masts they provide so check all that before you make the masts.
4. I'm sure I'll think of other things and let you know!

Overall warning--I've done the Mantua Sergal Victory, Soleiel Royal and Sovereign of the Seas and thought the SoS was the worst in terms of plans, materials and concept, so it definitely deserves a good bashing because there are lots of ways you can make it better!

183.jpg
 
Hi again--As I mentioned, I went back to have a look and came up with a few more caveats about things to be aware of when you tackle the kit. I've also attached some pictures of some of the things I'm referring to. Let me know if you need any clarifications. Here goes:

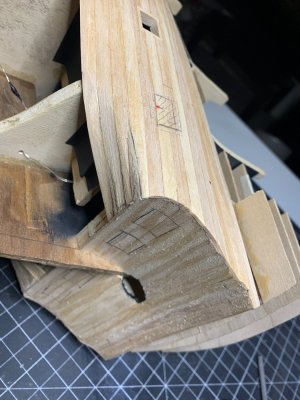
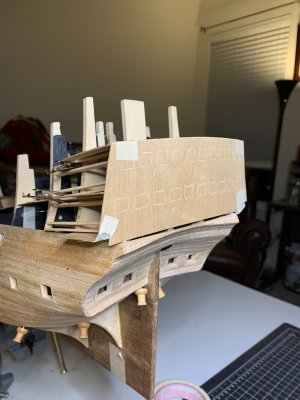
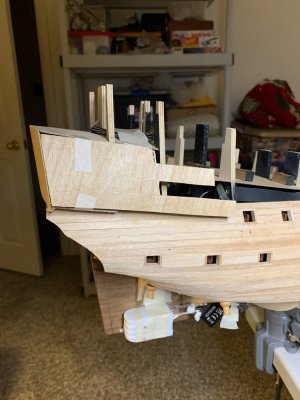
  • For the curved bulkheads the kit provides little cutouts to put down on the deck to secure the lower part of the bulkhead walls. Unfortunately, they don’t correspond to the curves of the plywood decking, so before you secure anything, make a template from the deck edge and make your own cutouts or guides. Otherwise you will have a huge problem getting the walls straight and even.
  • Be creative with the front of the fo’c’sle. The plans just have an opening but you could build steps down to the platform over the bowsprit or some other arrangement. I made a little door inside the opening as well.
  • Unlike the newer kits, this one provides nothing for the tops of the curved bulkheads other than the brass strips. I found them impossible to bend and miter in order to position them the way I wanted to and ended up making them out of quarter round timber that I could bend.
  • I didn’t like the Jacobs ladder the plans showed so I made mine using smaller timber. I also made a door that looked sort of 16th century. I also glued some netting inside the plywood stern windows to make it look like diamond window panes. Not sure how historically accurate that is, but I think it dresses things up.
  • Because the ship has royals as well as topgallants and the crows nests are not to scale (too large) the masts can look as if they are pitched forward, especially when the upper shrouds are in place. You might want to rake the masts back a bit more than usual to compensate for this or tilt the top masts back a bit when you assemble them.
  • Because you are doing sails it may not be as important, but there is no logic to the running rigging plan. Especially for the bowsprit and foremast where they have most of the lines going to one belaying pin and some going only to one. Also, if you try to run them to where the plan says you’ll get some illogical line crossings. Plan the whole thing out and make your fife rails a bit bigger than normal to take all the lines and to have a bit more room to work.
  • Good luck!

53.jpg

73a.jpg


115.jpg
 
Hi again--As I mentioned, I went back to have a look and came up with a few more caveats about things to be aware of when you tackle the kit. I've also attached some pictures of some of the things I'm referring to. Let me know if you need any clarifications. Here goes:

  • For the curved bulkheads the kit provides little cutouts to put down on the deck to secure the lower part of the bulkhead walls. Unfortunately, they don’t correspond to the curves of the plywood decking, so before you secure anything, make a template from the deck edge and make your own cutouts or guides. Otherwise you will have a huge problem getting the walls straight and even.
  • Be creative with the front of the fo’c’sle. The plans just have an opening but you could build steps down to the platform over the bowsprit or some other arrangement. I made a little door inside the opening as well.
  • Unlike the newer kits, this one provides nothing for the tops of the curved bulkheads other than the brass strips. I found them impossible to bend and miter in order to position them the way I wanted to and ended up making them out of quarter round timber that I could bend.
  • I didn’t like the Jacobs ladder the plans showed so I made mine using smaller timber. I also made a door that looked sort of 16th century. I also glued some netting inside the plywood stern windows to make it look like diamond window panes. Not sure how historically accurate that is, but I think it dresses things up.
  • Because the ship has royals as well as topgallants and the crows nests are not to scale (too large) the masts can look as if they are pitched forward, especially when the upper shrouds are in place. You might want to rake the masts back a bit more than usual to compensate for this or tilt the top masts back a bit when you assemble them.
  • Because you are doing sails it may not be as important, but there is no logic to the running rigging plan. Especially for the bowsprit and foremast where they have most of the lines going to one belaying pin and some going only to one. Also, if you try to run them to where the plan says you’ll get some illogical line crossings. Plan the whole thing out and make your fife rails a bit bigger than normal to take all the lines and to have a bit more room to work.
  • Good luck!

View attachment 529190

View attachment 529191


View attachment 529193
My sources say that the running rigging did not all end up being belayed to belaying pin racks or pins on the railings, but rather most of it was belayed directly to the railings. I imagine that lines having heavier loads would be belayed on the railing, around a timberhead. Many of the lines on La Couronne c.1636 are belayed to the railings as shown below on the forecastle.
1751316843588.png
 
My sources say that the running rigging did not all end up being belayed to belaying pin racks or pins on the railings, but rather most of it was belayed directly to the railings. I imagine that lines having heavier loads would be belayed on the railing, around a timberhead. Many of the lines on La Couronne c.1636 are belayed to the railings as shown below on the forecastle.
View attachment 529331
Exactly--when you look at the system, there are several lines that logically tie off to the railings.
 
Exactly--when you look at the system, there are several lines that logically tie off to the railings.
In the Sovereign, much of the running rigging was tied to cleats that were attached to the shrouds by lashing.
1751317431351.png

Here is one person's belaying plan interpretation. It seems consistent and proper. With it, you can figure out the running rigging.
1751317654214.png

Below is an attached article which points out many important and unique details on how HMS Sovereign of the Seas was rigged.
 

Attachments

In the Sovereign, much of the running rigging was tied to cleats that were attached to the shrouds by lashing.
View attachment 529333

Here is one person's belaying plan interpretation. It seems consistent and proper. With it, you can figure out the running rigging.
View attachment 529335

Below is an attached article which points out many important and unique details on how HMS Sovereign of the Seas was rigged.
I had no idea that was even a thing!
 
I had no idea that was even a thing!
Tying line to shroud cleats was frequently done on larger ships of the early 1600's. The rigging of a ship often had a unique belaying plan, although there were some conventions used by most. Most of the knowledge of how ships were typically rigged in the early 17th century was lost to time, so as a modeler trying to choose which ship to model first, it's easiest to build an 18th or 19th century ship and keep it accurate because there is much more information on those available.
 
I'm enjoying your build very much Ron and I love the idea of the coins on display! You never explained who signed the frames and why you posted scripture on the interior frames? I look forward to following your progress all the way to the end. Magic Mike
 
Keepsakes
As I was getting started with Sovereign, I remember that 35 years ago when I built the USS Constitution (kit from Mamoli), I had traveled to the Bahamas and found an old Danish coin from1678 that had a sailing ship on the transverse side of the coin. The coin was made to be a pendant on a necklace, but it was just sitting in my drawer for many years. After finding the coin, I got to thinking about whether there were other coins with sailing ships on them.

Lo and behold, I found 1 ounce silver proofs for the last 3 ships I’ve built or am building: Constitution, Victory, and Sovereign. I couldn’t resist starting a collection. Finding a walnut display case with a podium for each coin makes a great way to present everything.

View attachment 528735

View attachment 528736

View attachment 528737

View attachment 528838
I agree that coins are a great addition to ship displays. You can have your model celebrated in your own custom coin with your name and build info engraved on it.

 
Back
Top