Statenjacht PEGASUS circa 1700 [COMPLETED BUILD]

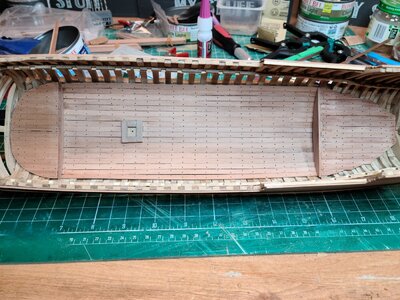
Thank you Jimsky !!! You are correct. As soon as I finish this section I will do the treenails. I can't skip that step before gluing things. Let's see if I can do them correctly. I will follow Jerónimo's way. Just punch the holes. Will see.

Thank you again for following my log. Always feel free to suggest improvements or point mistakes.

Cheers
Daniel

Great progress, Daniel and I fully support your decision to make from scratch internal structures! If I may suggest you considering imitating the treenails, at least just drilling the holes? In the last photo, it looks really nice, though.
 
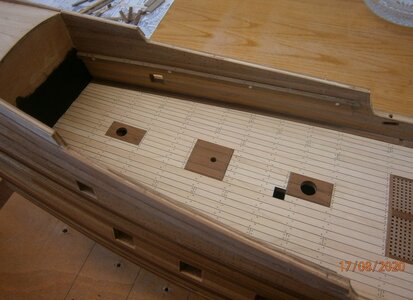
Mi idea ....for now :) .....will be to finish the deck without any planking to show the lower deck cabins details...... that idea can change if my details are a disaster JA JA JA JA :)

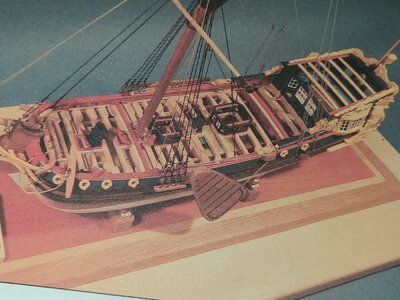
Picture of finished Utrech model from the book I referenced 2 postings back.

16070071073237952276459501288076.jpg

Cheers
Daniel
 
Last edited:
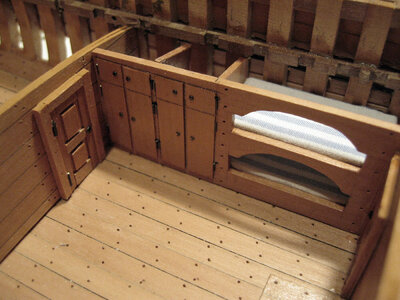
Starting building the crew cabin. Still missing MANY details and 4 more beds .... Nevertheless I wanted to show where I am.

In the kit and in the Chinese modeler built this step was skipped.

Well, to be clear, in the kit instructions NOTHING of the lower deck is suggested to be built. The instructions call to put now the deck planks, decorations and..... END !!

So all these extras are "modeler decision". I decided to try to fit as much as I can following the UTRECH interior design.

View attachment 196772View attachment 196773View attachment 196774View attachment 196775

The wall Dividing the cabin is also in place. I will paint it (is boxwood). In front of it I have to built a chimney.

Below Chinese modeler Pegasus crew cabin section.

View attachment 196777


Cheers
Daniel
Looking really good, Daniel! So, the kit provides framing, carvings and accessories? Excellent opportunity to dig into scratch building. Keep posting.
 
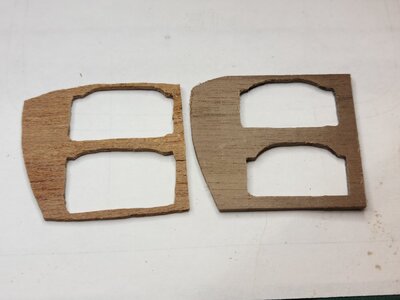
Ok...after looking my posted pictures I didn't like what I did. I went and tried a different wood (black walnut) and a little bit thicker. Using the previous as molding I did again one of the bed fronts.
Well..., I understand that you are trying to use the leftover timbers. Forgive me if this is not correct. Being this model mostly used Swish Perawood, I'd like to suggest you use the same timber for most parts. It does create such a uniform, you would love to see. If you look at walnut, it does show grains, while pear is generally very smooth. Pear has different shadows (darker or lighter or even rose (the one I like very much). You can combine shadows or even use boxwood, another very fine-grained wood. The combinations of Pear and Boxwood gives unbelievable results, IMHO. Others, in fact, may have a different opinion :cool:
 
Well..., I understand that you are trying to use the leftover timbers. Forgive me if this is not correct. Being this model mostly used Swish Perawood, I'd like to suggest you use the same timber for most parts. It does create such a uniform, you would love to see. If you look at walnut, it does show grains, while pear is generally very smooth. Pear has different shadows (darker or lighter or even rose (the one I like very much). You can combine shadows or even use boxwood, another very fine-grained wood. The combinations of Pear and Boxwood gives unbelievable results, IMHO. Others, in fact, may have a different opinion :cool:

Like this comment/suggestion .. .... I will see what I have in pear wood sheet and I will do them again. No problem at all..... I love doing things hundred times....... :) :)
Ja..Ja...ja

Do you know who sells pear or boxwood here in the USA ?
 
Last edited:
Daniel. That looks great - are you going to add a second row of treenailing? Depending on how accurate you want the treenailing to be, you can also have a look at this magnificent example from @Ondras71 's Roter Lowe (also a Dutch ship).

View attachment 196894

Heinrich for now I will leave it in that way.

Jerónimo's used two rows as your example. The Chinese modeler one row. I decided to go to the easier.... one road. But as the modeler from China their position is alternated.

Looking the planking you posted, I want to trash my ship. .... :-(
 
Last edited:
Looking really good, Daniel! So, the kit provides framing, carvings and accessories? Excellent opportunity to dig into scratch building. Keep posting.

Hi Gennaro

Thank you for the compliments..

Check this posting. You will find all the kit content.


Cheers
Daniel
 
Hi Daniel!

Your deck is not sealed with tar. In the real ships, the joints are wide to bring in the sealing material. And a large part of the deck will be lined and later not be visible at all. And the nails . . . ?

SANY0979.JPG
Take a look at the model on the cover of this book. It makes such a good impression that it is on the cover. And it is not built in the way many people today strive for.

When is a model ship beautiful?

Best regards
Thomas
 
Hallo Thomas,

bei dem Foto von Daniel geht es um die Innenbeplankung,
und die Planken waren in der Regel zweireihig verdübelt.

Die Aussenbeplankung wurde auch zweireihig verdübelt,
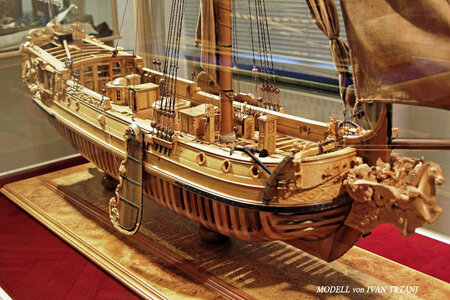
(siehe das Foto von Ivan Trtanj)
und nur bei der Aussenbeplankung wurden die Fugen zwischen den
einzelnen Planken mit Pech und Hanfschnüren verpresst, bzw.Kalfaterung.

Das Buch von Orazio Curti habe ich auch, er behandelt Themen nur allgemein.
Die Bücher bzw. Planzeichnungen von Boudriot, Delacroix sind um vieles besser
recherchiert und fundiert.

Google translate:

Hello Thomas, the photo of Daniel is about the interior planking, and the planks were usually pegged in two rows. The outer planking was also pegged in two rows (see the photo by Ivan Trtanj) and only with the outer planking were the joints between the individual planks pressed with pitch and hemp cords or calfing. I also have Orazio Curti's book, it only deals with subjects in general. The books and plan drawings by Boudriot and Delacroix are much better researched and well-founded.

Grüsse aus Nastätten
Karl Weinmann

Jim, Thanks for Translator


1.02.JPG
 
Last edited:
Back
Top