Sultana Schooner by Model Shipways

Joined
Apr 5, 2021
Messages
102
Points
88

Location
Maine, USA
This is intended to be a log of the final construction of a vintage MS Sultana kit started in the 70's.

Back in the 1970's I started ship modeling. I built a MS Privateer, a fishing schooner half hull from a Chapelle book, and a pinky schooner from plans. There were a few other forays into uncompleted models and I started in on a Model Shipways Sultana.

Moving aboard a sailboat in the 80's brought an end to my modeling and the Sultana hull went into storage. Now, here in 2022 we are back to living ashore and I am in a position where I can start work on her again.

This is pretty much where I am starting from:
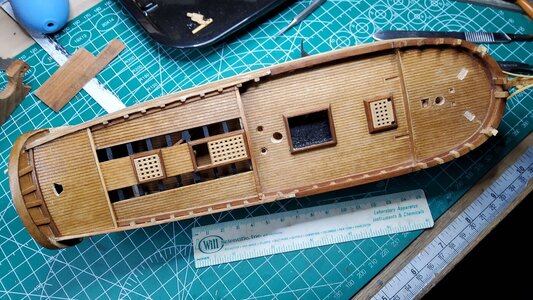
20220116_180136-01.jpeg


Even being retired there seems to be little time for modeling as I am sure others have discovered. My wife (never the Admiral, we have always been co-captains) has health problems so I do the housework, the yard work, the cooking so fatigue is a factor!

I also have spent quite a bit of time setting up my work area and purchasing tools I was never able to put aboard our boat. This included a Unimat 3 (replaced an older sl 1000 I had) a Proxxon circular saw, scroll saw and a 5" sanding disc. I also added a Wild stereo diseccting microscope for various projects including modeling. I worked with microscopes in my employment and get anxious if there is not one nearby ;-)

My first problem is the Sultana's caprails. When I installed them so long ago I knew that sooner or later I would have to deal with the fancy work at the ends of the rails. It is now later :-( I thought I would like the rails to be left natural so the end pieces would need to be wood and I would like them to be scrolls. I think they should be no larger than 2-3 mm to look in scale. I'm sure others could do it but several of my attemps at the job only left little tiny bits of boxwood that looked absolutely nothing like scrolls. Using the lathe the best I have done is to make cylinders with round grooves.Tacked onto the end of some railing and finished they look like: Kinda rough. Where should I go from here?
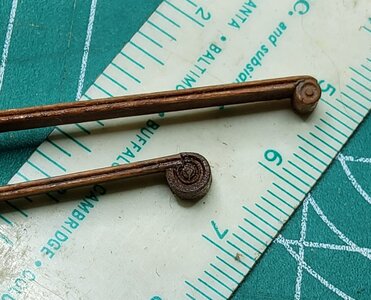
20220116_181357-02.jpeg

While thinking about this I decided to try catheads. My first attempt was the bottom one:
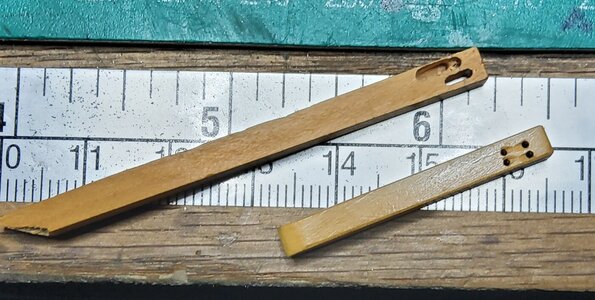


20220202_164504.jpg

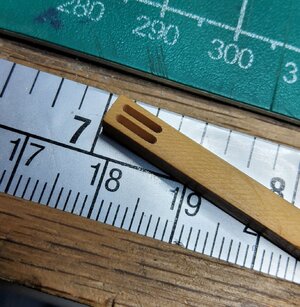
The way I seem to work is to make something, it turns out embarrasing to look at and then I throw it away and do it again. So (top one) I tried milling some slots in 4 mm box wood The result is promising but tedious so I am now refining the technique so I can do it without breaking too many end mills.

I have some pumps I'm making and they have their own issues which I will delve into later, hopefully when the issues are solved.

I also have a rudder and hardware coming along that actually looks pretty good..... so far ;-)

Fair Winds

Ed
 
Last edited:
beginning with some scratch works on some details is a learning curve of how to use the tools with the wood - step by step it is getting better and easier
A good start - I will follow your building log with big interest
 
Hi Sailor_ed

As Uwek pointed, most of us, if not all, we are always on a learning curve, as also the most experience modelers are always learning something from the SOS logs. You will see it with time after reading many logs.

Your attemps, that you posted, looks very nice. I tried to do end pieces rails and mine always finished in the trash and with a rail less fancy. The Catheads, your first attempt looks fine. But when we take those Zoomed pictures, all the defects of our job can be seen. I like more your second attempt (be carefully I am FAR AWAY of being a good modeler, like Uwek and many others). Your Unimat system includes a milling tool, correct ? I am sure that you will be able to do the slots with the milling tool. You were almost there in your picture.

By the way, I also spent most of my working life surrounded by microscopes. I am a Biologist that did research on Biology of Fertilization (sperm , oocytes, embryos). Where you a marine biologist ?

Cheers
Daniel
 
Last edited:
Thank you all for the comments. This is a great forum as I have learned from reading all the logs though the talents that are demonstrated are intimidating.

Daniel: By inclination I was a marine biologist but in actuality I wore many hats as a research assistant in biology. I managed and was operator of an SEM facility at a university but I also did TEM, LM, photography etc and washed my share of labware. At the SEM I was exposed to every conceivable science and once photographed horse sperm for a stud horse sperm storage facility in Hamilton, Massachusetts. Great stuff!

Fair winds.. Ed
 
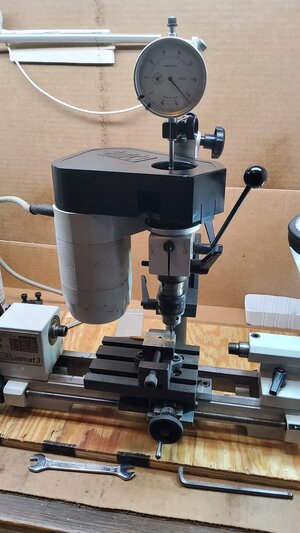
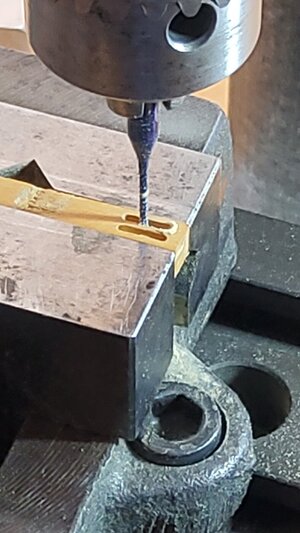
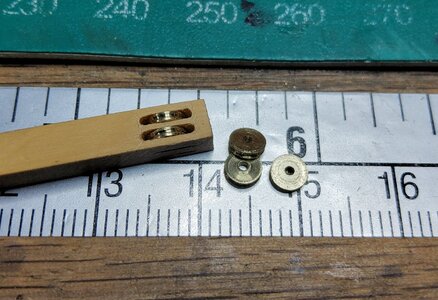
I milled out one cathead. I had to devise a method of advancing my unimat drill press a known amount for each milling pass as I did not wish to break my 0.8 end mill. I took cautious 0.2 to 0.3 mm passes. Here is my setup. It worked passably well but a vertical feed would be much better. 20220205_155101.jpg


20220205_155140.jpg20220205_160245-01.jpeg
 
Last edited:
This is intended to be a log of the final construction of a vintage MS Sultana kit started in the 70's.

Back in the 1970's I started ship modeling. I built a MS Privateer, a fishing schooner half hull from a Chapelle book, and a pinky schooner from plans. There were a few other forays into uncompleted models and I started in on a Model Shipways Sultana.

Moving aboard a sailboat in the 80's brought an end to my modeling and the Sultana hull went into storage. Now, here in 2022 we are back to living ashore and I am in a position where I can start work on her again.

This is pretty much where I am starting from:
View attachment 288160


Even being retired there seems to be little time for modeling as I am sure others have discovered. My wife (never the Admiral, we have always been co-captains) has health problems so I do the housework, the yard work, the cooking so fatigue is a factor!

I also have spent quite a bit of time setting up my work area and purchasing tools I was never able to put aboard our boat. This included a Unimat 3 (replaced an older sl 1000 I had) a Proxxon circular saw, scroll saw and a 5" sanding disc. I also added a Wild stereo diseccting microscope for various projects including modeling. I worked with microscopes in my employment and get anxious if there is not one nearby ;-)

My first problem is the Sultana's caprails. When I installed them so long ago I knew that sooner or later I would have to deal with the fancy work at the ends of the rails. It is now later :-( I thought I would like the rails to be left natural so the end pieces would need to be wood and I would like them to be scrolls. I think they should be no larger than 2-3 mm to look in scale. I'm sure others could do it but several of my attemps at the job only left little tiny bits of boxwood that looked absolutely nothing like scrolls. Using the lathe the best I have done is to make cylinders with round grooves.Tacked onto the end of some railing and finished they look like: Kinda rough. Where should I go from here?

View attachment 288161

While thinking about this I decided to try catheads. My first attempt was the bottom one:


View attachment 288162

The way I seem to work is to make something, it turns out embarrasing to look at and then I throw it away and do it again. So (top one) I tried milling some slots in 4 mm box wood The result is promising but tedious so I am now refining the technique so I can do it without breaking too many end mills.

I have some pumps I'm making and they have their own issues which I will delve into later, hopefully when the issues are solved.

I also have a rudder and hardware coming along that actually looks pretty good..... so far ;-)

Fair Winds

Ed
Your cap rail scrolls look very and at the scale of your model should be visually rewarding. Nice tool making approach. Rich (PT-2)
 
Sometimes the easy becomes difficult and I have to relearn old tricks.

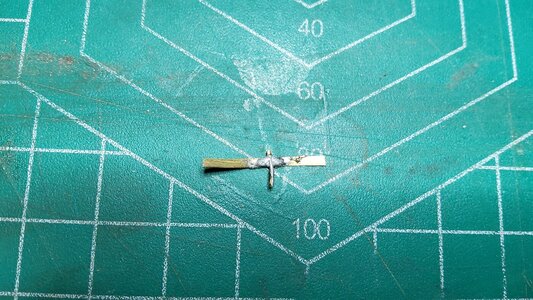
I wanted to solder up some pintles and gudgeons. Seemed easy I've even done it before.. 40 years ago. So I got my solder, brass stock, Flux and soldering pen. Confidence quickly turned to anxiety when I just could not get anything to work. The brass wouldn't tin properly even with proper cleaning. The solder wouldn't flow correctly. I spent a few hours fumbling around and only managed a few pathetic joints.

20220215_132316.jpg
What happened? This used to work?

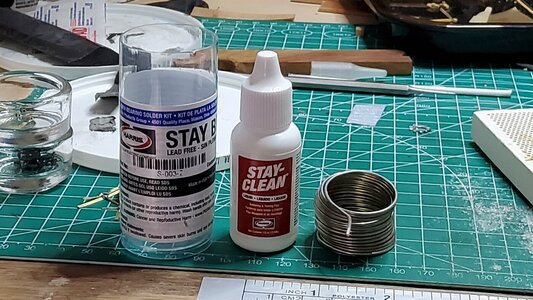
So I slept on it a while and slowly it came back to me. I used to use a special solder and Flux. Cruising through Amazon.com (where else?) I found my original tools:

20220215_135857.jpg
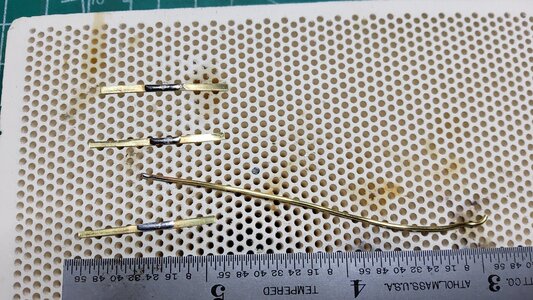
I was amazed that this made such a difference. Using microscopic amounts of Flux my brass tinned beautifully and in just a few minutes I had nice clean joints. Here's the tinning:

20220215_134304.jpg
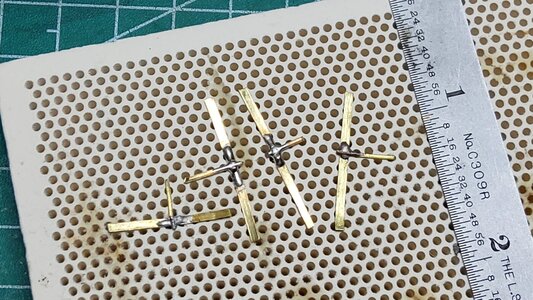
Here's the final result: two new in the center VS the old.

20220215_140144.jpg
Fair winds.. Ed
 
Last edited:
Sometimes the easy becomes difficult and I have to relearn old tricks.

I wanted to solder up some pintles and gudgeons. Seemed easy I've even done it before.. 40 years ago. So I got my solder, brass stock, Flux and soldering pen. Confidence quickly turned to anxiety when I just could not get anything to work. The brass wouldn't tin properly even with proper cleaning. The solder wouldn't flow correctly. I spent a few hours fumbling around and only managed a few pathetic joints.

View attachment 291123
What happened? This used to work?

So I slept on it a while and slowly it came back to me. I used to use a special solder and Flux. Cruising through Amazon.com (where else?) I found my original tools:

View attachment 291126
I was amazed that this made such a difference. Using microscopic amounts of Flux my brass tinned beautifully and in just a few minutes I had nice clean joints. Here's the tinning:

View attachment 291128
Here's the final result: two new in the center VS the old.

View attachment 291129
Fair winds.. Ed
Hi Sailor, have you tried using liguido tin?
 
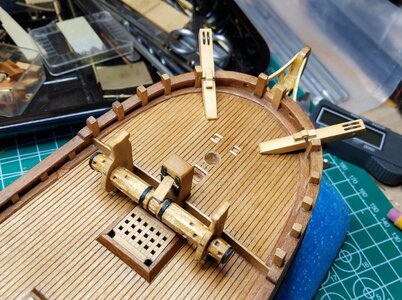
I have been working on the windlass and cat heads. Wish I could carve a star on the cat heads! The clapper arrangement is a little vague on the ancient Chappelle plan I have so I have taken some liberties with with the design. The cleats on the cat heads are a design used on old fishing boats so i used it here. I make my own history! Nothing glued yet. Thanks for reading.
20220313_144540-01.jpeg
Fair winds..Ed
 
Last edited:
Back
Top