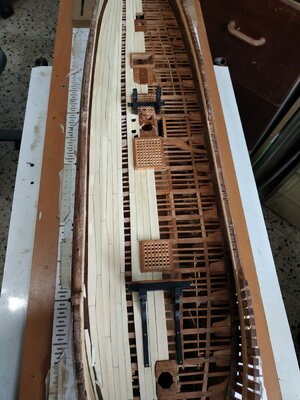
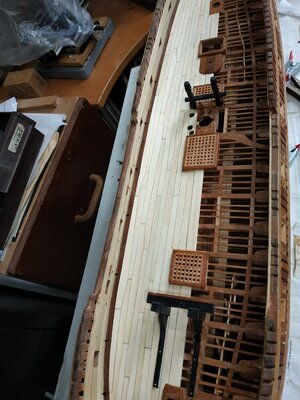
Swan Class – ¼” Scale - Stuglo [COMPLETED BUILD]

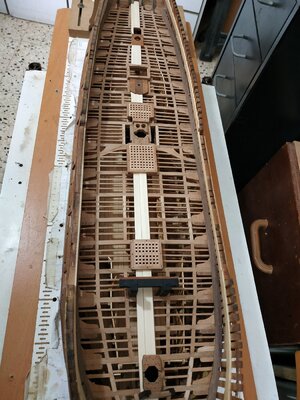
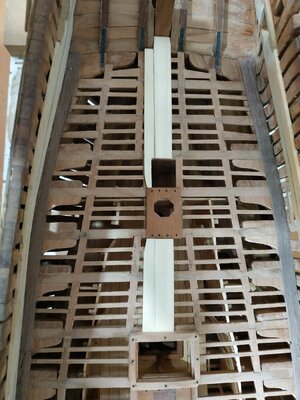
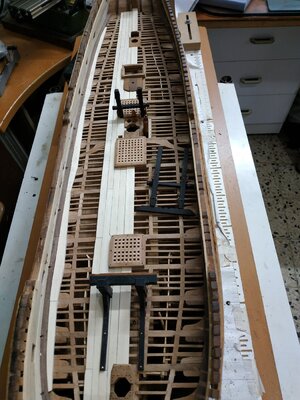
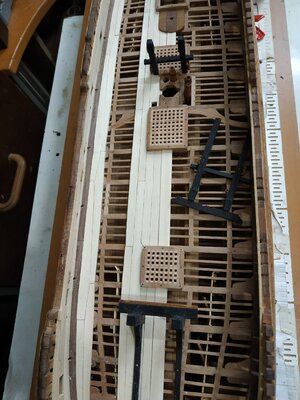
Hatch Coamings.
As I find it easier to fit the planking around the Hatches, I will make these first.
They are deeper than their lower deck counterparts.
The Coamings are 5.3mm deep and 3.71mm wide.
The Head Ledges are 5.55mmdeep (allowing for the rounding up of the beams) and only 3.18mm wide.
A Rabbet is only cut into the Coamings (1.6x1.6mm) to receive the Gratings.
At the corners are half-lap joints- the Head Ledge being uppermost.The upper part of the cornes will later be rounded.
Above the level of the deck, the outer edges of the Coamings and Head Ledges taper inwards by 1mm (This will be done after the deck is fitted.
Along with Head Ledges the Gratings are rounded up to match the beams.
Some of the Hatch Coamings need modifying to allow for fittings such as Bitt Pins.
Note Main and Aft Hatches have the same width, as do the foreHatch and Ladderway.
The Gratings are divided-2 for the fore and aft hatches: 3 for the main.
I found it easier to make these and fit the “framing” later.47322.jpg
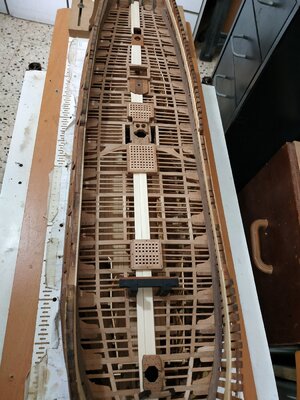
Remember to align all Grating Battens for-aft.
 
Riding Bitt Standards.
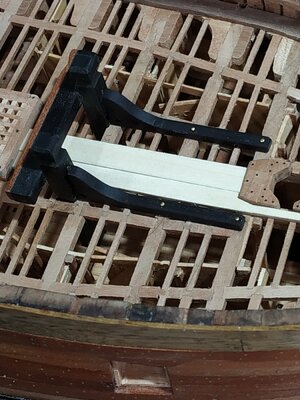
These are inverted knees for the R.B. Pins.
As they sit on the Beams, I think this is also easier to make and fit before the Decking is fitted.
They are 4.3mm thick, profile and length (53.0mm)as per plans.
They are scored by 0.53mm where they are let down on the Beams and Ledges.
Holes are drilled -1.46- for the Cable Stoppers, in the corner near the Pins and Deck.
Upper edges are chamfered.
IMG_20220308_073546.jpg
 
Last edited by a moderator:
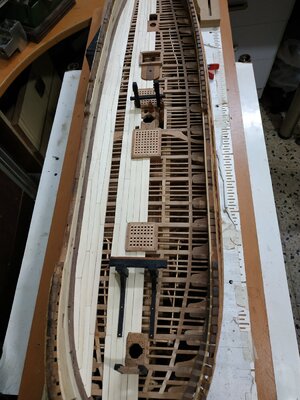
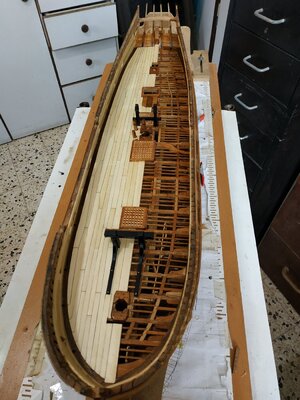
Planking the Upper Deck
The planks are 1.6mm thick except for the Central or King plank, which is 2.12 mm.
The Binding Strikes are also 2.12mm thick but Let Down to be level with the rest- ignoring this Let Down will allow use of 1.6mm planks as well.
( As previously noted,it seemed to me easier to make and fit the various hatches and Riding Bitt Standard, after fitting the King Plank)
After fitting the Inner Strikes, the Binding Strikes (2 each side) are fitted. Noted is the widening to compensate for the difference in width of the Hatches.
Note also that the Planks taper and curve.
I simply used printed copies of the planking pattern of TFFM, cutting out each section, with some spare, and shaping them using my Proxxon Belt Sander, which I found quicker and more accurate than a plane.
After these planks, I decided to jump ahead and make the outer 4 plank lines which are Top and Butt jointed.
I did this because I thought this aesthetically important feature should be made as accurately as possible, any adjustments will be made to the intermediate plans later.
I started from the outermost Plank line (next to the Hull).
Again, using cut-outs from the pattern, these were made and fitted fairly quickly. (Only had to remake one of them)
By using the patterns and fitting the wood directly, I didn’t have to side bend the planks, and avoided multiple calculations to decide the widths.8322.jpg8a322.jpg8b322.jpg9322.jpg10322.jpg10a322.jpg
 
Maybe I do things differently. Would you like "to start a conversation"
I didn't want to mess up your nice clean build logs about my problems with the Discovery1789 build. I kind of shared my difficulties on this post
I think my big problem is no plans so I have to wing it. Foresight and planning are not my strong suite.
I started with the king plank and worked out until I had a 4'(1") gap left. Then I had to fit the two T and B strakes in. Cutting and fitting is not really a problem. It's the figuring the shape of the planks. All the diagrams I could find seemed to be based on evenly spaced beams and in real life they aren't even so the touch is never the proper distance from the end of the plank. Trying to maintain the 3 butt pattern made the the plank lengths different.
I'm rambling. I guess the Discovery1789 is one of those models that "should never be built". There just isn't enough information about her.
 
I didn't want to mess up your nice clean build logs about my problems with the Discovery1789 build. I kind of shared my difficulties on this post
I think my big problem is no plans so I have to wing it. Foresight and planning are not my strong suite.
I started with the king plank and worked out until I had a 4'(1") gap left. Then I had to fit the two T and B strakes in. Cutting and fitting is not really a problem. It's the figuring the shape of the planks. All the diagrams I could find seemed to be based on evenly spaced beams and in real life they aren't even so the touch is never the proper distance from the end of the plank. Trying to maintain the 3 butt pattern made the the plank lengths different.
I'm rambling. I guess the Discovery1789 is one of those models that "should never be built".
Fortunately the author of TFFM did most of the brainwork. You are correct. The planks are not equal length but the "long arm" can be shortened or lengthened as long as the end width is the same. Among the most important tools for a scratch build are 1) Copier/printer 2) a Practicum. (or a course on naval architecture )
PS- re " There just isn't enough information about her." From what I have read, almost all period ship model kits are semi-fictitious or composite generic builds. Anything you do will be better than that.
 
I got the deck done. I'll post a picture on my build after I finish my coffee:)
 
I got the deck done. I'll post a picture on my build after I finish my coffee:)
According to my Atalanta plans, not all have pillars. eg, where there are Pins of the Bitts. Also some pillars are part of the Bulwarks. The first fore and last 2 aft have no pillars. Absent also is a pillar under 8th Upper Deck beam. The only reason seems to be that it would interfere with the sail room, but those who really know can give you a better answer
 
Upper Deck Planking
Finished, but when fitting the last plank, I realise I had miscalculated when numbering the planks on the plan and the result is a loss of a line of planking and the 3 butt pattern.Probably confused by the Waterway.
In any case, I have to decide whether to rip it all up and replace or live with it.
Must have been the Evil Eye.

13322.jpg
 
Upper Deck Planking
Finished, but when fitting the last plank, I realise I had miscalculated when numbering the planks on the plan and the result is a loss of a line of planking and the 3 butt pattern.Probably confused by the Waterway.
In any case, I have to decide whether to rip it all up and replace or live with it.
Must have been the Evil Eye.

View attachment 295910
Good afternoon, Stullo, is the planking of the bridge planned? I've never seen it like this, Thanks
 
Upper Deck Planking cont.
14322.jpgIMG_20220314_163359.jpgDespite encouraging words my eye is drawn to the mistake like a tongue to a newly filled tooth!!
So I changed the outer Binding Strake. The inner one now has a gap issue but I find this less noticeable and my conscience feels better.
 
Why those shapes? 18th century maths? Instinct? Experience from nature (such as the honeycomb) who knows? . As set out in the Practicum and explained as acting as a stronger support for the heavy cannons. The inner and outer hull planking shows this arrangement. Anyway, it looks nice and excites interest. I also would be interested if someone can enlighten us.
 
Why those shapes? 18th century maths? Instinct? Experience from nature (such as the honeycomb) who knows? . As set out in the Practicum and explained as acting as a stronger support for the heavy cannons. The inner and outer hull planking shows this arrangement. Anyway, it looks nice and excites interest. I also would be interested if someone can enlighten us.
Hi Stullo, if you like it OK, I've never seen the plank you made like that, I repeat if it's a Tua it's fine
 
Back
Top