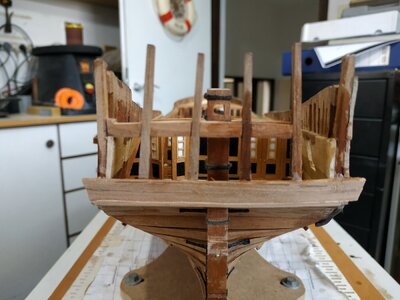
Swan Class – ¼” Scale - Stuglo [COMPLETED BUILD]

I was undecided whether to start a blog as there are so many good ones already out there. What can I add? Maybe a perspective from someone with more enthusiasm than talent. I'm no artist-can't draw for toffee. But wood is forgiving and the final result can hide a lot of mistakes and botch ups. When I started building 30 years ago, there were few books, no forums and restricted number of kits, mainly european. I had a mentor/teacher/friend who started me with additional help from magazines, Ships in Scale. Kit-bashing was for an elite and I never heard of scratch. In these magazines several builders were so good that they had to be professional. Well, we have forums, massive of information and machine and tools not available not so long ago. I built the Onieda (lumberyard) beautiful wood and kit but very difficult for me to understand the building process and lost some enthusiasm. I gave up in the middle, built the Charles Morgan ,visiting the real ship, and returned to Oneida with renewed enthusiasm and guidance from a blog on the internet (2014) After several large builds (Diane and Agamemnon ) I deliberately built variety of "quickies". I then bought the Robert Hunt Practicum of the Hannah with wood from Lumberyard. A new level. I love books,and have over 40 printed and e-books. Reading another blog I discovered The Fully Framed Model,TFFM (thanks Canoe21). The idea of scratch took root. Visiting my friendly carpenter to buy a cheap off-cut to use as a display base for a soon to be completed model, I asked him if he has any wood, beside MDF, Pine or Ply that is used in cupboards these days. He showed me some planks of cherrywood that had stood unused for 10 years. I bought them for the price asked (very cheap) and now owned 450X15X3 cm of raw material that TFFM says should be enough. Over the last year, I purchased what seemed according to others, to be essential. Plans from Seawatch books, vol.2 TFFM, milling machine, a larger table saw, thickenessor (Proxxon) and Band Saw and spindle oscillating sander (together less than the cost of a weeks holiday that I cannot have in covid - time, as I told my wife). I still thought that more experience was necessary and purchased another semiscratch kit, Rattlesnake and ordered Alert. A sudden health issue and seeing how many years others took to build scratch, I took the plunge.
I think Einstein said he stood on the shoulders of giants, I intend to stare under the armpits of other bloggers particularly video blog of Kevin Kenny and Dan Vardess and Trussben. Thank you.
The foregoing is to encourage the "ordinary" hobbyist to realise it can be done and not be overawed.
18th Aug 2020. First clear decks from previous build. I tidy up between stages but generally work in chaos ( spare bedroom, wife keeps distance)
Hallo @stuglo
we wish you all the BEST and a HAPPY BIRTHDAY
Birthday-Cake
Enjoy your special day
 
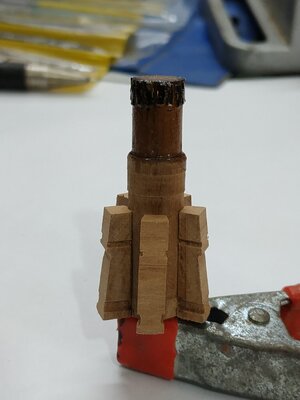
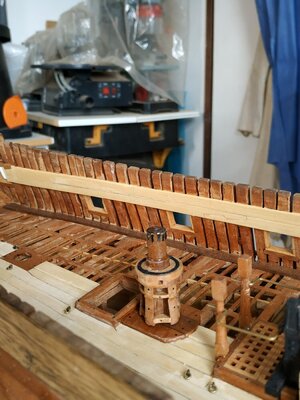
The Capstan.
Upper and lower parts built around a central Barrelr.
The “Lower” being on the upper deck.The area between them is a Partner
Advised to make the Upper capstan separately.
Overall length of 61.65 mm.
The Barrel has a diameter of 9.54mm- part of the Partner is 7.95mm
The Upper Capstan is 23.4mm long plus a Tenon 3.31 Mm height and 5.85mmsq.
The Lower Capstan is 22.40mm long plus Parner
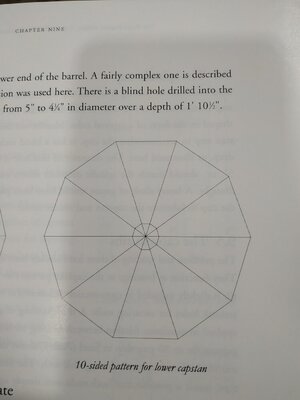
The Upper Capstan is 12 sided, the Lower 10 sided.
Attached to the Capstan Are Whelps. The side against the Barrel, is 3.15mm thick-The Upper is 2.92mm. They are let down by 0.53mm (A fact I noticed only after I finished this stage)
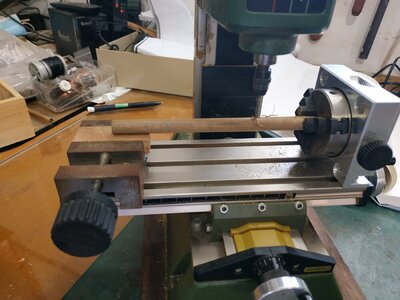
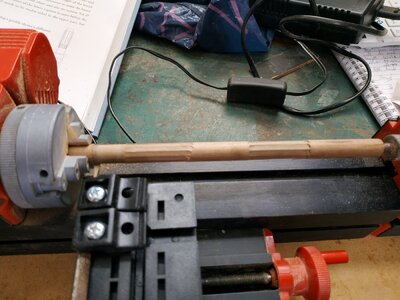
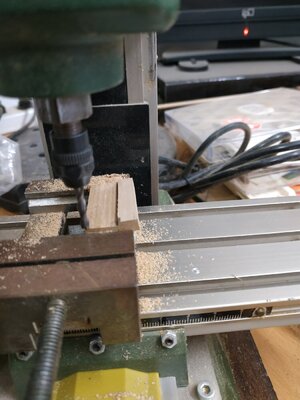
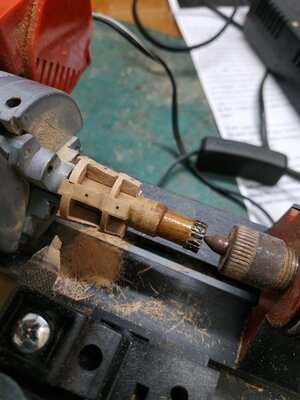
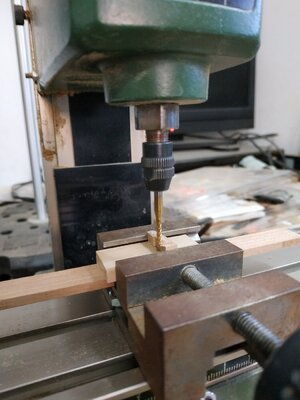
Turning a rod to 9.54. I set it in the DIVIDING attachment for the Proxxon Mill. This allows both fixed and moving rotation (horizontal and vertical) with accuracy of less than a degree.
Upper section, 12 sides- each with rotation of 30deg.
Lower section, 10 sides- each with rotation of 36deg
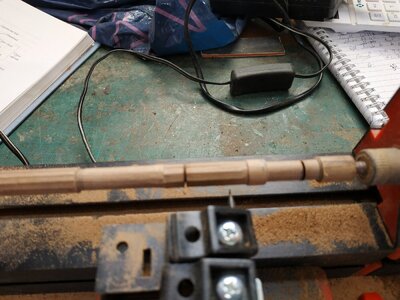
Using a 3mm Mill bit, these sides are easily made to the lengths required.
The whole can be transferred back for turning the narrowed part (7.95mm) of the Partner.
A “collar” was chamfered at the transition area.
The Upper Capstan separated from the whole.
The aforementioned Tenon, made with the piece upright in the mill.
5a422.jpg5b422.jpg5d422.jpg
 
Capstan Ribs
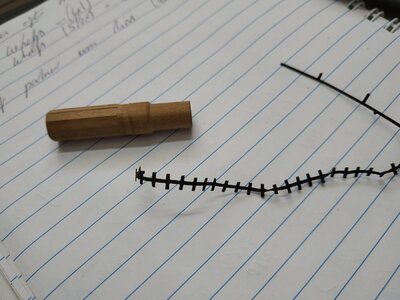
Top of Partner, ring of vertical iron Ribs 4.77x0.8x0.2 mm.
Used some sprue which fit the bill almost perfectly.

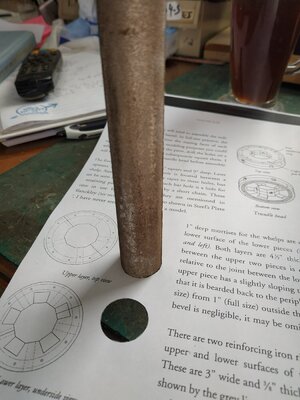
At the base of Barrel is a Spindle- an iron rod 14.31mm long-inserted into matching blind hole-protruding 2.39mm.
The rod and hole taper from 2.65 to 2.25 mm- a feature I omitted.
There is also a Spindle Plate countersunk into the base- again omitted. (Suffering an attack of laziness)
10422.jpgIMG_20220413_073759.jpg
 
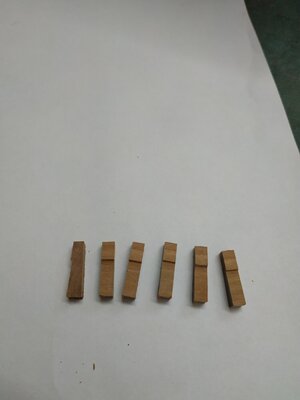
Lower Capstan WHELPS
5 in number- alternate faces on the Barrel.
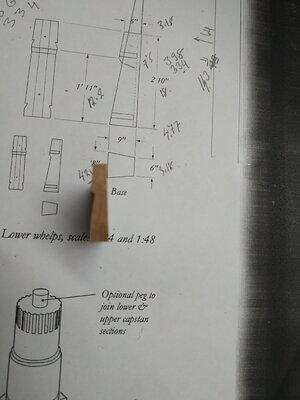
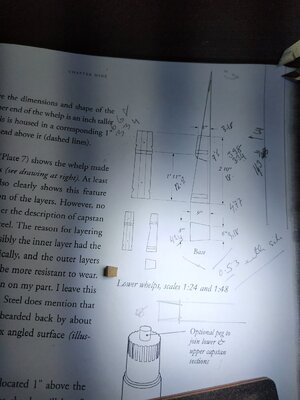
18mm long.The outer edge tapers upwards - at the base 4.77mm to 3.18mm at the top. At about ⅔ way up, it forms a dog-leg or Surge .
Too complicated to calculate, I extrapolated lines on larger scale drawing to give me an angle of 6deg.
The width is also wedge-shaped-4.24 at the outer edge, 3.18 wide at the barrel. The section at the top is square, the base trapezoid. Again, drawing it to a large scale, I estimated the “intoeing”angle at 7deg.
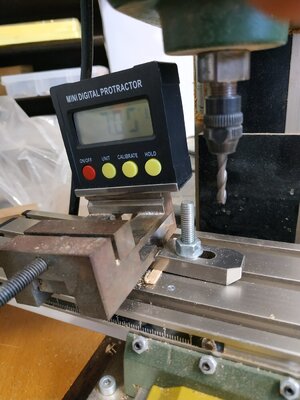
I thought the pieces were too small to use a cut out pattern. I took a blank 4.8 thick, 32 wide and 20 mm long. Set in the vise at 6deg . Set mill to 1.6mm depth and ⅓ down the length,increased depth by further .64 for the Surge.
The Surge was chamfered and the blank sawed to 4.24 widths.
In order to make the tapering toward the Barrel, I wedged up the vise to 7 deg.
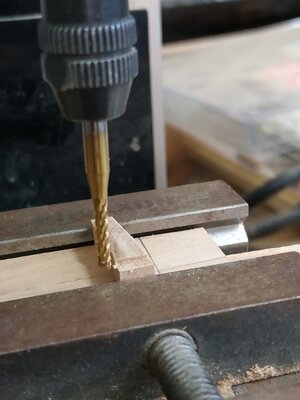
To maintain the individual whelps horizontal across the vise, I made a simple wood support.
Eyeballing the ends to be parallel with the vise jaws, the taper is milled to one side and rotating 180 deg, with the end still parallel to jaws, milled the other side.
Using the same setup, Scores for the Upper Cheek (0.53mm above the Surge) 1.06 wide and depth 0.53mm, can be made.
Similarly, scores for the Lower Cheeks,(2.12 mm above the base) 1.99 wide and 0.53 depth.
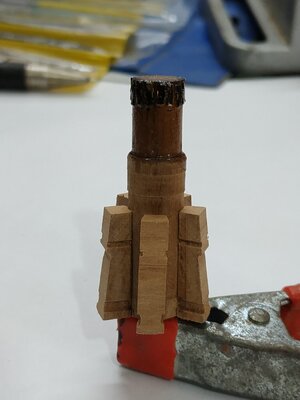
The Whelps can be glued to the alternate faces of the Barrel, ensuring the scores line up. (Easier said than done !!!)
Bolts,one above and one below the Surge, fix the to the Barrel

(Advice on an alternative or easier way, will be appreciated)12a422.jpg12b422.jpg12c422.jpg12d422 (2).jpg12e422.jpg12f422.jpg12g422.jpg
 
Upper Chocks
Wedged shaped pieces 1.06mm thick, fitting in the upper scores of the Whelps.
Convex curve follows that of Whelps- formed on lathe

Lower Chocks
Again wedge shaped but thicker at 1.99mm thick. Outer edge concave -radius as for the Trundle.(Same as a Permagrit sanding stick that I have and used to form the curve.
A card pattern was made and it was found easier to size and fit with the Capstan piece upside down.13422.jpg13a422.jpg13b422.jpg
 
The Trundle Heads.
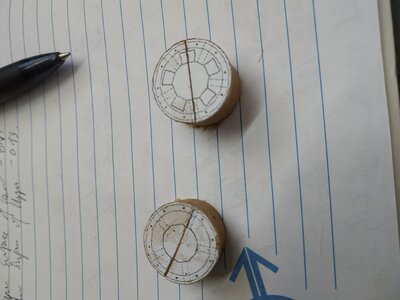
4 pieces in 2 layers-overlapping semicircles each 2.39mm thick.
The central hole is 10 sided to fit the Capstan Barrel.
Outside diameter 20.14mm.
The shared surfaces are each scored (radiating from center) to form the 5 Capstan Bar Holes-1.86MM sq.
The score is therefore 0.93mm each side.
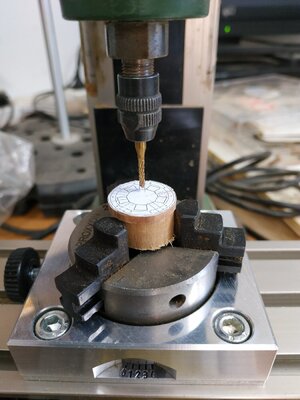
After cutting the 4 pieces to size, temporarily stuck them to a thicker disc of wood for easier gripping in the vise when milling. The Dividing Attachment for the Proxxon, again invaluable.
The cut-out pattern then stuck, and scores milled.
I found that a quick soak in alcohol and use of a hot hair dryer simply separated the pieces from their support.
The lower pair turned over and restuck to its support. New pattern placed and mortises for matching the Whelps approximated, at a depth of 0.53. with the mill. Removing from the vise, these were finished more accurately with a chisel blade.
The upper pair similarly separated, turned over and reattached to its base. A circular score,1.59mmx0.2mm, milled, with outer edge 0.59 within the outer edge of the Trundle Head.
This is for fitting an iron ring inset on the head.
Only after this stage, was the central hole roughed-out with the mill to be finished with the chisel blade and fitted individually around the Barrell.

This piece was fun to make but the final result was not as good as it should have been. I have seen Dan Vadas’s work- his skill and detail is astounding. I’m tempted to make it again at 1:24 scale.

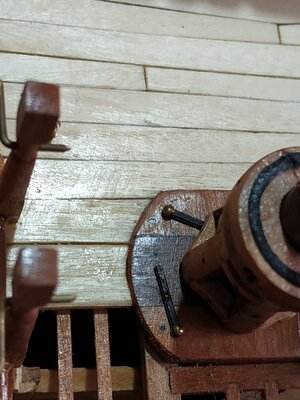
Capstan Pawls.
A pair of single iron bars that act as a brake. 11x1.6x0.8mm, bolted at one end to the Capstan Step, allowing each to swivel. 14422.jpg14a422.jpgIMG_20220418_131937.jpgIMG_20220418_150139.jpg
 
Lower Capstan, postscript.
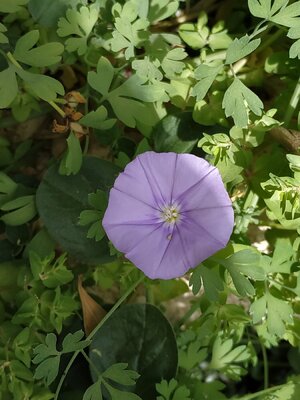
The ten-sided pattern is reflected in a flower that appears in our garden this time of year.
I don’t know its name- can someone enlighten me?View attachment 305704View attachment 305705
Isn´t it a so called "morning glory" - some of the same species are also called moonflower, because they open themself at night
 
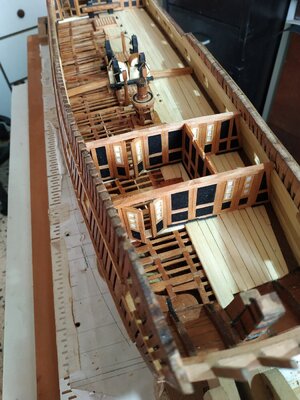
Aft Cabin Bulkheads.
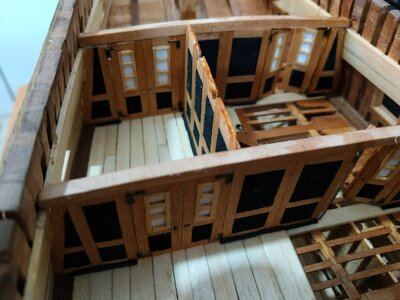
2 transverse Bulkheads. The more forward, unequally divided by a fore/aft Bulkhead into a smaller, starboard Bed Place, and the larger Coach, to the portside.
As before, establish position and height by first making the Quarter Deck beams.
There are 15 in number, plus a half beam for the 16th.They are NOT let down.
They are 3.71x2.92mm except nos. 4 and 5 which are 4.24x2.92mm
The transverse Bulkheads sit underneath nos. 8 and 11.
The plans seem to show them forward to the beams,but reference books I consulted,and other modelers place them under the beam.
The Bulkheads are fitted with the doors opening inwards to the cabin. The hinges are left on the outer (wrong) side because they look nice!
Instead of black cartridge paper, I used a black fabric, textured to look like velvet, with a stiff backing- total thickness 0.8mm. Don’t know what it's called or how it's made, but I think it looks good.
The fore/aft Bulkhead is made, the inner Deck Cant attached. The outer Deck Cant is glued to the deck in position to receive this Bulkhead, after the Quarter Deck parts are in place.
28422.jpg28a422.jpg28b422.jpg
 
The Upper Counter
A pair of planks, 1mm thick, filling29422.jpg29a422.jpgIMG_20220501_081402.jpg between the Lower and Upper Knuckle of the counter timbers.
The lower edge sits on the excess left on the upper edge of the top Lower Counter plank.
I adapted this pattern for an easier fit.
The combined width of the pair of planks is about 10mm/
The upper curve should be parallel with the lower edge of the Quarter Deck Transom.
The ends of the planks overlap the Side Planking and are cut flush to them.
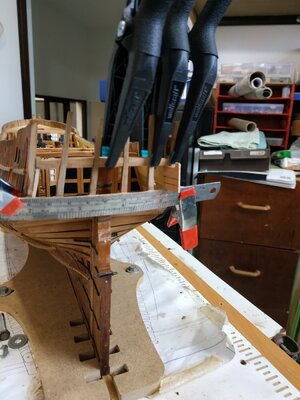
When made, one side seemed higher than the other. One checking, they were correct, but the starboard side of the Quarter Deck Transom was too low by 1mm.
Seems small but is noticeable and would be magnified when fitting the Lights.
The part was released with alcohol, unintentionally broke and reset at the correct level.
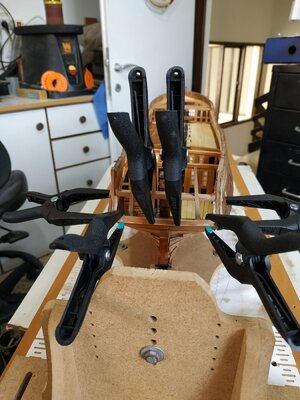
( After years searching locally for more Wolfcraft clamps - I had only 2 - I ordered more from Amazon, and received them a few days ago.They are the most useful of any clamps I know)
 
Back
Top