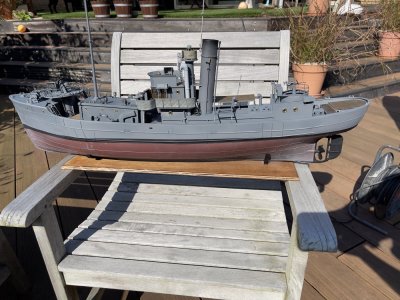
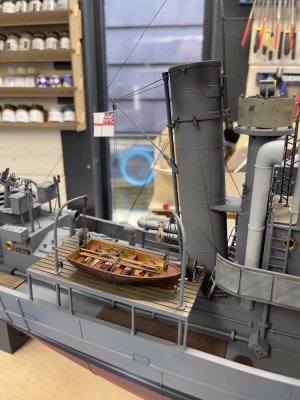
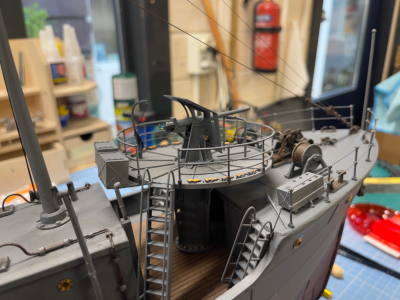
T227 Sir Gareth, round table class trawler, 1:48 scale, 3D print and scratch build [COMPLETED BUILD]

The going is slow and sometimes barely recognisable. So I thought this was a good moment to put Sir Gareth out in the sun for an overview shot. Still a lot of detailing to be done, but it starts looking like a true ship. I created a to do list and that’s still two pages in bullets. Oh well.

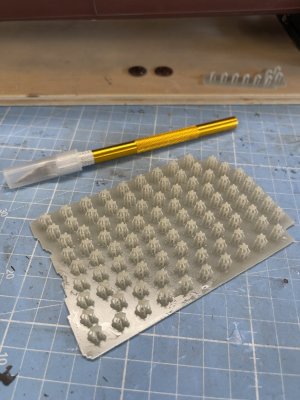
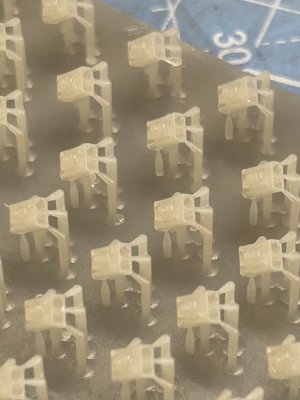
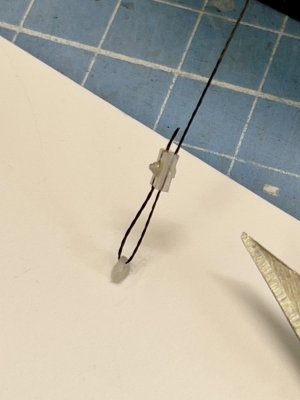
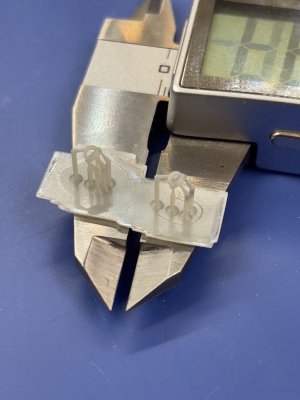
And isn't it amazing what one can 3D print? I wanted some brackets for some of the wires and didn't want to use metal eyelets. So I ended up drawing and printing a 2mm bottom plate and 0.5 mm hoop. And ... success! Here two still in their supports. I must be getting old that I am constantly in awe of modern technology.tempImageSvnoOq.jpg
tempImageQiyFTq.jpg
 
Now for the tricky part: rigging. I started counting and was amazed about the amount of cabling, rigs, stays and whatchamacallits running up, down and across the ship. But as I realise that detail makes the ship, I wanted to find an adequate way to connect these wires to the various brackets and such. Here is where 3D printing comes to its right. One design multiplied on the printer. I kept it straightforward and didn't try to be fancy with accurate historical modelling.

The connectors are barely visible at 2mm with 0.5 holes, but I'm sure that it will add to overal charm of this model.

tempImagejZrOYL.jpgtempImageXe7TDq.jpg
IMG_5418.jpeg
 
Last edited:
I am looking forward to see the final result on your model
 
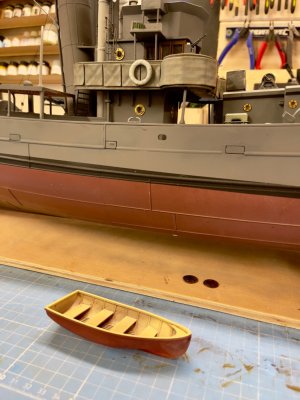
Rough weather to get something out of Fusion and the 3d printer, but I finally created a boat. A WHAT? A boat. So I drafted the complete hull for T227, but somehow completely forgot how to. And now I needed to create this little boat. It's a 20ft clinker, nothing special. But a rough sea in Autodesk Fusion.

Not happy yet with all the details, but a first test print of the rough form shows I at least am on the right path. Now back to the interior and the clinker lines on the outside. But experience taught me that starting over will result in 25% time on the next, better one.

I hope.

IMG_5498.jpeg
 
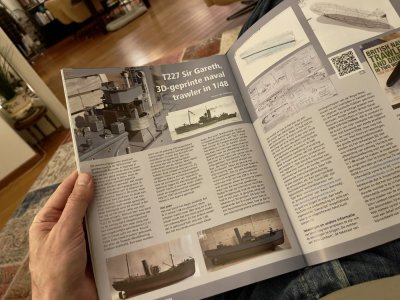
What fun! My ship is in an article in a Dutch magazine, ‘de modelbouwer’. And it is a five page spread at that. With part two, also some five pages, to follow in the next edition. Great fun writing, even better to see it in print.
1728559778142.jpeg
 
What fun! My ship is in an article in a Dutch magazine, ‘de modelbouwer’. And it is a five page spread at that. With part two, also some five pages, to follow in the next edition. Great fun writing, even better to see it in print.
View attachment 476553
Hi Marco. I have read your artikel this morning and wanted to mention it here. But you are ahead of me.:) Always nice to see the first chapter of a written story of your own hand in real life.
The first example of the little boat looks nice. And funny to hear from you the same: how quick you forgot how you did some work in Fushion …… Is that short of long term memory…….. ;)
For my model I also have to make a little boat, but that’s for later.
Regards, Peter
 
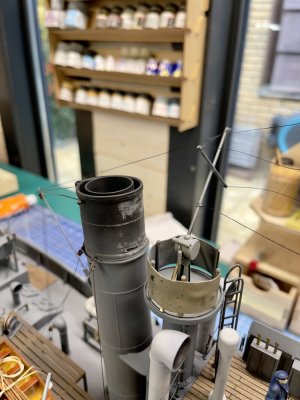
One of those days … funnel mast broke off. Which means that this is not a printable solution. Too weak and brittle. So will solder a bracket and superglue it in place.
 
Me old granny used to say there would be good days for all the bad days. Not too sure myself.

But can always hope . JJ..
 
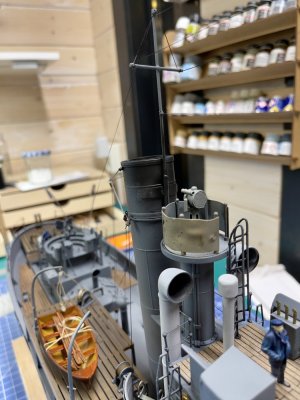
Just to keep you posted: doing about 1 knots against a 1.1 knot current, but getting closer to shore. Cleaning up some mistakes, starting to weather and adding bits here and there. And importantly, I raised the flag. It is paper I'm say, as it is really hard to get the ensign in cloth (or I have to jump the Brexit hurdle and pay a cazillion in import duties). But I found the signal flags in a Dutch shop, so they will be here in a few days.

Tough nuts to crack: the clinker boat (I wasn't able to get that right, need to study) is now a smooth hull boat and the ratlines (printing version 3, as its hard to make them look a little less plastic). Oh well.

But the harbour is in sight.
tempImageaLYkzD.jpg

tempImageWPTsqj.png
 
No ironbound coast for you Marco, I can see only a safe harbour and a hot toddy for the skipper.

All looks great.......well maybe the ships boat???

Cheers Jack.
 
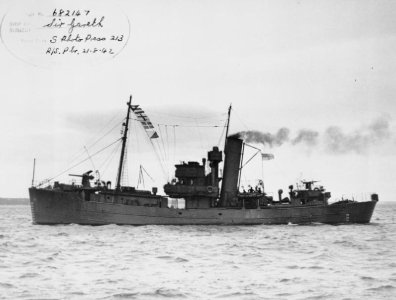
I would like some advice regarding signal flags. The lines that I must use are running quite a bit backward and are so in an angle to the mast. In real life the flag either 'droops' or is flying in the wind. But how to achieve the 'flying' on an angled line? Gravity will pull them down and that would look horrible.

The flags are made of some woven material, cloth like. The lines are not yet made (I ripped down what I had), so anything goes.

See the image of the real ship.

IMG_0328.jpeg
 
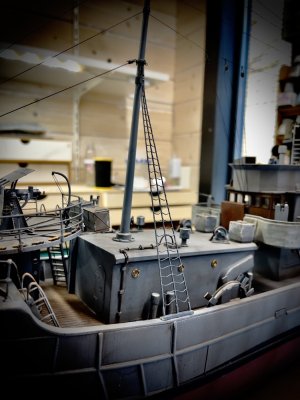
One of the harder parts to get out of the resin printer are the ratlines. Easy enough when you create "rope" of 2mm thick, but that's so far out of scale it's ugly. I tested and tried until I had it to breaking point. The shrouds (?) or stays (?) are 0.8 mm and the rats are 0.4 mm. I had to include a 'foot' as without, the whole thing became too flimsy. And I broke many before I got even ONE up and glued in place. Oh well.

In the image temporarily in place.

How to: in Fusion (or any CAD) create the general model as single lines, with splines for the rats. Then with a sweep draw 3 to 5 strands that circle many many times around the main lines until it looks like a cable. For print support reduce the support tips to 0.2 mm, otherwise you can't get them off.

IMG_5759.jpeg
 
Back
Top