- Joined
- Sep 29, 2021
- Messages
- 77
- Points
- 103

Well, I WAS going to build the Druid stern section. And I still will. But this hobby is all about the new shiney thing, right?
...So I'm building this instead. Then I'll do the druid.
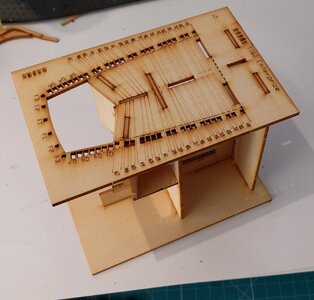
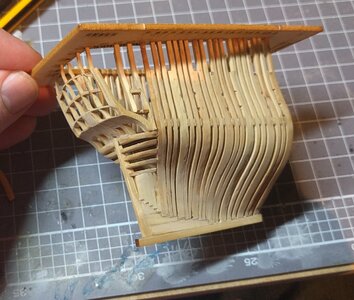
Here's the kit, all built up from their Face Page.

It has precisely one million microscopic bits that are supposed to build into a petite wee model about 3 inches wide and maybe 5 long.
I bought the kit a while back, (start of the year?) but have moved house since then and lost the instructions. A quick message to the facebook contact and some moderately English conversation later, I now have have a PDF of the instructions. Huzzah.
Construction starts with bottom bit at the back (technical term) which is build into a jig to keep it straight and true.
The supplied Jig, you'll notice, is very tight, so I filed it a bit. After that bit is all done and cured, it get's transferred to a second jig. There are lots of these. The super important thing is not to glue any of them. This next Jig would be a nightmare to remove from the model if you did. It's tight enough to hold together without adhesive, which is handy.


The Jig has to be assembled around the already completed parts in a particular order, which is not super easy to divine from the instructions. I'm sure the instructions are excellent, but they are in Chinese and google translate is only moderately helpful. Has helped me avoid a few pitfalls though. Think Indiana Jones pits full of spiders and spikes.


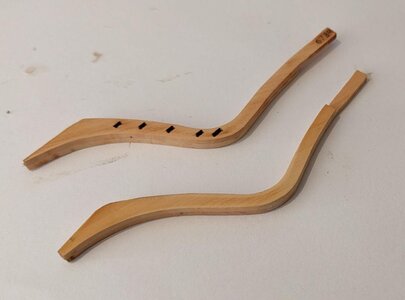
The first two Ribs are next, which have useful engraved lines to help shape them.

there is laser charing on all the pieces that I will be doing my best to remove, though I suspect some of the smallest parts may get the better of me. Meh. How hard can it be?

...So I'm building this instead. Then I'll do the druid.
Here's the kit, all built up from their Face Page.

It has precisely one million microscopic bits that are supposed to build into a petite wee model about 3 inches wide and maybe 5 long.
I bought the kit a while back, (start of the year?) but have moved house since then and lost the instructions. A quick message to the facebook contact and some moderately English conversation later, I now have have a PDF of the instructions. Huzzah.
Construction starts with bottom bit at the back (technical term) which is build into a jig to keep it straight and true.
The supplied Jig, you'll notice, is very tight, so I filed it a bit. After that bit is all done and cured, it get's transferred to a second jig. There are lots of these. The super important thing is not to glue any of them. This next Jig would be a nightmare to remove from the model if you did. It's tight enough to hold together without adhesive, which is handy.


The Jig has to be assembled around the already completed parts in a particular order, which is not super easy to divine from the instructions. I'm sure the instructions are excellent, but they are in Chinese and google translate is only moderately helpful. Has helped me avoid a few pitfalls though. Think Indiana Jones pits full of spiders and spikes.


The first two Ribs are next, which have useful engraved lines to help shape them.

there is laser charing on all the pieces that I will be doing my best to remove, though I suspect some of the smallest parts may get the better of me. Meh. How hard can it be?


