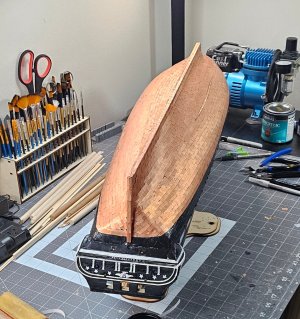
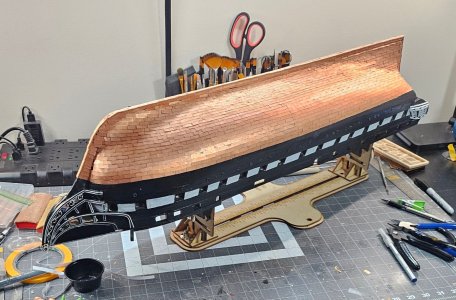
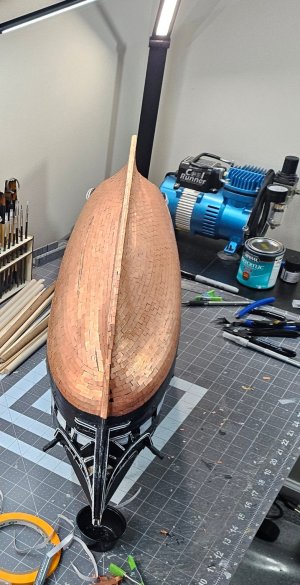
Ok, so I recently chose using copper plates on the hull of the Conny instead of the copper tape. Would anyone that has put on copper plating on any hull, recommend after finishing the plating, putting a coat of polyacrylic over the plating on the hull if that's a good idea or a bad one? If you use matte or gloss, it certainly changes the look. The plates are not shiny, so I would consider the matte finish to as a protectant. I am open to all suggestions and recommendations...
-
LUCZORAMA SHIPWRECK SCAVENGER HUNT GIVEAWAY. 4 Weeks of Fun • 1 Legendary Prize ((OcCre’s Fram Ship)) • Global Crew Welcome!
**VIEW THREAD HERE**
You are using an out of date browser. It may not display this or other websites correctly.
You should upgrade or use an alternative browser.
You should upgrade or use an alternative browser.
IMHO. I would leave the copper plates uncovered. With the time copper will oxidize and maybe even develop some green verdigris which will provide a natural weathered look to the hull.
- Joined
- Feb 8, 2025
- Messages
- 244
- Points
- 103

I never liked the look of green copper but that is just me. I like shinny things, I did a Pegasus a few years ago, another member said he used 2x clear coat Matt finish on his copper hull eight years ago, and it has not changed. This is just what I did, hope it helps
Bobby K .
Bobby K .
I’m happy to say that I survived the tedious task of copper plating the hull. I definitely had to take some Ibuprofen because at one point I thought my hands were going to fall off, lol. For those who have used the plates instead of the copper tape, I found out that even though each plate is separated from each other, each piece is left with a tiny copper tab left over on all four sides because they were all connected to each other. Using the exacto knife to trim these off for about ~2,280 copper plates was not fun whatsoever. I imagine the folks that used the plates when though a similar experience.
I learned a lot of stuff along the way after comparing Hunt’s Practicum that uses the tape with what other builders have used and technique. I found that there are two sizes of copper plates that are slightly off in size from each other, however both are acceptable to use on the Conny based on her scale. The tape has the advantage of being able to bend and make turns that are actually rounded off, whereas the plates are difficult to do this, so it may take a few more plates with gradual angles to look rounded, but a closeup will be straight lines overlapping each other to simulate something like a circle. The tape is easier to overlap than the plates. Each plate is individually glued on, so you can guess how many times I glued my digits together, or make new layers of skin, lol. I do have super glue remover, but even using it is not fun.
With the different fillers used at various points on the hull, it was a lot harder to do with plates than the tape which can easily overlap each other and still look good. If you sit in front of your model long enough staring at the plates as you glue them on and then step back, it will not look good to you because we compare them to other builders who have done this perfectly. However, we are our own worst critique, and when all is said and done, it does end up looking better than you think, including the little patches you might stick in there when you reach the bow or stern.
I laid the plates from stern to bow, bottom to top on the starboard side following the practicum. The fillers are somewhat dismissed in the practicum because of the original scale variance that Bob noted in the practicum. If this is the case, then that would likely or possibly hold true for the plates. I found doing a filler only in a couple small areas, although I had expected a lot more. Using the tape, it’s much easier because you can cut and/or overlap to make nice lines. The plates look neater, but do not leave you with nice lines because each plate is placed individually and some might go edge to edge of the plate or slightly overlap the plate. I had the luxury of realizing that the company I bought the plates mixed both sizes which made it challenging. The only way I made it without going insane was to overlap some plates and not overlap some of the plates to prevent any gaps and/or your row of plates from veering off from the right direction.
For the port side, I did it in reverse and started from the top to keel and from the middle and outwards. If my top waterline was taped off, that worked nearly identical in principle the starboard side. Bob uses two taped off areas of tape, but I felt that it was not necessary and more confusing to follow. In the end, it came out good and not perfect like some of the finished builds in the forum. Overall, I am very satisfied because there were may factors involved to consider. The next model will have tape because I learned how to smooth out the tape better, so it did not look wrinkled or mangled. I do not know how any rivet marks on the plates would be affected if you needed to smooth the tape out. I have not seen very much on this aspect from folks that chose copper tape over copper plates. This is my first wooden ship build, so I know it’s not museum quality, whatever that really means, and I will keep it as my trophy for surviving this feat, although I also realized I’m not halfway yet in the build, lol. So far, I am happy and if it looks good that’s all that matters.


