Using Photoshop to stitch scans together

Joined
Jan 25, 2023
Messages
133
Points
113

If you are like me, you have a ton of very large blueprints and technical drawings lying around. If you are even more like me you have absolutely zero room in your office to go spreading them around while you are working on your models. It is for this reason that I will scan them into my computer as jpegs and then use Photoshop to stitch them together into something I can use on the computer while I work on the model. I also use photoshop to measure off the drawings, and using a predetermined scale factor get accurate measurements to use in my models. So if you are interested, keep reading and I will explain how I use photoshop to stitch drawings together and then get accurate dimensions from it.

Firs things first. The drawing I am using for this tutorial are copyright protected by ANCRE and are used for demonstration purposes only!

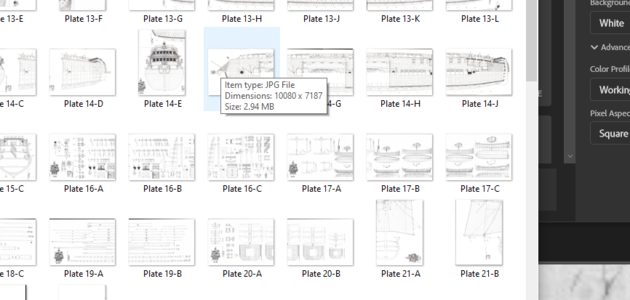
To get started it is important to know how big you scans are and the resolution they were scanned at.
Capture1.PNG

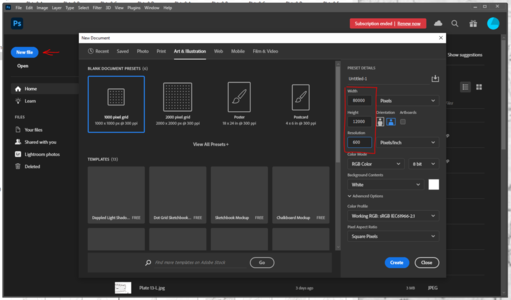
In this case they were scanned at 600 DPI and the resulting file is 10k x 7k pixels. In Photoshop we need to create a canvas where we can easily move these huge scans around so it must be several multiple times larger than one image. Click on New File and set the sizes accordingly.
1680148586023.png

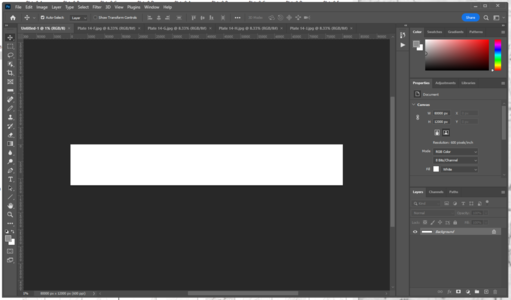
The resulting blank canvas:

1680148677368.png

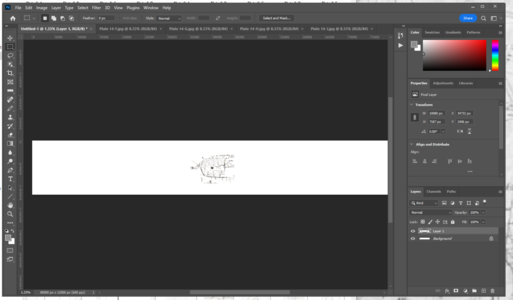
Notice that I have also opened all the the scanned images I will be using in the background. We're going to switch to the first image and use the select tool to highlight the entire image. Use ctrl+c and ctrl+v or copy paste to paste it into our new canvas.
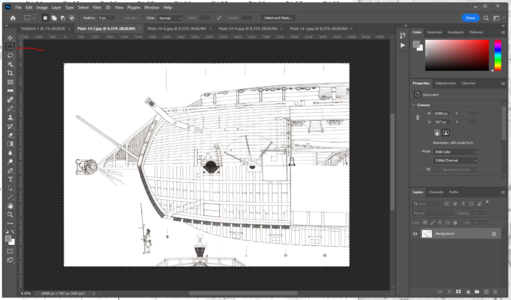
1680148836991.png
1680148888693.png

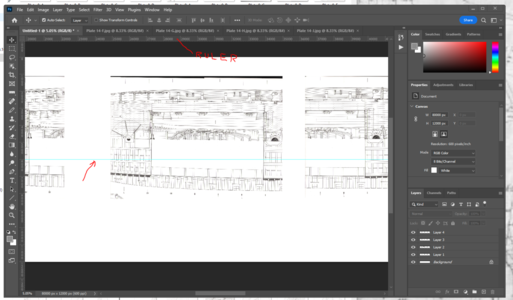
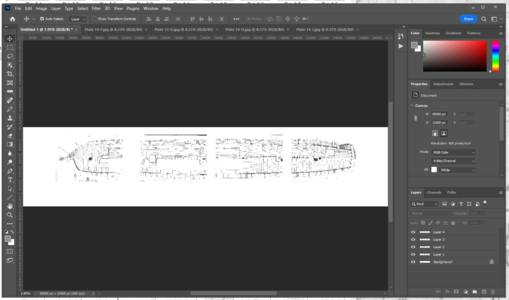
This inserts the entire image into the blank canvas and puts it on it's own layer (Layer1). Use the Move tool to move the image to one side and repeat for all the parts of the scan.
1680149070946.png

Notice that each segment gets it's own layer. This will be useful for us later on. This concludes the first part of the tutorial. Each segment of this is kinda time intensive so I will break it up into multiple posts top make it easier. Next I'll go over how to rotate the images so the centerline is perfectly horizontal.
 
Last edited:
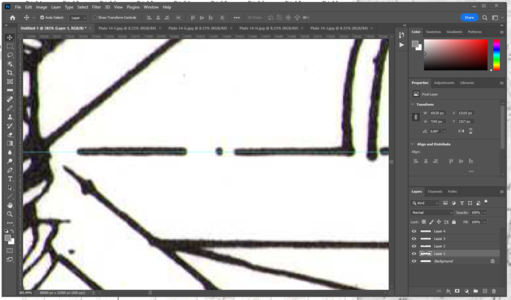
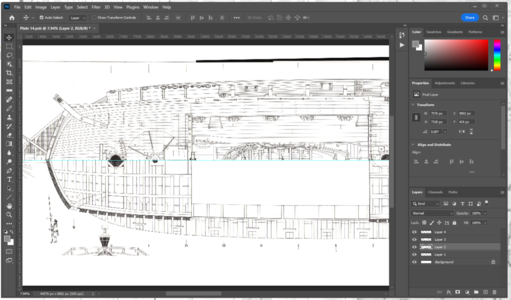
Now we need to start lining them up. In order to do that we first need to get them all oriented the same direction. I am going to use the centerline of the ship as our reference line and line everything up to that. First we need to turn on the ruler tool and create a reference line. At the top of the photoshop window click on View and then go down and click on ruler. This will bring up the rulers around the outer edge. Now click anywhere inside the top ruler and drag down. This will create a light blue line on your image that is perfectly horizontal and straight.

1680149614617.png

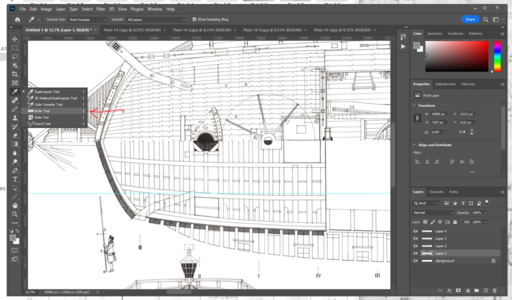
We will align all of our image segments to that blue line as the first part of bringing them together. In the tools to the left go to the eyedropper tool and right click. Select the ruler tool.

1680149760503.png

On the right hand side activate Layer1 by clicking on it then use the ruler tool to create a measurement roughly along the centerline of the first image. You just have to click the start point and then click the end point.

1680149878573.png

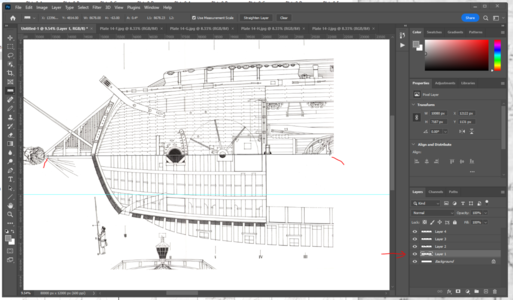
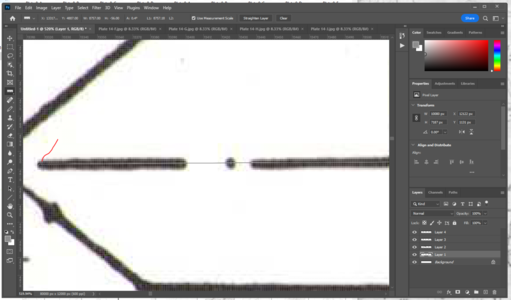
Now zoom in and move the ends of the measuring tool until the line is positioned along the centerline of the ship in the image. Just click and drag the end points.

1680149982313.png

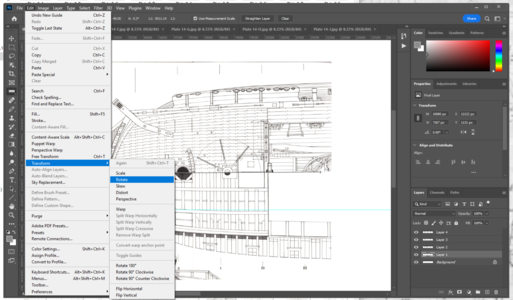
Do the same for both ends. The measuring tool should now lie along the centerline of the ship. It needs to be as close to the centerline as you can get it, but since these are hand drawn blueprints they will never be perfect. Close enough is close enough. Now we will rotate the image slightly until that imaginary centerline is perfectly horizontal. Go to Edit -> Transform -> Rotate in the tool bar.

1680150197542.png

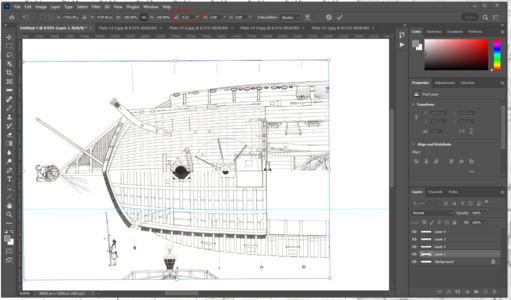
When you do this you will notice that your image has now rotated. It follows the angle of the measuring tool you just created, but for some reason it rotates the image the wrong way. We have to adjust it by going up to the Angle window in the tool and either adding or erasing the negative sign in front of the angle. In my case the angle noted is -.32º, so I need to edit it to read .32º.

1680150363001.png

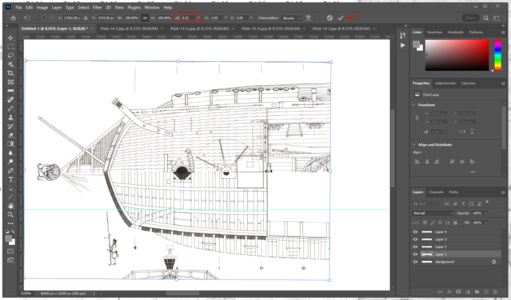
Make the change and click on the check mark to finish the rotate tool.

1680150420614.png

Now we again use the move tool to move that image until our centerline matches the light blue reference line.

1680150495975.png

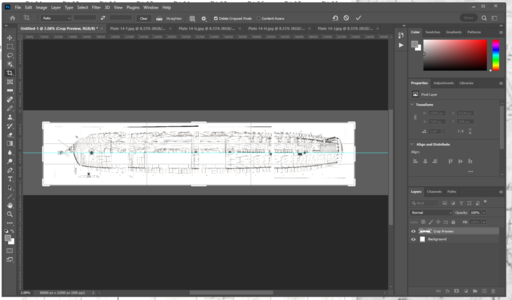
The centerline of your first image will now match the reference line. Do this for all the remaining parts of the drawing. Now that we have a better idea of how much extra canvas we need, let's crop it down and save.

1680150858082.png

That concludes this part. In the next part we'll move the images into their final positions.
 
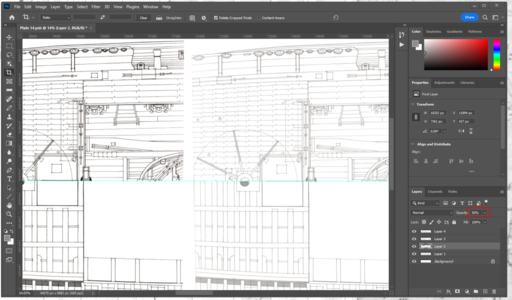
We are going to use the first image on layer one as out baseline. Everything else will be moved to that. Because there is so much overlap, we will not need the entire overlapping segments to be perfect, just certain areas of it. I find that the first and last couple of inches of most scans are useless, so I like to have huge areas of overlap so I have plenty of meat to work with. So the first thing we need to do is to activate layer2 and change it's opacity to 50%. This will make the layer transparent.

1680151253625.png

Now we can use the move tool to overlap our two images. Due to distortions during scanning the images will never perfectly overlap the entire length of the drawing. You have to pick specific areas and get them to overlap as best you can and ignore other areas. We only need it to be perfect in the area of transition between the two images. Notice in the middle area the overlap is good, but in the circle to the left you can see some distortion. Out working area will be around the larger right hand circle.

1680151649405.png
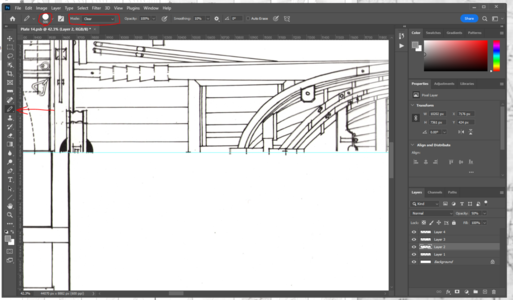
Now we will remove some of the second image that we do not want. First, select the pen tool on the left. In the tool properties at the top we want to change the Mode from Normal to Clear. I also like to increase the pen size to about 500 to make things easier.

1680151845132.png

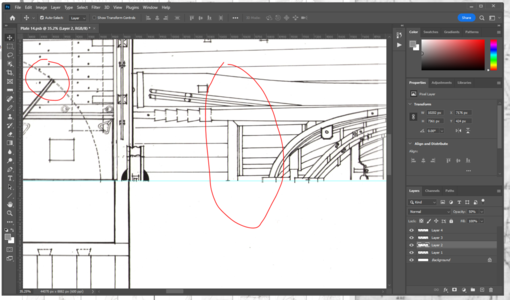
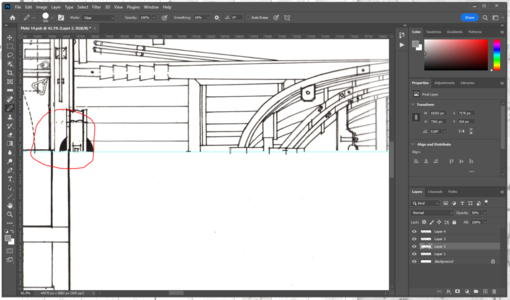
The clear tool will erase any part of the active layer that you click on. First lets mark about where the end of our second image should be by just click a bit to the left of where we picked out overlap spot. I clicked in roughly the area circled here.
1680152012884.png
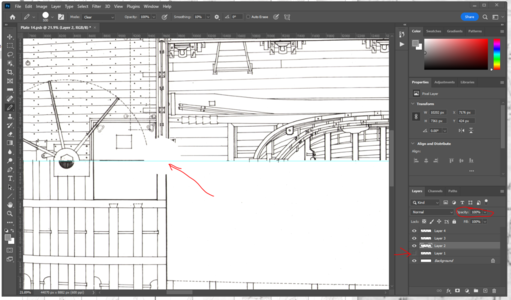
This tells us where we will remove stuff to. On the right, click the eyeball next to layer1 to hide it. Set layer2's opacity back to 100%. Now you can see where we cleared in the last step. We want to remove everything to the left of that mark.

1680152178978.png

Use the pen tool to clear all of it.

1680152282093.png

Now unhide layer1 and we see the two images now line up almost perfectly.

1680152350319.png

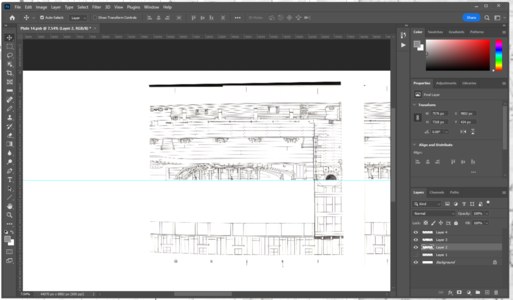
Let's do the same for the rest. Remember to save as you work. Images are going to get a bit bigger from here.

1680152564502.png

If you zoom way in, you will find tiny imperfections in the transition areas, but we don't need it to be perfect, just useable. Use the clear tool to go around the edges and clean up dark areas of the scans and extraneous stuff. Now Crop it, use the move tool to drag the light blue reference line back into the top ruler, save, and you are done. You will want to export the image as a jpeg or png now for ease of use. But this file will still be useful for getting scaled dimensions on so we keep both.

1680153114775.png

Next I will show you how to set up a measurement scale and use the measuring tool to get dimensions off your drawing.
 
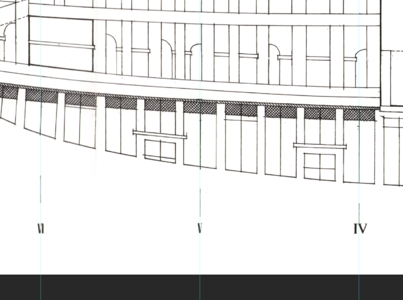
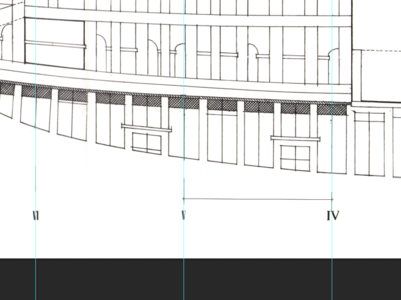
In order to get dimensions you need to set a custom measurement scale, and in order to do that you need a known dimension you can measure in the drawings. From the detail sheets for this drawing I know that the frames are spaced on 8 foot 8 inch centers and there are 4 frames per station. That equates to 416 inches between stations. First I like to create a few guidelines to aid in measuring. Like before, we will click on the left hand ruler this time and drag out three guidelines. We will position them over the station indicators. Zoom in as neccessary to fine tune them as much as possible.

1680153544638.png

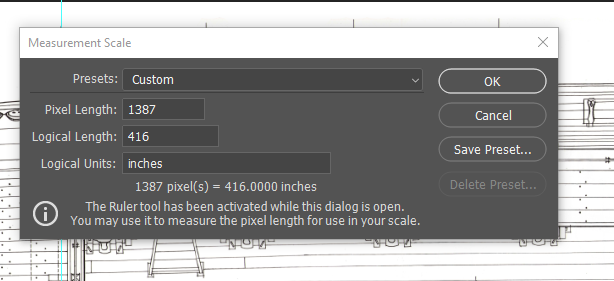
Use the measuring tool (the ruler in the left hand tool bar) to measure between your first and second line, then again between the second and third. Average the two. In this case I get an aveerage of 1387.325 pixels per station. Feel free to sample as much as you want to get a more accurate scale.

1680153794454.png

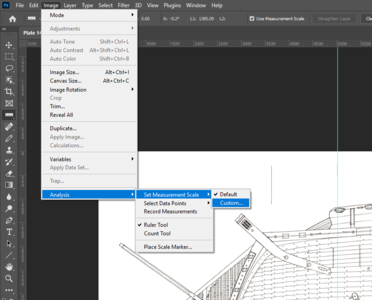
Go to Image -> Analysis -> Set Measurment Scale -> Custom.

1680153913754.png

In the dialog box change Pixel length to your average measurement. Change Logical Length to your known dimension. Changes Logical Units to whatever your know units are.

1680153978858.png

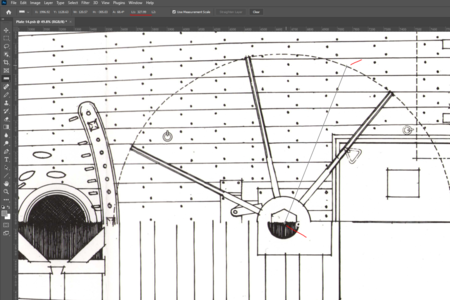
Now, whenever you measure something with the measuring tool it will tell you the distance in the units you desire. Here, the radius of the circle is roughly 328 inches, or 27'3".

1680154148618.png

It would also appear our deck planking is 30 inches wide, so we know that isn't accurate, but keep in mind the limitations of scale drawings and the fallibility of the artist. That's all for today, class, homework is pages 324 and 325 of your text book, my office hours are 12:58 to 1:00 PM if you have any questions. Your mid term essays are due on my desk no later than 11:59 PM on the 34th of the month.

EDIT: For the record, I screwed this up, there are 8'8" between numbered stations, not individual stations. It should be 26 inches between stations.
 
Last edited:
I've done the same thing using PhotoShop and then printed them out on paper, cut the planking plans out, and paste them onto the wood as cutting guides. Works great.
 
We are going to use the first image on layer one as out baseline. Everything else will be moved to that. Because there is so much overlap, we will not need the entire overlapping segments to be perfect, just certain areas of it. I find that the first and last couple of inches of most scans are useless, so I like to have huge areas of overlap so I have plenty of meat to work with. So the first thing we need to do is to activate layer2 and change it's opacity to 50%. This will make the layer transparent.

View attachment 365990

Now we can use the move tool to overlap our two images. Due to distortions during scanning the images will never perfectly overlap the entire length of the drawing. You have to pick specific areas and get them to overlap as best you can and ignore other areas. We only need it to be perfect in the area of transition between the two images. Notice in the middle area the overlap is good, but in the circle to the left you can see some distortion. Out working area will be around the larger right hand circle.

View attachment 365991
Now we will remove some of the second image that we do not want. First, select the pen tool on the left. In the tool properties at the top we want to change the Mode from Normal to Clear. I also like to increase the pen size to about 500 to make things easier.

View attachment 365992

The clear tool will erase any part of the active layer that you click on. First lets mark about where the end of our second image should be by just click a bit to the left of where we picked out overlap spot. I clicked in roughly the area circled here.
View attachment 365993
This tells us where we will remove stuff to. On the right, click the eyeball next to layer1 to hide it. Set layer2's opacity back to 100%. Now you can see where we cleared in the last step. We want to remove everything to the left of that mark.

View attachment 365994

Use the pen tool to clear all of it.

View attachment 365995

Now unhide layer1 and we see the two images now line up almost perfectly.

View attachment 365996

Let's do the same for the rest. Remember to save as you work. Images are going to get a bit bigger from here.

View attachment 365997

If you zoom way in, you will find tiny imperfections in the transition areas, but we don't need it to be perfect, just useable. Use the clear tool to go around the edges and clean up dark areas of the scans and extraneous stuff. Now Crop it, use the move tool to drag the light blue reference line back into the top ruler, save, and you are done. You will want to export the image as a jpeg or png now for ease of use. But this file will still be useful for getting scaled dimensions on so we keep both.

View attachment 365998

Next I will show you how to set up a measurement scale and use the measuring tool to get dimensions off your drawing.
Great idea and description. Thanks for sharing.

Just out of curiosity, have you tried using the panorama feature in Photoshop? It's probably not as good as what you are describing, but it would certainly be easier to do if it worked.
 
Great idea and description. Thanks for sharing.

Just out of curiosity, have you tried using the panorama feature in Photoshop? It's probably not as good as what you are describing, but it would certainly be easier to do if it worked.
I have, or rather my coworker did and the results were not good. We were working on aircraft blueprints and photoshop didn't realize that you can't just warp everything into shape. He ended up with blueprints that were banana shaped over their 20 foot length. It also moved stuff around to make lines match up. I don't know if it has improved at all since then, but I wouldn't trust it without heavily checking the results against the original.
 
I have, or rather my coworker did and the results were not good. We were working on aircraft blueprints and photoshop didn't realize that you can't just warp everything into shape. He ended up with blueprints that were banana shaped over their 20 foot length. It also moved stuff around to make lines match up. I don't know if it has improved at all since then, but I wouldn't trust it without heavily checking the results against the original.
The panorama function is probably not designed for line drawings so it likely defaults to scenic landscape thinking. There are a lot of settings possible but they all are likely to use some warp function.
 
Trust me when I say I would have loved nothing more than to be able to rely on it when stitching these blueprints.

1680374734453.png
 
Back
Top