Vasa - 1:65 DeAgostini [COMPLETED BUILD]

Hi Kurt,
Let's see if the 'masters' out there can get us an answer to your excellent question. The DeAg instructions call for the wales to be added after the secondary planking and the dimensional timber provided (which I have since replaced with pear but of the same dimensions) seems to take that into account. But almost every build on the forum shows wales installed directly to the primary hull (obviously with a single planked hull the point is mute). Let's see what we can learn...
The wales should not be on top of the planking, wales are planking, only thicker.
In an original ship construction the wales are fitted to the frames as the hoops around a barrel giving the structure rigidity.
In a ship like Vasa first the keel, stem and stern were laid, the they started with the planking of the bottom, followed by laying the floor beams followed by some of the futtocks determining the shape of the upper part of the ship. They did this with a plank determining the shape of the hull as a guidence for the rest of the futtocks. Direct above and below this guidence plank the wales were fitted, actually before the hull planking.
On this 17th century picture you see this guidence plank. You also see that the bottom is already planked as that is where the shipbuilding starts, before fitting frames.
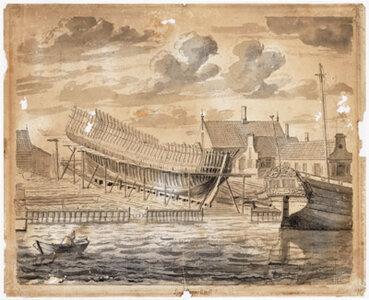
12_0559_lijnst_rogge.jpg

On this model of Ab Hoving of the fluit Heemskerk you can see the wales are now added and the guidence plank removed.
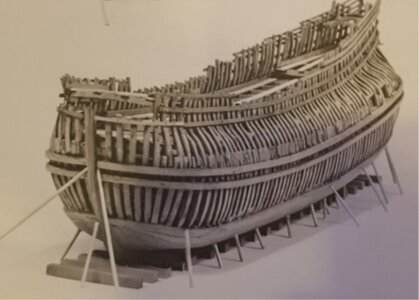
4332955.jpg

Now it is time to add the planking and fill up the space. If you want to build a correct model your wales should exactly follow planks. Therefore it is normally best to first determine the flow of your wales and fit the planking to that.

Hope it helps.
 
The wales should not be on top of the planking, wales are planking, only thicker.
In an original ship construction the wales are fitted to the frames as the hoops around a barrel giving the structure rigidity.
In a ship like Vasa first the keel, stem and stern were laid, the they started with the planking of the bottom, followed by laying the floor beams followed by some of the futtocks determining the shape of the upper part of the ship. They did this with a plank determining the shape of the hull as a guidence for the rest of the futtocks. Direct above and below this guidence plank the wales were fitted, actually before the hull planking.
On this 17th century picture you see this guidence plank. You also see that the bottom is already planked as that is where the shipbuilding starts, before fitting frames.
View attachment 199538

On this model of Ab Hoving of the fluit Heemskerk you can see the wales are now added and the guidence plank removed.
View attachment 199539

Now it is time to add the planking and fill up the space. If you want to build a correct model your wales should exactly follow planks. Therefore it is normally best to first determine the flow of your wales and fit the planking to that.

Hope it helps.
It seems model manufacturers throw out shipwright practice, and use a lot of liberties in an effort to make the build easier. After all it's a model, and not a real ship. But I suppose if you want to maintain historical accuracy, then you will have to do your homework and make the necessary changes, thus making the build more difficult and time consuming. In conclusion, it seems the choice is the builders, assuming they know better in the first place! ;)
 
It seems model manufacturers throw out shipwright practice, and use a lot of liberties in an effort to make the build easier. After all it's a model, and not a real ship. But I suppose if you want to maintain historical accuracy, then you will have to do your homework and make the necessary changes, thus making the build more difficult and time consuming. In conclusion, it seems the choice is the builders, assuming they know better in the first place! ;)
Manufacturers don't throw out shipwright practices, they are not designing their kits to match and follow their practices. They simply adopt kits design balancing between the production cost and simplicity of assembly. Should they care for historically correct wales attachment if the kit is double-plank on bulkheads ( not actual frames)? ;)
And I totally agree with you, if you want historically accurate - build from scratch, using as much research as you can find for the subject. Oh...and use the same timber as it was initially used in the vessel ;) (Just Kidding)
I think we are saying the same thing, if they don’t design their kits to match and follow shipwright practices, then they ARE throwing out shipwright practice...lol. Saying throw out, means not using. ;)
I like your joke about using the same timber, because you really can take this historical accuracy stuff too far...lol.
I say enjoy the hobby and do what makes you happy. I will never judge someone’s effort by historical accuracy, but rather by the quality of craftsmanship.
 
I say enjoy the hobby and do what makes you happy. I will never judge someone’s effort by historical accuracy, but rather by the quality of craftsmanship.
It is tough to object, and this is the beauty of our hobby: Build what you want, the way you want\can, and be proud of what you built. :) We all have our own 'acceptance' level. ;)
 
I liked the fact that Corel has you lay the wales first and plank around them because the wales guide the plank lines down to the waterline, below which the geometry of the makes things sort of go wild. At the flat transom, the edges of the planks and wales appear the same as they do on a real ship. When the wales are spaced properly, I got precisely one strake of planks between the lower wales with little to no sanding of the edges to make them fit. The best approach for me was to lay one wale, then a strake of planks below it, then the next wale down. The wales stay mostly parallel across most of the hull, and started to diverge (spread apart) higher up on the sides of the stern castle. It wasn't that hard to narrow a plank, held in a metal vice, and sand its edge with a sanding block containing 80 grit paper. It was even easier to use very sharp Fiskars shears to cut the plank close to shape by eye and sand a tiny bit to make it fit perfect. You'll have to choose what method makes you most comfortable and what works best. As for me, I swear by these things for trimming thing veneers AND rigging. They cut thread off as close as toenail clippers when stripping blocks and are very sharp.

1608263648766.png
 
Ofcourse it is is up to the builder and their level of skill but it is also nice to try to increase your skill level and learn. The flow of wales and planks is one of the biggest influences on the apearence of a shipmodel, if planks have a different direction then the wales you will directly see it. It is not more difficult to do it right it just means change the order of doing thing like in the Corel kit. In a double planked model it means the second layer to start with the wale, these determine the shape and flow of the whole ships planking.

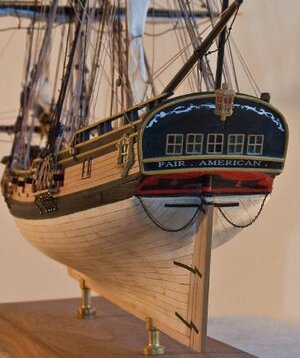
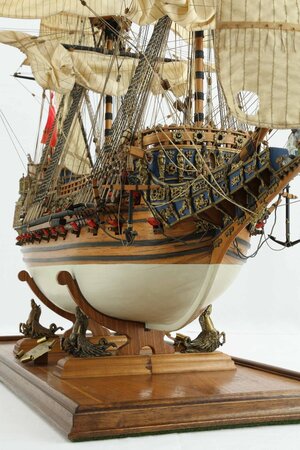
See the difference below between this fair american and sovereign of the seas.
fa6.jpg.opt364x434o0,0s364x434.jpg
6542b8dd9894be51b7f41848ad95dfec.jpg
 
Ofcourse it is is up to the builder and their level of skill but it is also nice to try to increase your skill level and learn. The flow of wales and planks is one of the biggest influences on the apearence of a shipmodel, if planks have a different direction then the wales you will directly see it. It is not more difficult to do it right it just means change the order of doing thing like in the Corel kit. In a double planked model it means the second layer to start with the wale, these determine the shape and flow of the whole ships planking.

See the difference below between this fair american and sovereign of the seas.
View attachment 199562
View attachment 199563
I agree we should always strive to do better and take on new challenges. That said, this is the first I have ever heard of the wales being part of the planking, as they are usually added last per kit instructions. But now that I know better...I will follow that on my next build! So thanks for the info and I consider your advice always as a master builder, IMHO! I just don't want Paul or anyone else to think their effort is any less, because they (myself included) didn't know to do it that way. ;)
 
I agree we should always strive to do better and take on new challenges. That said, this is the first I have ever heard of the wales being part of the planking, as they are usually added last per kit instructions. But now that I know better...I will follow that on my next build! So thanks for the info and I consider your advice always as a master builder, IMHO! I just don't want Paul or anyone else to think their effort is any less, because they (myself included) didn't know to do it that way. ;)
One of the things I learned is that most builders WANT to build accuracy and realism into their models, but when kits take shortcuts or change methods, the builder is largely unaware that more realistic methods exist, and that it often takes only a small amount of extra effort to make the kit look more professional and accurate. You constantly have to re-evaluate the instructions, what is correct and what is not, what is simplified and left out, and re-order all the steps to include your changes. It takes far longer to determine what the next step is that it does to perform that next step. Instructions are a minimal guide to the order of the steps. In Corel's case, the written instructions were useless, and the order of steps was illustrated in the many sheets of drawings, which is nice... except that there were about 5 things that conflicted between the drawings and one mis-numbered line. Most of the conflicts involved the location of belaying pins on the rails.

All of this boils down to, where do I go to get help for advice in where to change my kit? Well, that would be HERE on this forum. Build logs and advice from forum member become your set of instructions. It's really great to have so much support, especially on your first ship, where you fear that EVERY step you take could be a wrong one.
 
All of this boils down to, where do I go to get help for advice in where to change my kit? Well, that would be HERE on this forum. Build logs and advice from forum member become your set of instructions. It's really great to have so much support, especially on your first ship, where you fear that EVERY step you take could be a wrong one.
Sorry for the off-topic, @dockattner

Well said, Kurt. The kits always had flaws and unfortunately will have them no matter what. Some more, some less but they all do. The biggest problem, IMHO, is not the kits as they are, it is a modeler who chooses the kit as the next project. There is something called 'not for your teeth'. We have to be critical of ourselves judging the skills and ability to make the desired kit. Often times we've seen modelers start a three-decker as their first model. They will fail, right of the bet no question. It is not because the kit's plan is poor or bad instructions. It is the experience they will have to gain before building a three-decker :cool: Skilled modeler can technically turn any kit into a nice model, even without an instruction manual (for the most part)
 
Thanks, everyone, for this enlightening conversation - and special thanks to @Maarten who has once again been generous in sharing his knowledge. We have all been blessed by this interaction.

I was surprised by how much I can affirm what Kurt just wrote about how, on your first ship, every step introduces a certain level of fear. It has likely been a while since most of you built your first ship - but Kurt and I are a little newer at this hobby and his comments are spot-on from my perspective.

As for me, I would have used the wale as a plank if I had the sense to wonder how to do it properly. But the good news is that I took @Maarten's advice before I started the second layer of planking and placed a sacrificial wale to establish the run of the planks along the length of the hull. I think that means my wales will parallel the strakes precisely. I suppose I could even remove select rows to lay in the wales - but half of my wales are 5 mm (same as my planking) and half are to be 4 mm (this is representative of what is seen on the original ship) making the correction more difficult. And having removed strips of planking in the past I happen to know there will be collateral damage when making that effort...

I also think @Jimsky has made an excellent point regarding kit selection. This probably accounts for at least some of the build logs that go unfinished. Will the @dockattner Vasa end up with that ignominious group? Only time will tell! I certainly qualify for the "in over my head" prize! But I do have all of you to help me along the way and I find great encouragement in that. Onward!
I predict completion for you Paul. However be ready for a new world of pain on the rigging! You have a lot of time before you take on that task, so enjoy the journey, a board at a time! ;)
In my opinion, the two hardest parts of a build are the hull planking and the rigging. You have overcome the first big obstacle!!!
 
Hi Paul,

Looking at the quality and attention to detail you will certainly finish it into a fantastic model.
There are always people here online willing to help if needed.
Just go with the flow, it is a great hobby that will addict you for the rest of your live.
 
I always lay the Wale planks first to establish the run of the planking but I make the wales as thick as the layer of planking and after the hull is planked I go back and add another layer of wale planks to bring them up to the total wale thickness. Most times the wales are a different color, or in my models, a different species or color of wood and this makes the parting lines of the wales very distinct and if they are painted it is much easier to get a clean line if you paint them before installing the last layer.
 
I always lay the Wale planks first to establish the run of the planking but I make the wales as thick as the layer of planking and after the hull is planked I go back and add another layer of wale planks to bring them up to the total wale thickness. Most times the wales are a different color, or in my models, a different species or color of wood and this makes the parting lines of the wales very distinct and if they are painted it is much easier to get a clean line if you paint them before installing the last layer.
I’ve yet to put on wales that didn’t follow the flow of the planks, but I have never done them with the planking. I will definitely do it on the San Felipe. ;)
 
I guess what I am saying is that they do follow the flow of the planks - or rather they should establish the flow of the rest of the planking. They are also a great reference for measuring- gunports, oar ports, channels, top railings, etc,etc.
 
Meanwhile, back at the Kattner shipyard...

Planking, planking, planking, planking, planking, sleeping, planking, planking, planking, working, planking, planking, planking, grocery shopping for my mom, planking, planking, planking, planking, preaching, planking, planking, planking, reading other people's build logs, planking, planking, planking...

IMG_5815 (2).JPG

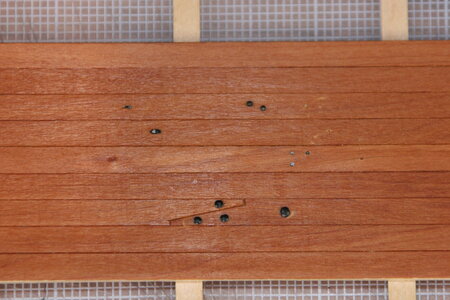
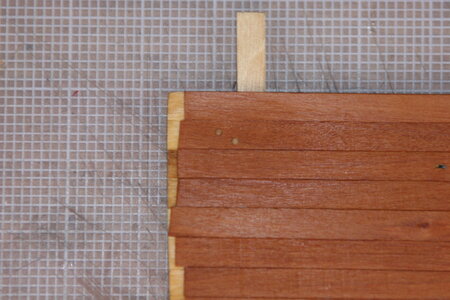
I have also been shopping for tiny nails and trying them out...

IMG_5818.JPG

And even tried my hand at treenails (trenails, trunnels)...

IMG_5817.JPG

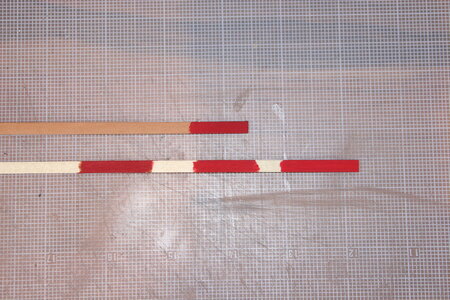
And began researching paint/ink options for the red tinting that will be applied to the decorative clinker planking still to be installed (you will see blue used on some models of the Vasa) as well as on the upper half of the stern castle.

IMG_5819.JPG

I believe the one on the pear strip is the winner. It's almost a dead match for the 1:10 Vasa Museum model.

Find a glass. I'll be inviting you to join me for a whiskey plank celebration sooner than later!
 
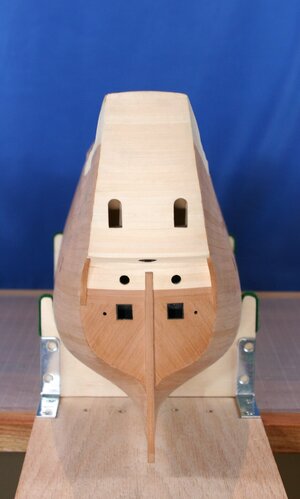
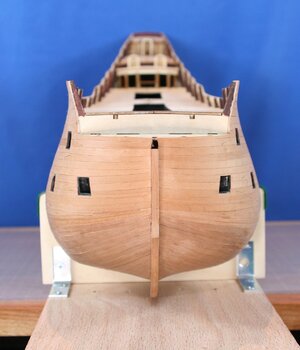
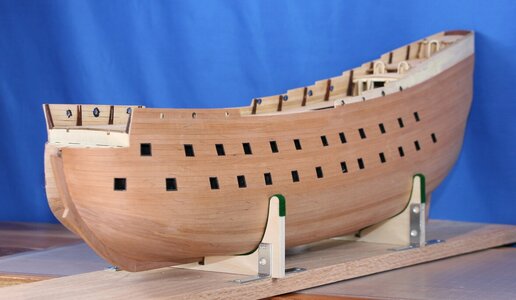
And with very little fanfare - without even really noticing it was happening - it was done.

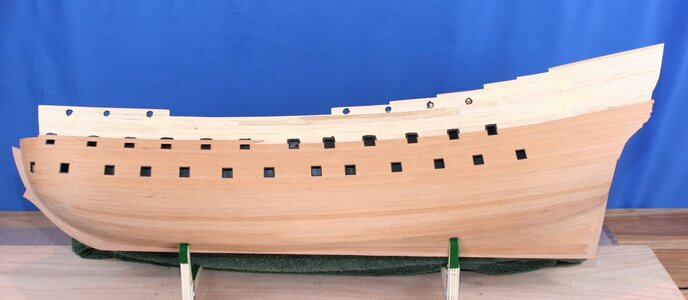
One month and one day ago I laid the first strake for the second layer of planking. Moments ago I laid the final plank (well, nearly so, there is a little bit of clinker planking running from midships toward the stern but that can't be placed until the hull is sanded so I am declaring an interim victory).

Each side has 42 rows of 5 mm pear tree strips. If you are keeping score at home the final scarf joint count is 600 give or take a few.

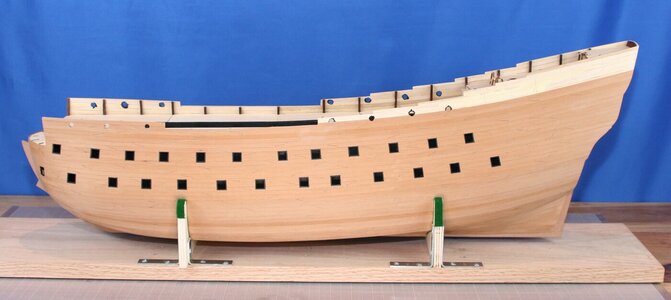
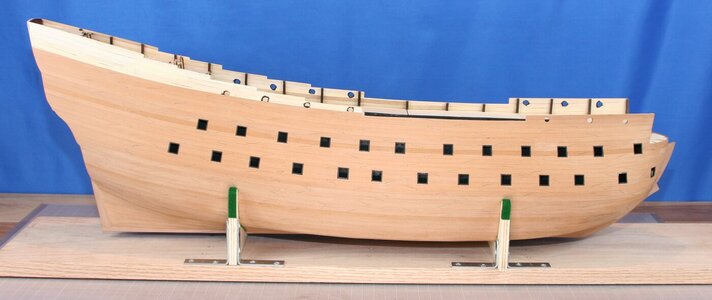
Here she is:

IMG_5822 (2).JPG
IMG_5823 (2).JPG

IMG_5826 (2).JPG IMG_5828 (2).JPG

IMG_5829 (2).JPG

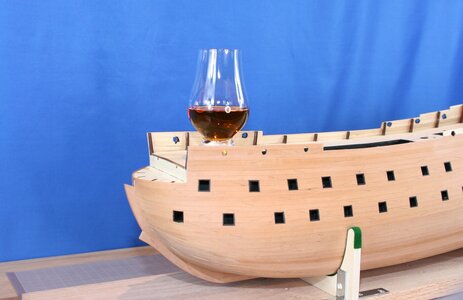
Some time back I was introduced to something called a whiskey plank by forum member @Brewbrarian. Being a novice to ship building of any sort (real or in model form) I was unaware of this tradition. If you are similarly unaware it's not complicated: the fitting of the final plank on the hull of a new ship under construction is an event worthy of celebration. In shipbuilding communities that celebration includes whiskey - thus, the whiskey plank.

I'm celebrating! I'm celebrating reaching this milestone in the building of my Wasa. And I'm celebrating the SOS forum and all of you who have been part of my humble endeavor. Whether you have been peeking in on my build now and again, or if you have shared likes and words of encouragement, or if you have been part of this success through the sharing of advice, correction, and instruction, I'm celebrating YOU.

Here's to this wonderful hobby and the kind and generous folks who are a part of it...

IMG_5831 (2).JPG

I'm not much of a drinker but I'm making an exception in this case!

If you are so inclined post an image and join in the celebration of model ship building and the fascinating group of people who are part of it!

Merry Christmas friends!
 
Last edited:
Back
Top