Vasa - 1:65 DeAgostini [COMPLETED BUILD]

Excellent as ever Paul. The galleries are coming along really nicely. From photos at the museum, I too added the small opening on the lower gallery, but made it a small window with a divided pane of clear plastic which shows the light through from the internal lighting. Its a small detail but looks good at night!!

I have seen so many Vasa models in logs where the modeller has opted not to 'scallop' the galleries. In my opinion, yours just validates why this should be done. I found it a long and tedious process, because on the Billing Boats kit there is no shape or guide to follow, but I think on the De Agostini model, you had a moulding which allows for precise scallop painting. In mine, I used a Rotring drafting pen filled with diluted yellow Vallejo paint - crude, but it worked out OK and allowed for reasonably fine linework.

Your close ups of the 'burnt' timber nails are awesome. I am experimenting with this now, but find that the filed needle point either burns the inner portion of the circle (when too hot), or is not hot enough to burn a complete circle. It's hard to get a consistent heat to the needle tip. Any tips you can offer on how you get such a uniformly burnt circle?

Love your work, Paul...

Regards,
PeterG
Thank you Peter. Your Vasa offers much inspiration for me.

RE: the opening in the lower gallery. I think you have it right. To my way of thinking this opening would have been a welcome source of light and/or ventilation - perhaps for inside the gallery but more likely for inside the ship itself. As you know the galleries can be entered but they are not really useful space. It has been suggested that the lower gallery might have provided a private latrine for someone worthy of that privilege on a ship - but the archeology just doesn't support that theory - or so I have read.

RE: the scallops. Obviously I agree with you. And the DeAg castings do include a profile to assist the modeler. Unfortunately I still struggled to make nice clean scallops but that shortcoming gets lost in the chaos of colors. I honestly believe yours turned out better.

RE: the faux trenails. First let's credit @Maarten who introduced me to this technique. I used an alcohol lamp and heated the syringe tip to the point that it just turned orange (not red) and then fairly quickly brought that to the planking. I used what can best be described as a slow motion tap. Practice is key because the magic seemed to happen when I got into a rhythm - even to the extent that I was careful to move the alcohol lamp a standardized distance from the place I was working so I was repeating the motion as well as the timing. Maarten used a continuous heat source (butane powered soldering iron) so his approach was more standardized than mine. Hope this helps.
 
Last edited:
Paul,

Galleries look spot on - and are very hard to get even close to right on the Vasa..The painting is also the "deep 6" part...

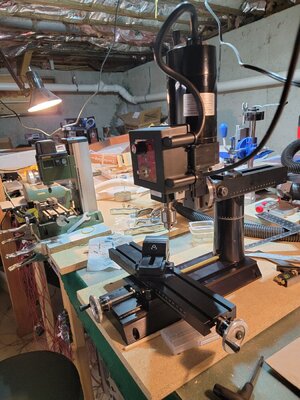
Re: Proxxon mill - it is indeed a "must" if you decide to go to the Dark Side of this hobby. Given your attention to this project I think that you will be chomping at the bit to improve your next effort lol.
Of the tools that I have the MF70 is so useful (and I have only scratched the surface with it). I added two other Proxxon tools for my current project (FET-37-070 table saw and their DS460 scroll saw) - glad that I did.

Regards,
I'm sure you're right, John. I'm not really sure what is holding me back - it's not like I'm afraid to spend money. I just spent a small fortune on fancy blocks, proper period deadeyes, brass bits, a ropewalk and seizing machine, etc. I guess I'm intimidated as I don't really know what accessories I should get with the mill. When all the real men were taking shop classes I was taking advanced biology and organic chemistry so I am completely out of my depth when it comes to tools.
 
Paul,
I wouldn't be too intimidated by the 3 axis milling machines. The one by Micro Mark seems to be a drill press, with a x-y axis adapter on it. You can source them separately if you chose, not sure if it would be cheaper?
But basically the drill press needs to have a variable speed adjustment for different materials (metal verses wood) and you need cutters for different materials (will have different flutes), and different type cutters (radiused, square, etc.). The Z axis is your depth, which you can set on the drill press (plunge depth), and the X axis will run horizontal (side to side) and the Y axis will run front to back. So if you want to make a notch in a board for instance, you would set up your depth (Z) on the drill press, and adjust your width (X axis) and length (Y axis) which would be through the part in this case. Hope that makes sense. You're an educated man, and I am certain you can figure it out quickly! Start out with basic cutters, preferably small diameters to medium. You can always get more cutters as need arises.
The only reason I don't have one yet, is because I have a hard time justifying the cost. At around $1,600 dollars on sale, how many times do I need to use it to justify having it, when I can typically make any notch or cut needed with hand tools? I haven't been in a situation yet where I couldn't make something because I didn't have a milling machine. They are very beneficial for accuracy, however at model scale, I find I can be very accurate with proper jigs and setup.
At the end of the day, it's your money and your call. But don't let intimidation stop you...after all, look what you've done on your first ship! ;)
 
I'm sure you're right, John. I'm not really sure what is holding me back - it's not like I'm afraid to spend money. I just spent a small fortune on fancy blocks, proper period deadeyes, brass bits, a ropewalk and seizing machine, etc. I guess I'm intimidated as I don't really know what accessories I should get with the mill. When all the real men were taking shop classes I was taking advanced biology and organic chemistry so I am completely out of my depth when it comes to tools.
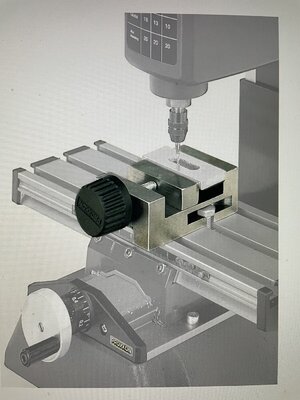
C'mon Paul, what you're doing with this build is out of this world. No need to be intimidated by milling. As @oldflyer mentioned, MF70 is great little milling machine. I've been using the same one for the past 15 years. The only attachment I'd get to start with would be precision steel vice.
 
Paul, as Dean mentioned, it is about skills. With hand tools you will be able to do most or all what you will do with a milling tool.

In my case, that doesn't work. My hands skills are so poor that I can't do perfect cuts or doors and all the details I did for my Pegasus. Also I used it as a wood thickness tool. I posted a video in a SOS thread.

Bottom line, is about "you and your skills".

For the Pegasus I got the Proxxon MF70 plus the Proxxon Vise ($370 + 70) . Then you buy bits as you need them.

2 weeks ago I decided to jump to a big brother. The Sherline 2010 plus the package A of accessories ($1400 price for the tool and packageA all together).

I will keep both. Why ? No justified reasons yet. But the Proxxon is so cheap and does a FANTASTIC JOB !!! , I will keep it.

The Sherline, I got it for my retirement. Income will be 1/3 of today's income and I decided to buy life time tools now that will pass to my heirs.

Bottom line:

For Budget go and get the Proxxon MF70.
For unlimited uses in wood and metal go and get the Sherline.

Both EXCELLENT !!!!

BTW, don't feel intimidated by tools.. I have a PhD in Biology, did more than 30 years of basic research and the last 10 years working in corporate Pharma. My knowledge about tool is CERO !!!!!. But at SOS and the other forums you will get all the info for the hobby.

The 2 milling tools

20210702_132530.jpg

Cheers
Daniel
 
Hey Paul, for me I have a one off brand bench top table saw I bought from Model Shipways $63.00. I would call this indispensable in my tool bin. I started buying small tools about 5 years before I retired in preparation for this hobby. My next power tool will be a benchtop disc/belt sander. I do now wish I had bought a Proxin table saw, and may still do so as it truly is so valuable for me.
 
Proxxon MF70 is a great way to introduce yourself to machining. But...because of the small footprint, it does have its limitations. The biggest limitation is the size of the endmills. The largest diameter of the endmills it is accepted - is 3.175mm. This leads to a huge limitation of both: variety and quality of endmills available on the market. This machine is very popular and attractive among modelers primarily for its precision and price. There are many kits offered (not from Proxxon) to convert this machine to a CNC mill. I own one and can assert the usefulness of this tool while milling wood and light metals.

However, if you are looking for long-run modeling, to fabricate parts from wood alone with metal, you might consider investing in a good desktop size mill. For sure it will be three times more expensive (if not more), but you will have a tool for the rest of your modeling journey.
Dima, we have a ship modeler in Russia, your namesake Dmitry Shevelev. He makes cutters himself from fragments of files. Any shape.
 
In an oddly satisfying way I spent most of a day working faithfully on my ship without really accomplishing anything. Today I stumbled and bumbled my way into the world of scale rope-making. Frankly, I have read lots of posts about the rigging process but I have learned virtually nothing because the language is completely foreign to me. I know I need to have lines of different sizes but that's about it at this point.

But I do now own a Domanoff ropewalk (and a serving machine) and have selected a base color for my rigging. The ropes on the Vasa were all hemp so I picked a 'hempy' color from Gutermann. As has been mentioned on other Vasa build logs, it would seem that little if any tar was used on the standing rigging but I will try to add some color variation just for the sake of visual interest.

While I won't be ready to do any rigging for quite some time I thought that making ropes would be something I could do every once in a while as a diversion... Anyway, that's my logic for taking up this subject now.

I figured out how to make different sizes of rope but will need to fill in some gaps once I determine what sizes I will need and in what quantities.

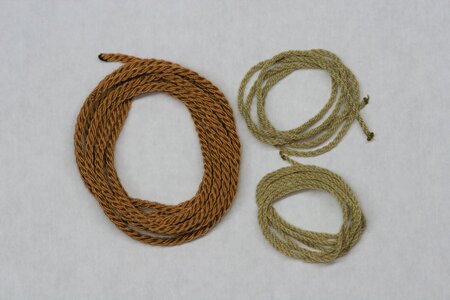
IMG_6904.JPG

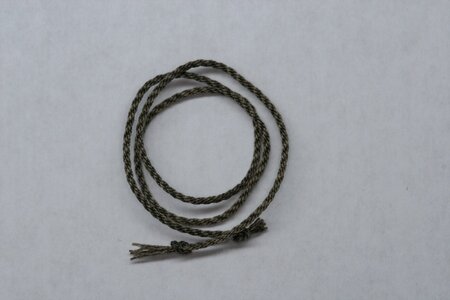
Here are a few examples of where I am after a day of trying to figure out how to do this job... The brown cable on the left is not the right color - just using up thread that I ordered trying to find the color I had in mind (color samples on websites are pretty worthless). Anyway, the two smaller ropes on the right are the color I will use.

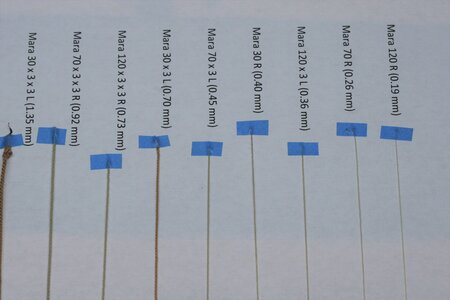
IMG_6916.JPG

I also was inspired by @mati.n and his rigging work but I was not able to replicate his tarred ropes. I wasn't surprised by this failure - I just need to figure out what I did wrong and keep trying... This is what I ended up with:

IMG_6919.JPG

Other than practicing more, I also need to determine what sizes of rope to use on my 1:65 early 17th century ship model and in what quantities - and as time allows start making some rope.

I am open to your suggestions and tips for rope-making!
 
Last edited:
I am so glad that you are doing this now, Paul. Sometime, by the end of the year, I will need to focus on rope making, myself. Does the Domanoff ropewalk come with any sort of guide to scale rope-making? Is the machine relatively easy to use/intuitive, in your opinion?
 
Dima, we have a ship modeler in Russia, your namesake Dmitry Shevelev. He makes cutters himself from fragments of files. Any shape.
@dockattner Sorry for the off-top

I am well aware of those cutters but yet have never come across the tutorial. Do you have any links or videos to share with our members? That would be great, but don't put it here. This is VASA dedicated build log. We have a section for tools\techniques

 
I am so glad that you are doing this now, Paul. Sometime, by the end of the year, I will need to focus on rope making, myself. Does the Domanoff ropewalk come with any sort of guide to scale rope-making? Is the machine relatively easy to use/intuitive, in your opinion?
Hi Marc,

There are some YouTube videos if you search for Domanoff - but they were less helpful than I needed them to be (having said that I did make rope by the end of the day). Like many things I have come across in model ship construction there is an unspoken assumption: you know a little about this subject so here's what you need to know next to up your game. For example, I learned today why left and right hand twists matter when building up ropes; but the instructions assume you know why it matters as the ante to get in the game. It sounds like I'm complaining but I'm not - I have accepted the learning curve problem as a problem to overcome not whine about.

I have attached the Domanoff .pdf instructions and that has some formulas but I found that list unhelpful because I'm not starting up a rope making business nor did I want to invest in that level of inventory. I have three sizes of Gutermann poly at 120 / 70 / 30. In my naiveté I'm thinking I can get by with those three sizes in my stockpile. We'll see. I don't even know what my goal sizes are yet. I'll message you another guide.
 

Attachments

  • PL4_Series_EN.pdf
    149.8 KB · Views: 32
Back
Top