Hey everyone. Just wanted to send out a note of gratitude for all the various ways you have helped me wade into the waters of wooden model ship building. You have been generous sharing your experience and wisdom and the 'likes' are certainly encouraging for this novice. Today marks the one month anniversary since I 'set the keel' on this build and not only am I having a blast but I feel like things are coming along quite nicely. Of course, at this stage of her construction, the 1628 Vasa was in good shape too!
You are using an out of date browser. It may not display this or other websites correctly.
You should upgrade or use an alternative browser.
You should upgrade or use an alternative browser.
Vasa - 1:65 DeAgostini [COMPLETED BUILD]
- Thread starter dockattner
- Start date
- Watchers 145
Thanks for checking out this update!
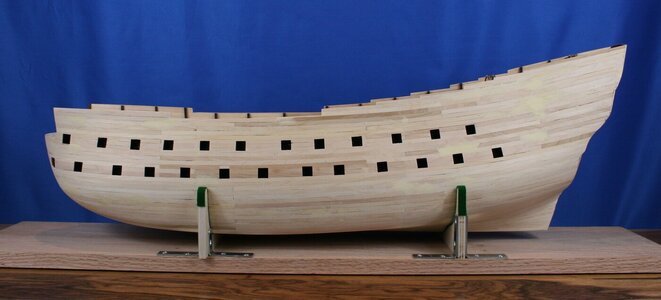
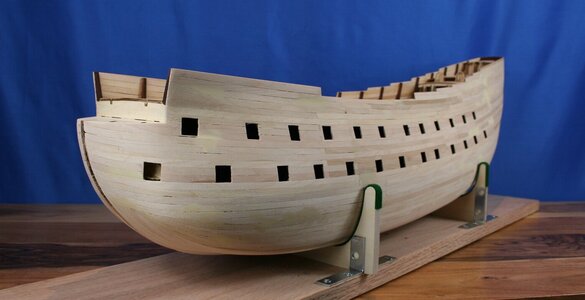
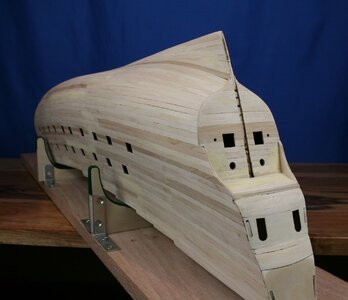
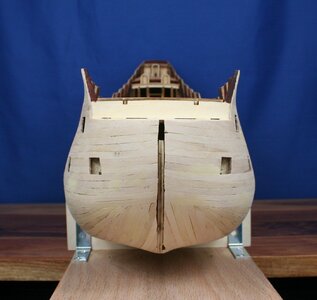
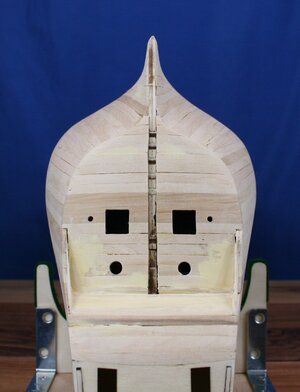
I achieved a milestone (or maybe a milestone and a half last week). I completed the sanding and shaping of the primary hull (a full milestone) - and, as you can see in the images that follow, I completed the gun ports (half a milestone).
I learned a few things along the way:
1. I failed to place a high enough value on selecting wood strips of consistent thickness while planking. Most of my sanding/wood filler struggles centered around managing thick or thin wood strips that I should have never placed. Lesson learned.
2. Sanding and shaping is a LOT of work. It took me two days and even though I thought I was being careful and taking my time I accidently sanded the false keel while shaping/tapering the aft portion of the hull. I'll need to address this once I fabricate and fit the true keel.
3. As noted by another builder - cutting in port holes is a tedious job. Even with taking my time I will need to do some refining when I place frames inside the openings and when doing the finish layer of planking.
Check out my work and feel welcome to note shortcomings that I can address before I go any further!


- Joined
- Jan 9, 2020
- Messages
- 10,377
- Points
- 938

Dear Doc. In my opinion, you have done an excellent first planking.  And you are right ... it is indeed a milestone.
Looking at your concerns and observations:
1. The thickness of the wood strips is an arbitrary thing. If you had only selected wood strips of exact and equal thickness, you would probably not have had enough planks for the job. Also bear in mind that we must not lose sight of how it was done in real life. Shipbuilders OFTEN used what was at hand, available and affordable. That meant different lengths, thickness and even varying types of woods.
2. Accidentally sanding the false keel: This happened to me as well. Just take care now that you provide as level a surface for the keel as you possibly can.
3. Port holes: You are right. You can only do the final shaping when the frames go in - so no worries there.
In all, you can be well proud of what you have achieved!
 And you are right ... it is indeed a milestone.
 Looking at your concerns and observations:
1. The thickness of the wood strips is an arbitrary thing. If you had only selected wood strips of exact and equal thickness, you would probably not have had enough planks for the job. Also bear in mind that we must not lose sight of how it was done in real life. Shipbuilders OFTEN used what was at hand, available and affordable. That meant different lengths, thickness and even varying types of woods.
2. Accidentally sanding the false keel: This happened to me as well. Just take care now that you provide as level a surface for the keel as you possibly can.
3. Port holes: You are right. You can only do the final shaping when the frames go in - so no worries there.
In all, you can be well proud of what you have achieved!
I agree that’s a very good first planking job and a milestone, especially given the size of the ship and the number of planks required! Keep up the good work.Dear Doc. In my opinion, you have done an excellent first planking.And you are right ... it is indeed a milestone.
Looking at your concerns and observations:
1. The thickness of the wood strips is an arbitrary thing. If you had only selected wood strips of exact and equal thickness, you would probably not have had enough planks for the job. Also bear in mind that we must not lose sight of how it was done in real life. Shipbuilders OFTEN used what was at hand, available and affordable. That meant different lengths, thickness and even varying types of woods.
2. Accidentally sanding the false keel: This happened to me as well. Just take care now that you provide as level a surface for the keel as you possibly can.
3. Port holes: You are right. You can only do the final shaping when the frames go in - so no worries there.
In all, you can be well proud of what you have achieved!
- Joined
- Jul 9, 2019
- Messages
- 495
- Points
- 323

I second that. Fantastic result. Very clean!
Hope you poured yourself a treat after that whiskey plank.
Hope you poured yourself a treat after that whiskey plank.
A very good basis - could nit find anything to remark or to comment -> Good Work
You took a huge step in building this kit and are doing a fine job, keep up the good work
Thank you @Uwek, @DonRobinson, @Brewbarian, @Dean62 and @Heinrich. I appreciate your gentle encouragement for my work on the primary hull. It is interesting how a larger scale ship should be easier to work on (technically speaking) but presents it's own challenges because of the larger size. I had not anticipated this aspect. I tend to be persistent (aka addictive) but I can see how someone might bail out on a project like this (as evidenced by build-logs that start but are not taken to completion). This project will require a mindset along the lines of: enjoy the journey because the finish is too far off to even contemplate. I may do a few more things on the hull (gun port frames, for example) but then take a break in favor of more artful pursuits. There are hundreds of metal bits to paint so maybe I'll spend some time on that???
I‘m enjoying following your build, the models size is impressive as is your work so far. I’m still a novice as far this wooden ship building business. But, I’ve found that taking an occasional break and pursuing other things, like reading a good novel, working a jig saw puzzle, putzing with my indoor RR layout, working in the garden, etc., allows me to get over the “uglies, frustration and the sometimes overwhelming feelings” of working on my model. It took me some time to realize there is no hurry to complete any step of the build, it’s a hobby not a contest and the eventual outcome will be worth the effort.Thank you @Uwek, @DonRobinson, @Brewbarian, @Dean62 and @Heinrich. I appreciate your gentle encouragement for my work on the primary hull. It is interesting how a larger scale ship should be easier to work on (technically speaking) but presents it's own challenges because of the larger size. I had not anticipated this aspect. I tend to be persistent (aka addictive) but I can see how someone might bail out on a project like this (as evidenced by build-logs that start but are not taken to completion). This project will require a mindset along the lines of: enjoy the journey because the finish is too far off to even contemplate. I may do a few more things on the hull (gun port frames, for example) but then take a break in favor of more artful pursuits. There are hundreds of metal bits to paint so maybe I'll spend some time on that???
Jan
Whiskey plank? I didn't know about the whiskey plank! I'm so embarrassed! Guess it will have to wait until the second planking. Or maybe I'll do a belated ceremony tonight and then again with the finish layer. I'm certainly not opposed to a worthwhile celebration! Thanks for the heads-up, Eric!I second that. Fantastic result. Very clean!
Hope you poured yourself a treat after that whiskey plank.
- Joined
- Oct 29, 2019
- Messages
- 90
- Points
- 58

a larger scale and therefore larger model does have its difficulties too but i find that i need 1/48 scale - and that makes for large size models when considering the size of the large american clippers but still i find it much easier than the smaller scales- especially 1/96 which i find really hard to buildThank you @Uwek, @DonRobinson, @Brewbarian, @Dean62 and @Heinrich. I appreciate your gentle encouragement for my work on the primary hull. It is interesting how a larger scale ship should be easier to work on (technically speaking) but presents it's own challenges because of the larger size. I had not anticipated this aspect. I tend to be persistent (aka addictive) but I can see how someone might bail out on a project like this (as evidenced by build-logs that start but are not taken to completion). This project will require a mindset along the lines of: enjoy the journey because the finish is too far off to even contemplate. I may do a few more things on the hull (gun port frames, for example) but then take a break in favor of more artful pursuits. There are hundreds of metal bits to paint so maybe I'll spend some time on that???
- Joined
- Jul 9, 2019
- Messages
- 495
- Points
- 323

So much to be learned here. Glad to contribute.Thanks for the heads-up, Eric!
I had a day off of work today so I spent some time fabricating and installing frames for the gun ports.
Some were able to be installed in accordance with the cut out...
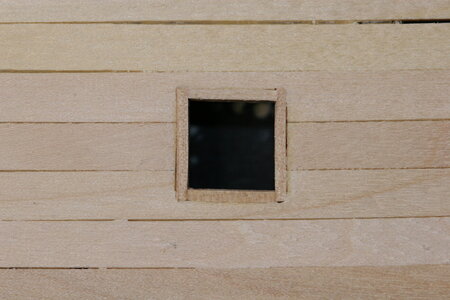
Others provided correction for a poor cut out...
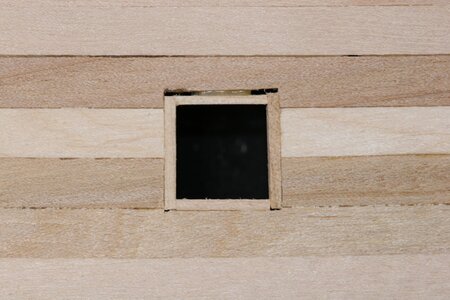
Most were somewhere in between...
The plan is to paint/stain these dark brown or black and then bring the finish hull planking to the outside edge of the frame. This will provide a very slight set-back of the frames relative to the finished hull (correction to scale of about 2 inches). If this is wrong please don't tell me. I've had enough of gun ports for a while!
Some were able to be installed in accordance with the cut out...

Others provided correction for a poor cut out...

Most were somewhere in between...
The plan is to paint/stain these dark brown or black and then bring the finish hull planking to the outside edge of the frame. This will provide a very slight set-back of the frames relative to the finished hull (correction to scale of about 2 inches). If this is wrong please don't tell me. I've had enough of gun ports for a while!
Last edited by a moderator:
A topic for discussion (if you are so inclined).
I am now at a point where I need to make some decisions regarding the wood species to be used on the hull. The original ship was planked in oak, and then below the waterline she was coated with an ivory colored 'sealant'.
The kit instructions call for painting the hull white/ivory below the waterline - and painting the hull baby-sh... brown above the waterline. Really. Check it out:
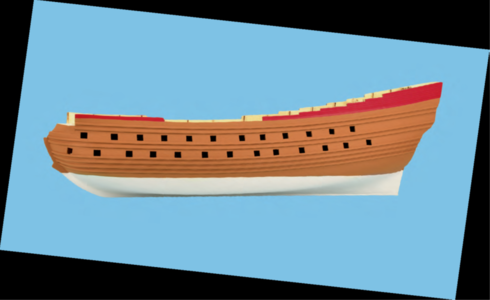
Anyway. I'm not going to paint the hull. That's not the part I want to discuss.
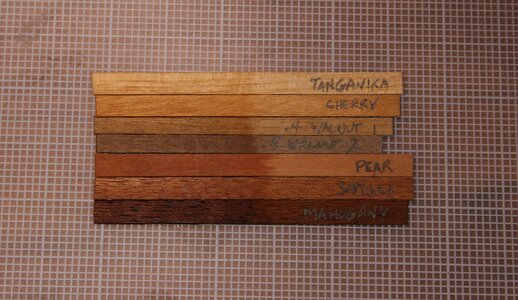
Here are some wood samples - there is Danish oil on half of the sample (a single coat). I am trying to figure out what would provide the best 'background' for all the ornamentation on the Vasa (I'll be painting those multi-chromatically based on what has been learned in the last ten years at the museum). I'm even considering using one species for the hull itself and a complementary species for the wales (don't hate me!).
What are your thoughts? From top to bottom: Tanganyika, Cherry, Walnut 1, Walnut 2, Pear, Sapele, Mahogany - still waiting for a Teak sample to arrive from AU (more than five weeks now in shipping) .
.
Thanks for checking in and your comments are very welcome!
I am now at a point where I need to make some decisions regarding the wood species to be used on the hull. The original ship was planked in oak, and then below the waterline she was coated with an ivory colored 'sealant'.
The kit instructions call for painting the hull white/ivory below the waterline - and painting the hull baby-sh... brown above the waterline. Really. Check it out:

Anyway. I'm not going to paint the hull. That's not the part I want to discuss.
Here are some wood samples - there is Danish oil on half of the sample (a single coat). I am trying to figure out what would provide the best 'background' for all the ornamentation on the Vasa (I'll be painting those multi-chromatically based on what has been learned in the last ten years at the museum). I'm even considering using one species for the hull itself and a complementary species for the wales (don't hate me!).
What are your thoughts? From top to bottom: Tanganyika, Cherry, Walnut 1, Walnut 2, Pear, Sapele, Mahogany - still waiting for a Teak sample to arrive from AU (more than five weeks now in shipping)

Thanks for checking in and your comments are very welcome!
Last edited by a moderator:
- Joined
- Jan 9, 2020
- Messages
- 10,377
- Points
- 938

This is a difficult one Doc as it hinges very much on personal preference. I like your idea of painting with wood. In my mind though, the Pear Wood stands out. As @Jimsky and @Uwek will rightly tell you - magic happens when you marry Pear Wood to oil. (I used tung oil)
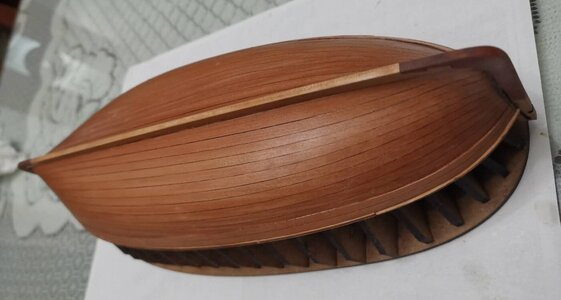
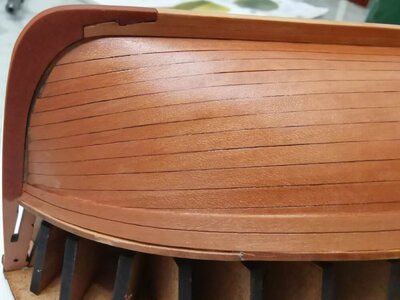
And I don't think you are crazy about the wales in a different colour at all - in combination with the Pear Wood, I would go for Black Ebony or - the ultimate if you can find it - Black Hornbeam from Russia (try Bibigon - they are one of our advertisers.)
Hope this helps. - Heinrich


And I don't think you are crazy about the wales in a different colour at all - in combination with the Pear Wood, I would go for Black Ebony or - the ultimate if you can find it - Black Hornbeam from Russia (try Bibigon - they are one of our advertisers.)
Hope this helps. - Heinrich
I like the the darker Walnut, I'm planking my Krick Alert with it right now. I'm finding it easy to work with.
Jan
Jan
Hi Jan. Would you be willing to share a picture with me? I'm new to this and seeing something in situ would be really helpful.I like the the darker Walnut, I'm planking my Krick Alert with it right now. I'm finding it easy to work with.
Jan
Hey Heinrich. Beautiful! Please tell me about your tung oil process. I know it is slow to dry. How many layers have you used here? Steel wool between each? The sheen is breathtaking!This is a difficult one Doc as it hinges very much on personal preference. I like your idea of painting with wood. In my mind though, the Pear Wood stands out. As @Jimsky and @Uwek will rightly tell you - magic happens when you marry Pear Wood to oil. (I used tung oil)
View attachment 185434
View attachment 185435
And I don't think you are crazy about the wales in a different colour at all - in combination with the Pear Wood, I would go for Black Ebony or - the ultimate if you can find it - Black Hornbeam from Russia (try Bibigon - they are one of our advertisers.)
Hope this helps. - Heinrich
Heinrich, your tung oil finish is superb. 


