Vasa - 1:65 DeAgostini [COMPLETED BUILD]

Paul,

Really excellent work. Did you get the DS460?

I used the Landström for the deck planking timbers. If you need some images I'll go through my files.

Cheers,
 
Paul,

Really excellent work. Did you get the DS460?

I used the Landström for the deck planking timbers. If you need some images I'll go through my files.

Cheers,
Thanks John,

Yes, I think its the DS460 (I have the larger one with the tipping table).

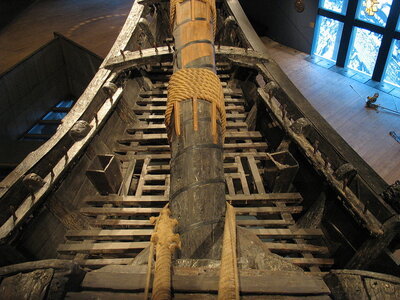
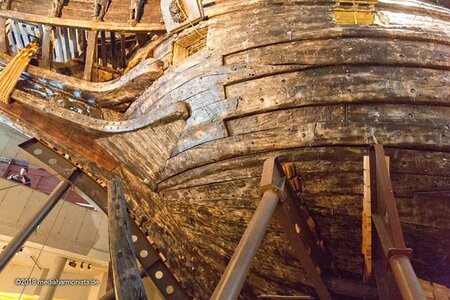
Are you talking about the deck planking for the beakhead? If that's what you are referring to I have the image from Landstrom as well as an even more clear one sent to me by Thomas. Not sure if you ever saw the following picture of this portion of the ship. Incredible photo:

1024px-Vasa-toilets-2.jpg

I doubt I'll be able to do any of this better than you did on your masterful Vasa.
 
Thanks John,

Yes, I think its the DS460 (I have the larger one with the tipping table).

Are you talking about the deck planking for the beakhead? If that's what you are referring to I have the image from Landstrom as well as an even more clear one sent to me by Thomas. Not sure if you ever saw the following picture of this portion of the ship. Incredible photo:

View attachment 259024

I doubt I'll be able to do any of this better than you did on your masterful Vasa.
Paul,

Yes that planking - I used this image as well as a guide. BUT still managed to put the toilets in the wrong places (forward of the pinrail) yikes (;-)))))

===================

This site has 500+ images.
I used image #472 when I chose to hand build the main mast as close to the 1:1s as I could. Ended up with some 30 or so parts, If I remember correctly......

http://www.wasadream.com/Index/indexenglish.html

Here are some other useful images -- You prob. have both of these in your favs.

https://www.modelships.de/Museums_and_replicas/Vasa-Museet-Stockholm/Photos-Vasa-ship.htm
 
Hello Friends,

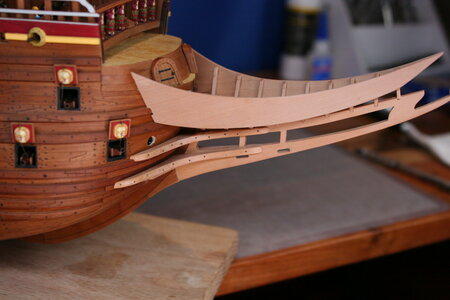
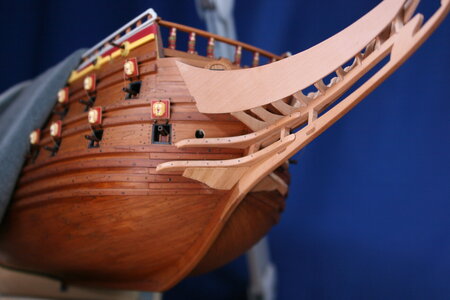
Just a quick update to close out my weekend. The centerline of the beakhead is supported by two knees on each side (an upper and a lower). Let's begin with the goal:

697B6446a.jpg

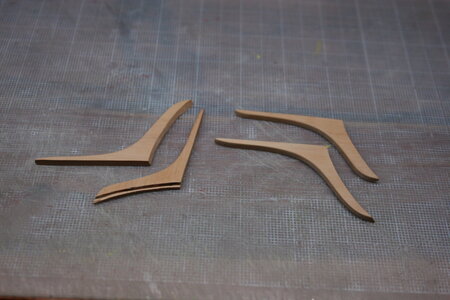
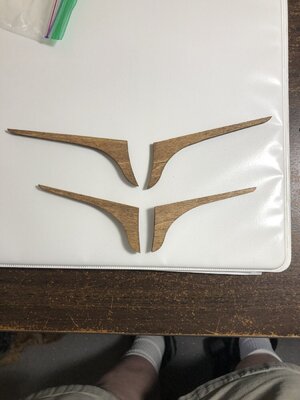
Once again I created a cardstock template for each of the knees and cut the pieces from my treasured pear wood sheets (4 mm thick for these pieces). This rough cut shape was then refined and detailed using files and sanding sticks.

IMG_7187.JPG

Fitting the knees to the ship was mostly a matter of patience (translation: they fit like garbage because I failed to accurately account for the upward tip of the knees when I fashioned the templates). You might be amused to learn that I had to sit on the floor working over my head to fit the splashguard bits on the underside of the lower knees. Note to future builders: go ahead and build the beakhead while you can still turn the ship upside down). Lesson learned.

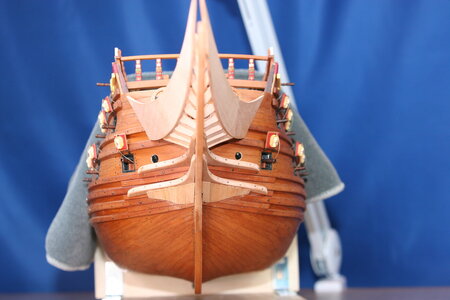
Here is what I ended up with (still need to do some tidying up):

IMG_7188.JPG

IMG_7192.JPG

IMG_7191.JPG

My sincere thanks to each of you for stopping by. I know you are all busy and I am humbled by your interest. You're a fine bunch!
 
Hello Friends,

Just a quick update to close out my weekend. The centerline of the beakhead is supported by two knees on each side (an upper and a lower). Let's begin with the goal:

View attachment 259440

Once again I created a cardstock template for each of the knees and cut the pieces from my treasured pear wood sheets (4 mm thick for these pieces). This rough cut shape was then refined and detailed using files and sanding sticks.

View attachment 259442

Fitting the knees to the ship was mostly a matter of patience (translation: they fit like garbage because I failed to accurately account for the upward tip of the knees when I fashioned the templates). You might be amused to learn that I had to sit on the floor working over my head to fit the splashguard bits on the underside of the lower knees. Note to future builders: go ahead and build the beakhead while you can still turn the ship upside down). Lesson learned.

Here is what I ended up with (still need to do some tidying up):

View attachment 259443

View attachment 259445

View attachment 259444

My sincere thanks to each of you for stopping by. I know you are all busy and I am humbled by your interest. You're a fine bunch!
Looks good, Paul. I've had similar awkward experiences upside down. I was once upside down on a house I was trying to sell. I forget at the moment what they call the ropes that fasten the bowsprit to the beakhead is called. I notice you cut those holes in the beakhead. I've done that with a drill before, but it didn't turn out that nicely. What tool/tools did you use?
 
Last edited:
Hello Friends,

Just a quick update to close out my weekend. The centerline of the beakhead is supported by two knees on each side (an upper and a lower). Let's begin with the goal:

View attachment 259440

Once again I created a cardstock template for each of the knees and cut the pieces from my treasured pear wood sheets (4 mm thick for these pieces). This rough cut shape was then refined and detailed using files and sanding sticks.

View attachment 259442

Fitting the knees to the ship was mostly a matter of patience (translation: they fit like garbage because I failed to accurately account for the upward tip of the knees when I fashioned the templates). You might be amused to learn that I had to sit on the floor working over my head to fit the splashguard bits on the underside of the lower knees. Note to future builders: go ahead and build the beakhead while you can still turn the ship upside down). Lesson learned.

Here is what I ended up with (still need to do some tidying up):

View attachment 259443

View attachment 259445

View attachment 259444

My sincere thanks to each of you for stopping by. I know you are all busy and I am humbled by your interest. You're a fine bunch!
It is gonne be a impressive 3D construction, with curves in all directions!
And working from the floor ...... back to basic.
And the hull covered under a blanket ..... I love it, Paul
Regards, Peter
 
Thanks Heinrich, Vic, Paul, Daniel, Peter and everyone else who has stopped by.

Vic, I just used a tiny drill bit to create the ends of each slot and then a jewelers saw to join the holes. I finished up the slots using files.

Peter, yes the beakhead is a 3 dimensional marvel - almost a mini-ship model. For all the skilled and experienced modellers out there it would have been routine. For me it has been quite a challenge (and will continue to be so). If I didn't have a real ship to look at in photos I would never have been able to interpret the drawings I am working from. It has given me a new appreciation for those who scratch build the whole ship.

Daniel, I'm glad this post was helpful to you. The DeAg kit does not have the knees or the splash guard at all. Does the Billings kit include those details (well, I guess knees should not be considered a 'detail' but you know what I mean)... It was possible to install the splash guard working from below but precision suffered.
 
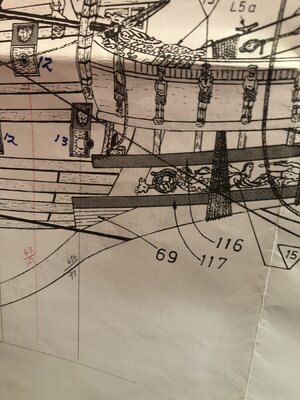
Paul the Billings kit does include the knees (plywood) and they point to the splash guard as part # 69. There is no part #69 on their parts list.
If you had not shown what yours looks like I would have never figured out what part #69 was. Thank you for solving that mystery.

View attachment 259616View attachment 259617View attachment 259618
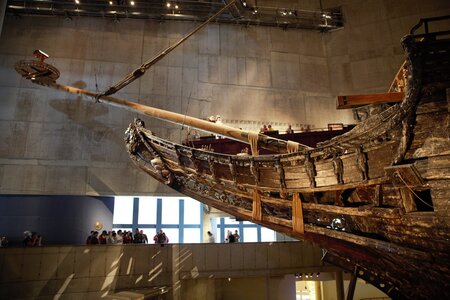
I'm excited that my knees look similar to the ones provided in your kit. My beakhead is now much more stable after installing these so I'm happy I chose to add them. Here is an even better picture that might help you out:

Stockholm-180323_8926.jpg
 
Wow, you’re last picture of the “knees and splash guard” explains a lot of the part you fabricated for your build. Having no knowledge of the 1:1 Vasa I had to zip up and down your log to visualize what you were doing. Thumbs-Up

Jan
 
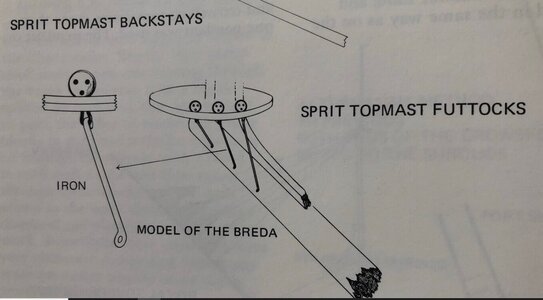
Hi, I have a question about the spritsail topmast. In regards to the VASA, how were the deadeyes of this mast connected to the bowsprit? The following image shows one option, but was wondering for your ship how it was done? Please double click on the thumbnail below to see the full image.
 

Attachments

  • SpritTopmast.jpg
    SpritTopmast.jpg
    103.2 KB · Views: 16
Back
Top