Thank you Heinrich. I am very curious about pearwood. It seems to have great utility so on my next build I think I shall combine the two (walnut hull, pearwood deck, rails, comings, etc.).Dave the hull color of your Vasa looks beautiful. In my opinion, the walnut offers much better ambience to the overall look of a period-ship than any other wood would have done. I know Pear is very popular - but then everything these days seems to be in Pear (my next build will also be Pear ... sigh ...). However, there is just something special about walnut. As to being brittle, I suppose there is walnut and then walnut. I have had no such problem on the Haarlem.
You are using an out of date browser. It may not display this or other websites correctly.
You should upgrade or use an alternative browser.
You should upgrade or use an alternative browser.
VASA 490 Build Log - Billing Boats, 1:75 [Completed Build]
- Thread starter Daniel20
- Start date
- Watchers 64
-
- Tags
- billing boats vasa
Good afternoon all.
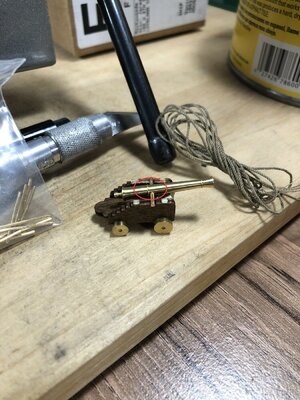
While I'm waiting on a shipment of 2.5mm sheave blocks I've prepared the canon carriages for off ship rigging. The barrels and wheels are brass so I tried brass black but ended up painting them black.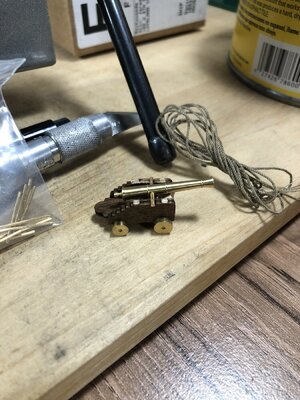
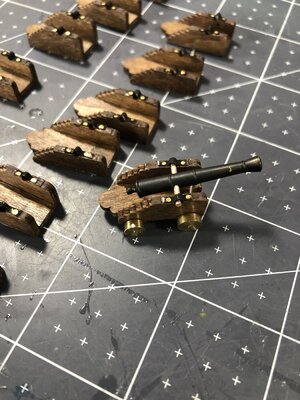
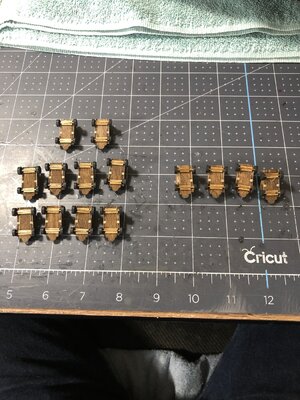
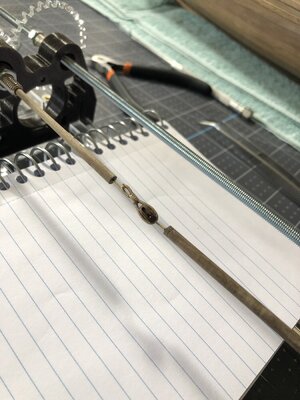
Next are a couple of pics making a becket and stropping it to a block with my new dominoff server. Wow I'm really liking this machine, there are instructions on braiding a weave for the mouse (fids) on the mainstays.
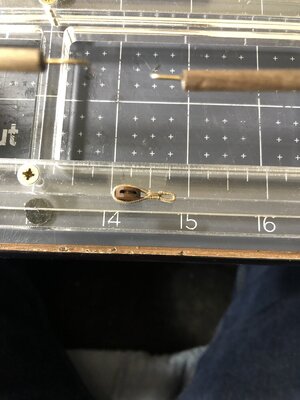
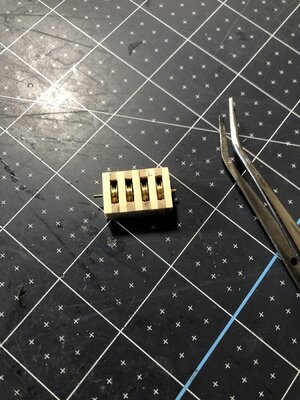
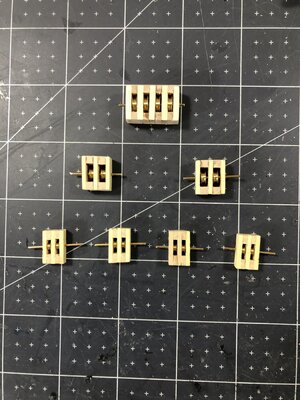
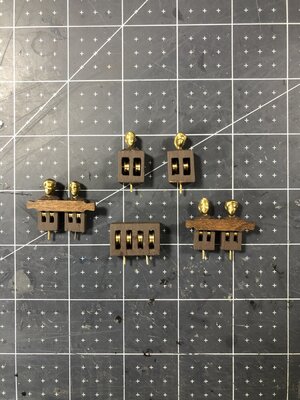
Next I have the deck mounted sheave blocks with gilded heads (wow), thanks to @dockattner (Paul), I copied your assembly line style build of these things.
6 diorama style figurines donated their heads for this since Billings just assumed the modeler could carve them I guess. NOT. This however seems presentable.
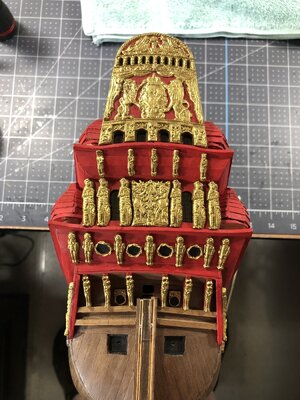
And last for todays post I added a few gilded carvings to the stern.
Coming up in the next weeks will be canon rigging and installation, fitting and installing the bulwark rail members, and finishing up stern decorations.
I sure thank you all for checking in on this build and until next time Happy modeling!
While I'm waiting on a shipment of 2.5mm sheave blocks I've prepared the canon carriages for off ship rigging. The barrels and wheels are brass so I tried brass black but ended up painting them black.


Next are a couple of pics making a becket and stropping it to a block with my new dominoff server. Wow I'm really liking this machine, there are instructions on braiding a weave for the mouse (fids) on the mainstays.


Next I have the deck mounted sheave blocks with gilded heads (wow), thanks to @dockattner (Paul), I copied your assembly line style build of these things.
6 diorama style figurines donated their heads for this since Billings just assumed the modeler could carve them I guess. NOT. This however seems presentable.


And last for todays post I added a few gilded carvings to the stern.

Coming up in the next weeks will be canon rigging and installation, fitting and installing the bulwark rail members, and finishing up stern decorations.
I sure thank you all for checking in on this build and until next time Happy modeling!
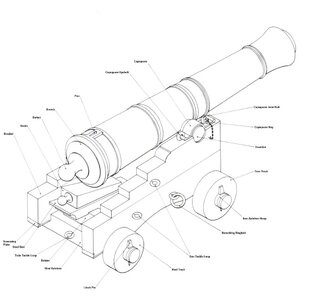
Great job on the cannons and block rigging, Daniel! Are the cannon barrels came with the kit or it is an aftermarket acquisition? One small observation, hope you still can correct it. The barrels places on the carriage upside down. Usually, the manufacture doesn't bother to drill the hole for the trunnion off-center. Your barrels are perfectly correct. Check out this reference image.Good afternoon all.
While I'm waiting on a shipment of 2.5mm sheave blocks I've prepared the canon carriages for off ship rigging. The barrels and wheels are brass so I tried brass black but ended up painting them black.
You have moved forward a long way Daniel.
Have you gold-gilded your sculptures or used gold paint? As you know I have painted mine but was wondering if gold flake gilding might look good on some parts. If you have, could you describe your process of applying the gold flake.
PeterG
Have you gold-gilded your sculptures or used gold paint? As you know I have painted mine but was wondering if gold flake gilding might look good on some parts. If you have, could you describe your process of applying the gold flake.
PeterG
Hi Jim, This is the barrel that came with the kit and the hole has been drilled in the center through. The barrel is front end heavy so I suspect the hole was drilled to far aft. I will need to fix it into position then place the elevation wedge and glue it all down. However if there are aftermarket examples I would be interested to know. By the way nothing is fixed at this point and the barrels are symmetrical so there is no upside down that I can tell.Great job on the cannons and block rigging, Daniel! Are the cannon barrels came with the kit or it is an aftermarket acquisition? One small observation, hope you still can correct it. The barrels places on the carriage upside down. Usually, the manufacture doesn't bother to drill the hole for the trunnion off-center. Your barrels are perfectly correct. Check out this reference image.
View attachment 255543
View attachment 255542
Last edited:
Hi Peter, I have only used gold paint, actually its Vallejo "Old Gold" which has an antique look to it. I made the decision to keep a simple color scheme actually before I bought the kit. Just personal preference.You have moved forward a long way Daniel.
Have you gold-gilded your sculptures or used gold paint? As you know I have painted mine but was wondering if gold flake gilding might look good on some parts. If you have, could you describe your process of applying the gold flake.
PeterG
- Joined
- Jan 9, 2020
- Messages
- 10,377
- Points
- 938

Great work Daniel. My cannon rigging is driving me nuts so I hope that you have more luck with it. Those sheaves blocks look very good and neat as does the stern of the model. That paint really does give a "gilded" effect.
Thanks for the quick response, Daniel. There are many aftermarkets places where you can buy the barrels, but why? Your barrels are of great quality. The photo showed as you put them upside down, I guess it was an optical illusion. It might be the size of this barrel is small for the carriage you are using?Hi Jim, This is the barrel that came with the kit and the hole has been drilled in the center through. The barrel is front end heavy so I suspect the hole was drilled to far aft. I will need to fix it into position then place the elevation wedge and glue it all down. However if there are aftermarket examples I would be interested to know. By the way nothing is fixed at this point and the barrels are symmetrical so there is no upside down that I can tell.
Thank you Heinrich. Yes I am very apprehensive about working with such tiny tackle blocks for the cannons. I'll be using home spun rope to rig with, so I'm hoping my investment will pay off in a presentable fashion.Great work Daniel. My cannon rigging is driving me nuts so I hope that you have more luck with it. Those sheaves blocks look very good and neat as does the stern of the model. That paint really does give a "gilded" effect.
Hey Daniel. The blocks with outsourced heads look fabulous! I have the Domanoff serving tool as well though it remains unassembled at this point. Your becket and block look outstanding. Would you mind sharing your technique if you get a spare moment?
Hey thanks for checking in on me Paul. I followed the video from Ship workshop (https://shipworkshop.com) whom I purchased mine from. Drill down to the SM4 serving machines tab and download the videos for it. They are really quite good. Your kit should have had the 'bent wires' used as a jig for making beckets. I ended up making wooden holders that are more like what's in the videos. Naturally I did not show the first few attempts at this as they were very sloppy , like everything I have to practice and still have a ways to go. When stropping the block you can use both hooks or one hook and one clamp depending on the block size. For mine I used both wood jigs.Hey Daniel. The blocks with outsourced heads look fabulous! I have the Domanoff serving tool as well though it remains unassembled at this point. Your becket and block look outstanding. Would you mind sharing your technique if you get a spare moment?
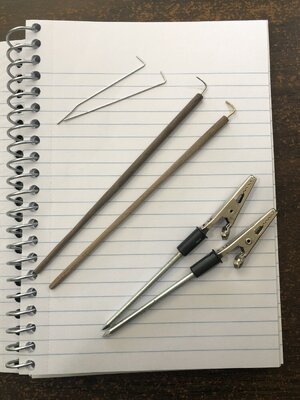
Found the video - perfect! They really did turn out very nice!Hey thanks for checking in on me Paul. I followed the video from Ship workshop (https://shipworkshop.com) whom I purchased mine from. Drill down to the SM4 serving machines tab and download the videos for it. They are really quite good. Your kit should have had the 'bent wires' used as a jig for making beckets. I ended up making wooden holders that are more like what's in the videos. Naturally I did not show the first few attempts at this as they were very sloppy , like everything I have to practice and still have a ways to go. When stropping the block you can use both hooks or one hook and one clamp depending on the block size. For mine I used both wood jigs.
View attachment 255659
Hello to everyone,
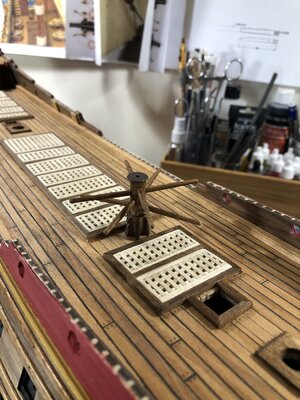
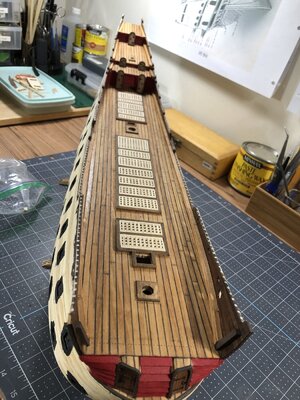
Just a short update, I haven't accomplished much in the past 10 days. I started on a section of the lower railing with some stained basswood and didn't like the look at all so tore it out and have ordered more walnut which will be more consistent with the hull and bulwark planking. So the wait for that goes on. I did manage to set the ships stern doors and covers as well as built the ships capstan. The capstan and grates are not glued in yet this is just a simple dress rehearsal.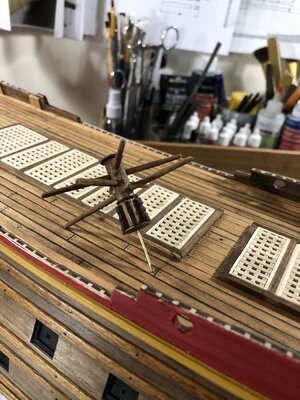
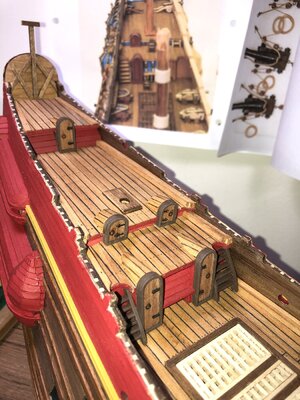
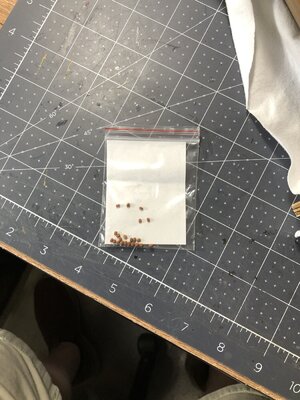
I received my 2.5mm single sheaves for the canon rigging and OMG they are so tiny I thought at first Dry Doc sent me packets of mustard seeds. Any way they are too small for me to work with and have ordered some 4mm which will just have to work. If anyone is interested in 75ea. 2.5mm sheaves PM me and I mail em to you.
Hope you all have a great weekend and thanks for looking in.
Happy modeling!!!
Just a short update, I haven't accomplished much in the past 10 days. I started on a section of the lower railing with some stained basswood and didn't like the look at all so tore it out and have ordered more walnut which will be more consistent with the hull and bulwark planking. So the wait for that goes on. I did manage to set the ships stern doors and covers as well as built the ships capstan. The capstan and grates are not glued in yet this is just a simple dress rehearsal.


I received my 2.5mm single sheaves for the canon rigging and OMG they are so tiny I thought at first Dry Doc sent me packets of mustard seeds. Any way they are too small for me to work with and have ordered some 4mm which will just have to work. If anyone is interested in 75ea. 2.5mm sheaves PM me and I mail em to you.

Hope you all have a great weekend and thanks for looking in.
Happy modeling!!!
He he he. When I received my 2.5 mm blocks I thought to myself - what am I supposed to do with these?
Your deck with the doors, bulkheads, and grates looks wonderful! Great job!
I'm working on railings too. Fiddly...
Your deck with the doors, bulkheads, and grates looks wonderful! Great job!
I'm working on railings too. Fiddly...
Thanks Paul. I can't wait to see how you do the upper rail! Looks difficult to me.He he he. When I received my 2.5 mm blocks I thought to myself - what am I supposed to do with these?
Your deck with the doors, bulkheads, and grates looks wonderful! Great job!
I'm working on railings too. Fiddly...
Looking good Daniel! You have made a lot of progress on your ship since you started this build!Hello to everyone,
Just a short update, I haven't accomplished much in the past 10 days. I started on a section of the lower railing with some stained basswood and didn't like the look at all so tore it out and have ordered more walnut which will be more consistent with the hull and bulwark planking. So the wait for that goes on. I did manage to set the ships stern doors and covers as well as built the ships capstan. The capstan and grates are not glued in yet this is just a simple dress rehearsal.View attachment 256960View attachment 256961View attachment 256962
I received my 2.5mm single sheaves for the canon rigging and OMG they are so tiny I thought at first Dry Doc sent me packets of mustard seeds. Any way they are too small for me to work with and have ordered some 4mm which will just have to work. If anyone is interested in 75ea. 2.5mm sheaves PM me and I mail em to you.
View attachment 256965
Hope you all have a great weekend and thanks for looking in.
Happy modeling!!!
I ordered some 5mm and 3mm blocks from Dry Dock, and those 3mm are probably as small as I would ever work with. I can’t imagine the 2.5mm.
Colleagues, go to scale 72 or less. You will learn how to work with blocks of 2.5 and 2 mm. In this scale, they are the most popular. There are most of them 


Daniel, great job 


Sasha my friend, I have not the eyes nor steady hand to deal with 2.5mm. 2.5mm on a scale looks bigger than those 2.5m blocks. Thank you for the thumbs up.Colleagues, go to scale 72 or less. You will learn how to work with blocks of 2.5 and 2 mm. In this scale, they are the most popular. There are most of them


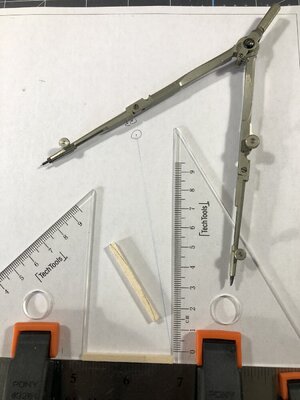
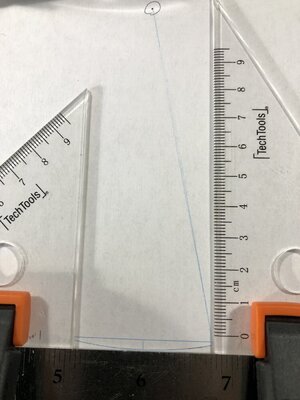
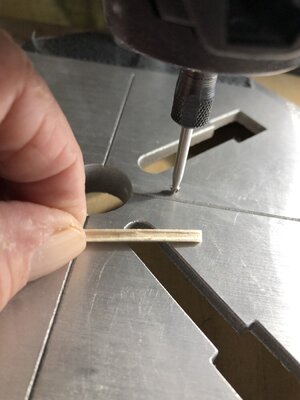
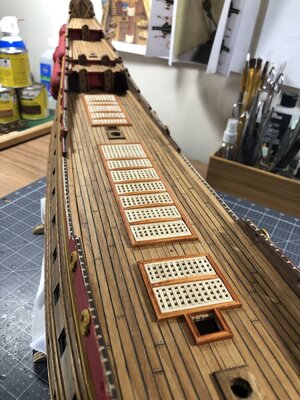
Well folks while I'm waiting on materials delivery I decided the grating framework I had was not up to current standards of my eye appeal so I went for broke and pulled out all the old framework and replaced it with something better looking (to me anyway) and a lot closer to the original Vasa framework. The wood is basswood, I routed out a profile and stained it with gunstock stain. I made a CAD drawing for the arched cross supports along with a jig and sanded out the arch. I will probably stain the mast and spars the same color to try and tie them in with the coamings. I've brought forth a photo of the original so you could see the difference.
Here is the original
Thanks for checking in.
Hope you enjoy and happy modeling!
PS: I know the corners are supposed to be lap joints but hey I'm stretching it as it is.


Here is the original

Thanks for checking in.
Hope you enjoy and happy modeling!
PS: I know the corners are supposed to be lap joints but hey I'm stretching it as it is.
Last edited:


