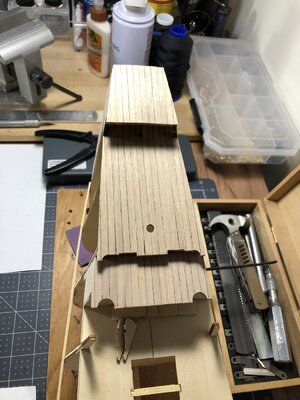
VASA 490 Build Log - Billing Boats, 1:75 [Completed Build]

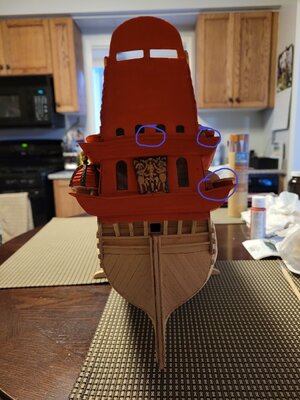
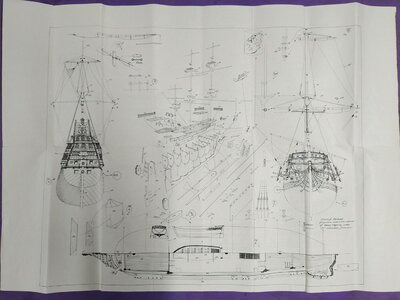
In your drawing you show gun ports overlapping frame pieces. What's your plan there? Also, note that the gun ports on the Vasa are not regularly spaced (at least not identically spaced).
Yes there is overlap. I have a couple of options, move the overlap port enough to miss or just cut into the bulkhead enough to mount the dummy cannon ends.
The spacing is actually exactly what's called for from the plans however. My first step is just to give myself a starting place.
 
Yo Ho,

Great job with the first (and awe inspireing) step toward Nautical Nirvana.

I am also working on a protracted build from 1979! Back then, trees had only recently been discovered for their "wood"! This is an Old School Kit.

LASER Pre-cuts? Fugettaboutit... Those cute little computer lathe cut, laser guided, pre-rounded, automatic, plug, glue, play parts? Nuh unh, not in this baby. This kit was produced before man was walking fully erect. And THAT is what makes it such a challanging and satisfying build.

I also can not find plans from this kit, so am relying on the web to search other builder's plans. BB has done a fantastic job of improveing the kit over the years.

So after having left this half-done model in strorage for 40 years, I decided to finish it. (Did he say 40 YEARS?)
For the most part I am moving along. Hull is done. Deck furniture, gun ports, rudder & rails, will pretty much bring her to the doorstep of Phase ll... the rigging!


My build is also a Wasa 490 BB kit, albeit circa: 1978, It was fabulous then, even more so now. It will be interesting to see how the newer kit addresses some build aspects of my ship. I will watch your progress with the rest of the crew, enjoy, good luck, and good Health!

Good on yer Matey!
Hello Sailbad, Ha I love your play on words moniker.
I would love to see "Tin Types" of your early VASA. Do you have a build log of it going?
 
Daniel,

While you have the deck and Hull open and accessible, two things you might consider which I did on my BB Vasa, was:

1. Look at your section plans and estimate where your lower, gun deck is positioned along each side of the hull. From this, I then put in false floors between the bulkheads that allowed me to mount gun deck gun carriages later. It was much easier than feeding the parts through the gun ports after planking. The alternative is to place the false floors as the planking comes up. This approach provides a more accurate positioning for the positions of the floors.

2. Think about the possibility of running some ‘in hull’ lighting LEDs. It’s easy with the Hull open but adds great effect later.

PeterG
Hello Peter, thank you for your encouragement. At this point I plan just using the dummy cannons supplied which should just require a black painted set back maybe 5 to 8 mm. I'm actually not even seeing a detail for it. What you are doing with the lower deck cannons is fantastic though.
 
Daniel,

I was perhaps not as clear with my talk of the lower deck cannons as I should have been. I was not meaning to construct full cannon carriages with a floor to carry them, but, as you know, the lower deck cannons (with their two different sizes), come in the BB kit with a small, turned brass barrel and at the inside end, a small stub piece of brass for mounting. The issue for you, is what are you going to mount the small stub into? I opted to build two small uprights with a ‘backing plate’ that I drilled a hole into with the uprights looking a bit like the front of a cannon carriage, and the backing plate holding the cannon barrel. This was mounted on a false floor between the bulkheads. It looked good when seen through the gun port and painted black, and was effective.

You have to have some method of mounting those lower deck cannon barrels, and there is nothing in the instructions to assist.

PeterG
 
Hey Peter I now see what you mean. Because of a lack of kit instructions I new I needed to do something but as of yet I wasn't sure. However you are absolutely correct that now is the time to plan some kind of cannon support system. Thank you for the heads up, I shall work on that straight away.
 
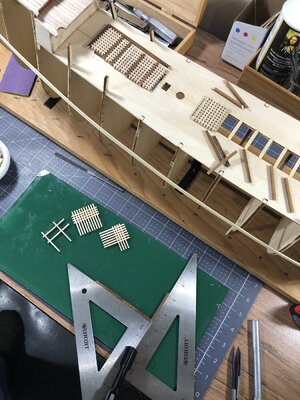
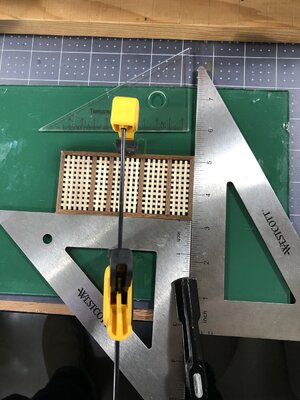
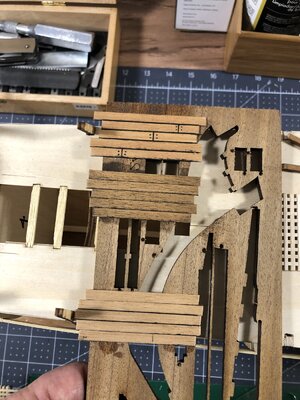
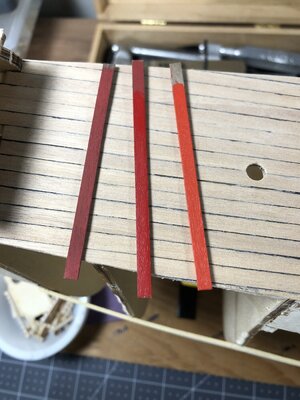
Greetings all. I've been bogged down a little scrambling for materials and choosing paint colors. Since I'm fabricating the deck grating had to go buy some basswood for the framing and stain it. I've been struggling a little with the deck planking but think I found the right combination. Please see the three planking samples and feel free to comment. The one with the nails and butt joints is what I'm planning to go with. I also show three samples of red paint. Technically I'm red green color blind and maybe you VASA experts can say left one, center one, right one, or none of the above. If you were to place a piece of red cloth in the middle of a green lawn and said find it or your dead, well might as well just shoot me. Anyway this ship so far has been a very enjoyable challenge and I shall keep you all updated. Thank you all for your interest.IMG_0898.jpgIMG_0902.jpgIMG_0903.jpgIMG_0904.jpgIMG_0906.jpg
Happy modeling.
 
The red color is something I really struggled with until I found a comment from Fred Hocker at the Vasa Museum that Carmine Red from Vallejo is really close to what is on the 1:10 model which he says is a good match for what was on the original. You can at least see what that looks like on my build log (or maybe you won't because its red...).
 
The red color is something I really struggled with until I found a comment from Fred Hocker at the Vasa Museum that Carmine Red from Vallejo is really close to what is on the 1:10 model which he says is a good match for what was on the original. You can at least see what that looks like on my build log (or maybe you won't because its red...).
Hi Paul, I actually saw that color today at the hobby store. Does it matter if its gloss or flat? I think this one didn't really say. The left sample is a vallejo flat red but all the rest of the colors didn't say.
 
Hi Paul, I actually saw that color today at the hobby store. Does it matter if its gloss or flat? I think this one didn't really say. The left sample is a vallejo flat red but all the rest of the colors didn't say.
I would say that it's a matter of preference. Some models are all shiny - others are more matte/flat. I have my preference but it is nothing more than that.

And to answer your question directly: the Vallejo Model Color Acrylics all seem to be more eggshell finish (satin) unless another finish is applied (like a poly - to either make them more or less shiny).
 
Here are few other issues with paint. What color wood is it going on. Darker lighter with with primer or dark will change your paint color as well.
Also your doing the billings kit and be warned unless they have corrected the issues with regard to the stern. It is a difficult area to get correct and found you need to take your time in order to get it symtical. I see many of them with an issue when it come to this area.
For some reason the set up on one side is off.
 
My congratulations for the building of the new grating. Your basswood work looks excellent and although staining is required, it will be a worthwhile improvement.

I did the nail and butt fitting of mahogany for my deck finish and it works well I think. The Vasa has quite random plank lengths in the deck layout so making it too geometric is probably not the right choice.

The Vallejo Carmine Red is a good choice although I agree with others, it is personal preference. Personally, I would choose only matt finish as gloss on wood tends to be a bit mixed in finish unless you sand the timber smooth, but that is certainly not what the Vasa had. Again this is personal preference.

For mgovey, I am unaware of the BB having asymmetrical issues at the stern, and in fact, it is regarded widely as being one of the most accurately shaped hulls. I think you may be thinking of the Corel Vasa, which on reports I have read, has the stern too thin and poorly shaped. It is quite an old kit which I don’t think has been upgraded.

PeterG
 
@mgovey , thanks for your heads up about the built in asymmetric stern. I have not noticed this malady yet but will definitely keep an eye out for it.
@PeterG , thanks for your opinion Peter, your mahogany deck is beautiful. I'm going for a contrast between the decking and the grating frames. I'm just going to get the Vallejo carmine red as is, they do not spec gloss or mat finish.
 
My congratulations for the building of the new grating. Your basswood work looks excellent and although staining is required, it will be a worthwhile improvement.

I did the nail and butt fitting of mahogany for my deck finish and it works well I think. The Vasa has quite random plank lengths in the deck layout so making it too geometric is probably not the right choice.

The Vallejo Carmine Red is a good choice although I agree with others, it is personal preference. Personally, I would choose only matt finish as gloss on wood tends to be a bit mixed in finish unless you sand the timber smooth, but that is certainly not what the Vasa had. Again this is personal preference.

For mgovey, I am unaware of the BB having asymmetrical issues at the stern, and in fact, it is regarded widely as being one of the most accurately shaped hulls. I think you may be thinking of the Corel Vasa, which on reports I have read, has the stern too thin and poorly shaped. It is quite an old kit which I don’t think has been upgraded.

PeterG
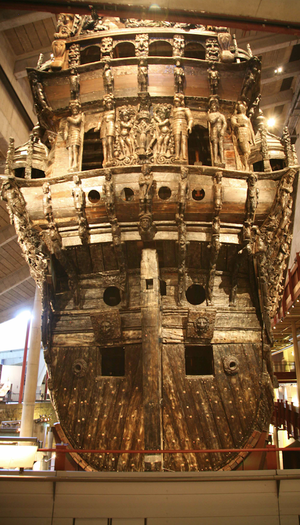
Just an explanation of what I was talking about the corners of this stern at these points on the end seem to bend up and difficult to do and without looking at many photos you don't really have an idea of how much it does until you look at the boards installed and the width of the real ship as a point of detail to see it. also the rise between both sides as the rear piece is more rounded. Hope this clarifies things. 20210405_1943532.jpgqrqwhwwrhrx.png
 
Ok I can see what you are talking about. Wow asymmetry in this view would look really bad. Compound angles intersecting compound angles with a circular structure at the intersections, nice... just the type of challenge I can sink my teeth into. I really appreciate the heads up on this mgovey!
 
Thanks mgovey in clarifying this. What you have explained is quite different from what I was thinking. In the Corel kit, I have read of some modellers making comments that the stern is too narrow when scaled to the real ship. In fact the ship’s kit width is too narrow for quite a distance along the framing where the upper deck cannon carriages are forced to be hard up against the gratings, because of the narrow beam. This is quite different from what you are referring to, so thanks for qualifying.

The rise of the stern shape timbers on both port and starboard sides could very easily be built asymmetrically, and so you are right to highlight the need for care. The photo of the real ship graphically illustrates the shape.

PeterG
 
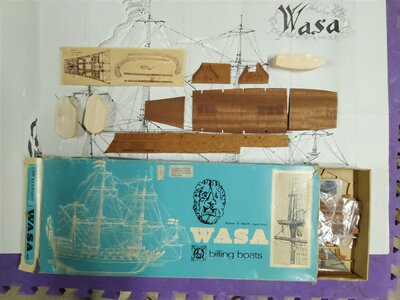
Hi Daniel like your gratings good use of the set squares. Have you ever seen the original Billings Vasa kit 440? This was the first wooden kit I purchased about 40 years ago in England before we moved to Australia, it was never finished but I kept some parts for spares. I found the box today if you're interested I'll send a photo you you won't believe how bad they were back then.
 
Hi Daniel like your gratings good use of the set squares. Have you ever seen the original Billings Vasa kit 440? This was the first wooden kit I purchased about 40 years ago in England before we moved to Australia, it was never finished but I kept some parts for spares. I found the box today if you're interested I'll send a photo you you won't believe how bad they were back then.
Hi Tony,
Yes I would love to see a photo of them. I can only imagine how difficult these kits were say before laser cutting. I know die cut wood has been around for a long time but I think only for thin sheets of wood.
 
About 40 years ago this was my first wooden kit and I really didn't know anything about them. I saw a big billings sailing ship in the hobby shop window and wanted to make one. I choose the Vasa as it was in my price range.
IMG_20210423_115432.jpg
IMG_20210423_115517.jpgIMG_20210423_115400.jpg

I got up to the planking before having to pack it up as we were moving to Australia. The more I learnt about model ships I realised that this kit would never turn out well, it looked nothing like the Vasa. Also see the balsa for the rear balconies, stern galleries and life boat. It's a shame because I can see that they are a lot better now but I will never buy another one from Billings. Still very interested in your build you never know you could inspire me to change my mind.
 
Wow, thanks for the photos. The real shape of the VASA was indeed a mystery to them. Todays Billings VASA has mostly pictures and very little dialog to go by compared to other brands. Although the Amati HMS Fly had its shortcoming's as well.
 
Back
Top