- Joined
- Jan 9, 2020
- Messages
- 10,377
- Points
- 938

Dear Friends
As you all know, there has been an abundance of discussion about lack of accuracy of the kit-supplied Bluenose ship's wheel. After I had taken up the matter with YQ, it seemed that Chinese customers (which make up the overwhelming bulk of their sales) were happy with the wheel and as such, YQ does not envisage changing it. For SOS members that obviously meant that if they were going to change the wheel, they would have to do something about it themselves. In this regard I have to mention the outstanding work that @Dean62 , @Peter Voogt and @Henk Liebre had done done. This however, does not solve the issue of getting YQ to change their ship's wheel or serve as a supply chain to SOS members who have bought the kit - whether they have started their builds or not.
So why is the YQ issue so important? The answer is actually quite simple. We have to take the lead in showing them that our very knowledgeable builders are not happy with this aspect of the build. However, instead of just griping on about it, there is a better alternative - show them what can be done. And I am very grateful to the aforementioned gentlemen for doing just that. But now we had to go one step further - I had to oblige YQ to make the change and what better way of doing that then supply them the wheel free of charge. Great, but nobody is going to be willing to print 150 plus wheels and ship them to China free of charge. Right??? Wrong !!!
In stepped Mike Shanks of Weasel Works (Previously, jokingly referred to as the "critters") who wanted to help. He certainly has the facilities, equipment and expertise to print the wheel, but someone had to design it first. In stepped our very own Jodie (@MystRacing ) who unselfishly did that. Now I hand over to Mike who will take us through the entire process.
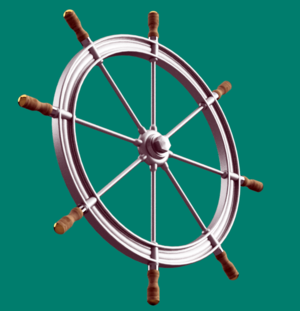
Jodie's rendering of the wheel.
Based on the great work Jodie has done.. I will fabricate a couple different prototypes of the Bluenose wheel including one that requires assembly. If they work out, I will make a batch of them and offer them up to SOS members who has bought the YQ Bluenose for FREE (except for postage).
Regarding YQ - I would be happy to ship them 150 wheels absolutely FREE. Pro Bono ... on me ... as a gift. If YQ likes the wheels they can include them in their kits as a "bonus" item to add value. No strings attached.
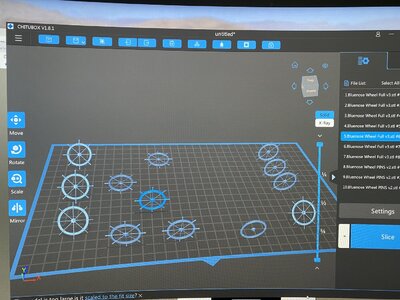
Prototype results. At this stage there are actually 3 versions. After printing, the parts will get an Ultrasonic scrubbing and an alcohol rinse. They will need to be removed from their support rafts as well. One of the versions will require assembly and all will require painting.
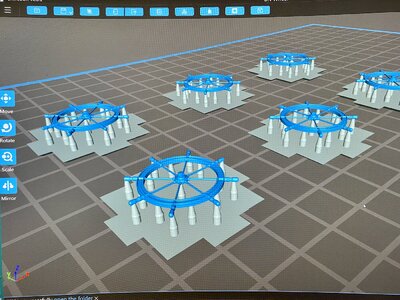
Playing with supports and exposure settings this morning to obtain optimum results. There are no clear rules for this so it comes down to experimentation and experience.
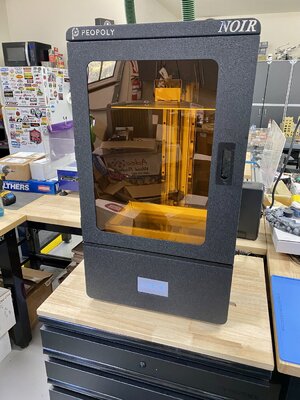
Just to give you guys some technical jargon. The Peopoly Phenom Noir 4K resin printer can easily print details down to 0.01". In fact, each layer of resin exposed by the LED light in the printer is only 0.002" in thickness. This is the reason the print jobs take so long to complete. Luckily this printer has one of the largest (if not the largest) printing areas on the market. Once the prototype is finalized, we can print about 75 wheels per job with each job being approximately 40 minutes long. There is a huge difference between consumer market 3D printers and top-of-the-line commercial resin printers. It is a completely different universe.
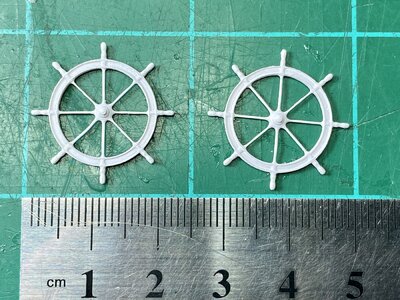
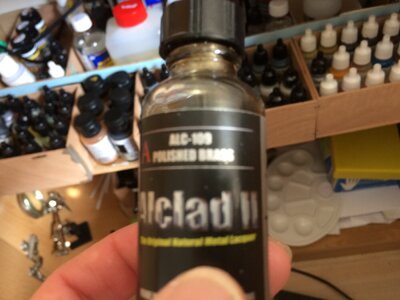
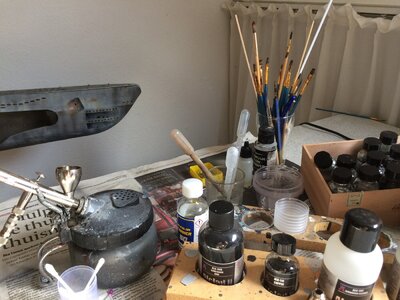
I had planned to use my Alclad II Metalizers but discovered there is no Bronze, so I opted for a more traditional airbrush paint job using Tamiya acrylics. After removing two of the wheels from their supports and carefully cleaning them up I applied a couple thin coats of Tamiya Fine White Primer and allowed the parts to dry in the sun for an hour.
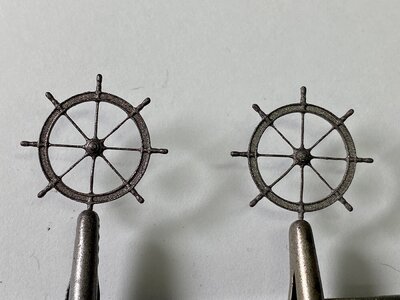
Next, I airbrushed several light coats of Tamiya X-33 Bronze.
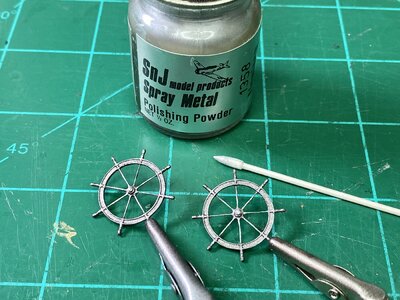
After the paint dried in the sun for an hour, I applied SnJ Polishing Powder with a small swab. Using the same technique as dry-brushing, the powder highlights the raised detail.
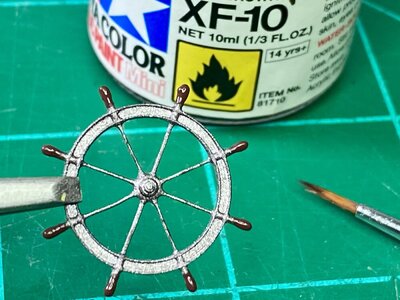
Moving right along, the next step was to brush paint the handles with Tamiya Flat Brown XF-10. This will need to dry for a while before moving on to the dark wash step.
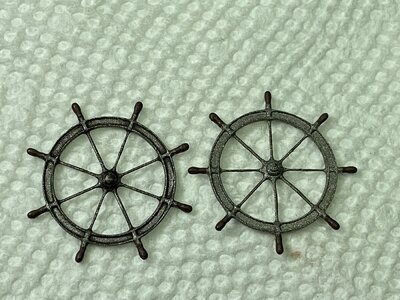
The effect is subtle but very convincing. Here you can see the washed part on the left compared to the unwashed part on the right. I used an oil-based paint pen to just touch the tip of each handle with a brass color. Very difficult to see at this scale since the part is so small (just as it should be). We are almost finished....
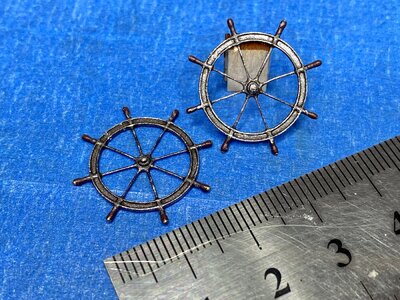
One last round of dry-brushing and this is the final result. To my eye, this looks fairly realistic at 1:72 scale. If you were to finish your wheel in this manner, I would NOT recommend any clear coats as it would eliminate the metallic effect and reduce contrast. I also want to emphasize that this is not the only way to paint this part. It is just how I chose to do it. Painting and finishing is a very subjective art and never looks the same to any two people.
Currently, the 3D printer is producing 6 more prototype variations of different support strut configurations. Upon completion of strut optimization, I will then run another print job and reduce the print layer thickness from 0.05mm down to 0.03mm. While this will nearly double the printing time it will also nearly double the detail fidelity. This is the proper methodology for 3D printing fabrication particularly for such small parts where the desire is to produce large quantities and to also maintain a high degree of quality.
The wheel is NOT available for sale. It was primarily made as an R&D exercise to see if it could be done and to provide Weasel Works members who own the YQ Bluenose kit a wheel if they would like one. Beyond that....
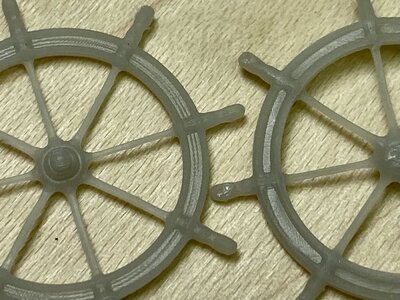
Improvements continue. Sliced at a layer thickness of 0.03mm (versus 0.05) the raised detail inside the wheel's rim begins to emerge (left). In addition, the reverse side of the wheel (right) becomes more defined with no stringers to clean off. It seems I have no choice but to try another run at 0.02mm layer thickness. Just for reference comparison, a human hair is about 0.075mm thick. Hmmm.
Mike Shanks.
As you all know, there has been an abundance of discussion about lack of accuracy of the kit-supplied Bluenose ship's wheel. After I had taken up the matter with YQ, it seemed that Chinese customers (which make up the overwhelming bulk of their sales) were happy with the wheel and as such, YQ does not envisage changing it. For SOS members that obviously meant that if they were going to change the wheel, they would have to do something about it themselves. In this regard I have to mention the outstanding work that @Dean62 , @Peter Voogt and @Henk Liebre had done done. This however, does not solve the issue of getting YQ to change their ship's wheel or serve as a supply chain to SOS members who have bought the kit - whether they have started their builds or not.
So why is the YQ issue so important? The answer is actually quite simple. We have to take the lead in showing them that our very knowledgeable builders are not happy with this aspect of the build. However, instead of just griping on about it, there is a better alternative - show them what can be done. And I am very grateful to the aforementioned gentlemen for doing just that. But now we had to go one step further - I had to oblige YQ to make the change and what better way of doing that then supply them the wheel free of charge. Great, but nobody is going to be willing to print 150 plus wheels and ship them to China free of charge. Right??? Wrong !!!
In stepped Mike Shanks of Weasel Works (Previously, jokingly referred to as the "critters") who wanted to help. He certainly has the facilities, equipment and expertise to print the wheel, but someone had to design it first. In stepped our very own Jodie (@MystRacing ) who unselfishly did that. Now I hand over to Mike who will take us through the entire process.

Jodie's rendering of the wheel.
Based on the great work Jodie has done.. I will fabricate a couple different prototypes of the Bluenose wheel including one that requires assembly. If they work out, I will make a batch of them and offer them up to SOS members who has bought the YQ Bluenose for FREE (except for postage).
Regarding YQ - I would be happy to ship them 150 wheels absolutely FREE. Pro Bono ... on me ... as a gift. If YQ likes the wheels they can include them in their kits as a "bonus" item to add value. No strings attached.

Prototype results. At this stage there are actually 3 versions. After printing, the parts will get an Ultrasonic scrubbing and an alcohol rinse. They will need to be removed from their support rafts as well. One of the versions will require assembly and all will require painting.

Playing with supports and exposure settings this morning to obtain optimum results. There are no clear rules for this so it comes down to experimentation and experience.

Just to give you guys some technical jargon. The Peopoly Phenom Noir 4K resin printer can easily print details down to 0.01". In fact, each layer of resin exposed by the LED light in the printer is only 0.002" in thickness. This is the reason the print jobs take so long to complete. Luckily this printer has one of the largest (if not the largest) printing areas on the market. Once the prototype is finalized, we can print about 75 wheels per job with each job being approximately 40 minutes long. There is a huge difference between consumer market 3D printers and top-of-the-line commercial resin printers. It is a completely different universe.

I had planned to use my Alclad II Metalizers but discovered there is no Bronze, so I opted for a more traditional airbrush paint job using Tamiya acrylics. After removing two of the wheels from their supports and carefully cleaning them up I applied a couple thin coats of Tamiya Fine White Primer and allowed the parts to dry in the sun for an hour.

Next, I airbrushed several light coats of Tamiya X-33 Bronze.

After the paint dried in the sun for an hour, I applied SnJ Polishing Powder with a small swab. Using the same technique as dry-brushing, the powder highlights the raised detail.

Moving right along, the next step was to brush paint the handles with Tamiya Flat Brown XF-10. This will need to dry for a while before moving on to the dark wash step.

The effect is subtle but very convincing. Here you can see the washed part on the left compared to the unwashed part on the right. I used an oil-based paint pen to just touch the tip of each handle with a brass color. Very difficult to see at this scale since the part is so small (just as it should be). We are almost finished....

One last round of dry-brushing and this is the final result. To my eye, this looks fairly realistic at 1:72 scale. If you were to finish your wheel in this manner, I would NOT recommend any clear coats as it would eliminate the metallic effect and reduce contrast. I also want to emphasize that this is not the only way to paint this part. It is just how I chose to do it. Painting and finishing is a very subjective art and never looks the same to any two people.
Currently, the 3D printer is producing 6 more prototype variations of different support strut configurations. Upon completion of strut optimization, I will then run another print job and reduce the print layer thickness from 0.05mm down to 0.03mm. While this will nearly double the printing time it will also nearly double the detail fidelity. This is the proper methodology for 3D printing fabrication particularly for such small parts where the desire is to produce large quantities and to also maintain a high degree of quality.
The wheel is NOT available for sale. It was primarily made as an R&D exercise to see if it could be done and to provide Weasel Works members who own the YQ Bluenose kit a wheel if they would like one. Beyond that....

Improvements continue. Sliced at a layer thickness of 0.03mm (versus 0.05) the raised detail inside the wheel's rim begins to emerge (left). In addition, the reverse side of the wheel (right) becomes more defined with no stringers to clean off. It seems I have no choice but to try another run at 0.02mm layer thickness. Just for reference comparison, a human hair is about 0.075mm thick. Hmmm.
Mike Shanks.


