YQ Bluenose by Johan [COMPLETED BUILD]

Joined
Sep 3, 2021
Messages
4,236
Points
688

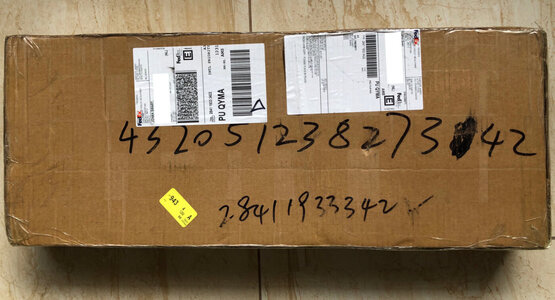
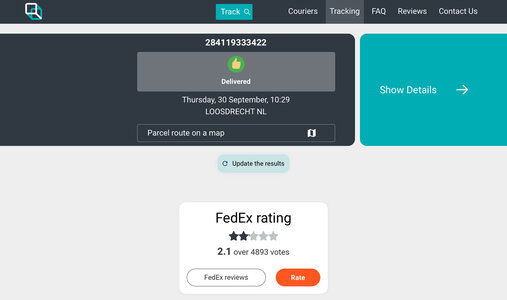
And there it is! Today at 10:29 a very friendly FedEx guy delivered an eagerly expected package from China.
Unfortunately, this is my first and also last post for this year on this Bluenose POF build log, since the Admiral put the package under lock and key; it's her Christmas present for me this year, so I'll have to sit on my hands for a while... ;)
Having said that, now I'll have to come up with a rather impressive Christmas present for the Admiral as well, which is a challenge in itself, but rest assured I'm up to it, years of experience under my belt. :)

Here some pictorial evidence of today's event:
EC812321-DE29-492C-924D-A9E2977E5EB4.jpeg0A5066A9-6294-4397-BEF6-27984BAF0E7B.jpeg98BA5003-851A-427E-8C8E-47A5A8FC41B9.jpeg
 
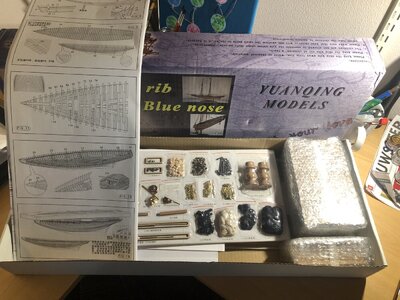
At long last boxing day 2021 arrived and finally I could open the mystery box that contained the long anticipated YQ POF Bluenose kit.
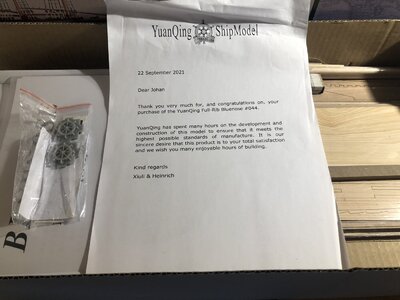
Opening the box and looking at it's content was rather unnerving, it felt more like having opened up Pandora's box. How on earth will I ever be able to make sense of all the parts, the building description in Chinese and for the first time realizing how small the parts in real life are, made me wonder whether or not I might have to acquire an electron-microscope.
Ever since I decided to build the POF Bluenose, I've been following every BN POF build on this site, looking at the pictures and reading the sometimes extensive descriptions, but that didn't prepare me for the scale of this kit. Especially the pictures gave me a sense of the model being larger than it actually is.
So it's a fact I have to live with and consider myself lucky, in the sense that, when looking at Heinrich's "Witte Swaen", I probably have a little more room to play with.
Second impression is that the box is very neatly and orderly packed, but I still have to go through the BoM, so I don't know if everything is present. A lot of burnmarks are visible on essentially all parts, so that's something requiring a "bit of sanding".
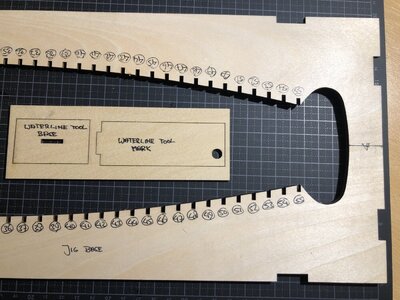
I decided to first have the jig prepared and ready for use, so I started of with the base jig, separating the parts from one another, very easily accomplished. What stood out was that the laser cuts are not perpendicular to the main surfaces, also the main jig base part is severely warped, an issue already encountered frequently, thus a major concern, requiring close attention during assembly of the main jig.

2CE267DB-D1ED-471E-861A-29F0E718FDDB.jpeg

A95C5245-8936-4B01-9183-60FFC375D163.jpeg

8E866530-DC5E-4934-B483-F3E6833F7967.jpeg

Numbered all frames and identified the centerline. (I don't yet know if it'll be useful...)
Up to assembly of the jig!
 
Last edited:
Looks like your off to a good start. :D

Just take your time and work as you feel fit.

When in doubt, check out the build logs of others who are way ahead of you.

I got mine months ago, and have not got as far as you have, working other projects taking space in the docks.
 
At long last boxing day 2021 arrived and finally I could open the mystery box that contained the long anticipated YQ POF Bluenose kit.
Opening the box and looking at it's content was rather unnerving, it felt more like having opened up Pandora's box. How on earth will I ever be able to make sense of all the parts, the building description in Chinese and for the first time realizing how small the parts in real life are, made me wonder whether or not I might have to acquire a electron-microscope.
Ever since I decided to build the POF Bluenose, I've been following every BN POF build on this site, looking at the pictures and reading the sometimes extensive descriptions, but that didn't prepare me for the scale of this kit. Especially the pictures gave me a sense of the model being larger than it actually is.
So it's a fact I have to live with and consider myself lucky, in the sense that, when looking at Heinrich's "Witte Swaen", I probably have a little more room to play with.
Second impression is that the box is very neatly and orderly packed, but I still have to go through the BoM, so I don't know if everything is present. A lot of burnmarks are visible on essentially all parts, so that's something requiring a "bit of sanding".
I decided to first have the jig prepared and ready for use, so I started of with the base jig, separating the parts from one another, very easily accomplished. What stood out was that the laser cuts are not perpendicular to the main surfaces, also the main jig base part is severely warped, an issue already encountered frequently, thus a major concern, requiring close attention during assembly of the main jig.

View attachment 278373

View attachment 278374

View attachment 278378

Numbered all frames and identified the centerline. (I don't yet know if it'll be useful...)
Up to assembly of the jig!
Hi Johan.
Nice to see that the Christmas present is given to you. And you opened Pandora's Box. So: there is no way back.
Good to see how you started, with numbering and adding the names.
Regards, Peter
 
At long last boxing day 2021 arrived and finally I could open the mystery box that contained the long anticipated YQ POF Bluenose kit.
Opening the box and looking at it's content was rather unnerving, it felt more like having opened up Pandora's box. How on earth will I ever be able to make sense of all the parts, the building description in Chinese and for the first time realizing how small the parts in real life are, made me wonder whether or not I might have to acquire a electron-microscope.
Ever since I decided to build the POF Bluenose, I've been following every BN POF build on this site, looking at the pictures and reading the sometimes extensive descriptions, but that didn't prepare me for the scale of this kit. Especially the pictures gave me a sense of the model being larger than it actually is.
So it's a fact I have to live with and consider myself lucky, in the sense that, when looking at Heinrich's "Witte Swaen", I probably have a little more room to play with.
Second impression is that the box is very neatly and orderly packed, but I still have to go through the BoM, so I don't know if everything is present. A lot of burnmarks are visible on essentially all parts, so that's something requiring a "bit of sanding".
I decided to first have the jig prepared and ready for use, so I started of with the base jig, separating the parts from one another, very easily accomplished. What stood out was that the laser cuts are not perpendicular to the main surfaces, also the main jig base part is severely warped, an issue already encountered frequently, thus a major concern, requiring close attention during assembly of the main jig.

View attachment 278373

View attachment 278374

View attachment 278378

Numbered all frames and identified the centerline. (I don't yet know if it'll be useful...)
Up to assembly of the jig!
Good to see you are getting started on the BN after much anticipation. I mounted the jig to some plywood to keep it flat, in which case you don’t need the sides. I did have to cut out the area the frames go in. But it worked well for me.
The laser cut is not perpendicular due to how the laser gets wider the further it travels, similar to a flashlight. Therefore the back side will have more material removed. Just be sure to square the edges that need to be. On the frames, they all have to be beveled anyway.
The size of the ship is most notable when you have to work inside of it while still in the jig! ;)
I am trying to adapt the jig such that I have ready access to both sides, something similar to what @MM2CVS9 did on his BN build, maybe not a jig which can be rotated, but at least a jig which can be flipped.
Tonight I found some plywood (thickness 12mm) I wanted to use as reinforcement of the jig's base, but it turned out to be warped, so no good. Among the leftovers, I also found a piece of chipboard, approx 20mm thick. Plan now is to evaluate whether or not I'll use the chipboard, after acclimatization, or order some plywood. The cutout for frame access is already planned.
 
Johan, I am so glad to see that you have started the build of the Bluenose. I know that at this stage, there is possibly some trepidation as to the build (unless you are different to all us ordinary mortals), but once you actually start the process it becomes a whole lot easier, things start to make more sense and almost if magical, fall into place. I have absolutely no doubt that you will make a resounding success of the build - so with that - let's make sawdust!
 
Johan, I am so glad to see that you have started the build of the Bluenose. I know that at this stage, there is possibly some trepidation as to the build (unless you are different to all us ordinary mortals), but once you actually start the process it becomes a whole lot easier, things start to make more sense and almost if magical, fall into place. I have absolutely no doubt that you will make a resounding success of the build - so with that - let's make sawdust!
Hello Heinrich, thank you for your kind words.
Luckily I'm no different than any other mortal, so no worries there.
Since I'm retired now, I hope I'll be able to take my time and think things through before jumping into it.
Luckily there are quite a few good examples to follow on Ships of Scale and always friends around to ask for advice, may things turn ugly.
Vacuum cleaner on standby!
 
Today saw almost all activities aimed towards the jig assembly. Cut the chipboard to size and followed Dean's advice to have a cut-out to allow access from both sides.
I attached the base jig to the chipboard with a couple of screws, so, if need be, I'll be able to detach the chipboard quite easily from the base jig. I also attached the four jig supports to the base jig, in order to at least maintain some rigidity (I hope), once I remove the chipboard from the jig.
After bonding the jig supports to the jig base and letting the adhesive set, I took the jig assembly upstairs, where I normally perform the less sawdust generating activities... One wants to keep the Admiral happy.

Very cautiously I started cutting out some frame parts, frame 8. Why? Just because the build instructions starts with frame 8 and I didn't have a reason not to. Removed the char from the interfaces, the next step is now to bond the frame parts together. This frame will also serve as a try out for the beveling of the frame. I hope to gain sufficient confidence from this example to move to the next frame and the next and the next...


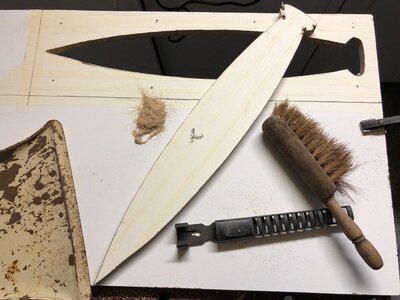
First sawdust, unfortunately not from the model, but from the jig support.

5DB3098D-87BE-4504-9ADC-5D53377325C9.jpeg

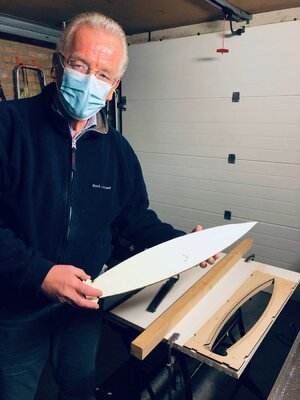
The Admiral took this picture where the cut-out already hints at the beautiful lines of the Bluenose.
The mask is against sawdust addiction...

EB7F2B49-A638-4C8F-895B-CE81E43D280C.jpeg

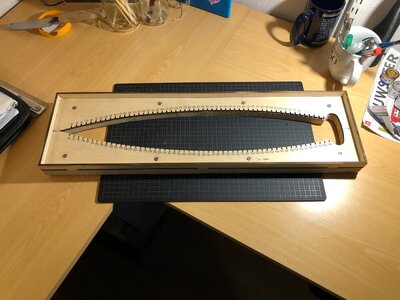
The base jig, ready for use.

F9AB79E6-11FF-4C23-BAD0-FE80B0C786E7.jpeg

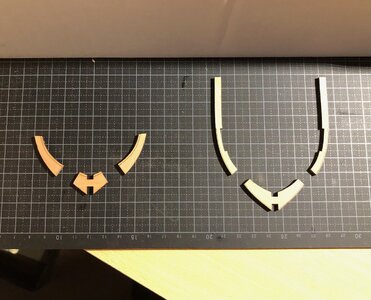
First frame (#8) freed from it's confinement.

6BB373A9-3C2B-4A54-931C-0D8F91C8D4BD.jpeg
 
Hi Johan. I fully agree with Heinrich: a good and decent start. Your jig is now a solid and flat base for when you started to place the frames. The first frame is like a kind of roadmap where you have to get to know the direction and layout. But together with the manual and the help lines, this is self-evident.
Keep the position of the frame in question in mind as in the hull and the sides to be beveled show their logic.
Regards, Peter
 
Back
Top