YUANQING BLUENOSE - Peter Voogt [COMPLETED BUILD]

After 10 days of touring the French Alps with the motorcycle and the maintenance afterwards, I picked up the thread again.
A chapter with a lot of AL-FI.

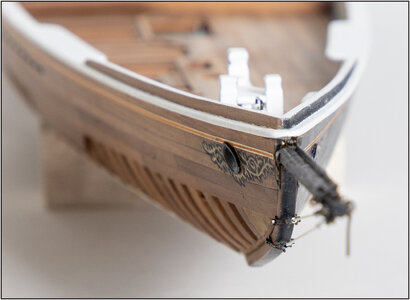
First up where the scrolls. After the 1st attempt, too thick, the 2nd attempt, run out by the linseed oil, this is the result of the 3rd attempt. They are slightly higher in shape than the original, but that's because the vault holes on my BN are turned down slightly.
View attachment 313045
View attachment 313046
The scrolls are drawn with a thin gold pen. Because this is not really visible on the wooden starboard side, I have put a black accent around it.

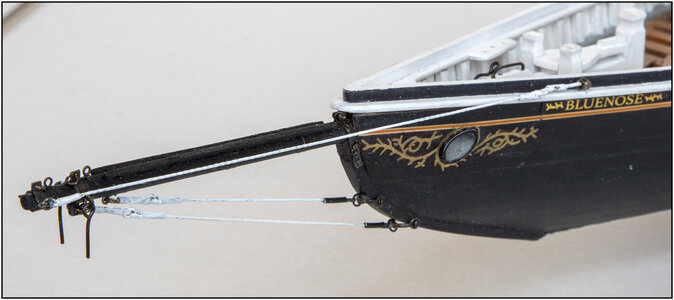
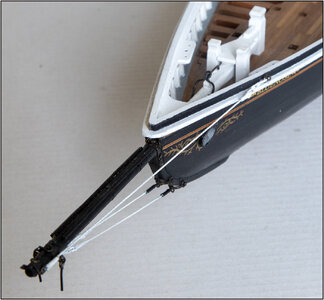
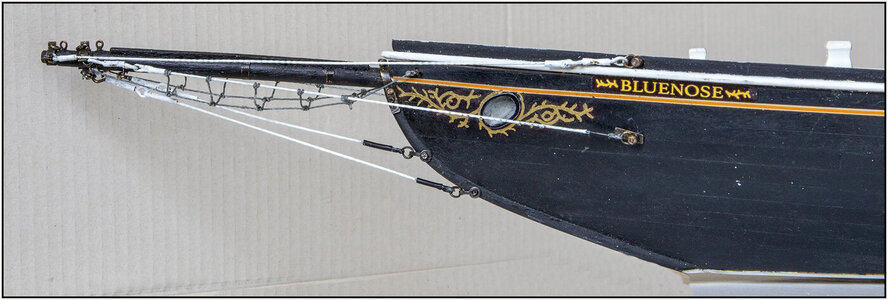
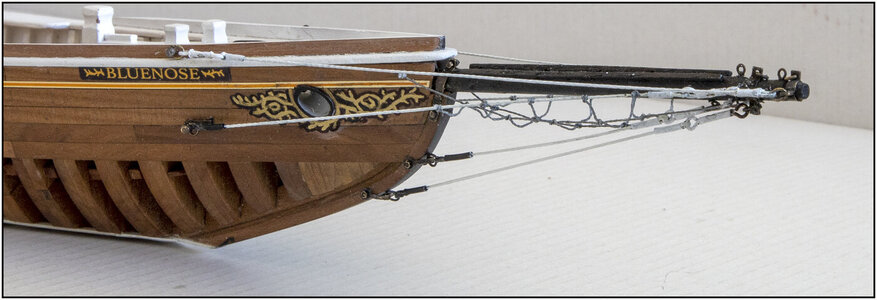
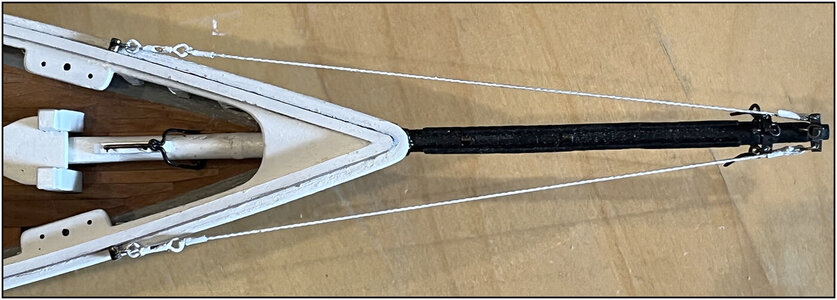
With in detail also the first 2 stays of the bowsprit:
View attachment 313047
View attachment 313049
Those are the inner and the lower bobstays.
On 2 photos shown earlier, it can be seen that they have been made white up to the bowsprit. The connection on the bow has a black piece.
Both the Saga and Chapelle's book mention that the stays were made of 'galvanized plow steel'. That is steel cable with a certain carbon content to make it stronger. A member of the Dutch forum had given me a bundle of braided wire for my Lee. I used that for both bobstays.
I made the turnbuckles from eye pins and pieces of brass tube.
For the attachment to the hull I still had small shackles lying around.

I'm not completely satisfied with the scrolls yet. Maybe 3D printing is an option. Made a first contact .....
Regards, Peter
Morning Peter,

Beautiful work, but that goes without saying.
Allow me two remarks:
1) Isn't the shackle of the lower bobstay a tad too short? I would expect a straight line between the two attachment points of the bobstay, where in this case there's a noticeable kink at the bow.
2) The scrolls look fantastic, I wouldn't be able to do any better, but for some unexplainable reason the starboard scroll looks "out-of-place" on the natural wood background, at least, that's how it appears to me.
I would even consider not having a scroll on the starboard side, just to enhance the beauty of the natural finish.
Oké, those were my two cents for today, awaiting your next post with great anticipation.

Johan

PS My initial post mentioned port, should of course be the starboard side...
 
Last edited:
Morning Peter,

Beautiful work, but that goes without saying.
Allow me two remarks:
1) Isn't the shackle of the lower bobstay a tad too short? I would expect a straight line between the two attachment points of the bobstay, where in this case there's a noticeable kink at the bow.
2) The scrolls look fantastic, I wouldn't be able to do any better, but for some unexplainable reason the port scroll looks "out-of-place" on the natural wood background, at least, that's how it appears to me.
I would even consider not having a scroll on the port side, just to enhance the beauty of the natural finish.
Oké, those were my two cents for today, awaiting your next post with great anticipation.

Johan
Hi Johan.
On the close-up picture, the lower shackle it self shows a little nod at its connection point. A had no one with longer 'arms'. Otherwise the drilled hole would come to close to the outside.
About the kink at the line the bow: this is how it looks from this point of view:
757 Front.jpg
The lower bobstay it self is almost in line with the lowest line of the keel. The shackle is attached where the curve of the bow begins. When I had connect it lower, the shackle would have had a bigger kink.
But was the lower bobstay in line with the lower part of the keel?
I have 'lined out' them on different pictures. Here are 3 of them:
758 Front.jpg
At the right picture, by here launch, there was only 1 bobstay, indeed in line!
The 2 left pictures, with the double bobstays, the line has a angle. See it in relation to the drawn yellow line. On the left, the 2 connection point are very close to each other. In the middle picture, there is more space between them. But on those 2 left pictures, different angles between the 2 stays. The YQ options is most alike with the left picture.
You can (almost) conclude from this that the BN has had several riggings. What will be reflected later even more with the connection points of the shroud and back rope on both sides. (Above, behind or halfway her nameplate.)
So it was a choice between different options.
Whit the help of AL-FI, I deliberately chose a small angle between both bobstays. From bottom to top towards the bowsprit, in my opinion this gives a harmonious progression.
About the port side scroll: different kind of taste gives different kinds of BN's. I like the black accents. If there comes a 3D scroll, the outline would also be black.
Regards, Peter
 
About the port side scroll: different kind of taste gives different kinds of BN's. I like the black accents. If there comes a 3D scroll, the outline would also be black.
Sorry, an old case of mixing up sides, I of course should have written "starboard", where you apply the scrolling on the unpainted planks. The port side, painted black, with the scroll around the hawspipe, is an absolute stunner, hands down.
For the starboard side however, and as you rightfully mentioned, it's a matter of personal taste, I might consider not applying a scroll at all. Right now I haven't decided on the finish of the starboard side, depending largely on how well I'll be able to plank the starboard side, but I'm leaning towards applying a transparent finish. If that materializes, we will be able to compare both configurations...
 
Hi Johan.
On the close-up picture, the lower shackle it self shows a little nod at its connection point. A had no one with longer 'arms'. Otherwise the drilled hole would come to close to the outside.
About the kink at the line the bow: this is how it looks from this point of view:
View attachment 313105
The lower bobstay it self is almost in line with the lowest line of the keel. The shackle is attached where the curve of the bow begins. When I had connect it lower, the shackle would have had a bigger kink.
But was the lower bobstay in line with the lower part of the keel?
I have 'lined out' them on different pictures. Here are 3 of them:
View attachment 313109
At the right picture, by here launch, there was only 1 bobstay, indeed in line!
The 2 left pictures, with the double bobstays, the line has a angle. See it in relation to the drawn yellow line. On the left, the 2 connection point are very close to each other. In the middle picture, there is more space between them. But on those 2 left pictures, different angles between the 2 stays. The YQ options is most alike with the left picture.
You can (almost) conclude from this that the BN has had several riggings. What will be reflected later even more with the connection points of the shroud and back rope on both sides. (Above, behind or halfway her nameplate.)
So it was a choice between different options.
Whit the help of AL-FI, I deliberately chose a small angle between both bobstays. From bottom to top towards the bowsprit, in my opinion this gives a harmonious progression.
About the port side scroll: different kind of taste gives different kinds of BN's. I like the black accents. If there comes a 3D scroll, the outline would also be black.
Regards, Peter
Hey Peter,

Thanks for your explanation of the bobstay configuration and I agree wholeheartedly that it is reasonable to assume that the Bluenose has seen various rigging configurations.
I had a close look at the pictures you attached and if the tangent, green lines you drew are anything to go by, one might possibly argue (and I'm treading really careful here, since I don't have any backup evidence) that she could even have had different bowsprits. I realize it's very easy to draw the wrong conclusions from these pictures; perspective, angle of lense in the three axes, distance, but still...
As for your interpretation, you're right, it's very close to what is shown in the left hand picture, I allowed myself to be led astray by the "Billing Boats" configuration.

Johan
 
It took some effort with 2 tweezers, but the 1st back-rope is on:
760 Back rope.jpg
It has become a compromise because after fitting and measuring it turned out that the bank for the anchor david was also not in the right place. :( To far at the front. So all the items around there must also be forward.

As you can see I also made a print of the name myself. With a small piece of foliage on both sides. But with different materials of 'gold', it's depending how the light flows and gives different color shades.
761 Back rope.jpg
When everything is dry, I also bend the front eye of the turnbuckle a little more straight.
Regards, Peter
 
Last edited:
When making the 2nd back-rope, I took some pictures of how I made them with the intermediate steps.
Maybe that will give someone else an idea.
762 Back rope.jpg
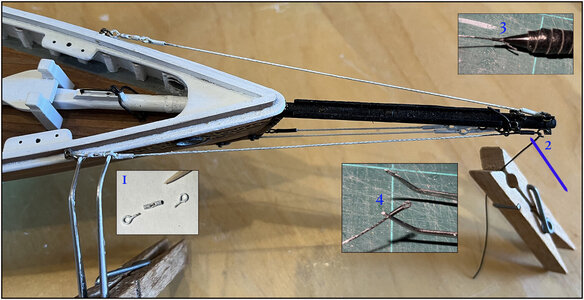
1: Put the parts of the turnbuckle together and fasten the cable eye from 1 side to an eye of the turnbuckle. Then keep the turnbuckle under tension with a tweezer;
2: glue the socket in position at the other end of the cable;
3: slightly widen the socket, made of 1.2 mm rubber hose, with a awl;
4: glue the cable end into the openings to form the eye.
(Anchor hawse holes still need to be finished on the inside.)
Of course, try everything on, apply in the two bent rings, bend the rings closed again and paint:
763 Back rope.jpg
Regards, Peter
 
Last edited:
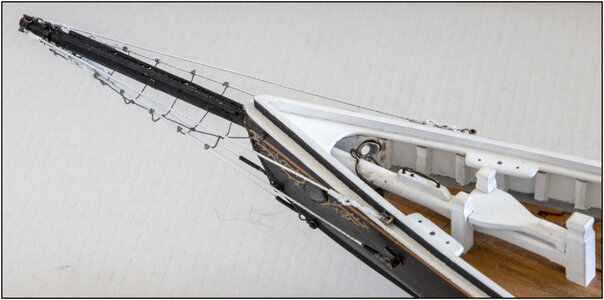
The last 2, the shrouds also applied:
764 Shroud.jpg
On top, the back-rope, is the only rope where the turnbuckles are attached to the hull. Seen in the old photos in post #2042.
The shroud and both bobstays have a black connection at the hull.
The other side
765 Shroud.jpg
A piece of advice for other builders (or if I had to do it again):
First attach all 6 cables to the tip of the bowsprit. Then you can easily put them aside. And then attach them to the bow from low to high.
Now I had to maneuver with the tweezers along the already installed cables with great care.

It now forms a beautiful interplay of lines that keeps changing with a different viewing angle.
And another one from a different angle:
766 6x.jpg

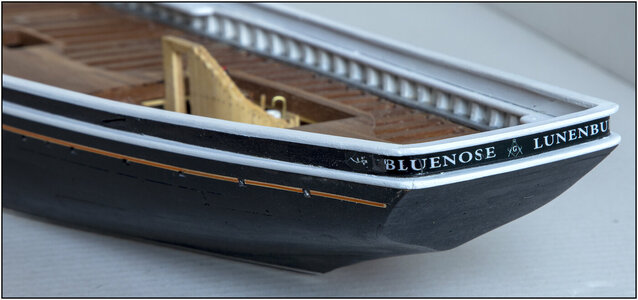
On the back also the decal supplied by YQ with the name applied.
767 Back.jpg
That is a combination of 2 appearances, as Heinrich @Heinrich beautifully explained in the review of the kit:
759 Name Back.jpg
With the letters around the corner and in the middle the "Masonic symbol of the Square and Compass".

But I am still not ready at the bowsprit .......
regards, Peter
 
Very impressive Peter. You are right, the bowsprit and supports are a spectacular assembly of the Bluenose II Thumbsup
Thanks, Mark.
The numbering of the versions of the BN can be discussed. When launched in 1921 with 1 bobstay and later 2, adaptation of the text on the back (1938) etc etc. Perhaps: 'Original-A' and 'Original-B'? Who knows what else I'll come across.
But my intention is not to make her look like the BN-II. ;) E.g. her bob stays: they are attached much more towards the waterline.
Regards, Peter
 
The last 2, the shrouds also applied:
View attachment 313625
On top, the back-rope, is the only rope where the turnbuckles are attached to the hull. Seen in the old photos in post #2042.
The shroud and both bobstays have a black connection at the hull.
The other side
View attachment 313626
A piece of advice for other builders (or if I had to do it again):
First attach all 6 cables to the tip of the bowsprit. Then you can easily put them aside. And then attach them to the bow from low to high.
Now I had to maneuver with the tweezers along the already installed cables with great care.

It now forms a beautiful interplay of lines that keeps changing with a different viewing angle.
And another one from a different angle:
View attachment 313627

On the back also the decal supplied by YQ with the name applied.
View attachment 313628
That is a combination of 2 appearances, as Heinrich @Heinrich beautifully explained in the review of the kit:
View attachment 313629
With the letters around the corner and in the middle the "Masonic symbol of the Square and Compass".

But I am still not ready at the bowsprit .......
regards, Peter
Hello Peter, I can't see these details, I ask: are they harbingers or what? Thank you

764 Shroud.jpg
 
Hello Peter, I can't see these details, I ask: are they harbingers or what? Thank you

View attachment 313700
Thanks for the reply, Frank. I don’t know what ‘harbingers’ are.
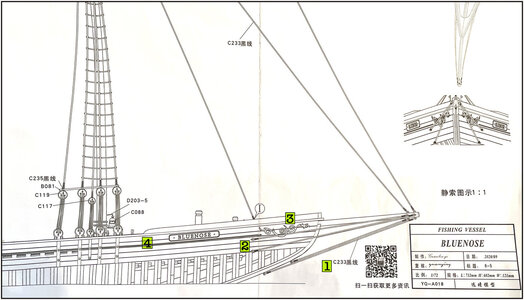
About the left arrow: see post #2088, note ‘1”, the turnbuckles. But the open middle part is not seen everywhere. Sometimes also a bit closed with paint.
About the right arrow: see note ‘2”, “3” and “4”, the sockets.
Also to see on the old pictures in post #2042.
Regards, Peter
 
Last edited:
Thanks for the reply, Frank. I don’t know what ‘harbingers’ are.
About the left arrow: see post #2088, note ‘1”, the turnbuckles. But the open middle part is not seen everywhere. Sometimes also a bit closed with paint.
About the right arrow: see note ‘2”, “3” and “4”, the sockets.
Also to see on the old pictures in post #2042.
Regards, Peter
Thanks Peter for answering me, on the photos the image is beautiful but on the drawing (my humble opinion) the winds are indecipherable
 
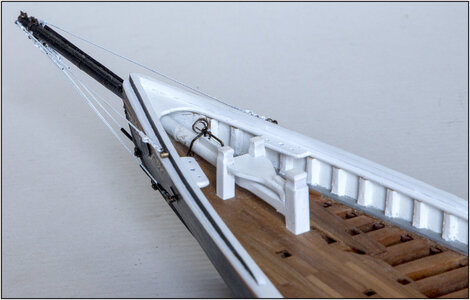
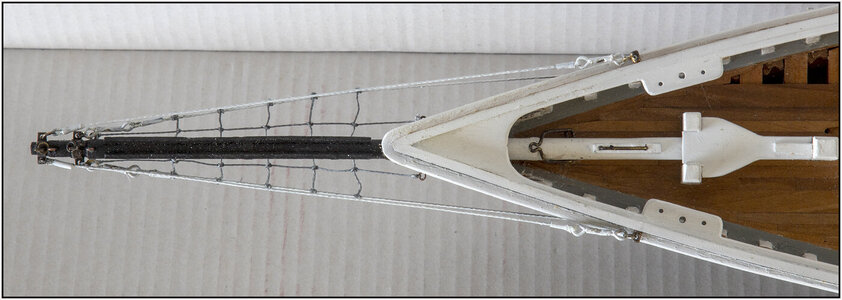
The last work on the bowsprit. A nerve-racking tying knots with 2 tweezers: the foot ropes along the bowsprit:
772 Footrope.jpg

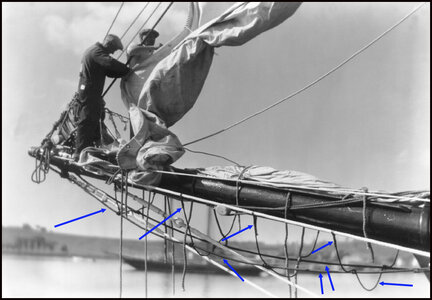
Let's add the example:
769 Footrope.jpg
Use the blue arrows to point to the 2 foot ropes themselves and the cross ropes to stabilize them. The cross ropes are attached to both shrouds.
771 Footrope.jpg

From some other positions:
770 Footrope.jpg
768 Footrope.jpg
And all with clove-hitches. For safety, all knots have been given a tip of glue. The eyes now get a rest.
(Yes, as mentioned before, the inside of the vault holes are still being finished.)
Regards, Peter
 
Back
Top