ZHL Black Pearl 2019 Golden Edition-Newbie build [COMPLETED BUILD]

Don't worry about sanding outside chamber in bulkheads till you test with a plank strip to use as guide.

You don't want to take too much off before you know angle from bulkheads on either side.

Hold a wide plank strip that will cross 3-5 frames and look behind to see how and what part of bulkhead to sand or file.

Work up and down the bulkheads to you get a good angle on all bulkheads in front and rear of boat, center ones need little sanding as they stay mostly flat.

Thanks @Kkonrath ... this is really helpful.
 
Great start and some good photos & commentary. I have often thought if the chinese kits came with good manuals they would be a force to be reckoned with.

Hi @Pat Pending.... thanks for dropping in on my build... I was pleasantly surprised at the quality of the ZHL kit... there were definitely some good looking pieces in the kit....little nice touches, like pre-cut sails and the copper etched pieces... ordering and shipping was a breeze, as well.
 
I was ready to proceed with installing the bulwarks, but decided to hold off because I realised that I still needed to provide for the wiring of the LED lights. Otherwise, it will be a tight squeeze to do it afterwards. So I drilled holes in areas that I thought the wires will go through. I have more or less figured out where I wanted to put the lights. Also, I found some 3mm yellow lights online that already were pre-wired, so I ordered a bunch of them. I am just hoping the 3mm aren't too bright. After placing the order, I had regrets that I should have shelled out a bit more money for the flickering kind. Maybe next time.

PSX_20200512_091043.jpg

Looking ahead, I was trying to figure out how to hide the wires for the lanterns. The 2mm piece that they lay on top of is just too thin to attempt to drill through it. So, I came up with a rough solution. I glued some of the paulownia strips vertically, but left gaps where the wires can go down in. The plan is to lay horizontal strips using the thinner dark walnut strips after the wires are set in place. This will serve to hide the wires. I know there must be a better way to do this, but I thought it will do for now.

PSX_20200512_090955.jpg

While waiting for my LED lights to arrive (it may take a week or two, considering there are still Covid quarantines in place), I thought I'd work on the captain's quarters and other smaller pieces. The captain's window sill is fairly straightforward, but required precision in the alignment because the pieces needed precise spacing and angles as you glue them together. I found it helpful that, when I was gluing the bottom pieces together, that I dry fit the top portions at the same time. I had to be very careful to bend the five-panel front piece, because it needed to be curved. By the way, I really liked the etched pieces for the windows.

PSX_20200512_091214.jpgPSX_20200512_091242.jpg

After I finished assembling the part, I noticed that there were gaps where light could seep through... so I put putty inside the assembly to block out light seepage from the LED lights later on. Also, I put in clear transparency plastic on the inside, to simulate glass.

PSX_20200512_091324.jpg

Then on to the other pieces. I worked on the entrance door below the poop deck. Also the skylight.

PSX_20200512_090749.jpgPSX_20200512_090808.jpgPSX_20200512_091022.jpg

I put on a few coats of tung oil to finish. Above, you can see how the wood looks like with the tung oil versus untreated.

The skylight has very tiny pieces which collapsed in my hand as I tried to glue them together. So I put a piece of tape on my desk and set the pieces there as I waited for the glue to set.

PSX_20200512_091055.jpg

Let's not forget the transparency film behind the windows.

PSX_20200512_091105.jpg

Next, I thought I'd tackle the deck planking. Since I've never done this before, I had to do a bit of research on how to do this. I decided to use the four butt shift system, only because I thought it looked cool. I also read somewhere that other modellers would try to simulate the caulking between the deck planks using black pencil or black string. I tried doing the pencil method but I didn't have any luck (maybe I had the wrong type of pencil). So I tried using diluted acrylic black paint, which I dabbed on one side of the deck planks using a Q-tip. After a while, I decided that using my fingers to dab the paint was much easier, notwithstanding the clean up afterwards.

PSX_20200512_091149.jpg

Next decision point is how I wanted to finish the deck planks. I tried different options, including a plain tung oil finish, a very light black paint wash. But I settled on the option as you can see below... using a very light black wash (only in spots), tung oil and for my amateur attempt at weathering, a very light grey paint was in certain areas. I finished off the planks by applying a few more coats of tung oil. I am not sure if I am doing this correctly, and I welcome suggestions please.

PSX_20200512_091425.jpg

The four butt shift planking system seemed complex at first, but once I put on the first 5 rows to establish the pattern, it was fairly straightforward. It was just a matter of remembering to repeat the patterns every five rows. Also it was very helpful to establish the plank lines, vertically and also horizontally (this is very important to make sure the plank joints all line up in a straight line.)

PSX_20200512_091450.jpgPSX_20200512_091746.jpg

That's it for now. Thanks again for dropping in
 

Attachments

  • PSX_20200512_091554.jpg
    PSX_20200512_091554.jpg
    68.1 KB · Views: 8
Hi everyone. My name is Reggie and I am a true, honest to goodness newbie. The only ship I ever built was a cheapie 1:130 sailboat model that I purchased from Lazada (the Far East equivalent of Amazon). It took me a while to build, only because I was really coming from a zero knowledge base, and every step was like groping in the dark. I was never very handy with my hands, for I’ve always been an office Birthday-Cake -type guy. My last job before I retired in 2015 was heading a national tv and media organization in the Philippines.

I stumbled across this forum and was so mesmerized (and not just a little bit jealous) of all the beautiful builds and I was immediately hooked. I read through the builds of @Donnie and @DariusArchitectus and was fascinated by their techniques, artistry and creativity. (I am sure there are lots of others in the group just as equally talented, so apologies if I fail to mention your names.) It was like bingeing on Netflix – I just couldn’t stop reading. Then I came across the build logs of @Hoffy, @Jay and @epicdoom for the ZHL Black Pearl Golden Edition, and I knew right away what my next project was going to be.

I placed my order through ZHL’s website on April 19 and it was fairly straightforward, including payment using Paypal. With the Covid quarantine restrictions, I didn’t expect to receive the package quite as fast. But, lo and behold, on April 23 I received an email which said my package has shipped via DHL, complete with a tracking number. It took a few more days for it to get to Manila and clear Customs, but I finally received the package on May 4. Not bad. And no customs duties! Shout-out to Max at ZHL... well done.

So, that brings me to today. I thought that I could start a build log, but focus more on the newbie perspective – including how to get started, what basic tools you need, basic concepts, how to navigate through the various choke points in the build, etc.

I hope the group will be forgiving for any mistakes in technique that I may commit, and I will welcome any constructive criticism or suggestions so I can further develop my skills. I look to our more experienced members for guidance and thank you all in advance. And please be patient with me... it may take longer for me to do this since I will need to do a lot of reading and research every step of the way.

So here it goes. I will start with the unboxing of the kit. Admin, this is my first post, so please let me know if I can do things better


The box arrived fairly well secured. I thoroughly disinfected the box before bringing it inside the house, as a precaution against Covid-19.
View attachment 148799View attachment 148800View attachment 148801View attachment 148802

Inside were two boxes, the smaller one containing the masts and planking strips. The other box had all the other components. Planks are Black walnut and Paulownia.

View attachment 148823View attachment 148824
View attachment 148825

There is a 32 page color instruction booklet. Probably not as detailed as I've wanted, but will have to do for now.
View attachment 148826

The following pictures show the rest of the contents of the box. It even includes a few LEDs, wire and switch box. Also shown are the 3 lanterns for the stern.
View attachment 148827View attachment 148828

A sheet of copper photo etched parts. And, a pleasant surprise, pre-cut cloth for the sail with nice clean edges.
View attachment 148829View attachment 148830

Carvings and other ornaments.
View attachment 148831View attachment 148832

Cannons, half cannons and Anchors
View attachment 148835
View attachment 148833View attachment 148834

Deadeyes, blocks, beads, etc
View attachment 148836View attachment 148837View attachment 148838View attachment 148839View attachment 148840
View attachment 148841View attachment 148842

Laser cut wooden parts
View attachment 148843

Ooops... looks like I've reached the maximum 25 picture attachments. Will post more in the next one.

Thanks everyone. Hope I didn't do too badly.
Hallo Reggie, alias @WarrLight
we wish you all the BEST and a HAPPY BIRTHDAY
Birthday-Cake
 
Hi friends... So sorry it's been a while since I updated my build log. I have just been waiting for some led lights for the last few weeks and I can't proceed any further with my build until I am able to install the wiring for the lights. Once the bulwarks are glued on (which is the next step in the build), it will be very difficult to gain access to the areas that I wish to get lit up. In the meantime, I've been sort of biding my time and working on some small pieces.

First, I finished installing the two figurines on the side of the door and applied final coats of paint and oil on the entrance to the quarters below the poop deck.

PSX_20200531_205044.jpg

I also worked on the diy piece that goes on top of the window ledge on the stern.

PSX_20200531_205654.jpgPSX_20200602_130240.jpg

Next was assembling the cannon carriages. The kit provides a small dowel stick that can be cut down to form the axle for the wheels. Gluing the small pieces was a challenge so I had to figure out a way to make sure the pieces were aligned properly.

PSX_20200531_205354.jpg

The carriages have a middle piece that slants upwards to receive the cannon. Care should be taken to ensure that the angle of slant is not too steep because you need to make sure that the cannons fit through the cutout for the cannon in the bulwark. Otherwise the cannon will bump up against the railing. These are small things that are probably second nature to experienced modellers, but to the newbie builder, they form part of the learning and knowledge base that you build up as you go along.

PSX_20200531_205323.jpg

Onwards with the cannon carriages. I wanted to rig up the cannons and was looking at various pictures of others' models. I figured I needed two sizes of rings to hold the rope. A larger ring for the rope that goes from the backside of the cannon to the inside of the bulwarks, and a smaller ring for the other ropes. I rigged my own rings using copper wire that is wound around a small dowel. Then drilling holes on the carriages.

PSX_20200531_204931.jpgPSX_20200531_204900.jpg

PSX_20200531_204956.jpg

Here are the finished pieces.

PSX_20200602_114634.jpg

Then on to some yet smaller pieces. The capstan gave me more trouble than I expected. Again, a task that is probably a piece of cake for experienced modellers, but a bit frustrating for the inexperienced. There were so many small parts for such a simple piece. I was scratching my head how to glue it together properly and keeping the pieces aligned.

PSX_20200531_205251.jpg

In the end, I completed it but I wasn't too pleased because it wasn't quite aligned properly. But, such is life.

PSX_20200531_205234.jpg

I also worked on the stairs to the fore deck. This was fairly straightforward. I used my favorite masking tape rig to help me keep the pieces in place as I glued them.

PSX_20200531_205831.jpg

The stairs going to the poop deck, however were a bit more challenging. The instructions show that the stairs get wider towards the bottom. But the steps provided in the parts kit were all the same width. I guess I could have diy the wider steps, but I was lazy and just decided to go with the pre-cut steps in the kit. The stairs also has balusters that I decided to pin using a piece of copper wire that are glued into small drilled holes on both ends of the balusters. I still haven't quite finished the stairs yet since I still need to install the top railing.

PSX_20200531_205753.jpgPSX_20200531_205719.jpgPSX_20200531_205640.jpg

I assembled the base pieces for the stern lanterns. These had holes in the middle to accommodate the wiring for the led lights, and I just needed to make sure that they were aligned properly.

PSX_20200531_205142.jpgPSX_20200531_205214.jpgPSX_20200602_130256.jpg

I finished other smaller items, including the steering wheel and a small cabinet.

PSX_20200602_114651.jpg

That's it for now. Hopefully my LED lights will arrive soon, so I can move on with installing the bulwarks and then on to the planking. Thanks everyone for dropping in.
 
I am following your build with much interest - I really like the way you explain each step. I am an "experienced" modeller, but anyone new to this kit - or many others - would find your build log very useful. I'm thinking.
 
Hello friends. My LED lights finally arrived from China. It took about a month to get my hands on them. I ordered a bunch of 3mm yellow and orange LED lights and a bunch of resistors of various ohm ratings for real cheap. Something like US$5 for 100pcs yellow and 100pcs orange lights and $4 for 600pcs resistors. I would have preferred smaller pico sized LEDs but I couldn't find a source here where I am in the Philippines. Once I install the wiring and the lights, I can finally commence building again.

But first, I just wanted to show you a bit of the work I did on the cannons and the anchors. I decided to paint them gunmetal black. I also found some burnished copper powder that I dabbed on the cannons to simulate weathering.

PSX_20200607_135255.jpgPSX_20200607_135309.jpgPSX_20200607_135339.jpg

Now, on to the LEDs. Just full disclosure, I am coming from a completely zero knowledge base in electronics so please bear with me if I don't do it 100% right. I had to do quite a bit of reading on wiring, resistors, forward voltage, ohms etc. And I decided that with my 3mm lights, I wanted to wire them in parallel (i.e. positives to positives, negatives to negative all the way to the power source. I purchased a 9v battery holder/switch, and with my 3mm yellow LEDs, I figured 330ohm resistors will do the job. I have a total of 12 LEDs, which I know will pull a lot of juice from the 9volt battery (I haven't tried to run out my battery, but I figured it will at least give me an hour to 2 hours of power). The kit came with some enamel copper wire but I wasn't quite sure if this meant that the wire was insulated. I didn't want to risk wires touching and causing a short. So I decided to strip down a bunch of old ethernet cables which gave me plenty of insulated wires to work with. I ran the wires from the LEDs, soldered the 330ohm resistor to the positive lead of each light. After soldering the positive wire to the other end of the resistor and the negative wire to the LED, I ran all the wires toward the starboard side of the ship where I gathered up all the negative wires together, the positive wires together and soldered them with the battery source wires.

Here are some pictures.... I know it wasn't the prettiest job of wiring and soldering, but I am just so glad that I made the LEDs light up, ha ha ha.

PSX_20200607_135538.jpg


A bit sloppy on the soldering of the resistor. The resistors are all connected to the positive wires of the LEDs. Each LED gets its own resistor. Am not sure if there's a way to just use one resistor for all the lights given that they are wired in parallel. I did it this way so I don't lose all my lights in case one of them malfunctions.

PSX_20200607_135622.jpg


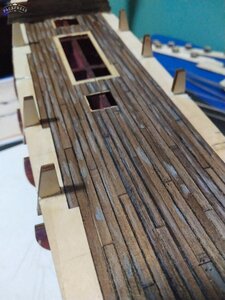
I already installed the LEDs to the back window of the captain's quarters because I won't be able to gain access to the wire leads inside once I assemble the bulwarks which will cover this whole area of the ship. I left the wiring for the 3 lanterns on top of the transom for later soldering and installation of the lanterns.

By the way, it's important that after soldering the resistor, that you temporarily hook up the wires to an LED to make sure it lights up.
PSX_20200607_140233.jpg


Here's all the wires all running towards one spot. I just had to make sure none of the exposed wires touch each other which might cause a short. I lost a light because of a small short in one of my connections

By the way, I made provisions for wiring of the LEDs on the side of the captain's quarters (where my finger is pointing to). Can't solder the light yet because this will be covered by the bulwark piece later on.

PSX_20200607_140252.jpg


And now for the moment of truth.... ta daaaa!!! All the lights go on.
The lights look too bright in the photos, but they will be dimmer once they get covered up with the windows.
PSX_20200607_140516.jpg
PSX_20200607_140411.jpgPSX_20200607_140516.jpg

Wheew, I am glad my first attempt at LED work was a success. I welcome comments if there's a better way to do this.

Now, on to the next step of my build.... the installation of the bulwark pieces. As I said before, I had to finish all the LED wiring before doing this because these pieces will cover up the area where the wires will run through.

Before installing the bulwarks, I put some electric tape on the top portion of the bulkhead uprights so the glue will not stick to them (they will need to be trimmed later on). Also, you might be tempted to trim the uprights in advance (which I was tempted to do). But don't do it because you will need these uprights later on when you install the bulwarks (to establish the angle of the bulwark, and also to provide clamping areas for the bulwark when you glue them.)
PSX_20200607_140618.jpg


First step is to dry fit the bulwarks. This will show if you need to trim some of the bulkheads, which I had to do to a few of them in order to get a more comfortable fit.
PSX_20200607_140839.jpg
PSX_20200607_140928.jpg


I also had to slightly move one of the half cannon holders because it was bumping up against one of the bulkheads.
PSX_20200607_140828.jpg

I also noted where I will need to drill a hole for the LED lights on both sides of the captain's quarters.

PSX_20200607_140751.jpg
PSX_20200607_141335.jpg

Oh, also don't forget to install the door/window piece below the poop deck because this will be covered by the bulwark.
PSX_20200607_141025.jpg

So, on to gluing the pieces together. I don't have clamps big enough to go across the deck so I decided to use rubber bands and pins to hold the pieces in place as I waited for the glue to dry (I used wood glue because it's a bit more forgiving than CA glue). I didn't have to worry about the pin holes because this will be covered up later on by the second planking. Note also that the bulwarks are clamped against the uprights in order to give it the proper slant angle.
PSX_20200607_141233.jpg


Oh, and don't forget to leave space (about half the width) on the second bulkhead from the bow. You will need this space later on when you glue on the first layer of planking towards the bow.
PSX_20200607_141139.jpg

Bulwarks glued on finally. Please note also the spots where the LEDs are either pre-soldered or pre-wired, as well as the wire coming out towards the bottom of the starboard side which will then be hooked up to the battery holder/switch.
PSX_20200607_141322.jpg

PSX_20200607_141335.jpgPSX_20200607_141421.jpgPSX_20200607_141540.jpg


Now I am ready to continue planking the deck. If you recall, I had done partial planking beforehand, but had to leave the sides undone because the bulkhead uprights were in the way. Now that the bulwarks are set, I can now trim the uprights and finish the deck planking.
PSX_20200607_141601.jpg


Until next time. Thanks friends for dropping in. All that I have done to this point is the result of much reading, research and building up my knowledge base. Being truly a newbie, I appreciate the insights that I get from reading the posts from our more experienced members. And as always, comments, constructive criticism and suggestions are most welcome.
 
I started with the planking task today, but I realized that both the paulownia and walnut planks are short by about 10cm to traverse the entire width of the hull. Question please.... for the 2nd planking, is it acceptable to join two strips? If so, are there special rules how to do this? I was planning on a natural oil finish on the hull so I cant really conceal the joint. Also, @Hoffy and @Jay, did you have the same issues with your Black Pearls? Maybe Max at ZHL can help? Thanks.
 
In my opinion I wouldn't worry about the lengths of the planking on the second layer - when building the real ships they would have had to join planks together as they would never have found boards well over 100ft long. As long as you stagger the joints it should be fine. As far as "special rules" go - I would simply butt joint them but this is your kit - do it the way you are comfortable with. For reference here is a link detailing hull construction on this type of ship (probably a little earlier but the principle remained the same for many years). https://www.quora.com/How-thick-were-hulls-in-sixteenth-century-British-warships
 
I started with the planking task today, but I realized that both the paulownia and walnut planks are short by about 10cm to traverse the entire width of the hull. Question please.... for the 2nd planking, is it acceptable to join two strips? If so, are there special rules how to do this? I was planning on a natural oil finish on the hull so I cant really conceal the joint. Also, @Hoffy and @Jay, did you have the same issues with your Black Pearls? Maybe Max at ZHL can help? Thanks.

It’s acceptable to me. In fact I like the look. It looks more natural to me.
 
In my opinion I wouldn't worry about the lengths of the planking on the second layer - when building the real ships they would have had to join planks together as they would never have found boards well over 100ft long. As long as you stagger the joints it should be fine. As far as "special rules" go - I would simply butt joint them but this is your kit - do it the way you are comfortable with. For reference here is a link detailing hull construction on this type of ship (probably a little earlier but the principle remained the same for many years). https://www.quora.com/How-thick-were-hulls-in-sixteenth-century-British-warships
Thank you @Pat Pending
 
just found this build. nice work on the deck planking and weathering. just a tip on led lighting: I found that if you have the standard white leds a touch of wood stain in a light brown color or even diluted acrylic paint will change the light to a soft candle-like glow that looks very realistic. keep up the good work.
 
Back
Top